










EMBP-03 DIY Keg Box Guide: Build Your Ultimate Home Bar Centerpiece
Introduction to the EMBP-03 Keg Box Project
Building your own keg box is one of the most rewarding projects a home brewer or entertaining enthusiast can undertake. The EMBP-03 design represents a well-engineered approach to housing a full-size or half-barrel keg in an insulated, attractive enclosure that becomes the focal point of any home bar setup. Whether you are a seasoned woodworker or a first-time DIY builder, this guide walks you through every stage of the process with clarity and confidence-building detail.
The appeal of a custom keg box goes far beyond mere aesthetics. A properly built keg box maintains the ideal serving temperature for your draft beer, typically between 36 and 38 degrees Fahrenheit, ensuring every pour is as crisp and satisfying as anything you would find at a professional establishment. Unlike a standard kegerator converted from a refrigerator, a keg box built from scratch can be tailored to your exact space, style, and functional requirements, making it a genuinely personal addition to your home.
The EMBP-03 plan is specifically designed to accommodate a standard half-barrel keg while leaving room for a CO2 tank, a single faucet tower, and adequate insulation on all sides. The overall footprint is compact enough to fit comfortably in most home bar corners while still being spacious enough to maintain consistent temperatures even during warm summer gatherings. Throughout this guide you will find material lists, cutting dimensions, assembly instructions, and finishing tips to see the project through from raw lumber to finished showpiece.
Materials, Tools, and Planning Before You Begin
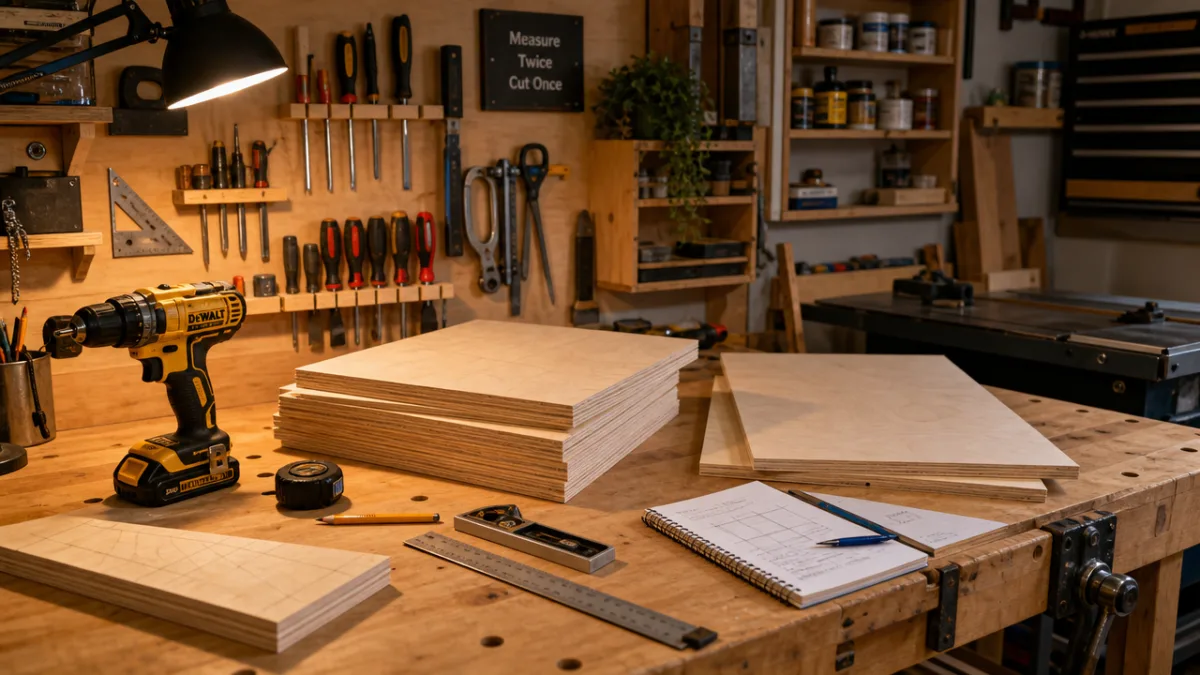
Gathering the right materials before starting any woodworking project saves considerable time and frustration, and the EMBP-03 keg box is no exception. The primary structural material is three-quarter-inch plywood, preferably cabinet-grade birch or oak for a clean finished appearance. You will need approximately four full sheets to complete the box walls, floor, lid framing, and interior panels. In addition to plywood, you will require two-inch rigid foam insulation boards, which serve as the thermal barrier keeping your keg cold without relying solely on the refrigeration unit.
For the refrigeration component, a small chest freezer or a purpose-built keg cooling plate placed inside the box is the most common approach. Many builders opt for a five-cubic-foot chest freezer mounted beneath or alongside the keg compartment and connected via a drilled passage, though a more streamlined build uses a dedicated cold plate attached to the interior wall and linked to a small compressor unit housed in a separate lower cabinet. Your choice will influence the overall dimensions of your build, so settle on a cooling method before cutting a single board.
The essential tool list for this project includes the following items to ensure clean cuts and solid joinery throughout every stage of the build.
- Circular saw or table saw for breaking down full plywood sheets
- Jigsaw for cutting curves on the lid and tap tower hole
- Drill and a complete set of drill bits including a two-inch hole saw
- Pocket hole jig and pocket screws for strong internal joints
- Tape measure, combination square, and marking pencil
- Clamps in assorted sizes, minimum six recommended
- Orbital sander with 80, 120, and 220 grit paper
- Paint brushes or foam rollers for finishing coats
Planning also means thinking carefully about the final location of the keg box in your home bar. Consider proximity to a power outlet for the cooling unit, access to a drain if you anticipate spillage or condensation management needs, and the visual sightlines from seating areas. Drawing a rough floor plan sketch before you begin helps you commit to a final height and width that genuinely suits the space rather than building something that looks great in isolation but creates awkward workflow in practice.
Cutting and Assembling the Main Box Structure
With your materials staged and your dimensions confirmed, the first major phase of construction is breaking down the plywood into the individual panels that form the outer shell of the keg box. The standard EMBP-03 footprint calls for an outer box measuring approximately 28 inches wide by 26 inches deep by 38 inches tall, though these dimensions can be adjusted by a few inches in any direction to accommodate specific keg brands or available space. Always cut the two side panels first, as they establish the foundational height from which all other panel dimensions derive.
Once the outer shell panels are cut, assemble them using pocket hole joinery reinforced with exterior-grade wood glue. Pocket screws driven at six-inch intervals along every seam create joints strong enough to support the weight of a full keg, which can exceed 160 pounds when loaded. Assemble the four walls first into a rectangular frame, then attach the floor panel from below using the same pocket screw technique. Take time at this stage to check for square using a large framing square or by measuring diagonally corner to corner; both diagonal measurements should match within one-eighth of an inch for a properly square box.
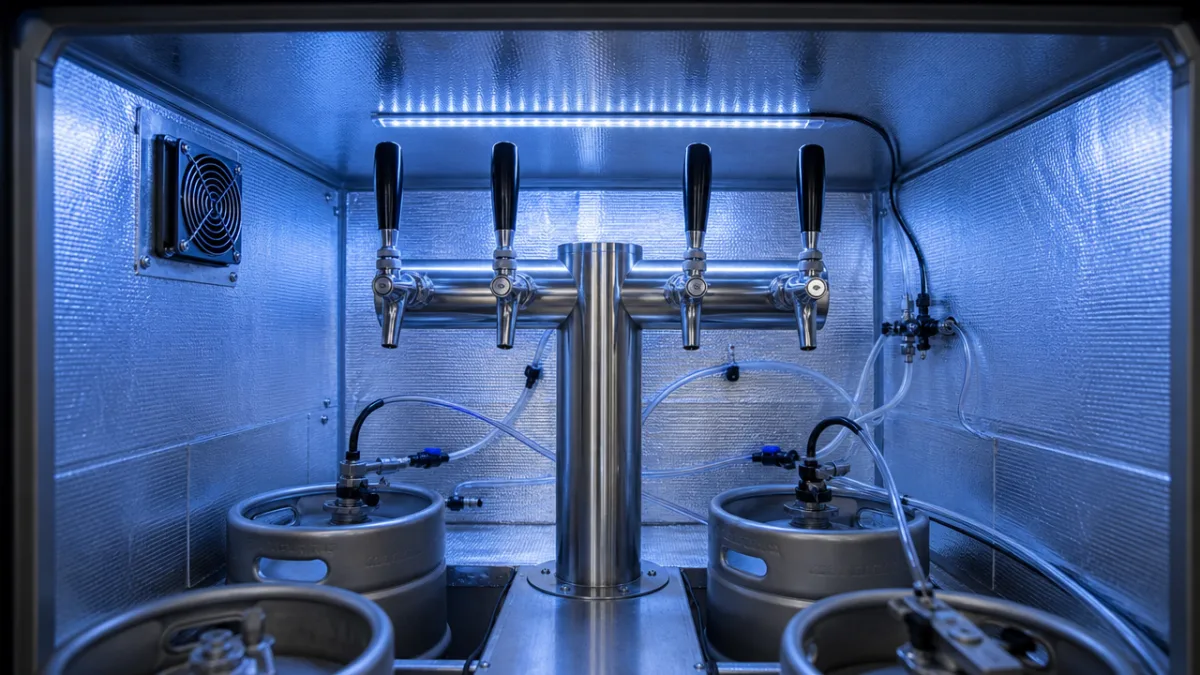
After the outer shell is complete and the glue has cured for at least four hours, cut the rigid foam insulation panels to fit flush against every interior surface. Two-inch foam provides an R-value of approximately R-10, which combined with a functional cooling unit is sufficient to maintain keg temperatures in most interior home bar environments. Use foam-compatible construction adhesive to bond the insulation to the plywood interior walls, pressing each panel firmly and allowing it to set before moving to the adjacent surface. Pay particular attention to sealing foam seams with foil-faced tape to eliminate thermal bridging through gaps.
The interior finishing layer goes over the foam insulation and is typically a half-inch sheet of smooth plywood or a food-safe fiberglass-reinforced panel. This inner liner protects the foam from physical damage and moisture, and it provides a cleanable surface that will accumulate condensation and minor drips over years of regular use. Attach the inner liner panels using short screws driven through pre-drilled pilot holes, being careful not to drive screws so deep that they pierce through the exterior plywood and compromise the finished outer surface.
Installing the Cooling System and Tap Tower
The cooling system is the heart of any functional keg box, and the EMBP-03 design is flexible enough to accommodate several different approaches depending on your budget and technical comfort level. The most popular method among experienced home bar builders is the modified chest freezer approach, where a small chest freezer is positioned directly beneath the keg compartment and connected through an insulated pass-through hole cut in the shared floor panel. A small fan circulates chilled air from the freezer into the keg compartment, maintaining consistent temperatures throughout the entire internal volume.
A temperature controller such as an Inkbird ITC-308 or similar dual-stage unit is essential for this approach, as chest freezers are not designed to cycle at refrigerator temperatures and will damage beer quality if allowed to drop below freezing. The controller probe is mounted inside the keg compartment and continuously monitors air temperature, switching the freezer compressor on and off to maintain your target serving temperature with precision. Wiring the controller is straightforward and requires no electrician, as it simply plugs into a standard outlet and the freezer plugs into the controller’s outlet socket.
Cutting the tap tower hole is one of the most satisfying moments of the entire build. Mark the center point of your chosen tower location on the lid or top panel, then use a hole saw sized to match your tower’s base diameter, typically one and three-quarter inches for a standard single-faucet tower shank. Drill slowly and keep the drill perpendicular to the panel surface to ensure a clean hole with no tear-out. Feed the beer line down through this hole before permanently mounting the tower, as routing the line after the tower is secured is considerably more difficult.
The CO2 regulator and tank can be housed in a small lower cabinet integrated into the base of the EMBP-03 design, accessible through a hinged door on the front face. Position the tank so it stands upright, as regulators are designed to function correctly only in a vertical orientation. A short piece of braided CO2 line runs from the regulator up through a small grommet-sealed hole into the keg compartment, connecting to the CO2 inlet on your keg coupler. Keep this line as short as practical to minimize pressure drop between the regulator and the coupler.
Exterior Finishing and Decorative Touches
The exterior finish transforms a functional plywood box into a piece of home bar furniture that earns genuine compliments. Begin by filling any pocket screw holes, edge voids in the plywood layers, and minor surface imperfections with a high-quality wood filler. Allow the filler to cure completely, then sand the entire outer surface with 120-grit paper followed by 220-grit to achieve a surface smooth enough for a glass-like paint finish or a rich stained appearance. Dust thoroughly between grits using a tack cloth rather than a dry brush, which redistributes fine particles rather than removing them.
For builders who want a painted finish, a two-part oil-based enamel applied with a foam roller delivers a durable, professional-looking surface that resists moisture and the inevitable bumps and scrapes of a busy home bar environment. Apply a dedicated primer coat first, allow it to dry completely, sand lightly with 320-grit paper, then apply two to three finish coats with light sanding between each layer. Popular color choices include matte black, deep navy, and forest green, all of which complement the typical stainless steel hardware used for the faucet, tower, and handles.
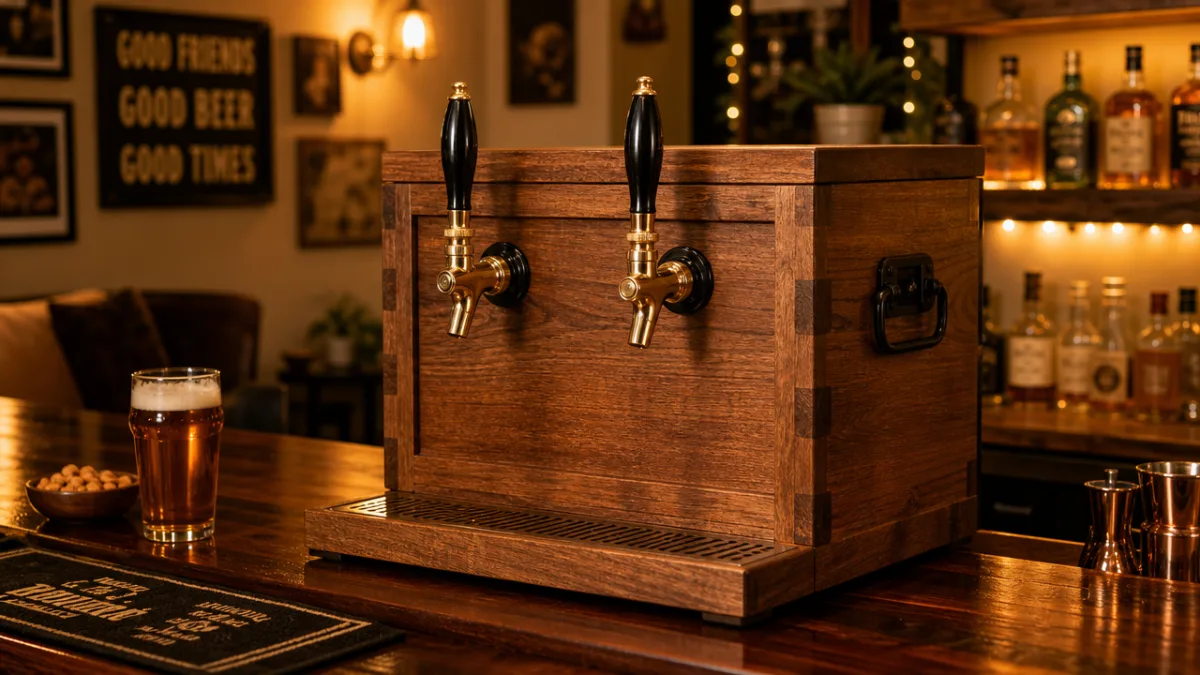
Builders who prefer a natural wood look should consider a solid hardwood veneer applied over the plywood exterior before finishing. Pre-glued oak or walnut veneer sheets bond easily to the plywood surface with a household iron and trim cleanly with a router flush-trim bit. Once the veneer is applied and trimmed, apply two coats of wipe-on polyurethane, sanding lightly between coats with 320-grit paper. This finish enhances the natural grain character of the wood while providing excellent moisture resistance appropriate for a beverage service environment.
Hardware selection deserves careful thought because handles, hinges, and lid supports contribute significantly to the overall visual impression. Consider the following hardware upgrades commonly used on high-end EMBP-03 builds to elevate the finished appearance.
- Heavy-duty soft-close lid supports that hold the top panel open securely without slamming
- Brushed nickel or matte black drawer pulls on the CO2 cabinet door for a cohesive look
- Rubber-footed cabinet levelers on the base to protect floors and allow fine leveling adjustments
- A recessed LED strip along the interior top edge to illuminate the keg compartment during loading
- A magnetic door catch on the lower cabinet door to keep it securely closed during parties
Testing, Troubleshooting, and Long-Term Maintenance
Before loading your first keg, conduct a thorough functional test of the entire system over a minimum of 48 hours. Set the temperature controller to your target serving temperature, power on the cooling unit, and monitor the actual compartment temperature with a secondary thermometer placed at keg height to verify that the controller probe reading accurately reflects conditions throughout the compartment rather than just at the probe location. Any significant variance of more than two or three degrees indicates inadequate air circulation and may be resolved by repositioning the circulation fan or adding a second fan at the opposite end of the compartment.
Leak testing the gas and liquid lines is equally critical before the first pour. Spray a mixture of dish soap and water on every connection point in the CO2 system, from the tank valve to the coupler, and look for bubbles that indicate escaping gas. Common leak locations include the regulator bonnet nut, the line quick-disconnect fittings, and the coupler probe assembly. Most leaks on new systems are caused by slightly undertightened fittings rather than defective parts, so a methodical quarter-turn tightening of any suspect connection usually resolves the issue without replacing components.
Long-term maintenance of your EMBP-03 keg box is straightforward and requires only a modest time investment every few months. Beer line cleaning is the single most important maintenance task, as biofilm buildup in the lines between the keg and the faucet produces off-flavors that no amount of ingredient quality can overcome. Use a dedicated beer line cleaning kit with a caustic or acid-based cleaner every two to four weeks of active use, circulating the solution through the complete draft system for the contact time specified by the cleaner manufacturer before flushing thoroughly with clean water.
The insulated compartment interior should be wiped down with a mild sanitizing solution whenever a keg is changed, removing any drips, condensation residue, or foam buildup before loading the fresh keg. Inspect the foam insulation periodically through the keg access opening for any signs of moisture penetration indicated by discoloration or softening, which would suggest a failure in the inner liner seal that requires prompt attention to prevent long-term structural compromise of the insulation layer.
Customization Ideas to Make the Build Your Own
One of the greatest pleasures of building the EMBP-03 from scratch rather than purchasing a commercial kegerator is the unlimited opportunity for personalization. Incorporating a chalkboard panel on one side of the box allows you to write the current keg style and brewery information in a format that invites guests to engage with the beer before they even pour a glass. Standard chalkboard paint applied over a smooth plywood panel creates this surface easily, and it can be repainted in a different color if you eventually prefer a different aesthetic direction.
Multi-tap configurations are a natural evolution of the basic single-faucet EMBP-03 design. By widening the overall box footprint by approximately ten inches and adding a second cooling pass-through below, you can accommodate two half-barrel kegs side by side under a dual-faucet tower. This configuration is particularly popular among home brewers who maintain a rotation of seasonal styles and want to offer guests a choice without the complication of a separate draft system. The increased weight of a dual-keg build requires upgraded casters if mobility is desired, rated to a minimum of 400 pounds combined capacity.
Integrated lighting transforms the keg box from a purely functional piece into a genuine bar statement. LED strip lights mounted behind a frosted plexiglass panel on the front face create an attractive backlit glow that can be controlled via a simple dimmer switch tucked inside the lower cabinet. Color-changing RGB LED strips controlled by a smartphone app allow you to match the box lighting to seasonal decorations, sports team colors for game day gatherings, or the overall mood lighting scheme of your home bar space. The low heat output of modern LED strips makes them safe for use in close proximity to the insulated keg compartment without any concern about affecting internal temperatures.
Finally, consider adding a personalized name plate, custom tap handles shaped to a theme that reflects your brewing identity, or a branded drip tray engraved with your home brewery name. These finishing details communicate to every guest that this keg box was built with care, intention, and genuine passion for the craft of both woodworking and home brewing. The EMBP-03 project is more than a functional appliance; it is an expression of the pride that comes from building something enduring and beautiful with your own hands, and every cold pour served from it carries that story forward.








What do you think?
It is nice to know your opinion. Leave a comment.