










Easy Home Upgrades: 7 Simple DIY Projects to Transform Your Space
Why DIY Home Upgrades Are Worth Your Time and Money
There has never been a better time to take your home improvement projects into your own hands. With an abundance of tutorials, affordable materials, and user-friendly tools available to everyday homeowners, DIY upgrades have become accessible to people of all skill levels. Whether you are a seasoned weekend warrior or someone picking up a paintbrush for the very first time, simple home improvements can yield dramatic results without draining your savings account or requiring a professional contractor.
The financial benefits alone make a compelling case for the DIY approach. Hiring professionals for minor upgrades can cost two to five times more than doing the work yourself, with labor often accounting for the bulk of the expense. A fresh coat of paint in a bedroom, for example, might cost a contractor several hundred dollars, while the materials alone can be purchased for under fifty dollars. Multiply those savings across seven or eight projects and you are looking at a meaningful return on your time investment.
Beyond the dollars and cents, there is a deeply satisfying psychological reward that comes from transforming your living space with your own two hands. Research in positive psychology consistently shows that completing creative, tangible tasks boosts mood, builds confidence, and fosters a stronger sense of ownership and pride in one’s environment. Every time you walk past that freshly painted accent wall or admire those new cabinet hardware pulls, you are reminded of your own capability and resourcefulness — and that feeling is genuinely priceless.
Project One: Refresh Your Walls With Paint and Texture
Paint remains the single most transformative and cost-effective upgrade you can make to any room in your home. A single gallon of quality interior paint covers approximately 400 square feet and costs between 30 and 60 dollars, making it possible to completely reinvent a space for less than most people spend on a casual dinner out. The key to a professional-looking result lies in proper preparation: clean your walls thoroughly, fill any holes or cracks with spackling paste, sand smooth, and apply a coat of primer before your chosen color goes on.
Beyond solid color, textured painting techniques have gained enormous popularity among DIY enthusiasts because they add visual depth and personality that flat paint simply cannot achieve. Techniques like color washing, sponging, and the increasingly trendy limewash effect create organic, layered looks that feel bespoke and high-end. Limewash paint in particular, which produces a chalky, aged plaster aesthetic, has become a favorite in modern farmhouse and Mediterranean-inspired interiors. It is applied with a large brush in irregular strokes and requires no special skills — in fact, the more imperfect your application, the more authentic the result.
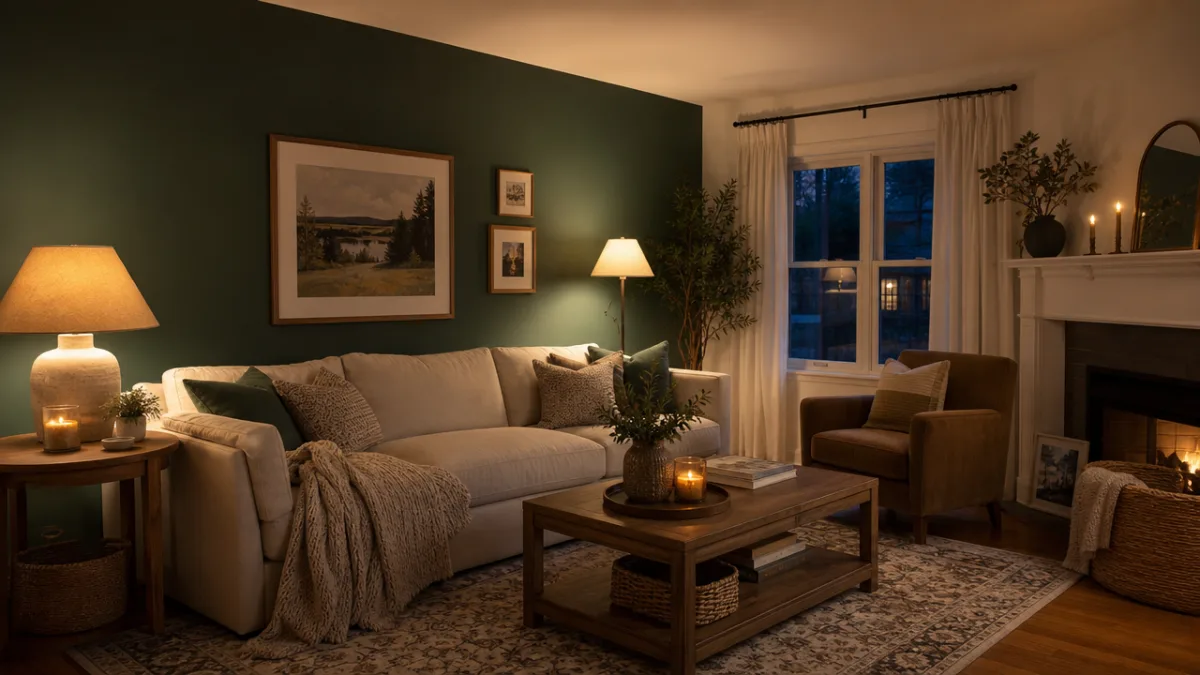
For those who want a bold statement without committing to an entire room, an accent wall is the perfect solution. Choose the wall that naturally draws the eye — typically the one you face when entering a room or the one behind a bed or sofa. Deep, saturated colors like forest green, navy blue, terracotta, or charcoal create striking contrast and make furnishings pop dramatically. If painting feels too permanent, removable wallpaper has advanced significantly in quality and now offers thousands of patterns, from geometric prints to botanical designs, that can be applied and removed without damaging walls.
Project Two: Upgrade Cabinet Hardware for an Instant Kitchen Facelift
Cabinet hardware is one of the most underappreciated elements of kitchen and bathroom design. The pulls, knobs, and hinges on your cabinets function like jewelry for the room — they are small in scale but enormous in visual impact. Swapping outdated brass knobs for sleek matte black bar pulls, or replacing generic chrome hardware with artisan ceramic knobs, can make a kitchen that feels stuck in the 1990s look like it belongs in a design magazine. This project typically requires nothing more than a screwdriver, a measuring tape, and an afternoon of your time.
Before purchasing new hardware, take careful measurements of the existing hole spacing on your cabinet doors and drawers, since most hardware is designed around standard spacing of 3 inches or 5 inches between screw holes. If you want to switch from knobs to bar pulls, you may need to drill new holes, which requires a simple drill and a steady hand. A drilling template, available inexpensively at most hardware stores, makes it easy to achieve perfectly aligned holes across all your cabinet fronts without the frustration of measuring each one individually.
When selecting your new hardware, consider the overall design language of your kitchen. Warm-toned finishes like brushed gold, unlacquered brass, and oil-rubbed bronze complement white, cream, and wood-toned cabinetry beautifully. Cool-toned finishes such as polished chrome, brushed nickel, and matte black work especially well with gray, navy, and two-tone cabinet schemes. Mixing metals has also become an accepted and fashionable approach — pairing a brushed brass faucet with matte black cabinet pulls, for instance, creates a layered, curated look that feels deliberately styled rather than mismatched.
Project Three: Install Floating Shelves for Storage and Style
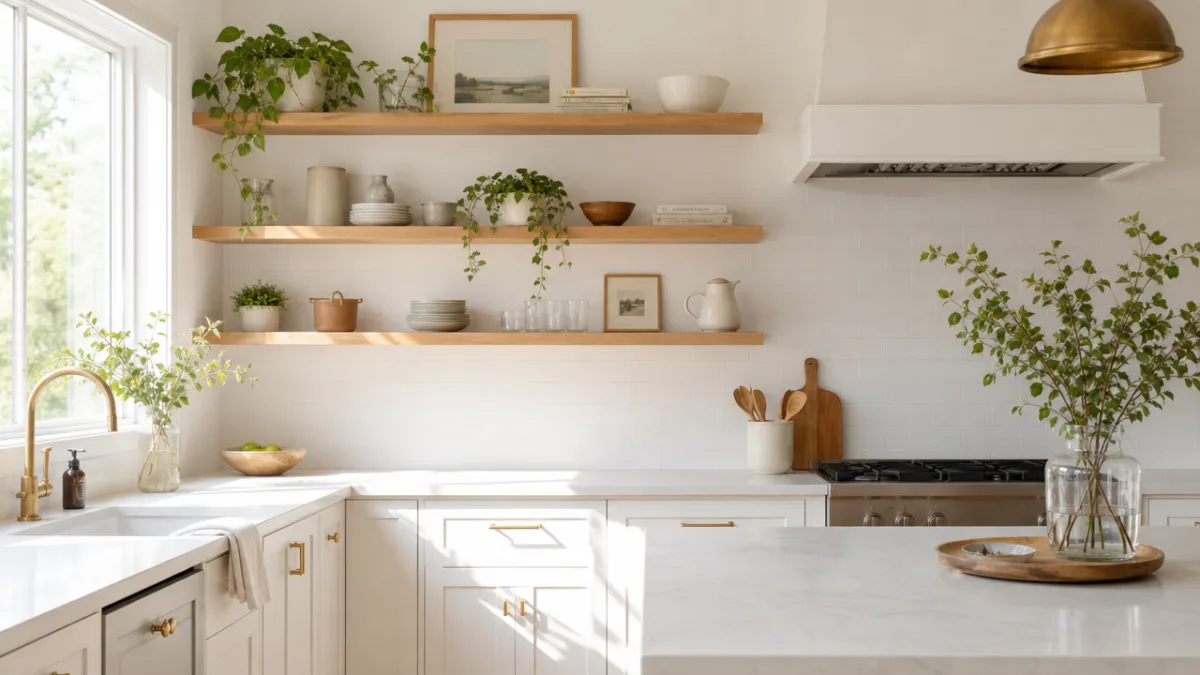
Floating shelves have earned their place as one of the most beloved DIY projects for good reason: they solve storage problems, provide display space, and add architectural interest to otherwise blank walls, all at the same time. A set of well-placed floating shelves in a kitchen can replace the need for upper cabinets in a small space, making the room feel more open while keeping everyday items within easy reach. In a living room or hallway, they become the perfect stage for books, plants, candles, and personal objects that tell the story of who lives in the home.
Installing floating shelves successfully hinges on one critical step: finding and anchoring into wall studs. Studs are the vertical wooden framing members hidden behind your drywall, typically spaced 16 inches apart, and they are the only part of a standard wall strong enough to support the weight of loaded shelves. An inexpensive stud finder makes locating them straightforward. If your shelf placement does not align with studs, use heavy-duty toggle bolts or anchors rated for the weight you plan to place on the shelf. Never rely on drywall alone, as it will eventually fail under load.
For materials, solid wood shelves cut from pine, oak, or walnut offer warmth and durability and can be stained or painted to match your existing décor. For a more modern look, consider MDF shelves with a smooth painted finish, or live-edge wood slabs for a rustic, organic aesthetic. Regardless of material, the brackets or mounting hardware you choose will affect the finished look significantly. Minimalist invisible brackets, where only the shelf surface is visible with no exposed hardware, create a particularly clean and architectural effect that reads as custom-built rather than store-bought.
Project Four: Transform Your Bathroom With Simple Fixture Swaps
The bathroom is one of the smallest rooms in most homes, yet it carries enormous weight in terms of daily comfort and resale value. Fortunately, its compact size means that even modest upgrades create a proportionally large visual impact. Replacing a dated vanity light fixture is one of the highest-impact swaps you can make, dramatically shifting the mood and modernity of the space. Modern vanity lighting in a globe, linear, or sconce configuration immediately updates the look of a bathroom in ways that require only basic electrical knowledge — specifically, how to safely turn off a circuit breaker and make simple wire connections.
Faucet replacement is another bathroom upgrade that falls comfortably within DIY territory for most homeowners. Bathroom sink faucets are typically standardized for either single-hole or three-hole configurations, and installation involves shutting off the water supply valves under the sink, disconnecting the old faucet, and connecting the new one according to the manufacturer’s instructions. The entire process usually takes between one and two hours, and the visual difference between an old faucet and a new one in a contemporary finish can be remarkable. Pair a new faucet with a matching towel bar set and toilet paper holder for a cohesive, polished look.
For a more dramatic bathroom transformation without touching plumbing or electrical systems, consider updating your mirror and adding a new shower curtain with coordinating rings. Mirrors have an outsized effect on how large and bright a bathroom feels — a larger mirror, or one with a distinctive frame, becomes a focal point that anchors the entire room. DIY mirror framing kits allow you to add a wood, metal, or decorative trim frame directly over a standard builder-grade mirror, transforming it from bland to beautiful in under an hour. Combined with a high-quality shower curtain in a rich fabric like linen or cotton canvas, these changes can make a basic bathroom feel genuinely luxurious.
Project Five: Enhance Curb Appeal With Exterior Touch-Ups
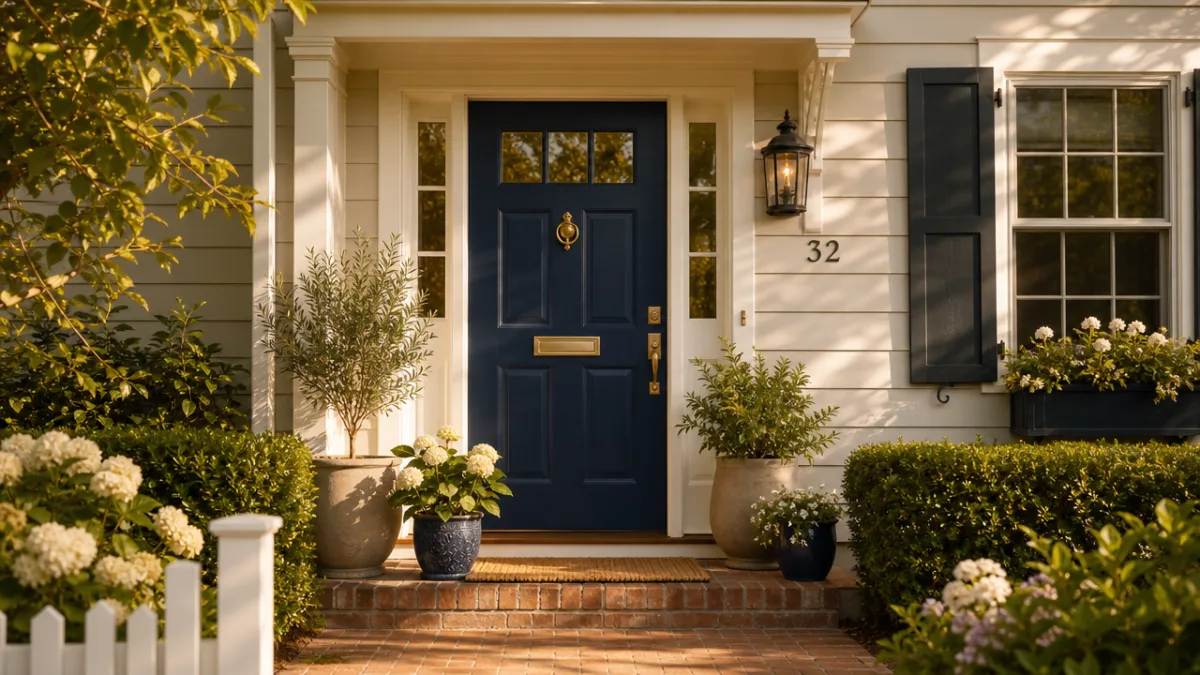
First impressions matter enormously, and the exterior of your home sets the tone for everything inside. Curb appeal improvements do not require a landscaping overhaul or a complete exterior repaint to be effective — targeted, strategic touch-ups can produce a dramatic improvement in how your home presents to the street. Start by assessing the condition of your front door. A freshly painted front door in a bold, intentional color is one of the most celebrated exterior upgrades in the design world, consistently cited by real estate professionals as one of the best returns on investment available to homeowners.
Beyond paint, your front door hardware, house numbers, and porch light fixture work together as a visual unit that signals the overall care and style of your home. Replacing tarnished or mismatched hardware with a cohesive set — door handle, deadbolt, kickplate, and door knocker all in the same finish — creates an immediate impression of intentionality and quality. Similarly, updating your house numbers to a modern font and finish, and replacing an outdated porch light with a contemporary lantern or flush-mount fixture, completes the picture without requiring major construction or significant expense.
Landscaping touches that fall within the DIY wheelhouse include adding a defined border between your lawn and garden beds using steel edging or natural stone, refreshing mulch in planting beds to a consistent two-inch depth, and adding potted plants or window boxes to frame your entrance. A pair of matching planters flanking a front door, filled with seasonal flowers or year-round evergreen shrubs, creates a symmetrical, welcoming effect that feels intentional and polished. These additions require no special skills, cost very little, and have an immediate and lasting impact on how your home looks from the street every single day.
Project Six: Lay Peel-and-Stick Tile for an Instant Floor Upgrade
Peel-and-stick tile has matured significantly as a product category in recent years, moving well beyond the flimsy vinyl squares of past decades into genuinely attractive, durable options that can fool even discerning eyes. Available in patterns ranging from classic subway tile and hexagon designs to ornate Moroccan and encaustic-inspired prints, modern peel-and-stick tiles can transform a dated bathroom floor, a tired kitchen backsplash, or a dull laundry room in a single afternoon. The installation requires no adhesive, no grout, no special tools, and no prior experience — just clean and level surface preparation, a sharp utility knife, and a measuring tape.
Surface preparation is the most critical factor in achieving a long-lasting peel-and-stick tile installation. The surface must be clean, dry, smooth, and free of wax, grease, or loose material. On existing tile floors, fill any grout lines that are deeper than one-eighth of an inch with a floor-leveling compound and allow it to cure completely before beginning installation. On painted or finished wood floors, lightly sand any raised areas and wipe away dust thoroughly. The cleaner and flatter your substrate, the better your tiles will adhere and the longer they will look great without lifting at the edges.
When planning your tile layout, always start from the center of the room and work outward toward the edges, just as you would with traditional tile. This ensures that cut tiles at the perimeter are symmetrical and that the most visible central area of the floor features only full tiles. Mark your centerlines with chalk or a pencil, lay a row of tiles dry without peeling the backing first to verify your layout, then begin installation from the center outward. Use a rubber mallet or rolling pin to press each tile firmly into place, ensuring complete contact with the surface beneath for maximum adhesion.
Project Seven: Add Smart Lighting for Ambiance and Efficiency
Lighting is arguably the most powerful design tool available to homeowners, capable of making a small room feel spacious, a cold space feel warm, and an ordinary room feel extraordinary — yet it remains one of the most commonly overlooked elements of interior design. The shift to smart lighting has made it easier than ever to customize the ambiance of your home without hardwiring new fixtures or calling an electrician. Smart bulbs from brands like Philips Hue, LIFX, and Govee fit into standard light sockets and can be controlled via smartphone app, voice assistant, or automated schedule, giving you granular control over color temperature, brightness, and timing.
Understanding color temperature is essential to using lighting effectively as a design tool. Color temperature is measured in Kelvins: lower values around 2700K produce a warm, amber-toned light reminiscent of candlelight, ideal for bedrooms, living rooms, and dining areas where relaxation and intimacy are the goal. Higher values around 4000K to 5000K produce a crisp, cool white light that promotes alertness and clarity, making it well-suited for kitchens, bathrooms, home offices, and workspaces. Many homeowners make the common mistake of installing cool, clinical lighting throughout the entire home, which can make even beautifully decorated rooms feel sterile and unwelcoming.
Beyond smart bulbs, adding plug-in dimmer switches, under-cabinet LED strip lights, and battery-operated puck lights requires no electrical expertise whatsoever and can dramatically expand your lighting toolkit. Under-cabinet kitchen lighting, in particular, is a transformative addition that improves both functionality and atmosphere — it illuminates countertops for food preparation while simultaneously adding a warm glow that makes the kitchen feel inviting during evening hours. LED strip lights installed behind a television, along staircase risers, or beneath floating shelves create a sophisticated ambient effect that elevates the perceived quality of the entire space at a fraction of the cost of a professional lighting consultation.
- Smart bulbs — Replace standard bulbs with tunable smart bulbs for full control over brightness and color temperature via app or voice command.
- Under-cabinet strips — Install adhesive LED strips beneath kitchen cabinets to illuminate workspaces and add warm ambient glow.
- Plug-in sconces — Add wall-mounted plug-in sconces to bedrooms and hallways for layered lighting without any electrical work.
- Dimmer switches — Swap standard on-off switches for dimmer switches to gain instant control over mood and energy usage.
- Accent lighting — Use battery-operated puck lights inside glass-front cabinets or bookshelves to highlight decorative objects and add depth.
Bringing It All Together: Planning Your DIY Upgrade Journey
With seven compelling projects now on your radar, the natural next question is where to begin. The most effective approach is to prioritize based on a combination of impact, budget, and your current skill level. If you are new to DIY, start with the lowest-stakes, highest-reward projects: paint and cabinet hardware are both forgiving, require minimal tools, and produce immediate gratification. As your confidence grows, graduate to floating shelves, fixture swaps, and peel-and-stick tile, each of which introduces slightly more technical considerations without requiring professional-level expertise.
Budgeting thoughtfully across your projects will help you avoid the common pitfall of running out of enthusiasm or funds halfway through a renovation push. Create a simple spreadsheet listing each project, the materials you need, estimated costs at your local hardware store or online retailer, and a realistic time estimate. Build in a ten to fifteen percent contingency on each project budget to cover unexpected needs — an extra can of paint, additional shelf brackets, or replacement tiles. Having a clear picture of the total investment across all seven projects helps you sequence them strategically and ensures that none of them stall due to insufficient planning.
Finally, document your progress from the very beginning. Before-and-after photography is not just satisfying to look back on — it trains your eye to recognize the incremental improvements you are making and keeps your motivation high when a project feels slow or challenging. Share your results with friends, family, or an online community of fellow DIY enthusiasts, and you will find that the encouragement and accountability of others makes the entire journey more enjoyable. Your home is a living reflection of your taste, your effort, and your vision. With these seven projects as your starting point, you are well on your way to creating a space that feels entirely, authentically yours.








What do you think?
It is nice to know your opinion. Leave a comment.