










Easy DIY Flower Frog Using Clay: A Complete Guide to Crafting Your Own Floral Arrangement Tool
What Is a Flower Frog and Why Every Flower Lover Needs One
A flower frog is one of those wonderfully old-fashioned tools that has made a quiet but powerful comeback in the world of floral arranging and home décor. At its most basic, a flower frog is a device placed at the bottom of a vase or vessel that holds flower stems in place, allowing you to create deliberately arranged bouquets rather than loosely bunched ones. The term “frog” is believed to come from the Japanese word “kaeru,” which means both frog and to return — a nod to the idea of flowers returning to a natural, lifelike posture when properly supported.
Traditional flower frogs were made from cast iron, brass, ceramic, or glass, and many antique versions are now considered collectibles. They came in a variety of designs — pin frogs with rows of sharp metal spikes, cage frogs with wire grids, and hairpin frogs with looped metal stands. Each style holds stems at a slightly different angle and works best with specific types of flowers or vessels. Today, crafters and floral enthusiasts are rediscovering these tools and making their own versions at home, with clay being one of the most accessible and enjoyable materials to work with.
Making your own clay flower frog is not only a satisfying craft project in itself, but it also gives you a completely customizable tool tailored to your specific vases, aesthetic preferences, and flower varieties. You can make them small and delicate for bud vases, or wide and sturdy for large centerpiece bowls. You can leave them natural and earthy, glaze them in bold colors, or paint them to match your home décor. Once you understand the basic technique, the creative possibilities are essentially limitless, making this one of the most rewarding beginner clay projects available.
The History of Flower Frogs in Home Décor
Flower frogs have a surprisingly rich history that stretches back centuries, particularly in Japanese ikebana flower arranging traditions where precise stem placement is considered both an art form and a meditative practice. Western households adopted similar tools in the late nineteenth and early twentieth centuries, when elaborate floral centerpieces were a cornerstone of formal home entertaining. Victorian and Edwardian households kept collections of flower frogs in various sizes, matching them to specific vases in their china cabinets and sideboards.
During the mid-twentieth century, flower frogs fell somewhat out of fashion as casual, relaxed bouquet styles became more popular and florist foam — commonly known by the brand name Oasis — became widely available. However, florist foam is a synthetic, non-biodegradable product that has come under increasing scrutiny in recent years due to its environmental impact. This has led many contemporary florists and home decorators to return to older, more sustainable tools like pin frogs and handmade clay versions, creating a genuine renaissance in this traditional craft.
Materials You Will Need for Your DIY Clay Flower Frog
One of the greatest advantages of making your own flower frog from clay is that the materials list is short, affordable, and easy to source from most craft stores or even online marketplaces. The most important decision you will make at the outset is what type of clay to use, and this choice will affect the durability, finish, and overall functionality of your finished flower frog. Air-dry clay is the most beginner-friendly option because it requires no kiln or specialized equipment — it hardens simply by being left out at room temperature over the course of one to two days.
Polymer clay is another popular choice for this project. It remains workable until you bake it in a standard home oven, which gives you more flexibility to adjust and perfect your design before committing to a final form. Polymer clay is also water-resistant once cured, which is a significant practical advantage for a tool that will regularly be placed in water-filled vessels. If you have access to a pottery kiln or a local ceramics studio, traditional earthenware or stoneware clay will produce the most durable and professional-looking result, with the added option of glazing for a beautiful, waterproof finish.
Beyond the clay itself, you will need a few basic tools and supplies to complete the project successfully. Most of these items are things you may already have at home, and none of them are particularly expensive to purchase if you don’t.
- Air-dry clay, polymer clay, or earthenware clay (approximately 200–300 grams for a medium-sized frog)
- A smooth, non-stick work surface such as a silicone mat, parchment paper, or a ceramic tile
- A rolling pin or smooth cylindrical object for flattening clay
- A round cookie cutter, jar lid, or bowl to use as a shape template
- A skewer, pencil, toothpick, or similar pointed tool for creating holes
- A small bowl of water for smoothing clay edges
- Sandpaper (fine grit, 220 or higher) for smoothing the cured surface
- Acrylic paint and a sealant or glaze if you wish to decorate the finished piece
- A ruler or compass for ensuring evenly spaced holes
Gathering all of your materials before you begin will make the crafting process much more enjoyable and efficient. It is also worth setting up your workspace thoughtfully — cover your table with a mat or cloth to protect it, ensure you have good lighting, and keep a damp cloth nearby for cleaning your hands and tools between steps. Clay can be surprisingly messy, particularly for beginners, so a little preparation goes a long way toward keeping your crafting session stress-free and focused on the creative work at hand.

Step-by-Step Instructions for Making Your Clay Flower Frog
Begin by conditioning your clay to make it soft, pliable, and free of air bubbles. For air-dry clay, this simply means kneading it thoroughly with your hands for several minutes until it feels smooth and uniform. For polymer clay, the same kneading process applies, and you may find that warming it in your hands or briefly exposing it to a warm lamp helps speed up the conditioning process. Well-conditioned clay is much easier to roll evenly and will be less prone to cracking as it dries or cures.
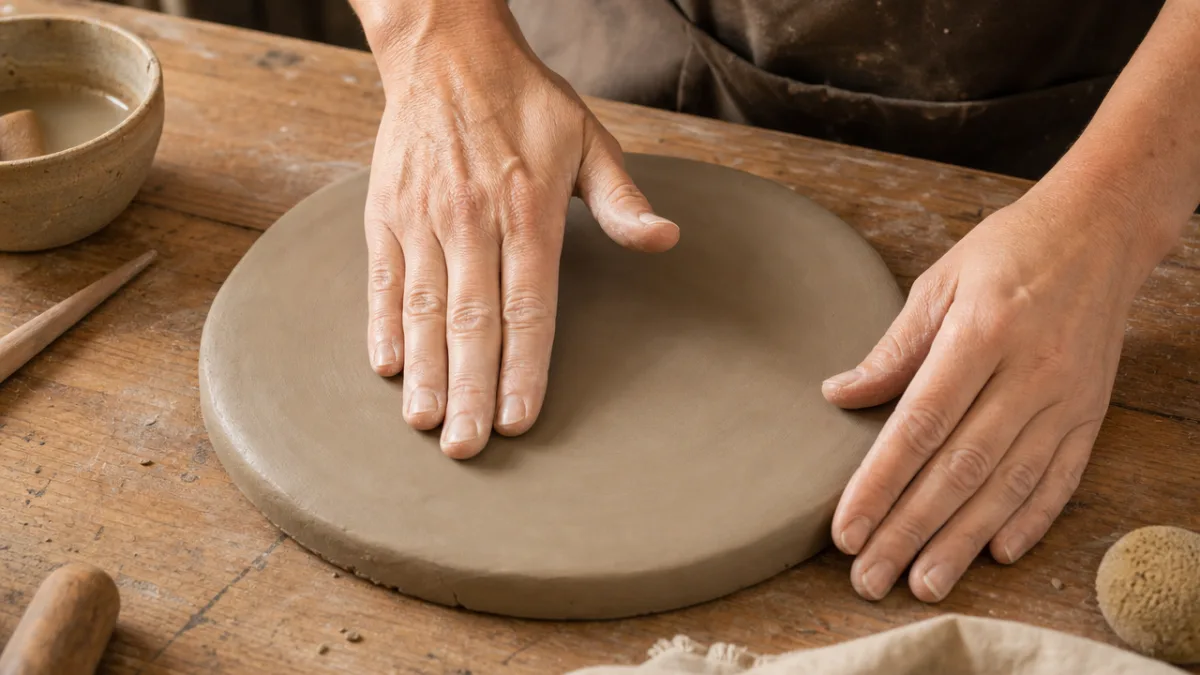
Once your clay is conditioned, place it on your work surface and use your rolling pin to flatten it into an even disc approximately one to one and a half centimeters thick. Consistency in thickness is important here because if the disc is too thin, the holes you create for the stems may crack around the edges, and the frog may not be sturdy enough to support heavier flower stems. If it is too thick, the frog will be unnecessarily heavy and may tip over lightweight vases. Use a rolling guide — two wooden dowels of equal thickness placed on either side of the clay — to achieve a perfectly even surface.
Use your chosen template — a cookie cutter, jar lid, or freehand-cut cardboard circle — to cut your clay into the desired shape. The classic flower frog shape is a simple circle, but you can absolutely experiment with ovals, squares, or even organic, irregular shapes if that suits your aesthetic. Press the cutter firmly and evenly into the clay, then carefully lift away the excess clay from around the outside. Smooth the edges of your cut shape with a dampened fingertip, running it gently around the perimeter to eliminate any rough or jagged spots left by the cutter.
Creating the Holes for Stem Placement
This is the most critical step of the entire project, and it deserves careful attention to both precision and technique. The holes you create in the clay disc are what give the flower frog its function, and their size, spacing, and arrangement will determine how versatile the finished tool is. Use your pointed tool — a skewer works particularly well — to pierce holes through the clay disc in a regular grid pattern or a circular arrangement, depending on your preference. Apply steady, even pressure and rotate the skewer slightly as you push it through to create clean, round holes rather than ragged tears.
The spacing of the holes matters more than many beginners realize. Holes that are placed too close together will weaken the clay between them, increasing the risk of cracking during drying. As a general guideline, leave at least one centimeter of clay between each hole and between the holes and the outer edge of the disc. The size of the holes should be slightly larger than the diameter of the flower stems you typically work with — approximately five to eight millimeters in diameter works well for most common garden flowers and florist stems. You can always make a few holes of varying sizes to accommodate different stem thicknesses.
After all the holes are pierced, go back and smooth around each opening with a damp fingertip or a small ball of clay used as an eraser, eliminating any raised edges or ridges that formed during piercing. This step not only improves the appearance of the finished piece but also strengthens the clay around each hole, reducing the likelihood of cracking. At this stage, you may also wish to add a small rim or foot to the underside of the disc by attaching a thin coil of clay around the bottom edge — this elevates the frog slightly and prevents it from sitting flat against the bottom of the vase, which can restrict water flow.
Drying, Curing, and Finishing Your Flower Frog
Allow your flower frog to dry or cure according to the instructions for your specific clay type. Air-dry clay typically takes twenty-four to forty-eight hours to dry completely at room temperature, depending on the thickness of the piece and the humidity in your environment. To encourage even drying and minimize warping, flip the disc over gently after the first several hours so that both sides are exposed to air. Place it on a wire rack rather than a flat surface if possible, as this allows air to circulate underneath the piece as well.
Once fully dry or cured, use fine-grit sandpaper to smooth the surface and edges of your flower frog. This step transforms the piece from a rough craft project into something that feels polished and intentional. Sand in gentle circular motions, periodically wiping away the dust with a dry cloth to assess your progress. Pay particular attention to the edges and the area around each hole, as these spots tend to retain the most roughness. After sanding, wipe the entire piece clean with a slightly damp cloth and allow it to dry completely before moving on to decoration.
Decorating and Personalizing Your Clay Flower Frog
The decoration phase is where your flower frog truly becomes a unique, personal object that reflects your creative sensibility and your home’s aesthetic. If you used air-dry clay and want your frog to be waterproof enough for regular use, you must seal it with a waterproof sealant before painting or after — ideally both, with a base coat of sealant before painting and a final protective topcoat after. Without sealing, air-dry clay will slowly absorb water and begin to soften and deteriorate over time, which will shorten the life of your flower frog considerably.
Acrylic paints are the most versatile and widely available option for decorating clay flower frogs. They adhere well to sealed clay, dry quickly, and are available in an enormous range of colors. Consider the vases you plan to use the frog in, the flowers you typically arrange, and the overall color palette of the room where it will live. A simple, elegant option is to paint the frog in a single matte color — sage green, terracotta, dusty rose, or creamy white are all perennially popular choices that complement most flower colors and interior styles. A coat of matte varnish over the finished paint gives a sophisticated, artisan pottery look.
For those who enjoy more intricate decorative work, there are many techniques that translate beautifully to clay flower frogs. Botanical stamping using real leaves or purchased rubber stamps pressed into acrylic paint and then onto the clay surface creates a lovely nature-inspired pattern. Fine-tip paint pens allow you to draw delicate designs freehand — tiny flowers, geometric patterns, or even script lettering. You might also experiment with applying gold or silver leaf for a luxurious, studio-pottery effect, or use a sponging technique with two or three colors of paint to create a soft, dappled surface reminiscent of natural stone.
Alternative Decorating Ideas and Techniques
If you prefer to work with the clay itself rather than paint as your primary decorative medium, there are several beautiful surface treatments you can apply before the clay dries. Pressing texture tools, fabric pieces, or natural materials like leaves and bark directly into the surface of the wet clay creates subtle, tactile patterns that look beautiful even without any paint. A piece of lace pressed gently into the surface of the clay and then carefully peeled away leaves a delicate floral impression that is particularly charming on a flower frog.
You can also incorporate color directly into the clay before shaping it, rather than painting the surface afterward. Many brands of air-dry clay and polymer clay are available in a range of pre-mixed colors, or you can tint white clay by working small amounts of acrylic paint or polymer clay pigments directly into the clay during the conditioning phase. Marbling effects can be achieved by partially mixing two or more colors together and leaving the blending intentionally incomplete — the swirling pattern revealed in the finished piece is unique every time and gives a beautifully organic, handmade quality to the flower frog.
Using Your Flower Frog: Tips for Beautiful Floral Arrangements
Now that your flower frog is finished and fully sealed, it is time to put it to work in the most enjoyable way possible — creating beautiful floral arrangements. The basic technique is straightforward: place your flower frog in the bottom of your chosen vase or vessel, add enough water to cover the frog and reach well up into the lower portions of the stems, and begin inserting your flower and foliage stems one at a time through the holes in the frog. The frog holds each stem securely at whatever angle you insert it, giving you full control over the direction, spread, and movement of every element in your arrangement.
Working with a flower frog encourages a more intentional, thoughtful approach to floral arranging than simply gathering stems in one hand and dropping them into a vase. Begin by establishing the overall structure of your arrangement with your tallest stems and main focal flowers, inserting them through the central holes of the frog at varying heights to create visual depth. Then fill in with secondary blooms and foliage, using the outer holes of the frog to create width and a sense of natural abundance. Trailing stems and delicate filler flowers like baby’s breath or sweet William can be inserted at steep angles through the holes at the outermost edge of the frog to create a soft, cascading effect.
One of the great joys of using a flower frog rather than florist foam is that it is completely reusable, easy to clean, and entirely compatible with keeping cut flowers properly hydrated. Between uses, simply rinse the frog under running water, use a small brush or pipe cleaner to clean inside the holes if necessary, and allow it to dry completely before storing. With proper care, a well-made clay flower frog sealed with a good waterproof varnish should last for many years, becoming a treasured tool in your creative practice and a beautiful decorative object in its own right.

Pairing Your Flower Frog with the Right Vessels
The vessel you pair with your flower frog matters enormously, both for practical functionality and for the overall aesthetic of the finished arrangement. Shallow, wide-mouthed vessels like ceramic bowls, vintage dishes, wooden boxes, and low ceramic trays are classic companions for flower frogs because they allow you to see the frog itself as part of the composition, and the wide opening gives you maximum flexibility in how you angle and spread your stems. These shallow arrangements, sometimes called ikebana-style or “floating” arrangements, have a spare, sculptural quality that highlights the individual beauty of each flower rather than presenting an overwhelming mass of blooms.
Narrow-necked vases present a different challenge — you will need a flower frog sized to fit snugly inside the opening, which may mean making a smaller frog specifically for this purpose. The advantage of a frog in a narrow-necked vase is that it prevents the common problem of all the stems crowding to one side or collapsing into a tangled cluster at the bottom. Even in a vase where the frog is not visible, its stabilizing effect dramatically improves the final appearance of the arrangement. Consider making a small collection of flower frogs in different sizes to fit the range of vessels you use most frequently.
Gifting and Sharing Your Handmade Flower Frogs
A handmade clay flower frog is a genuinely thoughtful and distinctive gift for almost any occasion — housewarming celebrations, birthdays, Mother’s Day, bridal showers, or simply as a token of appreciation for a friend who loves flowers or crafting. Because each frog is individually handmade, no two are exactly alike, which gives them the character and charm of a truly artisan object. Pairing a flower frog with a small bunch of seasonal flowers from a farmers’ market or even from your own garden elevates the gift into something that engages all the senses and invites the recipient into the pleasure of floral arranging.
If you enjoy making flower frogs, you might also consider hosting a simple craft afternoon for friends or family, providing each person with a portion of clay and the basic tools needed to make their own. These sessions are lovely for groups of mixed crafting experience levels because the technique is accessible enough for complete beginners while still offering plenty of room for more experienced crafters to explore and experiment. The conversation that flows naturally during a shared making session is one of the great, undervalued pleasures of craft culture, and everyone leaves with a beautiful, functional object they created themselves.
Sharing your flower frog projects on social media or craft communities like Pinterest, Instagram, or crafting forums is a wonderful way to inspire others and connect with a worldwide community of people who share your enthusiasm for handmade objects and flower arranging. The resurgence of interest in traditional crafts, sustainable alternatives to plastic floral tools, and the broader slow-living movement means that a well-photographed, thoughtfully made clay flower frog has genuine resonance with contemporary audiences. Document your process as well as your finished piece — step-by-step photos and honest reflections on what worked and what you would do differently next time are some of the most valued and widely shared content in the crafting community.
Expanding Your Clay Craft Practice
Once you have mastered the basic flower frog, you will likely find that your enthusiasm for working with clay grows naturally from there. The skills you develop through this project — conditioning clay, achieving even thickness, creating precise holes, smoothing surfaces, and applying finishes — are directly transferable to a wide range of other clay projects. Pinch pots, small trays, pendant jewelry, decorative tiles, and sculptural objects all build on the same foundational techniques, and each new project deepens your understanding of how clay behaves and how to work with it confidently.
Consider keeping a sketchbook or a notes file where you record ideas for future flower frog designs, experiments with different clay types or finishing techniques, and observations about what worked particularly well or what you would approach differently next time. This kind of reflective practice accelerates your development as a maker and ensures that each project benefits from everything you have learned in previous ones. Over time, you may find yourself developing a recognizable personal style — a particular color palette, a signature surface texture, or a characteristic shape — that makes your handmade objects immediately identifiable as yours.
The act of making something beautiful and functional with your own hands carries a satisfaction that is genuinely difficult to replicate in any other way. A clay flower frog sits at a particularly lovely intersection of craft, art, and everyday usefulness — it is an object that earns its place in your home not just by looking beautiful but by actively enhancing the way you interact with flowers, nature, and the simple pleasure of bringing living beauty into your living spaces. Whether you make one for yourself or many to share, this project is an ideal starting point for a richer, more handmade life.








What do you think?
It is nice to know your opinion. Leave a comment.