










DIY Wood Block Centerpieces for Dining Tables: A Complete Guide
Introduction to Wood Block Centerpieces
There is something timeless and deeply satisfying about bringing natural wood elements into your home, and wood block centerpieces for dining tables represent one of the most elegant and accessible ways to do exactly that. These handcrafted pieces blend rustic warmth with modern sensibility, creating focal points that draw guests in and spark conversation before the first dish is even served. Whether you are a seasoned woodworker or a complete beginner picking up a saw for the first time, the world of DIY wood block centerpieces is welcoming, forgiving, and immensely rewarding.
The beauty of wood as a crafting material lies in its incredible versatility. A single piece of raw timber can become a sleek, minimalist platform for candles and succulents, a rough-hewn display for wildflowers, or an intricately carved showpiece that anchors a formal table setting. Wood accepts stains, paints, and natural oils with equal grace, meaning your centerpiece can be tailored to match any existing décor — from farmhouse and cottagecore aesthetics to mid-century modern and Scandinavian design sensibilities. The creative possibilities are genuinely boundless.
Beyond aesthetics, making your own wood block centerpiece offers practical advantages that store-bought decorations simply cannot match. You control the dimensions precisely, ensuring the piece fits your specific table without overwhelming it or looking undersized. You choose the wood species, the finish, and every decorative element that sits on top. And perhaps most importantly, you end up with something unique — a handmade object that carries the quiet pride of your own effort and creativity. This guide will walk you through everything you need to know to create a stunning wood block centerpiece from scratch.
Choosing the Right Wood for Your Project
Selecting the right type of wood is arguably the most important decision you will make in this entire project, and it deserves careful thought before you head to the lumber yard or home improvement store. Different wood species offer dramatically different characteristics in terms of grain pattern, hardness, color, and how they respond to finishing treatments. Softwoods like pine and cedar are affordable, widely available, and easy to cut and shape, making them ideal for beginners. Hardwoods like oak, walnut, maple, and cherry are denser and more durable, and they tend to showcase more dramatic and visually striking grain patterns.
For a rustic or farmhouse-style centerpiece, reclaimed wood is an outstanding choice. Old barn boards, salvaged pallet wood, and repurposed shipping crates carry a patina of age and texture that is simply impossible to replicate with new lumber. The weathered surface, nail holes, and natural imperfections tell a story, adding depth and authenticity to your finished piece. You can often source reclaimed wood for free or at very low cost from construction sites, demolition projects, architectural salvage dealers, or online community marketplaces like Facebook Marketplace and Craigslist.
If you prefer a cleaner, more polished look, consider purchasing a pre-dimensioned board from your local hardware store and having it cut to your desired length. Popular choices include poplar for its smooth grain and paint-friendliness, pine for its warm, honey-toned knots, and oak for its bold, linear grain that photographs beautifully. Whatever species you choose, look for boards that are straight, free of major warping, and relatively dry — green or wet wood will shrink and potentially crack as it dries in your home. When in doubt, ask a store associate to help you select a quality piece.
Tools and Materials You Will Need
One of the most encouraging aspects of this DIY project is that it does not require an elaborate workshop or an expensive arsenal of specialized tools. The basic version of this project can be completed with a small number of common tools that many households already own, and the materials list is equally manageable. Having everything prepared and organized before you begin will make the process smoother, safer, and more enjoyable from start to finish. Taking time to gather supplies in advance means you will not have to interrupt your creative flow with unexpected trips to the store.
Here is a list of the core tools and materials you are likely to need:
- A miter saw, circular saw, or handsaw for cutting your wood to length
- Sandpaper in multiple grits — start with 80 or 120 grit for shaping and finish with 220 grit for smoothness
- A sanding block or orbital electric sander to speed up the process
- Wood stain, paint, or natural finishing oil such as Danish oil, tung oil, or beeswax
- Paintbrushes and clean rags for applying finish
- A tape measure, pencil, and carpenter’s square for marking cuts accurately
- Wood glue and clamps if you plan to join multiple pieces together
- Safety gear including protective glasses and a dust mask
- Decorative accessories such as candles, votive holders, dried flowers, greenery, or small figurines
Optional but highly useful additions include a router for adding decorative edge profiles, a drill for creating recessed candle wells or drainage holes, and wood burning tools if you want to add lettering, patterns, or designs to the surface. For those working with reclaimed or pallet wood, a pry bar and hammer for safe disassembly, as well as a metal detector wand to locate hidden nails, are worth including in your toolkit. Remember that safety should always come first — work in a well-ventilated space, keep your tools sharp and properly maintained, and never rush a cut.
Step-by-Step Construction Process
With your materials gathered and your workspace prepared, it is time to begin the actual construction of your wood block centerpiece. The process begins with measurement and planning, which might seem like a small step but is genuinely critical to a satisfying result. Measure your dining table carefully and decide on the proportions of your centerpiece — as a general guideline, a runner-style centerpiece works best when it spans roughly one-third to one-half the length of the table, and the width should allow comfortable placement of dishes and glasses on either side. Sketch your design on paper before making any cuts.
Once your dimensions are settled, mark your wood with a pencil and carpenter’s square, then make your cuts carefully and precisely. If you are using a single large block, one or two cuts may be all you need. If you are building a more complex piece — such as a tiered display, a rustic trough, or a multi-block arrangement — plan your cuts in sequence to minimize waste and ensure all pieces align properly. After cutting, use your coarser sandpaper to remove any rough edges, splinters, or saw marks, working your way progressively through finer grits until the surface feels smooth and even to the touch.
If your design involves multiple pieces joined together, apply wood glue to the mating surfaces, press them firmly together, and secure them with clamps while the glue dries — typically one to two hours for most interior wood glues, though leaving them overnight is ideal for maximum bond strength. Once your assembly is complete and fully dry, do a final sanding pass over the entire piece, paying special attention to any joints or seams. Now you are ready for finishing, which is where the real transformation happens and your wood block begins to reveal its full character and beauty.
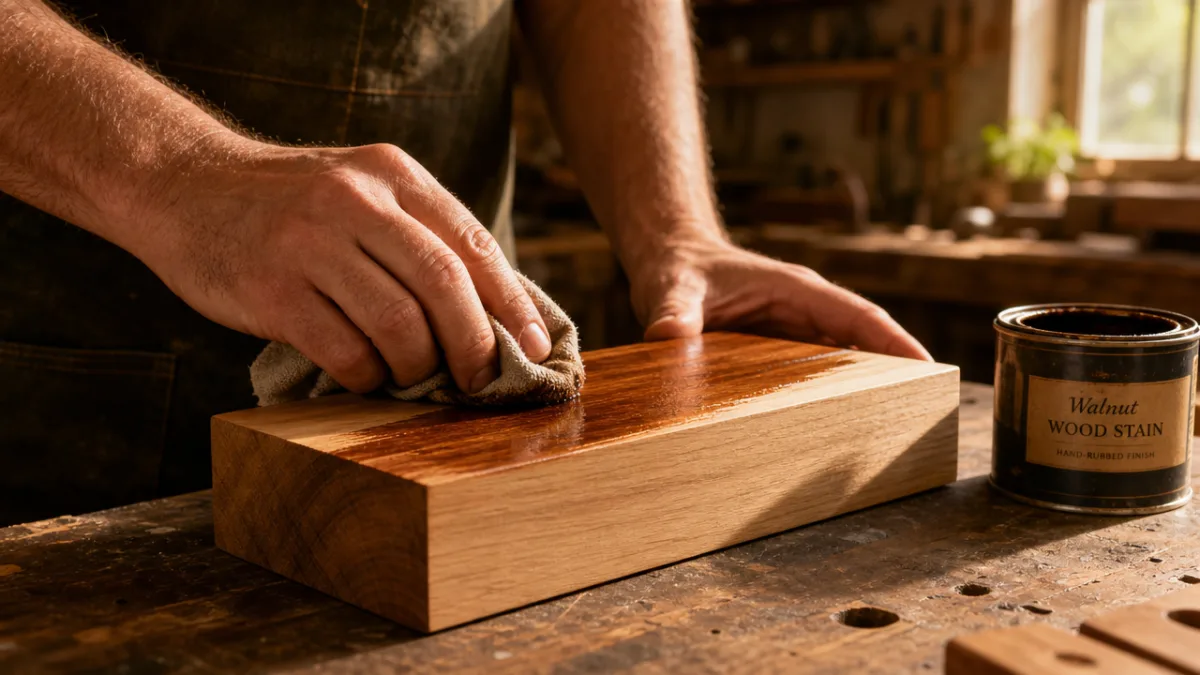
Apply your chosen finish — stain, paint, or oil — following the manufacturer’s instructions and working in the direction of the grain. Most stains and oils benefit from two to three coats, with a light sanding between each coat using very fine 320-grit sandpaper to ensure a smooth, even build. Allow each coat to dry fully before applying the next. For a weathered, aged effect, try dry brushing white or grey paint over a darker stained base, then lightly sanding the raised edges to simulate natural wear. For a sleek, modern look, a single coat of matte black paint with a clear topcoat is striking and sophisticated.
Design Ideas and Decorating Your Centerpiece
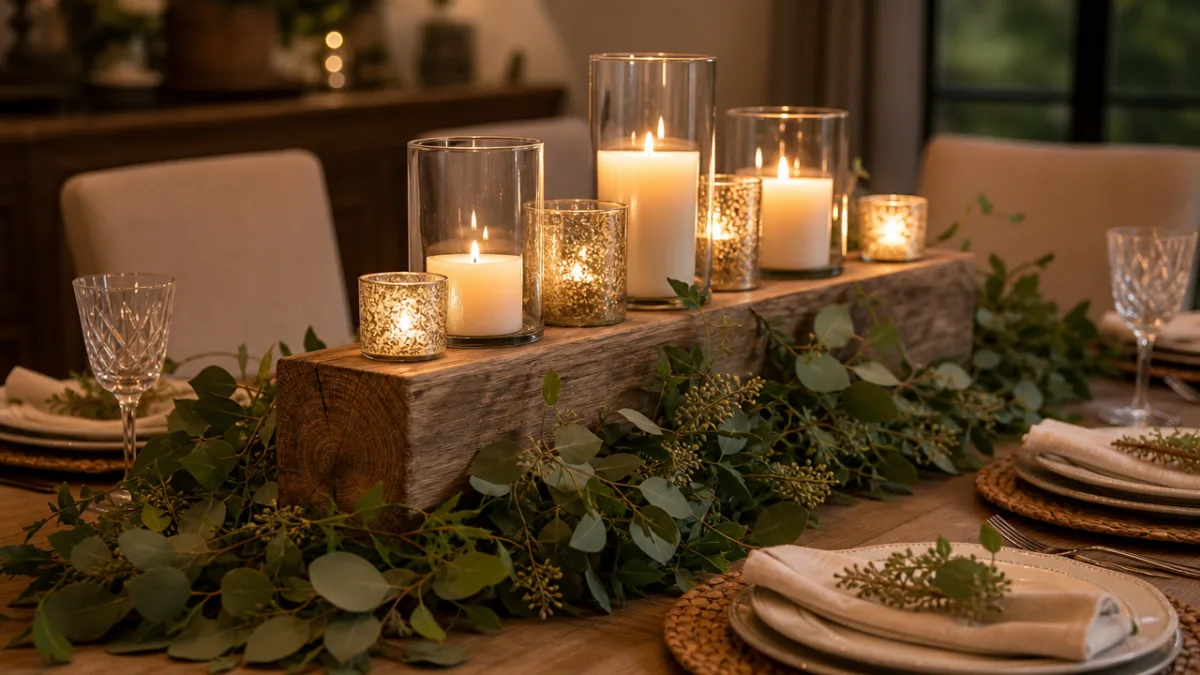
The construction of the wood block is just the foundation — what you place on top of it and around it is where your personal style truly shines through. The most versatile approach is to treat your wood block as a neutral stage, one that can be dressed differently with each season or occasion. In autumn, cluster small pumpkins, acorns, and sprigs of dried wheat across the surface. In winter, arrange pillar candles of varying heights alongside evergreen boughs, pinecones, and perhaps a dusting of faux snow. In spring and summer, fresh flowers in small bud vases, trailing ivy, and pastel-colored candles bring a sense of freshness and vitality.
For a cohesive, designer-quality look, consider these popular styling approaches:
- The Candle Cluster: Group three or five pillar candles of varying heights in the center of the block, surrounding them with small river stones, moss, or dried botanicals for texture.
- The Floral Trough: Drill a series of evenly spaced holes into the top of the block and insert small glass test tubes or votive holders, each filled with water and a single stem flower.
- The Succulent Garden: Hollow out a shallow trough with a router or chisel and fill it with potting mix, planting a variety of small succulents or air plants for a living centerpiece.
- The Layered Display: Combine the wood block with smaller supporting blocks at different heights to create a tiered arrangement that adds visual interest and dimension.
- The Seasonal Vignette: Use the block as a base for rotating themed collections — vintage books and dried flowers, holiday ornaments, or a collection of family photographs in small frames.
Lighting is a transformative element in any centerpiece arrangement, and it deserves special consideration. Real candles create the most romantic and organic ambiance, but battery-operated LED candles are a practical and safe alternative, especially for households with young children or pets. Fairy lights wound loosely around and beneath the wood block add a soft, diffused glow that is particularly magical in the evening. For outdoor dining settings, solar-powered lanterns placed beside the centerpiece extend the warmth of the display into the night without requiring access to electrical outlets.
Customization Tips and Advanced Techniques
Once you have mastered the basic wood block centerpiece, a world of advanced customization techniques opens up before you, each one offering a way to push your craft further and create pieces of increasingly sophisticated beauty. Wood burning, also known as pyrography, is one of the most accessible of these techniques — with an inexpensive wood burning pen and a little practice, you can add monograms, botanical illustrations, geometric patterns, or inspirational quotes directly into the surface of the wood. The results are striking, permanent, and entirely unique to your vision and hand.
Epoxy resin is another technique that has exploded in popularity among DIY woodworkers in recent years, and for good reason. Pouring a thin layer of clear or tinted resin over the top of your wood block creates a glass-like surface that protects the wood while also encapsulating decorative elements — pressed flowers, leaves, shells, or even small photographs — beneath a crystal-clear dome. Resin work does require attention to mixing ratios, temperature, and curing time, but the results can be genuinely breathtaking. Turquoise or cobalt blue pigmented resin poured into natural wood cracks, a technique known as river table styling, is particularly stunning on a larger centerpiece.
Inlay work — embedding contrasting materials into routed channels in the wood surface — represents a higher level of craftsmanship but produces centerpieces of heirloom quality. Traditional wood inlay uses thin strips or shapes of contrasting wood species; modern interpretations might use metal wire, crushed stone, or colored resin instead. Even simpler embellishments like decorative nail head trim along the edges, applied with a rubber mallet, can elevate a basic wood block into something that looks intentional, polished, and professionally crafted. The key principle is to choose one or two techniques and execute them with care rather than layering on too many elements that compete for attention.
Maintenance, Care, and Longevity
A well-made wood block centerpiece, properly cared for, can last for many years and even become a cherished piece of family décor passed from one generation to the next. The key to longevity begins with the finishing choices you made during construction. Pieces finished with a hard topcoat — polyurethane, lacquer, or conversion varnish — offer the most resistance to moisture, heat, and everyday wear, making them ideal for dining environments where spills and steam are a regular occurrence. Oil-finished pieces have a more natural look and feel but require periodic re-oiling to maintain their protective properties.
For everyday care, dust your centerpiece regularly with a soft, dry cloth and avoid placing it in direct sunlight for extended periods, as UV exposure will gradually fade and discolor even well-finished wood. If your piece develops a water ring from a misplaced vase or glass, a gentle rub with a fine steel wool pad (0000 grade) followed by a fresh application of finishing oil will often remove the mark completely. For painted surfaces, a light sanding followed by a touch-up coat of paint and a clear sealer is the recommended approach for addressing chips or scratches.
Seasonal storage deserves thought as well, particularly if you rotate your centerpiece design throughout the year. When storing your wood block between uses, wrap it in breathable fabric — not plastic, which can trap moisture and encourage mold growth — and keep it in a climate-controlled space away from extreme temperature swings. Avoid storing wood pieces in attics or garages where humidity fluctuates dramatically, as this can cause warping and cracking over time. With a modest investment of care and attention, your handmade centerpiece will reward you with beauty and character that only deepens as the wood ages gracefully alongside your home.








What do you think?
It is nice to know your opinion. Leave a comment.