










How To Make A DIY Raised Planter with Trellis: Complete Tutorial and Plans
Introduction: Why a Raised Planter with Trellis Is the Ultimate Garden Upgrade
A raised planter with an integrated trellis is one of the most functional and visually striking additions you can make to any outdoor space. Whether you have a sprawling backyard, a compact patio, or a narrow balcony, this two-in-one structure solves multiple gardening challenges at once. It elevates your plants off the ground for better drainage and soil control while simultaneously providing vertical support for climbing vegetables, flowering vines, and trailing greenery. The result is a garden feature that works harder and looks better than a standard planter ever could.
Beyond pure functionality, a raised planter with trellis creates a sense of structure and intentionality in your garden design. It defines spaces, creates privacy screens, and draws the eye upward, making even small gardens feel layered and lush. When built from quality cedar or redwood, these structures develop a beautiful weathered patina over time, becoming a permanent and cherished part of your outdoor environment. Unlike store-bought alternatives, a DIY version allows you to customize every dimension to perfectly match your space and style.
This tutorial walks you through every stage of the build, from selecting your lumber and gathering your tools to mixing your soil and training your first climbing plants. Whether you are a seasoned woodworker or picking up a drill for the first time, the step-by-step instructions and straightforward plans in this guide are designed to give you confidence and clarity throughout the entire process. By the end, you will have a sturdy, beautiful, and deeply satisfying structure that will serve your garden for many years to come.
Materials, Tools, and Planning Your Build
Before cutting a single board, good planning will save you time, money, and frustration. Start by deciding on the overall footprint of your planter. A common beginner-friendly size is 24 inches wide by 48 inches long and 18 inches tall, which provides generous growing volume without requiring an excessive amount of lumber. The trellis can extend an additional 48 to 60 inches above the top of the planter box, giving climbing plants plenty of vertical room to work with. Sketch your design on paper first, noting every board length and thickness you will need before heading to the lumber yard.
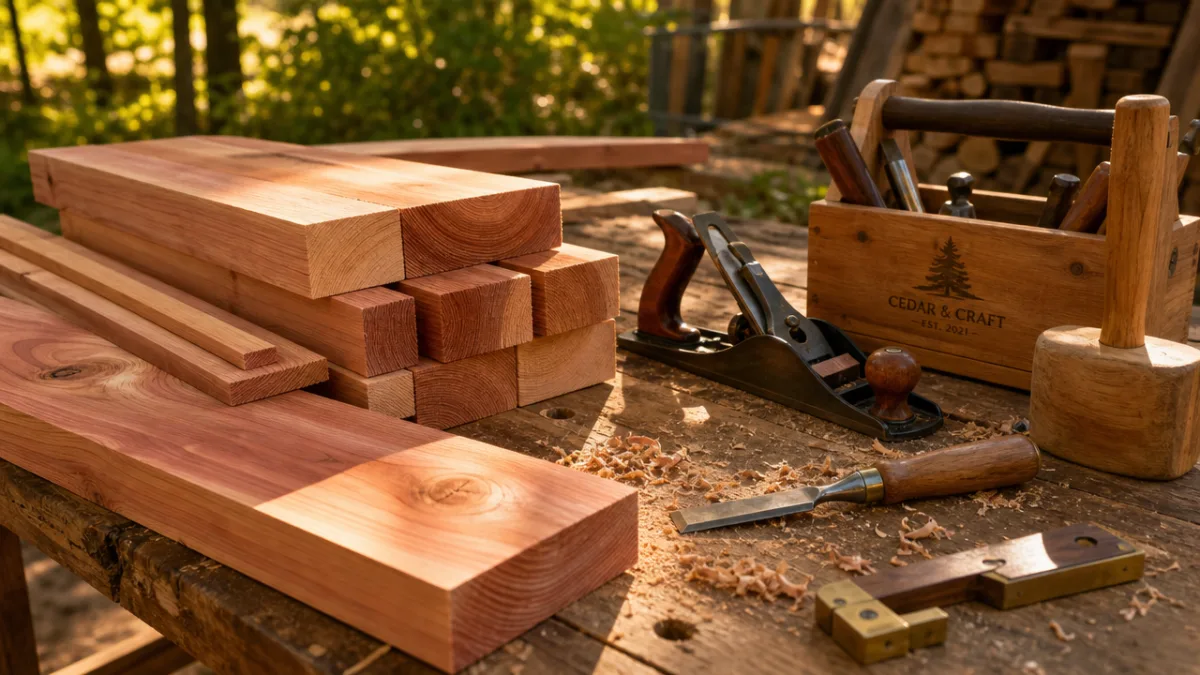
Cedar is the most recommended wood for outdoor planters because it contains natural oils that resist rot, insects, and moisture without the need for chemical treatment. Pressure-treated lumber is an alternative that offers even greater durability, though some gardeners prefer to avoid it for edible crops due to concerns about chemical leaching. Redwood is another excellent natural option but tends to be more expensive and less widely available. Whatever species you choose, look for straight, knot-free boards and allow freshly purchased lumber to acclimate outdoors for a day or two before cutting.
Here is a general materials list for a standard 24×48 inch raised planter with trellis:
- Six 2x6x8 cedar boards (for the planter box sides and ends)
- Four 4x4x8 cedar posts (two for the planter corners, two for the trellis uprights)
- Ten 1x2x6 cedar furring strips (for the trellis grid)
- Exterior wood screws in 2.5-inch and 3.5-inch lengths
- Galvanized post anchors or pre-mixed concrete (if anchoring to ground)
- Landscape fabric liner
- Waterproof wood sealant or exterior stain (optional but recommended)
- High-quality raised bed soil mix
In terms of tools, you will need a circular saw or miter saw for making clean, straight cuts, a power drill with screwdriver bits, a tape measure, a speed square, a level, clamps to hold boards in position while you fasten them, and safety glasses. A saw horse or workbench makes the cutting process much safer and easier. If you plan to apply a stain or sealant, have a brush and some painter’s tape on hand as well. Most of these tools are available for rent from home improvement stores if you do not own them already.
Step-by-Step Instructions for Building the Planter Box
Begin construction by cutting your 4×4 posts to the correct length. Two of these posts will serve double duty as both the corner supports of the planter box and the upright pillars of the trellis frame. For the design described in this tutorial, cut two posts to 78 inches total. This accounts for 18 inches of planter height plus 60 inches of trellis height above it. The other two posts, which will anchor the opposite end of the trellis, should be cut to 60 inches if you want a slanted top rail, or 78 inches if you prefer a flat, symmetrical top. Always use your speed square to confirm cuts are perfectly perpendicular before committing to the blade.
Next, cut your 2×6 boards into the side and end panels of the planter box. For a 48-inch by 24-inch footprint, you will need four boards at 48 inches and four boards at 21 inches (the 24-inch width minus the 1.5-inch thickness of two posts on each end). Stack two boards on top of each other per side to achieve the 12-inch interior wall height, then add a third layer if you want the full 18 inches of soil depth. Clamp your boards firmly to the posts before drilling pilot holes to prevent the wood from splitting, then drive your 3.5-inch exterior screws through the boards and into the faces of the corner posts.
Once all four sides are assembled, flip the box upright and check it for square by measuring diagonally from corner to corner in both directions. If both diagonal measurements are equal, your box is perfectly square. If not, apply gentle pressure to the longer diagonal while a helper watches from above, nudging until measurements match. Reinforce the bottom interior corners with small metal L-brackets for extra rigidity, especially if your planter will be filled with heavy, moist soil. Finally, line the interior of the box with landscape fabric, stapling it to the inside walls. This fabric allows water to drain freely while preventing soil from escaping through any gaps between boards.
Building and Attaching the Trellis Frame
With the planter box complete, turn your attention to the trellis structure that will rise above it. The two tall corner posts you set at the back of the planter box already form the primary uprights of your trellis. Begin by cutting a top horizontal rail from a 2×4 board and attaching it across the tops of these two upright posts using 3.5-inch screws driven at a slight downward angle for maximum holding power. This top rail forms the crown of your trellis and bears the lateral tension created by growing vines, so do not skip the pilot holes and take care to seat each screw fully without stripping the wood.
The trellis grid itself can be constructed in several ways depending on your aesthetic preference and the types of plants you intend to grow. A simple square grid made from 1×2 furring strips spaced 6 to 8 inches apart is the most beginner-friendly option and works beautifully for beans, cucumbers, peas, clematis, and climbing roses. Attach the vertical furring strips first, running from the top rail down to the top edge of the planter box, spacing them evenly across the width. Then weave and attach the horizontal strips across them, securing each intersection with a 2.5-inch screw. Pre-drill every hole in the 1×2 strips to prevent splitting these thinner boards.
For a more decorative variation, consider arranging the trellis strips in a diamond pattern by rotating the grid 45 degrees. This creates a classic lattice look that suits cottage-style and traditional garden aesthetics particularly well. You can also skip the wood grid entirely and stretch galvanized wire or heavy jute twine between screw eyes fastened to the uprights and top rail at regular intervals. This approach is less durable long-term but is perfectly adequate for annual vegetables and lightweight flowering vines, and it gives the structure a lighter, more airy visual presence that works well in smaller spaces.
Once the trellis is fully assembled, step back and check the entire structure for plumb — meaning truly vertical — from multiple angles using your level. Even small variations in alignment become more noticeable once climbing plants fill the structure and draw the eye upward. If adjustments are needed, loosen screws at the connection points, correct the angle, and re-fasten. Finally, if the structure will be freestanding on a patio or deck surface, consider adding a diagonal cross-brace at the back of the trellis between the two uprights to prevent any lateral rocking or wobbling over time.

Finishing, Sealing, and Preparing Your Planter for Planting
Before filling your planter with soil, this is the ideal moment to apply any stain, paint, or sealant to protect the wood and enhance the look of your finished project. Even cedar and redwood benefit from a coat of exterior-grade wood oil or penetrating sealant, which slows the natural greying process and helps the wood repel moisture more effectively through years of seasonal changes. Choose a product labeled safe for use around edible plants if you plan to grow vegetables or herbs. Water-based formulas tend to be lower in volatile organic compounds and dry faster than oil-based alternatives, making them a practical choice for most home gardeners.
Apply your chosen finish with a brush, working with the grain of the wood and paying special attention to end cuts, which absorb moisture most readily and are therefore most vulnerable to cracking and splitting over time. Allow the first coat to dry fully according to the manufacturer’s instructions before applying a second coat if desired. For a natural, minimalist look that ages gracefully, simply leave the cedar untreated and allow it to weather to a soft silver-grey over one to two seasons. This patina is not only beautiful but also indicates that the wood’s natural oils are doing their protective work.
Soil selection is equally important to the long-term success of your raised planter. Never fill a raised bed with native garden soil straight from the ground, as it compacts easily in the confined space of a planter box, restricts root development, and often introduces weeds and pathogens. Instead, use a purpose-blended raised bed mix that typically combines topsoil, compost, perlite or coarse sand, and sometimes coconut coir for moisture retention. A good rule of thumb is to aim for a mix that is roughly one third compost for fertility, one third topsoil for body, and one third drainage material such as perlite or aged wood chips.
Choosing Plants and Getting the Most From Your New Structure
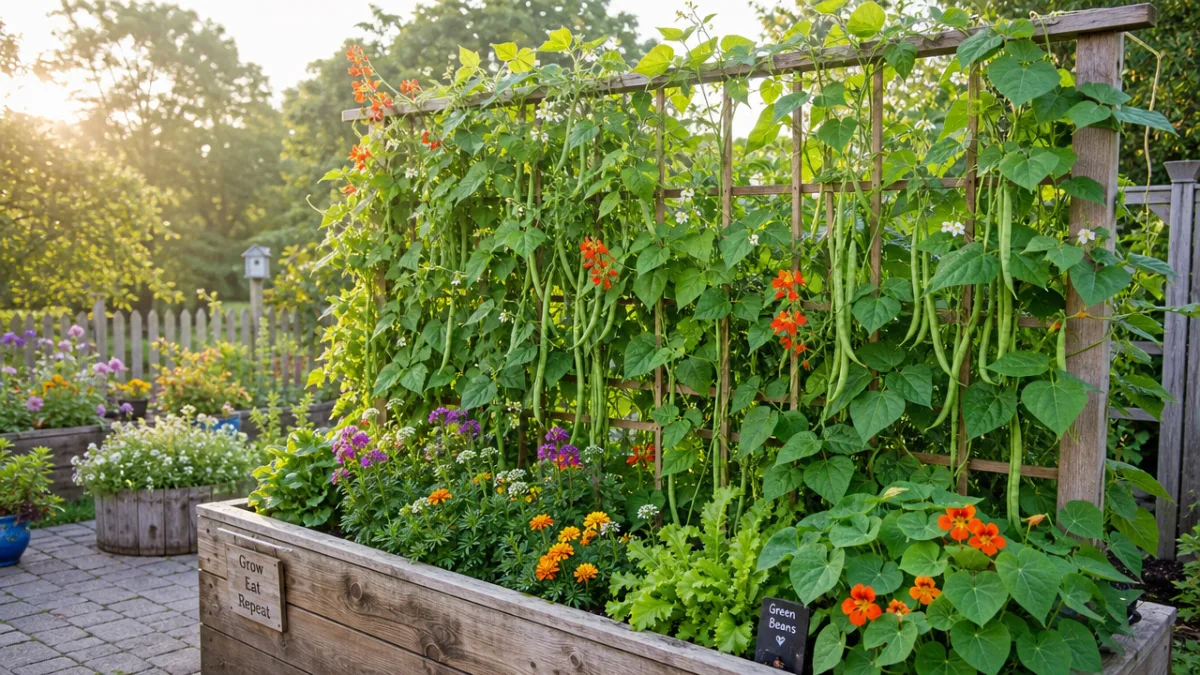
The combination of a raised planter and an integrated trellis opens up an impressive range of planting possibilities, especially for those working with limited horizontal space. The planter base is ideal for compact, mounding, or root-producing crops such as lettuce, spinach, radishes, beets, herbs like basil and parsley, and even strawberries along the edges. Meanwhile, the trellis above is perfectly suited to vertical growers including pole beans, sugar snap peas, cucumbers, small-fruited squash, and indeterminate tomatoes trained to a central leader. This vertical layering makes extraordinarily efficient use of both soil volume and sunlight.
For ornamental gardens, the trellis becomes a living tapestry when planted with annual or perennial climbers. Sweet peas provide intoxicating fragrance and cheerful color through spring and early summer. Black-eyed Susan vine (Thunbergia alata) covers the structure quickly with bright orange blooms and thrives even in part shade. Climbing roses require more patience but reward it with unmatched beauty and seasonal fragrance. Clematis in its many varieties offers flowers in virtually every color imaginable from early spring through late autumn, and many cultivars are well-suited to growing in containers provided their roots are kept cool and consistently moist.
Training your climbing plants properly from the start will pay enormous dividends as the season progresses. Begin guiding young tendrils and stems toward the trellis as soon as they are long enough to reach it, using soft garden twine or plant clips to gently tie stems to the nearest horizontal or vertical strip. Avoid tying too tightly, as stems thicken quickly and tight ties can girdle and damage them within just a few weeks. As plants grow taller, continue redirecting new growth horizontally across the trellis face rather than allowing everything to race straight up, which creates a fuller, more balanced appearance and often increases flowering and fruiting.
Regular maintenance keeps both the structure and the plants performing at their best. Check screws and connections at the start of each growing season and tighten any that have loosened over winter. Reapply wood sealant every two to three years. Remove spent plant material at the end of the season to prevent disease and pest overwintering in the structure. Refresh the soil each spring with two to three inches of fresh compost worked into the top layer, replacing any soil that has settled significantly. With these simple habits, your DIY raised planter with trellis will remain a productive, beautiful, and deeply rewarding garden feature for a decade or more.
Customization Ideas and Variations to Make It Your Own
One of the greatest advantages of building your own raised planter with trellis is the freedom to adapt the design in countless ways to suit your personal aesthetic and practical needs. For a farmhouse or rustic look, consider using rough-sawn lumber rather than smooth-planed boards, embracing the natural texture and imperfections of the wood surface. Alternatively, painting the entire structure in a bold, deep color such as navy blue, forest green, or charcoal creates a dramatic backdrop that makes foliage and flowers pop with extraordinary visual impact against the painted surface.
You can also expand the basic design by adding features that increase utility. A small shelf bracket mounted to the side of the planter provides a convenient spot to rest a watering can or a tray of seedlings. Hooks screwed into the side of the planter box can hold small hand tools exactly where you need them. If your planter will sit on a deck or patio, consider fitting heavy-duty locking casters to the base so the entire structure can be repositioned easily to follow the sun or protect plants from unexpected frosts. For elevated decks, always confirm that the structural load capacity of your surface can support the considerable weight of a fully soil-filled planter.
Multiple planter-and-trellis units can be arranged in sequence to create an impressive living wall or garden room divider that offers both privacy and productive growing space. Positioning two units at right angles forms a cozy garden corner, while lining three or four in a row along a fence or property boundary creates a lush, layered garden border that looks established and intentional from the very first season. However you choose to configure and customize your build, the combination of thoughtful planning, quality materials, and your own careful craftsmanship will result in a garden structure that is uniquely and authentically yours.








What do you think?
It is nice to know your opinion. Leave a comment.