










DIY Wall Stick Hanging: Add Style and Personality to Your Walls!
Introduction: Why DIY Wall Hangings Are Transforming Home Décor
Honestly, there’s never been a better time to put your own stamp on your home. DIY wall hangings made from natural sticks and branches have exploded in popularity lately, and it’s easy to see why — they give you something no store-bought piece ever can: something that’s genuinely, completely yours. Whether you’re in a tiny studio apartment or a big family home, a handcrafted wall hanging brings warmth, texture, and a little bit of your story into whatever room you hang it in.
What makes stick-based wall hangings so special is that deep connection to the natural world. Every branch has its own shape, its own grain, its own character — no two are alike. When you hang one on your wall, you’re essentially bringing a little piece of the outdoors inside, creating this visual link between your home and the world beyond your windows. That sense of organic, unforced authenticity seems to resonate with people no matter what their design style is, whether they’re going full rustic farmhouse or keeping things sleek and minimalist.
And beyond just the end result, making your own wall hangings is genuinely enjoyable. It’s the kind of craft that slows you down in a good way — you’re out gathering materials, then you’re working with your hands, and eventually something beautiful exists that didn’t before. A lot of people find the process just as satisfying as the finished piece, which makes it a hobby that also happens to double as meaningful home décor. Fair warning though: once you make your first one, you’ll probably want to keep going.
Gathering Your Materials: What You Need to Get Started
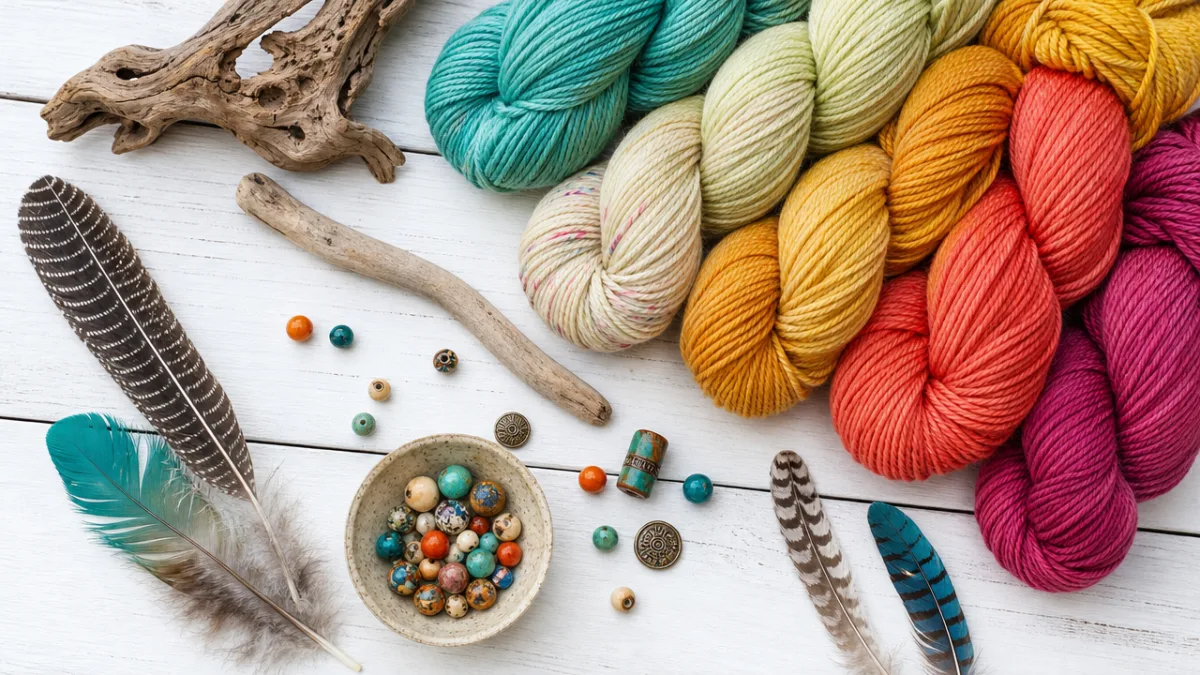
Like any good DIY project, this one starts with gathering your materials — and here’s the great news: most of what you need is either free or costs very little. The star of the show is, naturally, your stick or branch. After a windy day, you’ll likely find plenty of fallen branches in parks, forests, or your own backyard. You’re looking for something fairly straight, sturdy, and with a bit of natural personality. Length depends on the look you’re after — anywhere from about 30 centimeters for a smaller accent piece to over a meter if you want something that really makes a statement.
Once you’ve got your branch sorted, everything else comes down to your design vision. Yarn is the go-to choice for most DIY wall hangings because it comes in such an incredible variety of colors, textures, and thicknesses. Chunky wool gives you that cozy, bohemian feel, while fine cotton yarn looks more delicate and refined. Macramé cord is another fantastic option — it’s made from natural cotton and has this wonderfully earthy, textural quality to it. Mixing different types of yarn and cord in a single piece creates depth and visual interest that makes people want to stop and look.
Beyond yarn and cord, you can personalize your hanging with all kinds of extra touches. Here are some ideas worth adding to your materials list:
- Feathers — natural or dyed — for a free-spirited, bohemian aesthetic
- Wooden beads or clay beads threaded onto yarn strands for texture and weight
- Dried flowers, seed pods, or pressed leaves for an organic, seasonal touch
- Tassels made from embroidery thread in complementary or contrasting colors
- Ribbons or strips of fabric for a softer, more eclectic feel
- Small shells or stones with natural holes for a coastal or earthen vibe
For tools, you really only need a few basics: scissors, a comb or stiff brush for fringing yarn, and maybe a ruler or tape measure if you want things to stay symmetrical. Some people like having a hot glue gun on hand for certain embellishments, but honestly, most things can just be tied or knotted in place without any glue at all. The simplicity of the supply list is a big part of what makes this craft so welcoming for beginners and seasoned makers alike.
Design Inspiration: Styles and Aesthetics to Explore
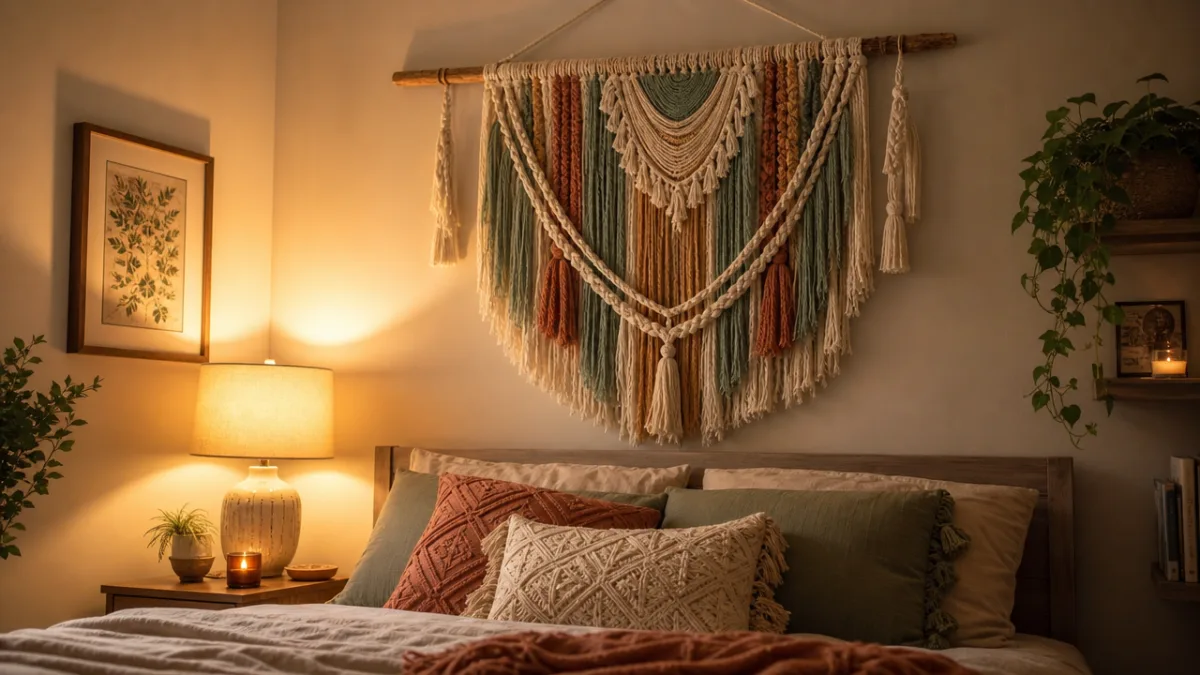
One of the best things about DIY wall stick hangings is the sheer variety of styles you can pull off with essentially the same basic materials. The bohemian look is probably the most iconic — think warm earthy tones, layered textures, plenty of fringe, and that overall free-spirited, relaxed vibe. A boho hanging might mix natural macramé cord with amber, terracotta, and sage-green yarn, then finish it off with feathers and wooden beads. It ends up feeling both handcrafted and globally inspired, and it works beautifully in living rooms, bedrooms, and cozy reading nooks.
If your home leans more Scandinavian or minimalist, the same basic technique adapts really well to a cleaner, more restrained look. Pick a tight color palette — maybe crisp white with soft grey — and lean into geometric simplicity rather than layered abundance. A simple white cotton fringe hanging from a slim, pale birch branch can be every bit as striking as something heavily embellished, and it’ll sit perfectly in a modern, pared-back interior. With minimal pieces like this, the space around the hanging actually becomes part of the composition.
If you love color, a rainbow-themed wall hanging is such a joyful project. Arrange yarn strands across the full spectrum — red through orange, yellow, green, blue, and violet — and you end up with something that just radiates happiness. Rainbow hangings are especially great in kids’ bedrooms, creative studios, or any space where you want to keep the energy light and playful. They’re also a brilliant way to use up leftover yarn from other projects, so they’re as economical as they are cheerful.
Some other directions worth exploring:
- Seasonal themes: Incorporate autumn leaves and dried berries for fall, or delicate florals for spring.
- Woven panels: Use your stick as a loom and weave yarn back and forth to create textured geometric shapes within the hanging.
- Layered fringe: Create multiple lengths of fringe that cascade downward in tiers for a dramatic, waterfall effect.
- Mixed media: Combine yarn with fabric strips torn from old clothing or linens for a sustainable, upcycled aesthetic.
- Monochromatic: Work entirely within a single color family, using different shades and textures to create tonal depth.
Step-by-Step Technique: Creating Your First Wall Hanging
Alright, materials ready and design in mind — let’s actually make something. Start with your branch. If you found it outside, give it a gentle wipe down with a damp cloth and let it dry completely before you start. From there, you can leave it exactly as it is — bark, imperfections, and all — or sand it lightly for a smoother look. Some people like to paint their branches or add a thin coat of varnish for a more finished feel, but neither step is necessary if you love the natural look.
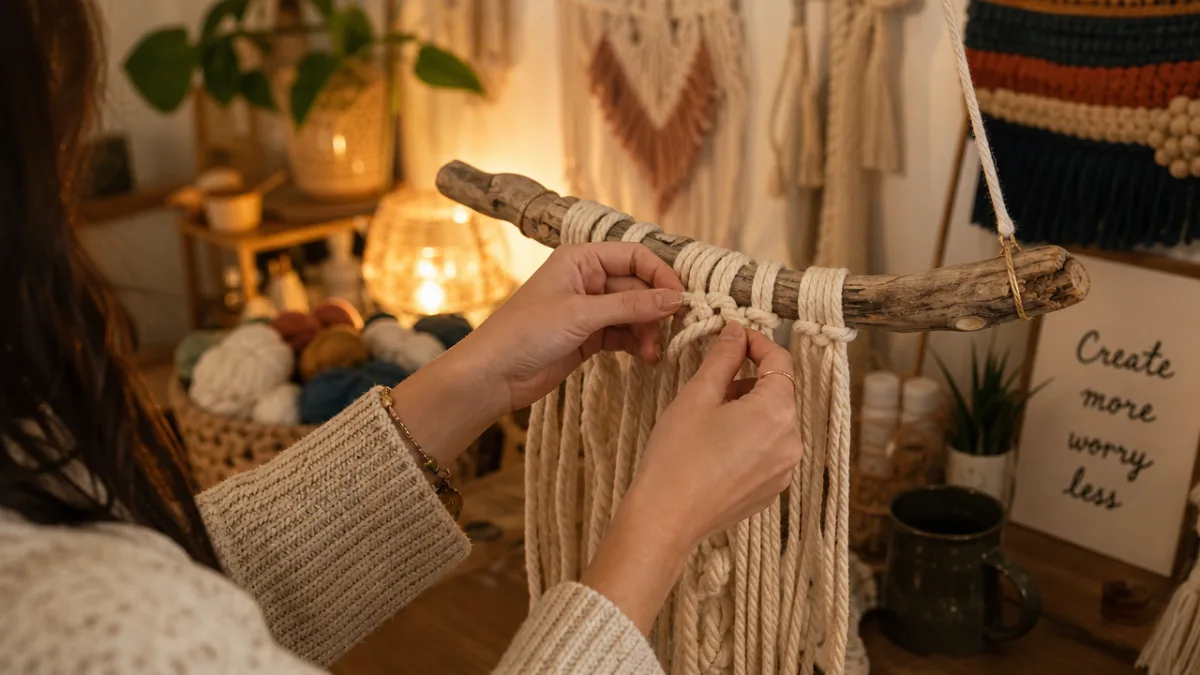
The single most important technique to know for stick wall hangings is the lark’s head knot. Once you’ve got it down, everything else follows naturally. Here’s how it works: cut a length of yarn about twice as long as you want the finished strand to be. Fold it in half to find the midpoint, then loop the folded end over your branch from front to back. Pull the two loose ends up through that folded loop and pull it tight. You end up with a clean, secure knot sitting neatly on the branch, with two hanging strands ready for whatever comes next — more knotting, braiding, or just hanging free as fringe. Repeat this all the way across the branch, packing the knots close together for a full, lush look, or spacing them out if you want something airier.
With all your yarn attached, you can start adding texture and detail. For fringe, the simplest option is just letting the strands hang loose — but if you want that fluffy, soft finish, try separating the yarn plies or brushing the ends out with a comb. For braids, group strands into sets of three and braid down to your desired length before letting the ends fall free. If you want to go a step further, basic macramé knots like the square knot or the spiral half-hitch create gorgeous repeating patterns that give your piece a real artisan quality, and you don’t need any specialist tools to do them.
When you’re happy with the main body of your hanging, it’s time to add your embellishments. To add beads, just pass a yarn strand through the bead and knot above and below to hold it in place. For feathers, wrap a strand of yarn tightly around the quill and knot it securely, or simply tuck the feather between existing strands and tie it in. Dried flowers can be woven into the yarn or fixed with a tiny dab of hot glue. To finish, cut a length of yarn or twine for a hanging cord, tie each end securely to the branch, and you’re done.
Displaying Your Creation: Placement and Styling Tips
Where you hang your piece matters just as much as how you made it. One of the most classic spots is above the bed as a soft alternative to a headboard. A wide, generously fringed hanging centered above the bed creates an instant focal point and brings so much warmth to a space that can otherwise feel a bit bare. For the best proportions, aim for a piece that’s roughly two-thirds the width of your bed, and hang it low enough that it feels like it belongs with the bed rather than floating disconnected on the wall above it.
Gallery walls are another fantastic home for stick hangings, mixed in alongside framed artwork, photographs, and mirrors. The organic, three-dimensional quality of a hanging creates really lovely contrast against the flatness of framed prints, making the whole arrangement feel more dynamic and alive. When you’re working a hanging into a gallery wall, think of it as one element among many rather than the centerpiece, and let its color palette guide your choices for the other pieces around it.
It’s also worth thinking about the less obvious spots in your home where a hanging could add something unexpected. A small, simple piece in the entryway greets people with warmth and creativity the moment they walk in. A hanging in the bathroom adds a bohemian, spa-like quality that lifts the whole room. Even a home office can really benefit from a well-placed wall hanging — it softens the space, adds color, and honestly might even help with creativity during those long working days.
Caring for Your Wall Hanging and Making It Last
With just a little basic care, a well-made DIY wall hanging can stay beautiful for years. The most common issue is dust, which will inevitably settle into the fibers over time. The easiest fix is a gentle blast from a hairdryer on the cool setting — it blows the dust away without disturbing the structure of your piece. You can also use the brush attachment of a vacuum on its lowest suction setting to carefully lift dust from the yarn without pulling or distorting anything. Doing this every few months is usually enough to keep things looking fresh.
If your hanging includes natural elements like dried flowers, feathers, or leaves, keep in mind that these can fade or become brittle over time, especially in direct sunlight. UV light is genuinely tough on both natural embellishments and yarn, causing colors to fade noticeably over months and years. Where you can, display your hanging away from south-facing windows or somewhere it gets diffused light rather than direct sun. If you want the brightness of natural light without the fading risk, a UV-protective fabric spray applied before you hang it for the first time can make a real difference.
The good news is that wall hangings are very easy to refresh when they start looking a little tired. You can swap out worn or faded embellishments for new ones and give the piece a whole new lease of life without starting from scratch. Seasonal refreshes are a fun way to keep things feeling current — switch out warm autumn tones for soft spring pastels, or weave in a few festive touches during the holiday season. This adaptability is one of the loveliest things about handmade décor: the piece can evolve right along with you and your home.
And finally — mistakes are part of the process, especially when you’re learning something new. If a knot looks off or a strand of fringe isn’t quite right, you can almost always just undo it and try again. Yarn is wonderfully forgiving. Go into each piece with curiosity rather than a demand for perfection, and you’ll find that the little imperfections and happy accidents are often what make handmade pieces feel the most special. Every wall hanging tells its own story — and yours is just getting started.








What do you think?
It is nice to know your opinion. Leave a comment.