










Aesthetic Summer DIYs: Seashell Soy Candle
The Magic of Making Your Own Seashell Soy Candles
There is something deeply satisfying about transforming simple, natural materials into something beautiful and functional. Seashell soy candles sit at that perfect intersection of coastal charm and sustainable living, making them one of the most beloved summer DIY projects for crafters of all skill levels. Whether you gathered your shells from a beach vacation or picked them up at a local craft store, these candles capture the spirit of the ocean in a way that no store-bought product ever could. The warm flicker of a flame inside a natural shell creates an atmosphere that feels both rustic and refined.
Soy wax has become the go-to material for home candle makers, and for excellent reasons. Unlike paraffin wax, which is derived from petroleum, soy wax is a renewable resource made from soybean oil. It burns cleaner, lasts longer, and holds fragrance oils more effectively. When you combine soy wax with the organic beauty of a seashell, you get a product that feels genuinely artisanal — something that looks like it belongs on a boutique shelf but was crafted with your own two hands on a sunny afternoon.
This project is also remarkably accessible. You do not need a dedicated craft room or expensive professional equipment to get started. Most of the supplies are either inexpensive or already sitting in your kitchen drawers. The learning curve is gentle, the process is meditative, and the results are consistently stunning. Once you have made your first batch, you will find yourself collecting shells wherever you go, seeing them not just as beach souvenirs but as future vessels for light.
Why Seashell Candles Are the Perfect Summer Aesthetic
The aesthetic appeal of seashell candles is undeniable. They bring a sense of the shoreline indoors, evoking memories of bare feet on warm sand, the sound of waves, and the salty breeze of a summer afternoon. When arranged on a windowsill, coffee table, or bathroom shelf, they create a coastal vignette that feels curated without being forced. The natural variation in shell shapes, sizes, and colors means that no two candles are ever exactly alike, which gives your space an authentic, collected quality.
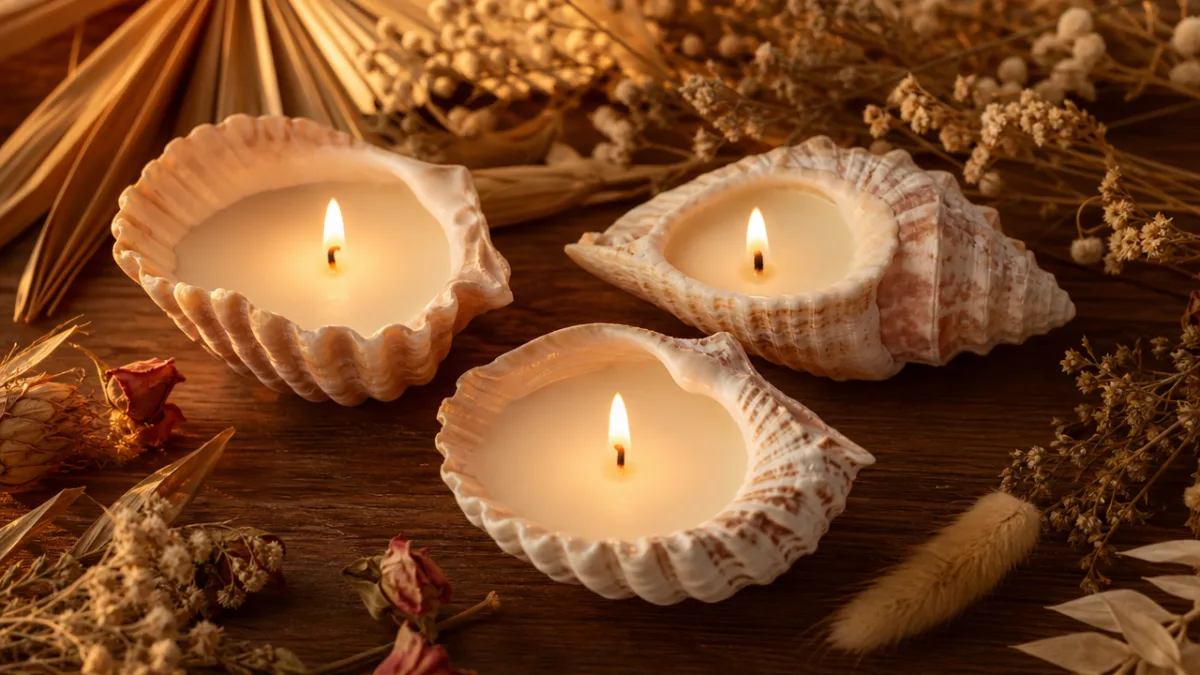
Seashell soy candles also photograph beautifully, which has contributed significantly to their popularity on visual platforms. The interplay between the smooth, pearlescent interior of a shell and the soft, matte surface of cooled soy wax creates a textural contrast that is endlessly appealing to the eye. Add a flicker of flame and the golden light it casts, and you have an image that feels both calming and alive. This is the kind of detail that elevates a living space from merely decorated to genuinely atmospheric.
Beyond their visual appeal, seashell candles make extraordinary gifts. They are personal, handmade, and thoughtful in a way that a purchased candle simply cannot be. Gifting someone a candle you made yourself — especially one housed in a shell you may have collected from a beach you both visited — carries a warmth and intentionality that resonates deeply. Wrap a few in tissue paper, tuck them into a small basket with some dried flowers, and you have a gift that will be remembered long after the wax has burned down.
Gathering Your Materials and Tools
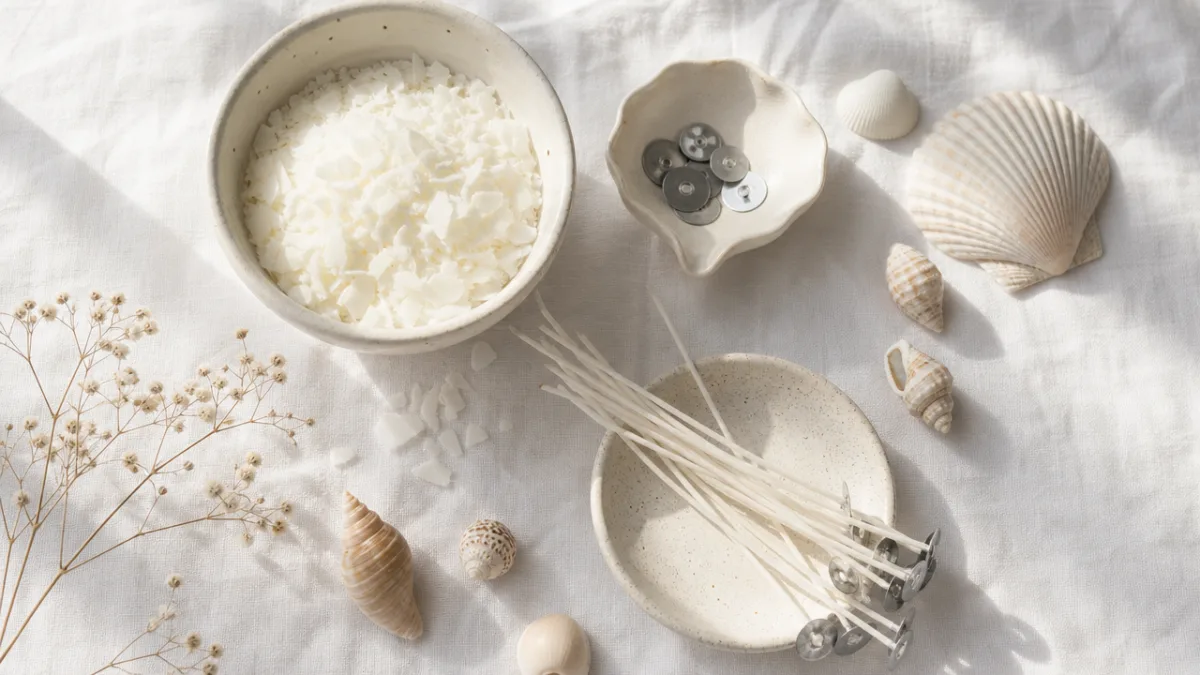
Before you begin crafting, it is essential to gather everything you need so that the process flows smoothly from start to finish. Candle making involves working with melted wax, which hardens quickly and can create a mess if you are not prepared. Laying out all your materials in advance also helps you feel calm and in control throughout the project, turning what could be a stressful experience into an enjoyable, almost meditative one. Think of it as setting the stage for your creative work.
Here is a complete list of what you will need to make seashell soy candles:
- Large, deep seashells (clam shells, scallop shells, or abalone shells work beautifully)
- Soy wax flakes — approximately one cup per two medium shells
- Pre-tabbed candle wicks sized for small containers
- Fragrance oil or essential oils of your choice (sea salt, coconut, jasmine, and vanilla are popular summer options)
- A double boiler or a heat-safe pouring pitcher set inside a pot of water
- A thermometer (a candy or candle thermometer works perfectly)
- Wooden chopsticks or pencils to hold wicks in place while the wax sets
- Wick stickers or a small dab of hot glue to anchor wicks to the shell
- A kitchen scale for measuring wax by weight
- Rubbing alcohol in a spray bottle for smoothing the surface after pouring
When selecting your shells, size and depth matter most. You want shells that are large enough to hold a meaningful amount of wax — ideally at least three inches across — and deep enough that the wick will sit at an appropriate height above the wax surface. Clam shells are particularly popular because of their generous bowl shape and natural stability, but scallop shells offer a beautiful fan-like silhouette that looks stunning when displayed in groups. Whatever you choose, make sure the shells are clean, dry, and free of any cracks that might cause the liquid wax to leak.
Preparing Your Shells and Setting Up Your Workspace
Proper preparation of both your shells and your workspace is the foundation of a successful candle-making session. Start with your shells. Even if they look clean, give them a thorough wash with warm soapy water to remove any salt residue, sand, or organic matter that might interfere with the wax adhesion. Rinse them well and allow them to dry completely — this step cannot be rushed. Any moisture left inside the shell when you pour hot wax can cause the wax to bubble, crack, or spit, ruining both the aesthetic and the safety of your candle.
Once your shells are clean and dry, arrange your workspace on a flat, heat-resistant surface. Cover your work area with newspaper, parchment paper, or an old silicone mat to protect against wax drips, which are notoriously difficult to clean up once they harden. Set your shells on a baking tray lined with parchment paper — this allows you to move them easily without disturbing the wicks before the wax sets. The tray also catches any overflow if a shell is slightly uneven, which is a common characteristic of natural materials.
Anchoring your wicks is the next critical step. Place a small wick sticker or a tiny drop of hot glue in the center bottom of each shell and press the metal tab of your pre-tabbed wick firmly into place. Hold it for about thirty seconds to ensure a strong bond. Then, balance a wooden chopstick or pencil across the top of the shell and loop or tape the wick around it so that it stands straight and centered. This two-point support system keeps your wick perfectly positioned while the wax is poured and as it cools, ensuring an even, clean burn once the candle is finished.
Choosing the Right Fragrance for a Summer Vibe
Fragrance is arguably the most personal element of any candle, and with seashell soy candles, your scent choices can dramatically enhance or undercut the coastal aesthetic you are working to create. The most harmonious fragrances are those that echo the natural world — ocean-inspired notes like sea salt, driftwood, and fresh linen work beautifully, as do tropical florals like frangipani, hibiscus, and ylang ylang. Light citrus notes such as bergamot, grapefruit, and lemon verbena also feel refreshingly summery without being overpowering.
When blending your own fragrance combinations, start simple. A mixture of coconut and vanilla creates a warm, beachy sweetness that pairs perfectly with the look of a seashell. Sea salt and eucalyptus offers something more invigorating, reminiscent of a cool ocean breeze. If you prefer a floral direction, a blend of jasmine and sandalwood is luxurious and grounding. The key is to add fragrance oil at the correct temperature — typically between 130 and 140 degrees Fahrenheit — to ensure the scent binds properly with the soy wax and performs well when the candle burns.
The general rule for fragrance load in soy wax candles is between six and ten percent of the total wax weight. For small seashell candles, this means you will use a relatively modest amount of fragrance oil, but the enclosed shape of the shell actually helps concentrate the scent throw beautifully. Start conservatively with your first batch and adjust in subsequent pours based on your preference. Keep notes on what you used and how it performed — this habit will help you refine your craft over time and develop signature scent profiles that feel distinctly your own.
The Candle-Making Process Step by Step
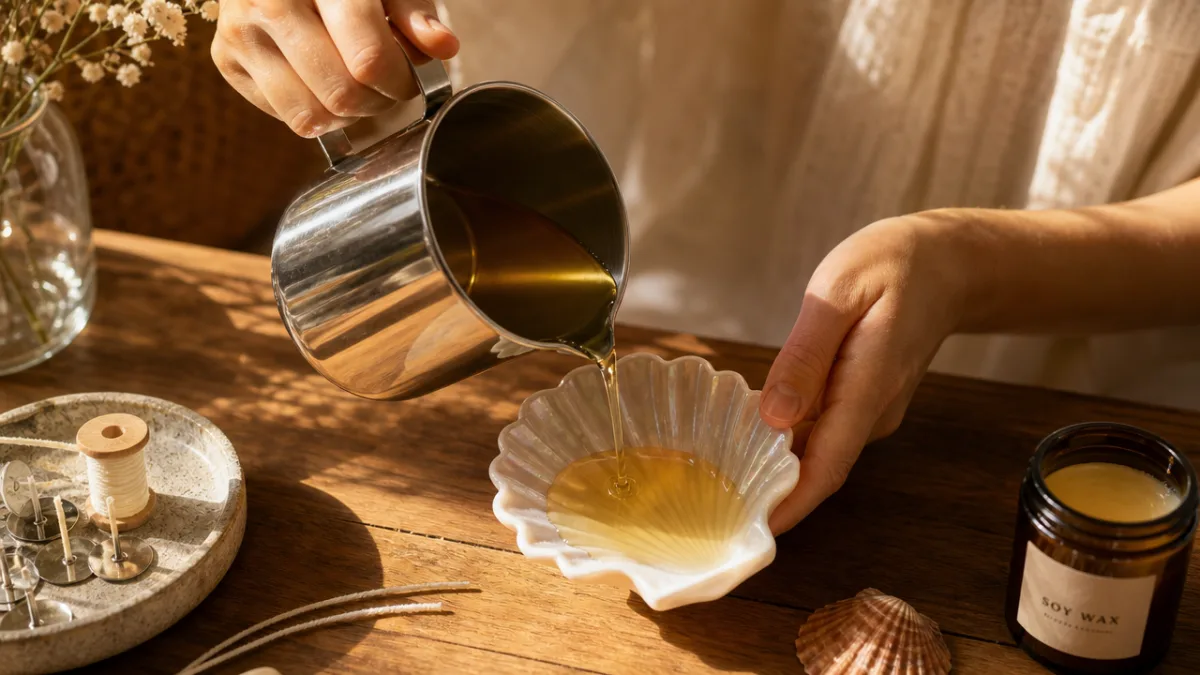
With your workspace prepared and your materials gathered, you are ready to begin the actual candle-making process. Start by measuring your soy wax flakes using a kitchen scale. For every shell you plan to fill, you will need roughly half a cup of wax by volume, though measuring by weight yields more consistent results. Place your measured wax into the top of your double boiler — or into a heat-safe pouring pitcher set inside a pot of simmering water — and allow it to melt slowly over medium-low heat, stirring occasionally with a wooden spoon or silicone spatula.
Monitor the temperature of your melting wax with a thermometer. Soy wax fully melts at around 120 to 140 degrees Fahrenheit, but you want to heat it to approximately 170 to 180 degrees to ensure all the wax is fully liquid and any cloudiness has cleared. Once you reach that temperature, remove the wax from the heat and allow it to cool slightly before adding your fragrance oil. The ideal temperature for adding fragrance to soy wax is between 130 and 140 degrees Fahrenheit. Stir the fragrance in gently but thoroughly for at least two full minutes to ensure it is fully incorporated into the wax.
Allow the wax to cool a little further, to around 120 to 125 degrees Fahrenheit, before pouring. This slightly lower temperature helps the wax adhere better to the walls of the shell and reduces the chance of sinkholes forming as the wax contracts during cooling. Pour slowly and steadily into the center of each prepared shell, filling to just below the rim and leaving a small amount of wax in reserve. As soy wax cools, it can sink slightly in the center, creating a small depression around the wick. Use your reserved wax for a small top-up pour once the first layer has set — typically after one to two hours.
Troubleshooting Common Issues
Even experienced candle makers encounter occasional imperfections, and knowing how to address them is part of becoming skilled at the craft. One of the most common issues with seashell candles is uneven surfaces after cooling. This happens because soy wax contracts as it solidifies, and the natural contours of a shell can create uneven cooling rates. The solution is simple: perform a second pour using the wax you set aside, heating it back to around 125 degrees and carefully filling in any depressions or uneven areas.
Another frequent issue is frosting — a white, powdery bloom that appears on the surface or sides of soy candles as they cool. While frosting can look like a flaw, it is actually a natural characteristic of pure soy wax and a sign of its authenticity and quality. It does not affect the performance or scent of the candle at all. If you find it aesthetically displeasing, you can minimize it by pouring at a slightly higher temperature and insulating your candles with a light towel as they cool to slow the cooling process and reduce crystallization.
Wick issues can also arise if the wick shifts during pouring or is not perfectly centered. If you notice the wick has moved before the wax fully sets, you can gently reposition it using a toothpick. Once the candle is fully cured — ideally after 24 to 48 hours — trim the wick to approximately a quarter of an inch above the wax surface before the first burn. This small but important step dramatically improves burn quality, prevents excessive soot, and ensures the flame stays at an appropriate size for the scale of the shell container.
Displaying, Gifting, and Caring for Your Seashell Candles
Once your seashell soy candles have cured for at least 24 hours, they are ready to be displayed, used, or gifted. When it comes to display, grouping is almost always more effective than isolation. Arrange three or five candles together in a cluster — mixing different shell shapes and sizes — on a tray, a piece of driftwood, or a shallow dish filled with sand or smooth river stones. This kind of vignette creates a focal point in any room and tells a cohesive aesthetic story without requiring any additional decor.
For gifting, presentation is everything. Nestle each candle in a small box or kraft paper bag with a handful of dried botanicals — preserved sea lavender, dried citrus slices, or tiny dried starfish work beautifully with the coastal theme. You can hand-write or print a small card with the fragrance name, estimated burn time, and care instructions. Candle care tips to include on your card might be:
- Trim the wick to one-quarter inch before every burn to ensure a clean, even flame.
- Allow the wax to melt fully to the edges of the shell on the first burn to prevent tunneling.
- Never burn for more than three to four hours at a time to preserve the quality of the scent and wax.
- Keep away from drafts, which can cause uneven burning and excessive flickering.
- Never leave a burning candle unattended or near flammable materials.
- Once the wax is gone, clean out the shell with warm water and repurpose it as a decorative dish or soap holder.
The lifespan of a seashell soy candle depends on the size of the shell, but most medium-sized shells will give you between four and eight hours of burn time. While this may seem brief compared to a large jar candle, the experience of burning a seashell candle is so atmospheric and beautiful that the brevity feels entirely worth it. Many people choose to burn them only on special occasions — a slow Sunday morning, a dinner party, a bath ritual — which stretches their life considerably and makes each burn feel like a deliberate, pleasurable act.
Expanding Your Craft: Variations and Creative Additions
Once you have mastered the basic seashell soy candle, a world of creative variations opens up. Layered candles are a natural next step — pour your first layer, let it set completely, then pour a second layer in a contrasting color using candle dye chips. Soft pastels like blush, seafoam, and pale lavender layer beautifully and give the candles a sophisticated, almost watercolor-like appearance. You can also embed small dried flowers, botanicals, or glitter between layers for added visual interest.
Scent layering is another avenue for experimentation. Pour your first layer with one fragrance, allow it to set fully, then pour a second layer with a complementary but distinct fragrance. As the candle burns down through the layers, the scent evolves — beginning with one note and gradually revealing another. This kind of sensory storytelling elevates your candles from simple craft projects to genuinely sophisticated olfactory experiences, and it is the kind of detail that will genuinely surprise and delight recipients.
You might also consider expanding beyond shells to other natural vessels — small terracotta pots, halved coconut shells, dried citrus rinds, or smooth river stones with natural hollows can all be adapted as candle containers. Each material brings its own aesthetic character and presents its own set of challenges and rewards. The skills you develop making seashell candles — wick placement, temperature control, fragrance blending, second pours — transfer directly to these new materials, meaning every variation you attempt builds on a growing foundation of craft knowledge that is genuinely yours to keep.
The Broader Joy of Summer DIY Culture
Seashell soy candles are just one expression of a much broader cultural movement toward handmade, intentional living that has flourished in recent years. There is a growing hunger for objects that carry a human story — things made slowly, with care, by someone who chose the materials and shaped the outcome with their own hands. In a world of mass production and algorithmic recommendation, the handmade object offers something irreplaceable: evidence of time well spent and attention freely given.
Summer is a particularly fertile season for this kind of creativity. The long days, the slower pace, the abundance of natural materials — shells, flowers, herbs, stones — all conspire to make outdoor and craft-based activities more accessible and appealing. There is also something about the sensory richness of summer — the warmth, the light, the textures of the natural world — that inspires a desire to capture and preserve those feelings in tangible form. A seashell candle lit on a winter evening does exactly that: it carries summer inside it like a message in a bottle.
The DIY community that has grown up around projects like these is also a meaningful source of connection and inspiration. Online platforms are full of makers sharing their processes, their results, their failures, and their refinements. Engaging with that community — whether by sharing your own creations, asking questions, or simply admiring the work of others — adds a social dimension to what might otherwise be a solitary activity. Craft, at its best, is never entirely private. It is always, in some sense, a conversation — with the materials, with the tradition, and with the wider world of people who find meaning in making things with their hands.








What do you think?
It is nice to know your opinion. Leave a comment.