










DIY Home Desk Project: Build Your Perfect Workspace from Scratch
There is something deeply satisfying about sitting down at a desk you built with your own hands. A DIY home desk project is one of the most rewarding home improvement endeavors you can undertake, combining practical functionality with personal creativity. Whether you are setting up a dedicated home office, a crafting station, or a study nook for the kids, building your own desk gives you complete control over dimensions, materials, and style in a way that no flat-pack furniture store ever could.
The beauty of a DIY desk is that it grows from your specific needs rather than forcing you to adapt to a generic product. You can design it to fit an awkward alcove, match your existing furniture perfectly, or include built-in features like cable management channels, drawer units, or even a built-in monitor riser. The project is also far more budget-friendly than you might expect, with many stunning desks built for under a hundred dollars using accessible materials from your local hardware store.
This guide will walk you through every stage of the process, from initial planning and material selection all the way through finishing techniques that give your desk a professional, polished look. Whether you are a seasoned woodworker or picking up a saw for the first time, this project is designed to be approachable, practical, and genuinely fun. By the end, you will have a workspace that is uniquely yours and built to last for years to come.
Planning Your Desk: Dimensions, Layout, and Purpose
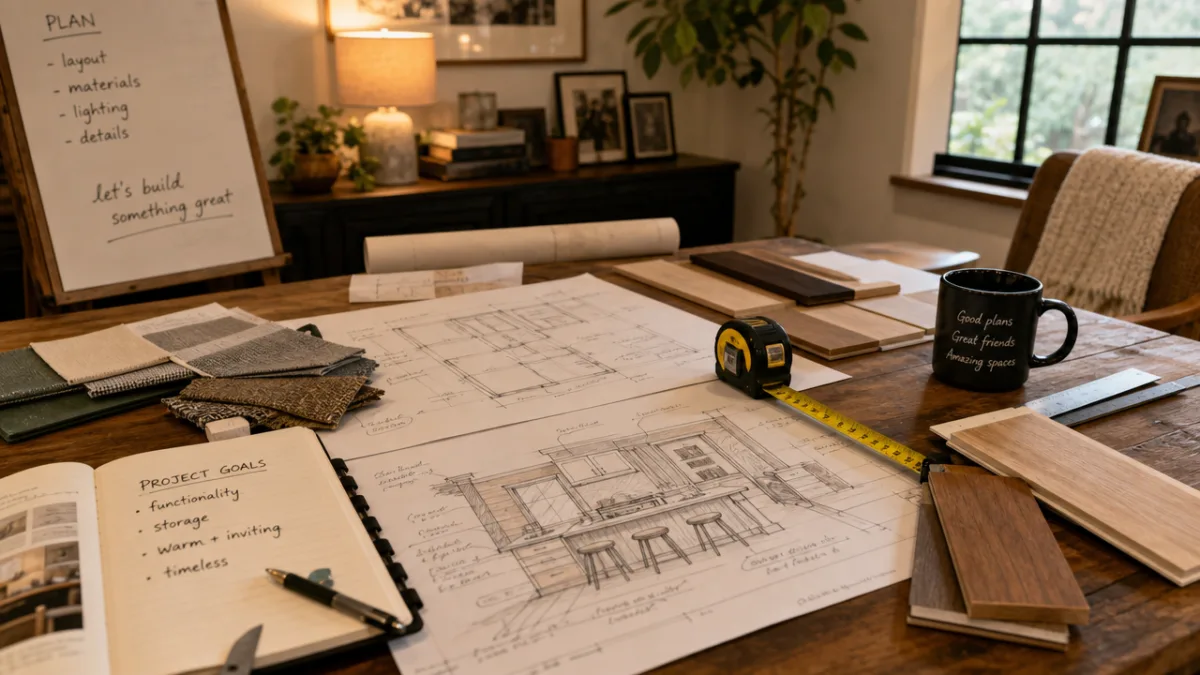
Before you purchase a single piece of wood or tighten a single bolt, you need to spend meaningful time in the planning stage. This is where the entire project either succeeds or runs into avoidable frustration. Start by measuring your available space carefully, noting the width, depth, and height constraints of the area where the desk will live. Consider the room’s traffic flow — you want to be able to push your chair back comfortably and move around without bumping into walls or doorways. A tape measure, a notepad, and a cup of coffee are all you need for this first critical session.
Think carefully about how you will actually use the desk on a daily basis. A desk for dual-monitor video editing has entirely different requirements than a compact writing desk in a bedroom corner. If you need storage, factor in drawer placement now rather than as an afterthought. If you work with large documents or drafting materials, you will want a deeper work surface than the standard 24 inches. Ergonomics matter enormously here too — the ideal desk height for most adults is between 28 and 30 inches, but if you are taller or shorter than average, this is your chance to customize that measurement exactly to your body.
Sketch out your design on paper or use a free tool like SketchUp or even graph paper to visualize the proportions. Note where power outlets are located in the room, since that will influence where you place the desk and how you plan cable management. Decide early whether you want a freestanding desk, a wall-mounted floating design, or an L-shaped configuration that uses a corner. Each option has different structural requirements, cost implications, and levels of difficulty. Committing to a clear plan before you buy materials will save you time, money, and a considerable amount of frustration in the later stages.
Choosing the Right Style for Your Space
Your desk does not exist in isolation — it needs to feel at home within the rest of your room’s aesthetic. A sleek, minimalist desk with metal legs suits a modern or Scandinavian-inspired interior beautifully, while a chunky farmhouse-style desk built from reclaimed pine fits perfectly in a rustic or industrial space. Take a few minutes to look at your existing furniture, wall colors, and flooring before you commit to a design direction. This small act of intentionality makes the finished desk feel like it belongs rather than like an afterthought dropped into the room.
Popular DIY desk styles include the classic trestle desk, which uses two A-frame legs supporting a solid top; the pipe desk, which combines black iron plumbing fittings with a wood plank for an industrial look; and the floating wall desk, which is anchored directly to wall studs and creates the illusion of a surface hovering in midair. There are also hairpin leg desks, sawhorse desks, and full cabinet-base desks for those who want maximum storage. Each style involves different materials, tools, and skill levels, so choose one that matches both your aesthetic goals and your current woodworking confidence.
Color and finish are as important as form. A raw wood desk with a simple oil finish has a warm, organic quality that suits creative spaces wonderfully. A painted desk in a deep navy or forest green can become a bold design statement in a neutral room. White painted desks remain perennially popular because they are bright, clean, and complement almost any other color in the room. Whatever direction you choose, make sure the finish you select is durable enough to withstand daily use, including the inevitable coffee cup, keyboard, and the occasional accidental pen mark.
Materials and Tools: What You Need to Get Started
Choosing the right materials for your DIY desk is one of the most important decisions in the entire project, and it will significantly impact both the final appearance and the longevity of what you build. Solid wood is the premium choice — pine is affordable and easy to work with, oak and maple are harder and more durable but more expensive, and walnut is the luxurious option that produces breathtaking results. Plywood, particularly Baltic birch plywood, is an excellent alternative to solid wood for the desktop surface itself, offering stability, resistance to warping, and a beautifully smooth surface that takes paint and stain equally well.
For those working on a tighter budget, a butcher block countertop from a home improvement store makes an outstanding desk surface at a fraction of the cost of custom-milled wood. These are typically sold in standard widths and can be cut to length with a circular saw. Medium-density fiberboard, or MDF, is another economical option for painted desks, though it is heavier than plywood and more susceptible to moisture damage, so it works better in dry interior environments. Whatever material you choose for the top, make sure it is thick enough to resist flexing — at minimum three-quarters of an inch for plywood or MDF, and at least one and a quarter inches for solid wood.
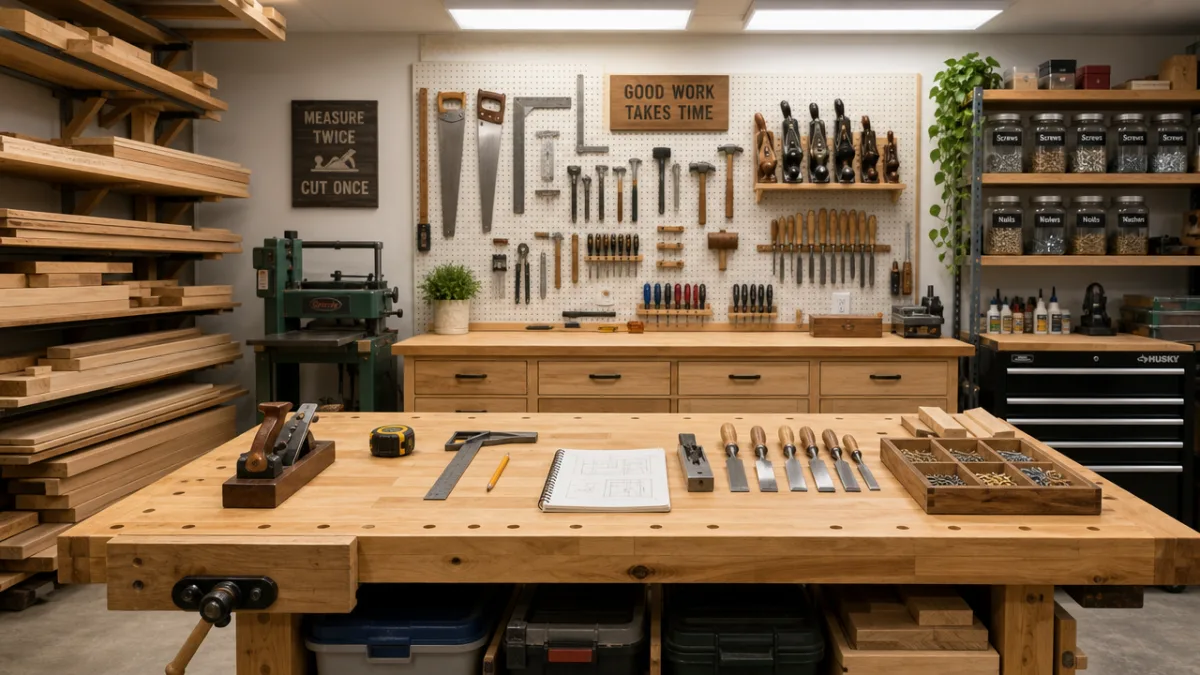
The tools required for a basic desk build are relatively modest and many are likely already in your home. A circular saw or miter saw handles most of the cutting, a drill and driver handles assembly, and a random orbital sander smooths every surface before finishing. Beyond these core tools, you may also need a jigsaw for cutting curves or cable management holes, a pocket hole jig for invisible joinery, clamps in various sizes to hold pieces together while glue dries, and a level to ensure everything sits perfectly flat. If you do not own these tools, many hardware stores offer tool rental programs that make the investment much more manageable.
Hardware and Fasteners: The Details That Matter
The hardware you choose for your desk is about far more than just functionality — it contributes significantly to the overall aesthetic of the finished piece. Hairpin legs in matte black give an instant modern-industrial look and are widely available online in a range of heights and finishes. Heavy-duty steel brackets are the right choice for wall-mounted floating desks, and they need to be rated for significantly more weight than you think you will place on the surface, since desks accumulate equipment quickly. Drawer slides, if you plan to include drawers, come in a wide range of qualities, and it is worth spending a little more on soft-close versions that will smooth the experience of daily use.
For fasteners, pocket hole screws are the DIY builder’s best friend, creating strong, hidden joints without requiring advanced joinery skills or specialized equipment. A pocket hole jig is a one-time investment of around thirty dollars that pays for itself on the very first project. Wood glue should be used alongside screws wherever possible, since the combination creates a bond significantly stronger than either alone. For metal-to-wood connections, such as attaching hairpin legs, standard hex bolts with flat washers provide a clean, industrial look while creating a rock-solid connection.
Do not overlook the importance of grommets and cable management solutions in your hardware shopping list. A single round grommet cut into the back corner of the desktop allows you to route power cables, USB hubs, and monitor cables through the surface and down the back of the desk, keeping your workspace clean and organized. These small brushed-metal or plastic inserts cost just a few dollars each and make an enormous difference to the professional appearance of the finished desk. Similarly, a small power strip mounted to the underside of the desk surface, out of sight but within easy reach, transforms the workspace from functional to genuinely polished.
The Building Process: Step-by-Step Construction
With your plan finalized and your materials assembled, it is time to start building. The first step is breaking down your lumber or sheet goods to rough dimensions, a process known as rough milling. If you are working with a full sheet of plywood, cut it down to manageable sizes before making your final precision cuts. Always measure twice and cut once — this is not a cliché but a lesson every builder learns from at least one painful mistake. Use a straight edge clamped to your workpiece as a guide for your circular saw to ensure straight, accurate cuts every single time.
Once your pieces are cut to final dimensions, it is time to sand them before assembly, which is far easier than trying to sand a fully assembled desk. Start with 80-grit sandpaper to remove any mill marks or rough spots, then move through 120-grit and 150-grit progressively. If you are painting the desk, finishing at 150-grit is sufficient. If you plan to apply a clear finish or stain to show the natural wood grain, continue up to 220-grit for the smoothest possible surface. Wipe all surfaces down with a tack cloth or a damp rag to remove every trace of sanding dust before moving to assembly.
Assembly proceeds from the inside out, starting with any internal structures such as drawer boxes or support frames before attaching the desktop itself. Use your pocket hole jig to drill angled holes in the joining pieces, apply a thin bead of wood glue to the mating surfaces, and drive the screws home. Clamp everything securely and check for square using a large carpenter’s square or by measuring diagonally from corner to corner — if both diagonal measurements are equal, your assembly is perfectly square. Allow glue to cure for the manufacturer-recommended time before removing clamps and moving on to the next assembly step.
Attaching Legs and Ensuring Stability
Leg attachment is one of the most critical steps in the entire build, since a desk that wobbles is not just annoying but potentially damaging to your equipment and your work. If you are using hairpin legs, position them approximately two inches in from each corner of the desktop, mark the mounting hole locations, drill pilot holes slightly smaller than your mounting screws to prevent splitting, and drive the screws firmly home. Stand the desk up and test for wobble immediately — if there is any movement, check that all legs are the same length and that the floor is level before making adjustments.
For wall-mounted floating desks, locate wall studs using a stud finder before marking bracket positions. Every bracket must be anchored into solid wood framing rather than just drywall — drywall anchors alone are insufficient for a desk that will hold a monitor, computer, and accessories. Use a level to ensure all brackets are perfectly horizontal before drilling, since even a small tilt will be immediately obvious once the desktop is in place. Attach the brackets to the wall first, then lower the desktop onto the brackets and secure it from above with screws driven through the bracket flanges into the underside of the desktop.
Once legs or brackets are attached and the desk is standing, check the surface with a long level in multiple directions. Small adjustments can often be made by adding felt pads of varying thicknesses to the bottoms of legs, or by shimming bracket positions slightly. On uneven floors, adjustable leveling feet screwed into the base of each leg provide a permanent and elegant solution. Spend a few extra minutes getting this step perfect, because a level, stable surface is something you will appreciate every single day you sit down to work.
Finishing Techniques: Painting, Staining, and Sealing
The finish you apply to your desk is the difference between something that looks handmade in the best possible way and something that looks merely homemade. For painted desks, the key to a professional result is proper preparation and thin, even coats rather than one thick, dripping application. Begin with a coat of shellac-based primer, which seals the wood fibers and prevents bleed-through on softwoods like pine. Sand lightly with 220-grit paper between each coat of primer and paint, wiping away dust each time. Two coats of primer followed by two coats of your chosen paint color will produce a smooth, durable surface that rivals factory finishes.
For natural wood finishes, the options range from simple Danish oil — which is rubbed in by hand and requires no special equipment — all the way to spray lacquers and polyurethane topcoats. Danish oil is the most beginner-friendly option, producing a soft, warm sheen that enhances the natural grain without completely obscuring the texture of the wood beneath. Apply it with a lint-free cloth in circular motions, allow it to soak in for the recommended time, then wipe away any excess. Three coats, sanded lightly with 400-grit paper between each, will produce a genuinely beautiful result on any wood species.
Polyurethane is the most durable option for a desk surface that will see heavy daily use. Water-based polyurethane dries quickly and has a clear, bright finish, while oil-based polyurethane takes longer to dry but produces a warmer, amber tone that many people find more appealing on natural wood. Apply it in thin coats with a high-quality natural bristle brush or a foam applicator, always working in the direction of the grain. Allow each coat to dry fully, sand lightly with 320-grit paper to knock down any dust nibs or brush marks, and apply a minimum of three coats for a desktop that will resist scratches, spills, and the daily grind of keyboard and mouse use.
Adding Personal Touches and Custom Details
This is the stage where your desk truly becomes yours rather than simply a competent piece of furniture. Consider adding a strip of leather or cork along the front edge of the desktop, which creates a comfortable wrist rest and an unexpected design detail that sets your desk apart. Floating shelves mounted to the wall directly above the desk at monitor height provide valuable storage without taking up precious desk surface area, and when built from matching materials they create a cohesive, intentional look. Small hooks mounted to the underside of the desk can hold headphones, a bag, or a small cable organizer, making use of space that would otherwise go completely to waste.
Drawer pulls and knobs are small details that carry disproportionate visual weight. A set of modern brass cup pulls on simple plywood drawer fronts immediately elevates the whole piece into something that looks thoughtfully designed. Ceramic knobs in a muted glaze suit a more bohemian or eclectic room, while sleek bar handles in brushed nickel reinforce a contemporary aesthetic. Whatever you choose, make sure all pulls are the same style and finish throughout the desk — mixing hardware styles in a single piece almost always reads as an unfinished decision rather than an intentional one.
Finally, consider the accessories that will live on and around your desk as extensions of the same design thinking. A matching wood monitor stand, a leather desk pad, a small potted plant, and a carefully chosen desk lamp can transform a beautiful desk into a complete, cohesive workspace environment. These finishing touches do not need to be expensive — a simple plant cutting in a ceramic pot costs almost nothing but adds life and color to the space in a way that no purchased accessory quite matches. The goal is a workspace where you genuinely want to spend time, and these small personal details are what make that possible.

Maintaining Your Desk and Troubleshooting Common Issues
A well-built and well-finished desk requires very little ongoing maintenance, but a small amount of regular care will keep it looking beautiful and functioning perfectly for decades. For painted desks, a quick wipe-down with a damp cloth is all that is needed for routine cleaning — avoid harsh chemical cleaners, which can dull the finish over time. For oiled wood surfaces, reapply a light coat of the same finishing oil once or twice a year, or whenever the surface begins to look dry or dull. This takes less than thirty minutes and immediately restores the warm, lustrous appearance of the wood.
Scratches are the most common form of desk damage, and most of them are far more repairable than they first appear. On painted surfaces, a touch-up with the original paint color, sanded smooth and blended with 400-grit paper once dry, repairs most minor scratches invisibly. On natural wood surfaces, a small amount of Danish oil or clear wax rubbed into the scratch can minimize its appearance dramatically. Deep gouges can be filled with wood filler, sanded smooth, and refinished to match the surrounding area, though this is a more involved repair that requires patience and careful color matching.
Structural issues such as wobbling legs or loosening joints are almost always preventable with a little attention during the build process, but they can still develop over time with heavy use. If a leg becomes loose, remove it, clean away any old adhesive residue, apply fresh wood glue, reattach firmly, and allow to cure fully before using the desk again. If a joint between two wood components develops a gap, a thin bead of wood glue worked into the joint with a palette knife, followed by firm clamping until cured, will restore the original strength. Regular visual inspections every few months allow you to catch these issues early when they are simple to address.
Upgrading and Adapting Your Desk Over Time
One of the greatest advantages of building your own desk is that you are not locked into a single configuration forever. As your needs change — a new job, a new hobby, a growing family — your desk can evolve with you in ways that a purchased piece never could. Adding a monitor arm mount requires only drilling a single hole in the appropriate location and attaching the clamp or grommet-mount bracket. Installing a new drawer unit beneath an existing desktop is a weekend project that dramatically increases storage without requiring a completely new piece of furniture. Even changing the finish color, from a tired white to a bold new color, is entirely achievable with proper preparation and the techniques described in the finishing section.
If your needs outgrow the original desk entirely, the skills and confidence you have built through this project prepare you beautifully for more ambitious builds. A matching bookshelf, a filing cabinet, or a full built-in office unit using the same materials and finish creates a cohesive, custom-designed workspace that would cost many thousands of dollars if purchased from a furniture retailer. The investment in tools and skills made during your first desk build pays dividends across every subsequent project, and many people find that this single project marks the beginning of a lasting love for woodworking and home craftsmanship.
Document your build process with photographs at each stage, both for the satisfaction of looking back at what you accomplished and as a practical reference if you ever need to replicate or modify the design. A short album of progress photos, from raw lumber to finished piece, tells a story worth sharing and preserves the details of dimensions and techniques for future reference. Share your finished project with online communities of DIY enthusiasts — the feedback, encouragement, and inspiration you receive from fellow builders can spark ideas for your next project before the finish on this one is even fully cured. Building your own desk is not just a home improvement project; it is the beginning of a deeply satisfying creative practice.








What do you think?
It is nice to know your opinion. Leave a comment.