










15 Epic Backyard Bar & Grill Ideas – DIY Pallet Bar with Charcoal Grill
Why a DIY Backyard Bar & Grill Is the Ultimate Outdoor Upgrade
There is something undeniably satisfying about stepping into your own backyard and being greeted by a thoughtfully built outdoor bar and grill station. Whether you are hosting a summer cookout, a weekend gathering with friends, or simply enjoying a quiet evening under the stars, a dedicated outdoor entertaining space transforms your yard into an extension of your home. A DIY pallet bar paired with a charcoal grill brings that vision to life without the price tag of a professionally built outdoor kitchen, making it one of the most rewarding weekend projects a homeowner can tackle.
The resurgence of pallet furniture has made it easier than ever for handy homeowners to create stylish, functional outdoor structures on a budget. Wood pallets are widely available, often free or at very low cost from local businesses, warehouses, and shipping companies. When properly sanded, sealed, and assembled, they become the backbone of a bar structure that looks intentional, rustic, and genuinely impressive. Paired with a quality charcoal grill, the result is an outdoor setup that rivals anything you might see in a magazine spread on backyard living.
Beyond aesthetics, the real appeal lies in customization. Unlike store-bought outdoor bars, a DIY build lets you control every dimension, finish, and feature. Want a built-in bottle opener? Done. Prefer open shelving for your spirits collection? Easy. Need a side counter beside the grill for food prep? You can design it exactly that way. This level of personalization, combined with the satisfaction of building something with your own hands, makes the DIY pallet bar and grill concept one of the most popular backyard project ideas circulating across platforms like Pinterest today.
Choosing the Right Pallets and Materials for Your Bar Build
Not all pallets are created equal, and choosing the right ones is arguably the most important first step in your build. The first thing to look for is the ISPM-15 stamp, which indicates that the wood has been heat-treated rather than chemically treated with methyl bromide, a pesticide you absolutely do not want in a surface where food and drinks are being served. Heat-treated pallets are marked with the letters “HT” alongside the stamp, and these are the only pallets you should be using for any furniture or bar build intended for regular use.
Beyond safety, you want pallets that are structurally sound. Inspect each one carefully before committing to it. Look for boards that are not warped, cracked, or heavily stained. Some surface weathering is fine and even adds character, but deep cracks or soft, punky wood indicate rot and should be avoided. European-style pallets, often marked “EUR” or “EPAL,” tend to be more uniform in size and higher quality than generic block pallets, making them an excellent choice when you can find them. Hardware stores and home improvement centers sometimes sell reclaimed pallets directly, offering a convenient and vetted source.
In addition to the pallets themselves, your materials list should include exterior-grade wood screws, sandpaper in multiple grits (starting around 80 and finishing with 220), a good-quality outdoor wood stain or sealant, and lumber for any structural reinforcement needed. You will also want casters if you plan to make your bar mobile, and concrete blocks or treated lumber feet if you prefer a stationary build. Hardware like drawer pulls, hooks, towel bars, and a mounted bottle opener can all be sourced affordably at any big-box home improvement store, and these small details are what elevate a basic pallet stack into a polished, finished bar.

Design Inspiration: 15 Epic Backyard Bar & Grill Configurations
One of the greatest joys of planning a DIY backyard bar is the sheer range of design directions available to you. The following ideas represent some of the most popular, visually striking, and functionally effective configurations that homeowners and DIY enthusiasts have developed. Whether your backyard is expansive or compact, shaded or sun-soaked, there is a design here that can be adapted to suit your space and personal style. Let these ideas serve as a launching pad for your own creative vision rather than a rigid blueprint.
The L-shaped pallet bar with a built-in charcoal grill station is consistently one of the highest-rated configurations because it separates the prep and serving areas from the cooking zone while keeping everything within arm’s reach. By positioning the grill at one end of the L and the bar at the other, the host can tend to the charcoal while still engaging with guests seated at the bar. This layout also creates a natural gathering space within the corner of the L, making conversation and crowd flow feel organic and easy.
For smaller backyards or apartment patios, a compact single-unit pallet bar with a portable charcoal kettle grill positioned beside it offers nearly the same functionality in a fraction of the footprint. This setup is especially effective when the bar includes a pegboard back panel fitted with hooks for hanging grilling tools, keeping everything organized and accessible. The following list highlights some of the most popular design variations worth considering as you plan your own build:
- The Classic Straight Bar: A single row of stacked pallets with a wooden countertop, bottle shelving on the back panel, and a mini fridge cavity built into the lower section.
- The L-Shaped Corner Station: Two bar sections meeting at a corner, creating defined prep and service zones, with the grill integrated into one end.
- The Tiki-Inspired Pallet Bar: A straight or L-shaped bar dressed with bamboo cladding, a thatched roof overhang, and tropical planters for a resort-style feel.
- The Rustic Farmhouse Bar: Pallets finished with a dark walnut stain, topped with butcher block or reclaimed barn wood, and accessorized with wrought iron hardware.
- The Industrial Loft Bar: Pallets combined with black metal pipe fittings for legs and shelving brackets, topped with a concrete or slate countertop for a sleek urban aesthetic.
- The Poolside Cabana Bar: A weather-resistant build sealed with marine-grade varnish, featuring a bar-height countertop that faces the pool and integrated storage for pool supplies below.
- The Pergola-Integrated Bar: A bar built directly beneath a wooden pergola, with climbing vines, string lights, and hanging planters creating an immersive outdoor room experience.
Step-by-Step Guide to Building Your DIY Pallet Bar
Building a pallet bar is a project that most people with basic carpentry skills and a weekend of free time can accomplish successfully. The process begins with planning, which means sketching your intended dimensions and deciding on height, width, and depth before you source your pallets. A standard bar height is around 42 inches, which typically requires two pallets stacked vertically on their sides or one pallet stood upright with additional framing. Bar depth is typically 18 to 24 inches, which is enough for comfortable service without feeling cavernous.
Once you have your pallets selected and your design sketched, the build process generally follows a logical sequence. Start by thoroughly cleaning each pallet with a stiff brush and warm soapy water, then allow them to dry completely before doing anything else. Sand every surface that will be touched or seen, working through progressively finer grits to achieve a smooth, splinter-free finish. This step is particularly important for the countertop, which should be as smooth as a piece of indoor furniture since it will be in contact with food, drinks, and your guests’ forearms throughout every gathering.
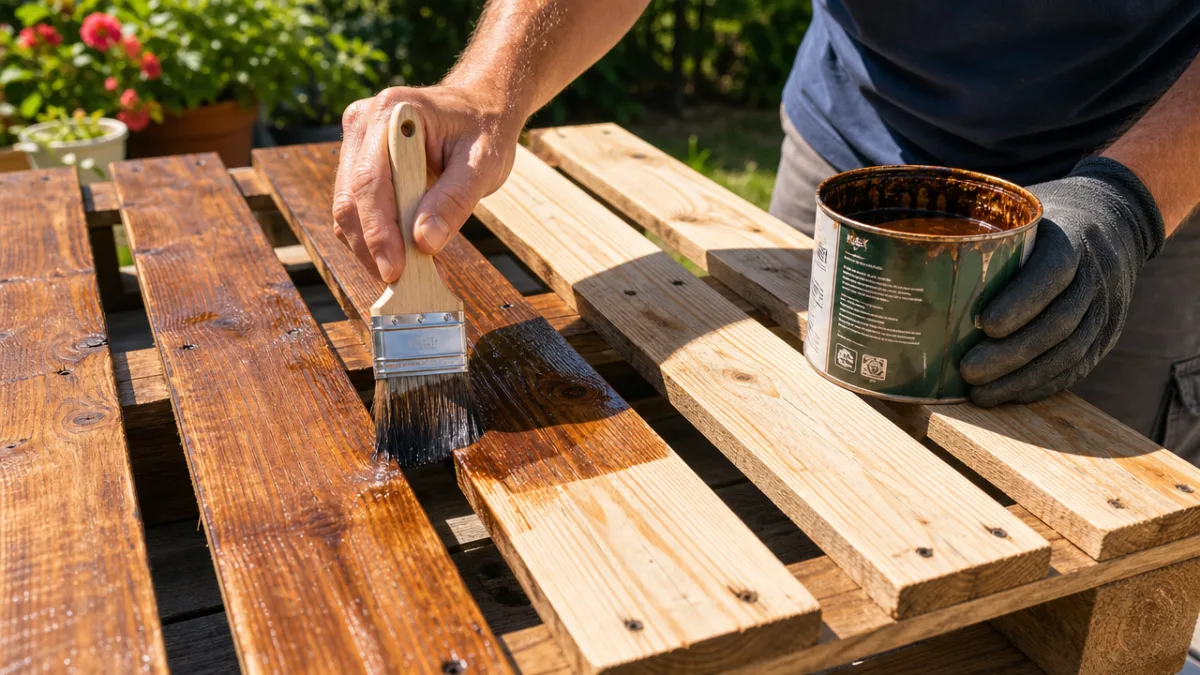
Assembly follows sanding. Use exterior-grade screws to join your pallet sections together, reinforcing internal corners with metal L-brackets for stability. Once the basic structure is assembled, apply two to three coats of your chosen exterior wood stain or sealant, sanding lightly between coats. Add your chosen hardware last, as this allows you to make final placement decisions once the bar is fully assembled and you can see the proportions in context. The following steps summarize the core build process:
- Source and inspect pallets, selecting only heat-treated (HT) examples in good structural condition.
- Clean all pallet surfaces thoroughly and allow to dry for at least 24 hours.
- Sand all surfaces from coarse to fine grit, paying particular attention to the countertop area.
- Assemble the base structure using exterior screws and metal corner brackets for reinforcement.
- Cut and attach a solid wood countertop, using a router or sander to create smooth, rounded edges.
- Install any built-in features such as shelving, towel bar mounts, or a bottle opener before sealing.
- Apply two to three coats of exterior stain or sealant, sanding lightly between applications.
- Attach final hardware including hooks, pulls, and any decorative elements.
- Position the bar in its intended location and allow the final coat of sealant to cure fully before use.
Integrating Your Charcoal Grill for the Perfect Cooking Station
The charcoal grill is the heart of any serious backyard cookout, and positioning it thoughtfully in relation to your pallet bar is what transforms a casual setup into a genuine outdoor cooking station. Charcoal grilling offers advantages that gas simply cannot replicate, including the distinctive smoky flavor that comes from burning real wood charcoal, the ritual satisfaction of building and managing a live fire, and the high radiant heat that produces the kind of sear marks and caramelized crust that make grilled food genuinely extraordinary. Choosing the right charcoal grill for your setup depends on your cooking volume, your available space, and your preferred cooking style.
Kettle grills, such as the classic Weber 22-inch model, are the most popular choice for DIY bar setups because they are compact, affordable, durable, and capable of indirect cooking, smoking, and searing with equal effectiveness. For larger gatherings or more serious barbecue enthusiasts, a barrel or offset smoker positioned beside the pallet bar creates an even more impressive and functional outdoor cooking station. The offset smoker adds the ability to slow-cook briskets, ribs, and whole birds over several hours, making your backyard bar a destination for serious food as well as great drinks.
Safety and clearance are non-negotiable when positioning a charcoal grill near a wooden pallet bar. The grill should be placed at a minimum of three feet away from any combustible surface when actively burning, and you should never position a charcoal grill directly beneath any overhead structure, including pergolas, canopies, or bar shelving. A dedicated heat-resistant grill mat placed beneath the grill protects your lawn or patio surface from ash and heat damage. Keep a fire extinguisher nearby and ensure that your grill ash is fully extinguished and cooled before disposal, as live embers in ash can smolder for over 24 hours after the fire appears to have gone out.
Stocking and Styling Your Outdoor Bar for Maximum Entertaining Impact
Once your pallet bar is built and your grill is positioned, the finishing touches are what bring the entire space to life as a true entertainment destination. Stocking your bar thoughtfully means thinking beyond just the bottles. A well-equipped outdoor bar should include a quality cocktail shaker and strainer, a muddler for craft cocktails, a jigger for accurate measuring, an ice bucket with tongs, a cutting board and bar knife for garnishes, and an assortment of glassware suited to the drinks you plan to serve. Polycarbonate glasses, which look like glass but are shatterproof, are an ideal choice for outdoor entertaining since they eliminate the risk of broken glass in bare feet-friendly areas.
Lighting is one of the single most impactful styling decisions you can make for your outdoor bar area. String lights hung above the bar or woven through a pergola create an immediate sense of warmth and festivity that transforms the space after dark. Solar-powered stake lights can illuminate a perimeter path to the bar area, while small LED lanterns placed on the bar counter itself add an intimate glow at eye level. If your budget allows, installing a dedicated outdoor electrical outlet near the bar enables the use of a mini fridge, a Bluetooth speaker, or under-bar LED strip lighting that can be color-adjusted to match any occasion.
Planters, bar stools, and decorative elements complete the picture. Tall planters flanking the bar filled with drought-tolerant herbs like rosemary, mint, and basil serve double duty as decor and as a fresh cocktail ingredient source. Bar stools with backs are more comfortable for extended gatherings and should be chosen to complement the style of your bar, whether that is rustic wood stools, metal industrial stools, or upholstered teak stools for a more refined look. A chalkboard panel mounted to the back of the bar where you can write the evening’s drink specials adds a playful, gastropub-inspired touch that guests consistently love and photograph for their own social feeds.

Maintenance, Weatherproofing, and Keeping Your Setup Looking Great Year After Year
A DIY pallet bar is a meaningful investment of your time and energy, and protecting that investment through proper maintenance is what separates a bar that looks great for one summer from one that remains a beautiful, functional centerpiece of your backyard for a decade or more. The most important maintenance task is reapplying your exterior sealant or stain on a regular schedule, typically once every one to two years depending on your climate and how much direct sun and rain exposure your bar receives. Before reapplying, lightly sand the surface with fine-grit sandpaper to remove any peeling or weathered finish, clean the surface thoroughly, and allow it to dry completely before adding a fresh coat.
Covering your bar during periods of non-use, particularly through winter months or extended rainy seasons, dramatically extends the life of the wood and reduces the frequency of maintenance needed. A custom-fitted outdoor bar cover made from UV-resistant, waterproof canvas is available from most outdoor furniture retailers and is a worthwhile investment. Alternatively, heavy-duty outdoor tarps secured with bungee cords can serve the same purpose at a fraction of the cost. If you live in a region with harsh winters, consider disassembling the bar entirely and storing it in a garage or shed, as freeze-thaw cycles can be particularly damaging to unsealed wood joints.
For your charcoal grill, regular maintenance is equally essential for both longevity and food safety. After every use, burn off any residual food debris by running the grill at high heat for 10 to 15 minutes with the lid closed, then brush the grates thoroughly with a stiff wire grill brush. Empty and dispose of ash after every two to three uses to prevent moisture buildup inside the grill bowl, which accelerates rust formation. Once per season, wash the grill grates with warm soapy water, rinse and dry completely, then apply a thin coat of high-heat cooking oil to prevent rust. With these simple habits in place, a quality charcoal grill can serve your backyard bar station reliably for many years, delivering the smoky, seared flavors that keep your guests coming back summer after summer.








What do you think?
It is nice to know your opinion. Leave a comment.