










10 Beginner DIY Projects That Look Expensive (But Cost Almost Nothing)
Introduction: Why DIY Looks More Luxurious Than Ever
There is a persistent myth in home décor circles that beautiful, polished interiors require deep pockets and a professional interior designer on speed dial. The truth, however, is far more empowering. With the right techniques, materials, and a little patience, beginner DIY enthusiasts are creating spaces that rival high-end showrooms without spending a fraction of what those rooms actually cost. This shift toward elevated, budget-conscious decorating has taken over platforms like Pinterest, Instagram, and TikTok, and for very good reason.
The projects featured in this article share a few key qualities that make them look more expensive than they are: clean lines, thoughtful material choices, and finishes that mimic luxury goods. What sets these apart from your average craft project is the attention to detail and the strategic use of inexpensive materials that photograph and present beautifully. You do not need decades of experience or a fully stocked workshop to pull these off. You need a plan, a few basic tools, and the confidence to try.
Whether you are decorating your first apartment, refreshing a tired living room, or simply looking for a creative outlet that adds real value to your home, these ten beginner-friendly projects are a perfect starting point. Each one can be completed over a weekend, most require fewer than five materials, and every single one of them will make your space look like you spent significantly more than you actually did. Let us dive in.
Section 1: Limewash Paint Walls — The Texture That Changes Everything
Limewash paint has been used in European architecture for centuries, lending ancient villas and rustic farmhouses that distinctly aged, layered look that feels simultaneously timeless and deeply modern. Today, it is one of the most sought-after wall finishes in interior design, frequently spotted in high-end boutique hotels and designer-curated homes. The remarkable thing is that achieving this effect yourself requires nothing more than a specialty limewash paint product, a large brush, and an afternoon of effort. Brands like Portola Paints and Romabio have made limewash accessible for home DIYers at a fraction of what a professional application would cost.
The technique itself is forgiving, which makes it ideal for beginners. Unlike traditional paint, limewash is applied in irregular, sweeping strokes that intentionally leave variation in coverage. You are not aiming for perfection — the uneven layering is precisely what gives this finish its character and depth. Most beginners find that after painting one wall, they are ready to tackle the rest of the room with complete confidence. The process is meditative, the results are stunning, and the cost per wall typically comes in well under fifty dollars depending on your room size.
Color selection is where limewash painting becomes truly personal. While soft whites, warm taupes, and dusty sages are the most popular choices for that Italian countryside aesthetic, limewash in deeper tones like charcoal, terracotta, or navy can create a dramatically moody backdrop that looks extraordinarily sophisticated. Pair a limewash accent wall with simple white linen curtains, a vintage wooden console, and a few sculptural objects, and you have a room that looks like it belongs in an architectural digest spread. This is genuinely one of the highest-impact, lowest-effort DIY upgrades a beginner can attempt.
Section 2: Concrete-Look Planters Using Hypertufa or Dip Coating
Concrete planters have become a staple of contemporary interior and exterior design, showing up in every design-forward home, café, and retail space imaginable. Their appeal lies in their raw, industrial simplicity — they carry visual weight without visual noise, and they complement almost every plant variety beautifully. Purchasing genuine cast concrete planters from design retailers, however, can be surprisingly expensive, with mid-sized pieces often running between forty and over a hundred dollars each. The DIY alternative produces results that are virtually indistinguishable from the real thing at a tiny fraction of the cost.
One of the most popular methods for beginners is the hypertufa approach, which combines Portland cement, perlite, and peat moss in a simple mixture that can be shaped around molds made from household items like cardboard boxes, plastic containers, or even crumpled aluminum foil. The result is a lightweight, porous material that looks authentically aged and stony. Another approach involves coating existing plastic or terra cotta pots with a concrete paint or specialty dipping medium that mimics the texture and color of solid concrete. Both methods require minimal investment and produce genuinely beautiful results.
For beginners interested in the dip-coating method, the process involves little more than mixing a concrete-textured craft medium, diluting it slightly with water, and applying it to clean, primed pots using a chip brush in varied, somewhat patchy strokes to replicate the natural variation in poured concrete. A light sanding between coats and a finishing seal ensure durability and water resistance. Group three to five planters of varying heights and sizes together on a windowsill or porch, fill them with sculptural plants like snake plants, cacti, or monstera cuttings, and you have an arrangement that looks curated, cohesive, and genuinely expensive.

Section 3: Framed Fabric Wall Art — Gallery Walls Without the Gallery Price
Gallery walls have dominated interior design trends for years, and for good reason — a well-executed gallery wall transforms a blank surface into a focal point that tells a story, adds color, and gives a room genuine visual energy. The challenge for budget-conscious decorators has always been the cost of original artwork or even quality prints, which can add up quickly when you are filling a large wall. The solution that savvy DIYers have embraced is framed fabric art, a technique that delivers all the visual impact of traditional gallery art at a shockingly low price point.
The concept is elegantly simple. You select fabric with a compelling pattern, color, or texture — this might be a bold geometric print, a delicate botanical illustration, a rich woven texture, or even a piece of vintage clothing fabric — and stretch or mount it within an inexpensive frame. Fabric from craft stores, vintage shops, or even repurposed items like scarves or pillow covers can become stunning art pieces when properly framed. A large piece of dramatic fabric mounted in a simple black or natural wood frame can serve as a statement artwork that commands attention in any room.
For a cohesive gallery wall, consider choosing fabrics within a consistent color palette while varying the patterns and textures. Mix a solid linen in a warm neutral with a subtle stripe, a botanical print, and a tone-on-tone geometric weave, all mounted in matching frames for a collected-but-intentional look. You can find inexpensive frames at IKEA, thrift stores, or discount home goods shops, and the total cost for a five to seven piece gallery wall using this method often comes in under thirty dollars. The result reads as thoughtfully curated and artistic to anyone who enters the room.
Section 4: DIY Bouclé and Reupholstered Furniture — The Thrift Store Transformation
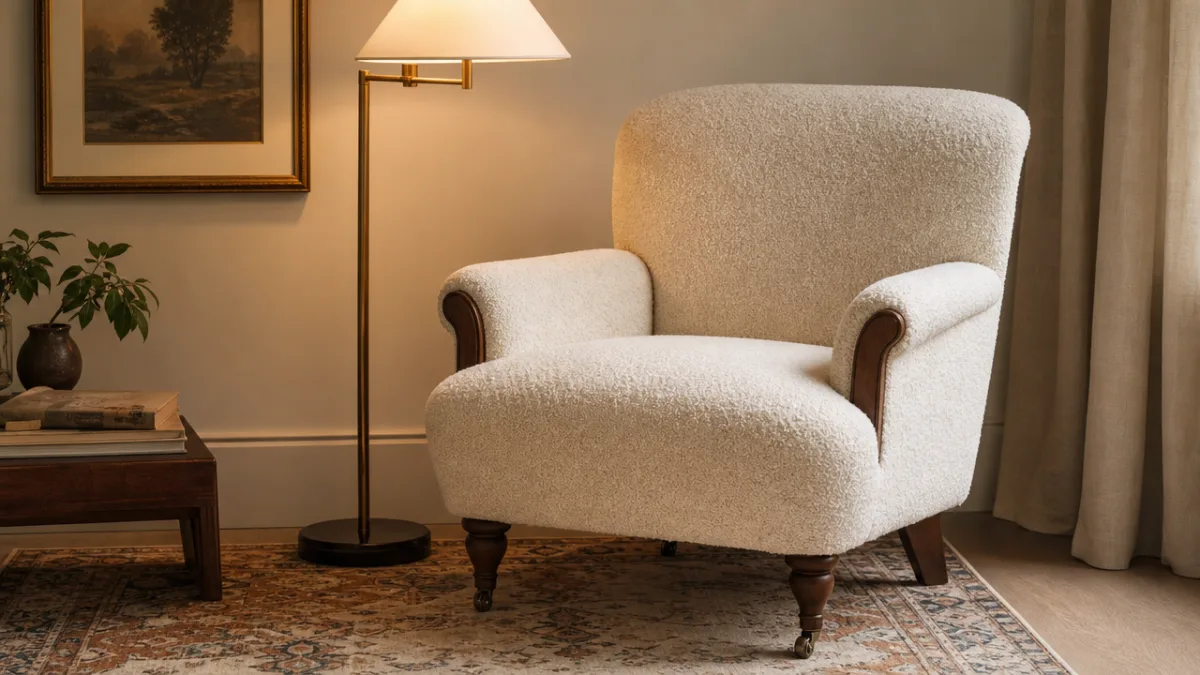
Bouclé fabric — that soft, loopy, textured material that has blanketed nearly every aspirational interior space in recent years — is one of the defining luxury textures of contemporary design. Sofas, chairs, ottomans, and headboards upholstered in bouclé command premium prices from high-end furniture brands. A bouclé accent chair from a designer retailer might cost anywhere from five hundred to well over two thousand dollars. A thrift store chair reupholstered in bouclé fabric from a wholesale supplier? Often under seventy-five dollars in total, and the result is nearly identical in appearance.
Beginner reupholstery is far more accessible than most people assume. For simple pieces like dining chairs with drop-in seats, the process requires only removing the seat from the chair frame, pulling off the old fabric, cutting new fabric to size with a generous overlap, and stapling it taut and smooth to the seat board using a basic electric staple gun. The entire process for a single chair seat takes under thirty minutes and requires no sewing whatsoever. Slightly more complex pieces like armchairs require a bit more patience and a willingness to watch a few tutorial videos, but the technique remains entirely within reach for beginners.
Beyond bouclé, beginners are achieving incredible transformations with velvet, linen, faux leather, and heritage-style floral prints. The key to making reupholstered furniture look truly expensive lies in two details: the tightness of the fabric pull and the neatness of the corners. Loose, wrinkled fabric immediately reads as amateur, while properly tensioned fabric with crisp mitered corners is indistinguishable from professional work at a glance. Pair your newly upholstered piece with updated hardware — swapping out old brass pulls for matte black or antique bronze — and the transformation is complete and genuinely stunning.
Section 5: DIY Plaster or Venetian Plaster Effect Using Joint Compound
Venetian plaster is among the most coveted wall finishes in luxury interior design. Its multi-layered, polished depth creates a surface that seems to shift and glow as light moves across it, evoking Renaissance palazzos and sophisticated European interiors. Professional Venetian plaster application is skilled work that commands significant labor costs on top of expensive materials. What many homeowners do not realize is that a nearly identical visual effect can be achieved using ordinary joint compound — commonly known as drywall mud — available at any hardware store for under fifteen dollars per bucket.
The technique involves applying thin, irregular layers of thinned joint compound to a primed wall using a wide putty knife or a flat trowel, working in loose, overlapping strokes that leave a varied texture behind. Once dry, the surface is lightly sanded to knock down the highest peaks, then a second or third layer is applied and burnished with the flat of the trowel to create a smoother, more polished finish in places. The final surface is sealed with a matte or satin paint, and the result is a beautifully textured wall with real dimensional depth that photographs like a professional plaster finish.
Color washing the dried compound with a diluted paint before sealing adds another layer of richness and complexity to the finish, allowing warm terracottas, aged whites, sage greens, and dusty blues to settle into the texture in a way that looks completely organic. This project takes a bit more time than limewash painting because of the drying time between layers, but the final product is arguably even more impressive. It is the kind of wall finish that guests will touch because they simply cannot believe it is a DIY project, and that reaction is exactly what makes it feel so luxurious.
Section 6: Elevated Shelving and Display Styling — The Art of Arrangement
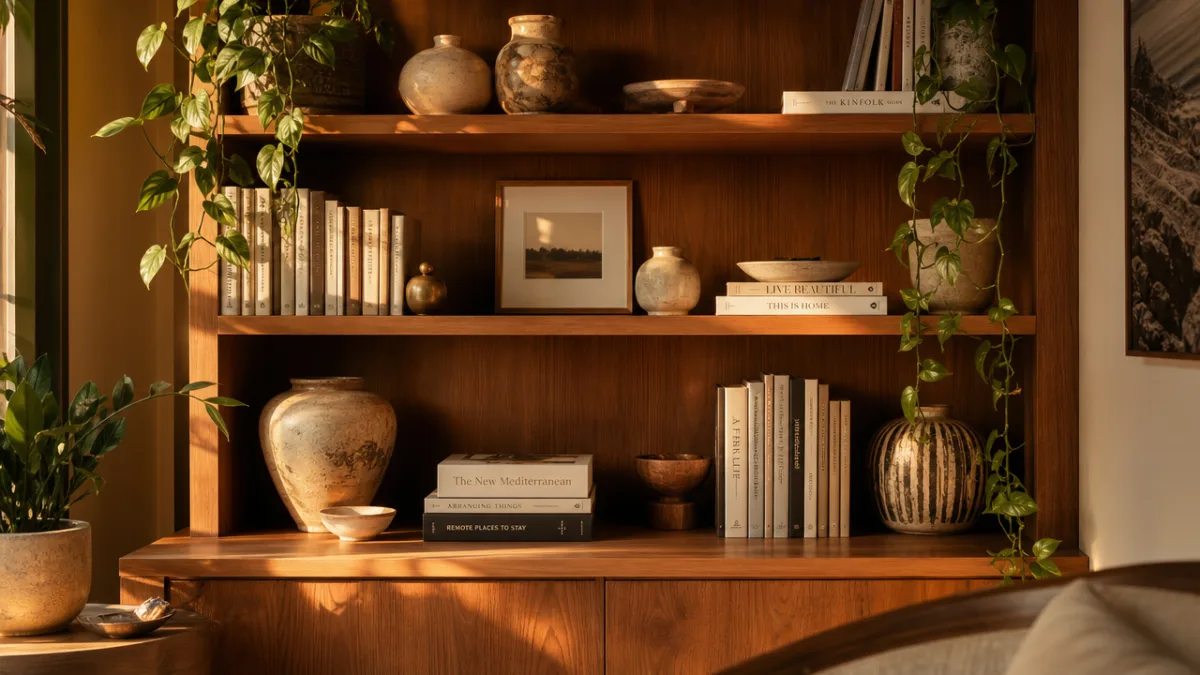
One of the most underestimated DIY upgrades available to any homeowner or renter requires no construction, no paint, and no power tools. The art of intentional shelf and surface styling — arranging books, objects, plants, and decorative items in a way that looks curated and effortless — is a genuine skill, and learning it costs nothing. Styled shelving is the difference between a bookcase that looks like a storage solution and one that looks like a carefully edited installation. It is the difference between a mantelpiece that feels cluttered and one that feels composed.
The principles that professional stylists use are not secret. They work primarily with three key ideas: varying height, varying texture, and the rule of odd numbers. Objects arranged in groups of three or five have a visual rhythm that feels pleasing and balanced. Mixing tall items with medium items with flat or horizontal items creates movement across a shelf. Interspersing soft textures like books with spines facing inward, small plants, woven baskets, or candles among harder objects like ceramics and glassware adds tactile richness to the overall composition. Negative space — empty areas between groupings — is as important as the objects themselves.
The materials for a beautifully styled shelf do not need to be expensive. Thrifted ceramics in coordinating colors, stacks of hardcover books with their dust jackets removed to reveal the clothbound covers beneath, small propagated cuttings in simple glass vessels, a single sculptural object, and a handful of candles can create a shelf display that looks like something from a high-end interior magazine. The investment is largely in time and attention, not in money. Learning to style is perhaps the most transferable skill on this entire list, because it applies to every surface, room, and home you will ever inhabit.
Here are some quick principles to keep in mind when styling any shelf or surface:
- Always work in odd-numbered groupings — threes and fives read as more natural and dynamic than pairs or fours.
- Vary the height of objects within each grouping to create visual rhythm and prevent a flat, uniform silhouette.
- Mix at least three different textures in any arrangement — for example, smooth ceramic, rough natural fiber, and reflective glass.
- Leave deliberate empty space between groupings; negative space is not wasted space, it is visual breathing room.
- Use books horizontally as risers to elevate smaller objects and add height variation without purchasing additional stands.
- Introduce at least one living element — a plant, a stem, or fresh foliage — to bring energy and softness to the composition.
Section 7: DIY Arched Mirror or Wall Cutout — Architectural Interest on a Budget
Arched mirrors have become one of the most iconic decorative objects of recent interior design trends, and their popularity shows no sign of fading. A large, freestanding arch mirror from a quality retailer can cost several hundred dollars. Smaller wall-mounted versions in premium materials start at prices that make most budgets wince. But enterprising DIYers have discovered multiple routes to achieving the same arched, architectural impact at a fraction of the price, using everything from inexpensive flat mirrors retrofitted with custom frames to entirely new constructions made from foam board, MDF, or even cardboard painted to resemble plaster.
One of the most popular beginner approaches involves purchasing the least expensive full-length flat mirror available — often found at discount stores for under twenty dollars — and building a shaped frame around it using craft foam or thin MDF cut to an arched profile, then painting the entire assembly in a single matte color like plaster white, warm ivory, or soft black. The arch shape at the top transforms the mirror from a basic flat object into something that reads as architectural and intentional. When leaned against a wall, this type of mirror adds height, light, and a sense of designer taste to any room it inhabits.
A related project involves creating decorative wall cutout or arch shapes directly on the wall using paint, plaster, or applied molding strips to suggest architectural detail where none structurally exists. A painted arch above a bed or sofa, executed neatly with a compass-drawn template and careful painter’s tape, can function as a headboard alternative, a gallery backdrop, or a simple moment of visual interest that elevates the entire room. These architectural gestures are hallmarks of expensive, professionally designed interiors, and the painted version is nearly indistinguishable in photographs — and in person, frankly, to most eyes.
Conclusion: The Philosophy of Affordable Elegance
What unites every project on this list is not a particular material or technique but a mindset — the belief that thoughtfulness and intention are more valuable in interior design than a generous budget. The most expensive-looking homes are not always the most expensively furnished ones. They are the ones where every choice feels deliberate, every surface feels considered, and every object earns its place. That sensibility is entirely free, and it is something any beginner can cultivate with practice, observation, and a willingness to experiment without fear of imperfection.
The practical reality is that beginning your DIY journey with even one or two of these projects will teach you more about your own aesthetic preferences than any amount of browsing online or flipping through design magazines. You will discover whether you love texture or prefer clean simplicity, whether you gravitate toward warm earthy tones or cool moody palettes, whether you find satisfaction in the meditative process of painting or in the immediate gratification of a styling project. Every project is an education, and the education is one that compounds — each new skill you develop makes the next project more achievable and more refined.
Perhaps most importantly, approaching your home with a DIY mindset fosters a relationship with your space that no amount of money can buy. When you know that the textured wall in your living room was created by your own hands over a rainy Saturday, or that the styled shelf in your entryway represents hours of thoughtful arrangement and rearrangement, those spaces carry a meaning that transcends their monetary value. Beautiful homes are not made exclusively by designers with large budgets. They are made by people who pay attention, who care about their surroundings, and who are willing to try. That is you. Start this weekend.








What do you think?
It is nice to know your opinion. Leave a comment.