










Woodland Pine Cone Gnomes for Kids: A Calm & Easy Nature Craft
Bringing the Forest Indoors: Why Pine Cone Gnomes Are the Perfect Kids’ Craft
There is something quietly magical about gathering materials from the forest floor and transforming them into something whimsical and alive with character. Pine cone gnomes sit at that sweet intersection of natural crafting and imaginative play, offering children a chance to engage with the outdoors in a meaningful, creative way. These charming little woodland creatures have roots in Scandinavian folk traditions, where gnomes were thought to be guardians of the home and forest, and making them by hand connects children to something older and more grounded than a screen ever could.
What makes this craft particularly special for kids is the combination of textures, shapes, and materials involved. Pine cones are endlessly varied in size, shape, and character, which means no two gnomes will ever look identical. That natural imperfection is a gift to children who are still learning that art does not have to be perfect to be beautiful. When a child picks up a pine cone and starts to imagine what kind of gnome lives inside it, something wonderful happens in their mind — a whole world begins to take shape.
This craft is also wonderfully calm. In an age of overstimulation and rushing, sitting at a table with pine cones, felt, yarn, and glue invites a slower, more meditative pace. Children focus their attention, exercise fine motor skills, and experience the genuine satisfaction of making something real with their own hands. Whether done on a rainy afternoon, as a homeschool project, or as a group activity at a nature camp, pine cone gnomes offer an experience that is as soothing as it is joyful.
Gathering Your Materials: A Walk in the Woods Is Step One
Before you reach for the craft supplies, consider making the material-gathering itself part of the experience. A walk through a park, woodland trail, or even a backyard with pine trees can be the opening act of this project. Give children small paper bags or baskets and invite them to collect pine cones of different sizes. Encourage them to look closely at what they find — to notice which cones are wide and squat, which are tall and narrow, and which have that perfect gnome-like silhouette already built in by nature. This foraging step builds observation skills and a connection to the natural world that no craft store can replicate.
Once you have your pine cones, a few key materials are all that is needed to bring your gnomes to life. The beauty of this project is that it uses simple, inexpensive supplies that most households already have on hand, or that can be found at any craft store without breaking the budget. Here is a complete list of what you will need:
- Assorted pine cones, dried and cleaned (one per gnome)
- Wool felt or craft foam in a variety of colors for the hats
- Yarn or fur fabric scraps for beards and hair
- Wooden beads or small pom-poms for noses
- Hot glue gun and glue sticks (adult supervision required)
- Scissors
- Small googly eyes (optional, for extra personality)
- Ribbon, twine, or jute for hanging or decoration
- Acrylic paint or markers for adding color details
- Small dried flowers, moss, or berries for woodland embellishment
It is worth spending a little time preparing the pine cones before crafting begins. If you have collected them from outside, let them dry fully in a warm spot for a day or two — this allows them to open up fully and ensures any insects or moisture have had a chance to vacate. You can speed this process by placing them on a baking sheet in a low oven (around 200°F or 90°C) for about thirty minutes. Once dried, a gentle shake over a paper bag and a quick wipe with a dry cloth will leave them clean and ready for transformation.

Step-by-Step Instructions: Making Your Woodland Gnome
The construction of a pine cone gnome is beautifully simple, which is part of its enduring appeal. The basic form follows a consistent pattern — hat, nose, beard — but within that structure there is enormous room for personalization and creative expression. Start by selecting your pine cone and deciding which end will be the top. Most pine cones have a natural tapered end that works wonderfully as the base of the hat, while the wider, flatter bottom can rest on a surface or be glued to a small slice of wood for a stable display piece.
Follow these steps to assemble your gnome from start to finish:
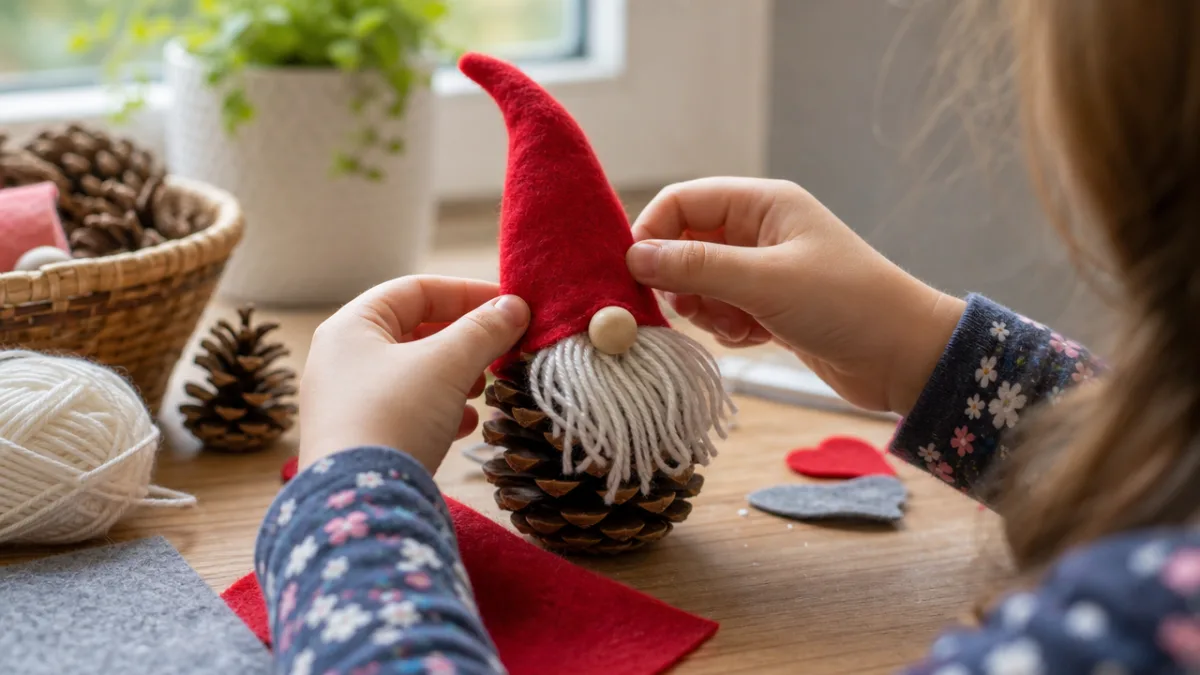
- Make the hat: Cut a triangle or cone shape from your felt fabric. The size should be proportional to your pine cone — taller and narrower for a classic gnome look, or shorter and wider for a cozy, stout gnome personality. Roll the triangle into a cone shape and secure with a line of hot glue along the edge.
- Attach the hat: Apply a ring of hot glue around the tip of the pine cone (or whichever end you have chosen as the top) and press the hat firmly into place. Hold it for a count of ten to allow the glue to set.
- Add the nose: A wooden bead or small pom-pom works perfectly. Apply a dot of hot glue just below the hat brim and press the nose into position. This tiny detail immediately brings the gnome to life.
- Create the beard: Cut a small bundle of yarn into roughly equal lengths, or use a piece of faux fur fabric cut to a roughly triangular or oval shape. Apply glue beneath the nose area and press the beard material firmly into the scales of the pine cone. The natural texture of the cone helps grip the yarn beautifully.
- Add optional embellishments: Tiny dried flowers tucked into the hat brim, a ribbon belt around the middle, a small sprig of faux greenery — these details transform a simple gnome into a full woodland character.
The most important thing to remember during the construction phase is that hot glue is for adult hands, while pressing, positioning, and decorating is for the children. Establish this division early and make it feel exciting rather than restrictive — adults control the “magic glue gun,” while kids are the creative directors making all the design decisions. This approach keeps the activity safe while ensuring that children maintain full ownership of their creative vision. The result is a gnome that truly belongs to them.
Making It Mindful: The Therapeutic Power of Nature Crafting
Nature crafting occupies a unique space in the world of children’s activities. Unlike purely digital entertainment or even many structured art projects, working with natural materials engages the senses in a deeply grounding way. The rough texture of a pine cone under small fingers, the earthy scent of dried forest materials, the soft give of wool felt — these sensory inputs work together to anchor children in the present moment. For children who experience anxiety, sensory processing challenges, or simply the general overwhelm of modern childhood, activities like this can function as a gentle form of regulation.
Occupational therapists and child development specialists have long recognized the value of fine motor crafting for children’s development. Activities that require pinching, cutting, pressing, and manipulating small objects all build the hand strength and dexterity that children need for writing, self-care tasks, and countless other daily activities. Pine cone gnome crafting is particularly rich in these opportunities — cutting felt, threading yarn, pressing beads, and gluing small details all engage the hands in varied and beneficial ways. What looks like simple play is also, quietly, excellent developmental work.
There is also something to be said for the act of making something permanent and displayable. Unlike a drawing that might be tucked in a folder or a sandcastle that washes away, a pine cone gnome can sit on a shelf, decorate a windowsill, or hang from a Christmas tree for years. That permanence matters to children. It says: what you made has value. It is worth keeping. This kind of tangible affirmation of creative effort builds confidence and a positive relationship with making things — a relationship that can last a lifetime and express itself in countless future creative pursuits.
For parents or educators looking to extend the calming dimension of this craft, consider pairing it with soft background music, a nature sounds playlist, or even a relevant audiobook or story about forest creatures. Creating an ambient environment that supports focus and gentle engagement can deepen the meditative quality of the activity. Some families have turned pine cone gnome crafting into a seasonal ritual — gathering cones in autumn, crafting gnomes on a cozy November afternoon, and decorating with them through the winter months as a bridge between the outdoor world and the warm indoor one.
Variations and Seasonal Adaptations: Gnomes for Every Time of Year
One of the great strengths of the pine cone gnome as a craft template is how readily it adapts to different seasons, holidays, and themes. The basic structure remains the same, but a change of color palette, hat style, or embellishment transforms the gnome’s entire personality and seasonal identity. This makes the project something you can return to again and again throughout the year without it ever feeling repetitive — each season brings its own mood, its own colors, and its own natural materials to incorporate.
Here are some seasonal and thematic variations to inspire your gnome-making sessions:
- Autumn Harvest Gnomes: Use deep reds, burnt oranges, and warm yellows for the hats. Tuck tiny dried maple leaves or acorn caps into the hat brim. A rust-colored yarn beard and a cinnamon-scented dab of paint on the nose creates an instantly cozy fall character.
- Winter Holiday Gnomes: Red and green felt hats, white fluffy yarn beards, and a tiny silver bell sewn to the hat tip create classic Scandinavian-style Christmas gnomes, known as Tomtes or Nisse. These make wonderful handmade gifts and ornaments.
- Spring Garden Gnomes: Soft pastel hat colors, tiny dried flower accents, and a cheerful ribbon belt evoke the freshness of a spring garden. These gnomes pair beautifully with potted plants and make charming decorations for a windowsill herb garden.
- Summer Forest Gnomes: Natural, earthy tones and miniature fern fronds or tiny pebbles glued to the base create a wild forest floor aesthetic. These gnomes feel at home in a terrarium or displayed alongside other nature collection items.
- Fantasy and Story Gnomes: For children inspired by fairy tales, make gnomes with tiny book satchels made from felt, miniature mushroom hats cut from foam, or wizard-style hats studded with star-shaped sequins. The gnome becomes a character in an ongoing imaginative narrative.
Seasonal crafting also offers a beautiful opportunity to talk with children about the natural world and the rhythm of the year. As you make autumn gnomes, you can discuss why leaves change color and what animals are preparing for winter. As you craft spring gnomes, conversations about new growth, returning birds, and longer days arise naturally from the creative work. The gnome becomes a gentle anchor for learning about nature’s cycles, turning a simple craft session into something richer and more connected to the world outside the window.
Displaying and Gifting Your Gnomes: Sharing the Magic
A completed pine cone gnome deserves to be seen and celebrated. The way you display these small woodland figures can be as creative as the crafting process itself, and involving children in the display-making extends the project in a satisfying direction. A small slice of natural wood makes a beautiful base — simply apply a ring of glue to the flat bottom of the pine cone and press it to the wood slice. Add a few dried moss pieces or tiny pebbles around the base and you have an instant woodland diorama that looks like it belongs in a nature museum.
For holiday display, gnomes can be transformed into ornaments by attaching a loop of jute or ribbon to the back of the hat before it is glued in place. Hung on a tree or a winter branch arrangement in a vase, these handmade ornaments carry a warmth and authenticity that no store-bought decoration can match. A collection of gnomes in varying sizes arranged on a mantelpiece, windowsill, or bookshelf creates a charming gnome village that children love to add to over time, building a display that grows with each crafting session.
Pine cone gnomes also make deeply personal and thoughtful gifts. A child who has made a gnome with their own hands and then gives it to a grandparent, teacher, or friend is offering something genuinely made with care and intention. To make a gnome gift extra special, encourage the child to write a small note or story about the gnome — its name, its home in the forest, its favorite thing to do on a winter night. This storytelling addition transforms the object into a narrative gift, and the act of writing or dictating the story reinforces literacy skills in the most natural and motivated of contexts.
For group settings like classrooms, nature clubs, or birthday parties, pine cone gnome crafting scales beautifully. Set up a central station with shared materials, prepare the hats in advance to save time, and let each child personalize their gnome with individual color and embellishment choices. At the end of a group session, take a moment to let each child share their gnome and say its name — this simple act of narrating and presenting builds public speaking confidence and celebrates every child’s unique creative contribution. The variety of gnomes that emerges from a single set of materials is always a wonderful testament to the individuality of each young maker.

Extending the Experience: From Craft Table to Full Nature Curriculum
For educators and parents who want to take this craft beyond a single afternoon activity, pine cone gnomes can serve as a launching point for a genuinely rich nature-based learning experience. The project naturally connects to biology (the life cycle of conifer trees and the role of pine cones in seed dispersal), art history (Scandinavian folk art traditions and the cultural history of gnomes), and environmental literacy (sustainable foraging, the importance of forest ecosystems). What begins with a hot glue gun and a pile of pine cones can open into weeks of interconnected exploration.
Consider building a small unit around the project by incorporating complementary activities such as:
- Reading picture books or chapter books featuring forest gnomes and woodland creatures
- Sketching and observational drawing of pine cone specimens before crafting begins
- Researching the types of trees that produce different kinds of cones in your region
- Creating a nature journal entry about the gnome-making experience with drawings and writing
- Exploring Scandinavian traditions around Tomtes and Nisse through simple cultural storytelling
- Planting a small pine seedling to observe how the tree that produces cones begins its life
The pine cone gnome also connects naturally to mathematical thinking for younger children. Sorting cones by size, counting the scales, estimating how many yarn strands make the fullest beard, and measuring hat triangles all embed informal math into creative play. For older children, more deliberate mathematical challenges can be introduced — calculating the volume of a cone shape for the hat, researching the Fibonacci sequence that governs the spiral arrangement of pine cone scales, or graphing the variety of cone types collected from different tree species. The natural world is full of mathematics, and pine cones are among its most beautiful expressions.
Ultimately, what the pine cone gnome craft offers children is something that the best learning experiences always provide: a sense of wonder and a sense of capability. When a child holds a finished gnome in their hands and sees the translation of imagination into reality — when a rough, ordinary object from the forest floor has become a character with a name and a story — something important happens. They learn, in the most direct and embodied way possible, that they are makers. That they can take the raw material of the world and shape it into something new. That quiet attention and patient hands can produce something genuinely beautiful. In a noisy, impatient world, that is a lesson worth giving again and again.








What do you think?
It is nice to know your opinion. Leave a comment.