










Why Garden Tool Storage Is the Problem Every Gardener Faces
If you’ve spent any time tending a garden, you already know the quiet frustration of it: you need your trowel, and it’s somewhere under a pile of kneeling pads, tangled up with a garden hose that hasn’t been properly coiled since last spring. Garden tools have a way of multiplying and migrating, ending up in corners, leaning precariously against walls, or rusting quietly on the garage floor because there simply wasn’t a good place to put them. This is not a personal failing — it’s an organizational gap that most garden sheds and garages were never properly designed to solve.
The problem compounds over time. You start with a few basics: a spade, a fork, a trowel, some pruning shears. Then come the specialized tools — the bulb planter, the cultivator, the hori hori knife, the long-handled weeder. Before long you have fifteen tools competing for three feet of leaning space, and the ones at the back are invisible until you need them most urgently. Poor storage doesn’t just create clutter; it actively slows you down and shortens the life of your tools by exposing them to moisture, contact damage, and the general chaos of a disorganized space.
What makes this particularly worth solving is that good tool storage isn’t an expensive or complicated project. The right system can be built from inexpensive materials, adapted to almost any space — whether you have a full garden shed, a narrow garage wall, or just a corner of a utility room — and assembled in a single weekend afternoon. The payoff is immediate and lasting: every tool in its place, visible at a glance, dry and protected, and ready when you reach for it. This guide walks you through building exactly that kind of system from scratch, using smart DIY approaches that have proven themselves in real gardens.
Planning Your Storage System Before You Build Anything
The single most common mistake in any storage project is building first and planning second. It feels productive to start cutting wood or drilling holes, but without a clear plan you’ll end up with a system that fits the tools you happened to think of, not the tools you actually own. Before you pick up a single tool from your existing collection, take twenty minutes to do a complete inventory. Lay everything out on the lawn or the garage floor. Sort by size, by frequency of use, and by the type of head — long-handled tools, hand tools, cutting tools, and accessories like twine, labels, and gloves each have different storage needs.
Measure your available wall space carefully, noting where studs are located, where the light falls, and how close to the door you can position things for easy grab-and-go access. Think about workflow: the tools you use every single time you go into the garden — your hand trowel, your gloves, your pruners — should be at eye level and arm’s reach from the entrance. Tools you use seasonally, like a bulb auger or a soil blocker, can live higher up or in a less prime location. This kind of zoning turns your storage wall from a simple rack into a genuinely functional system that works with how you actually garden.
Sketch a rough layout before buying any materials. Note the height of your ceiling, the width of your wall, and any obstacles like windows, doors, or electrical outlets. Decide whether you want a fixed system — boards and hooks permanently mounted — or a modular one using slotted pegboard or a French cleat wall that you can reconfigure as your tool collection changes. Both approaches work well; the choice depends on how stable your tool collection is and how much flexibility you want. A simple sketch, even on the back of an envelope, will save you multiple trips to the hardware store and prevent the frustration of having to redo work.
Building the Core Structure: The French Cleat Wall System
The French cleat is one of the most elegant and versatile storage solutions ever devised, and it’s particularly well suited to garden tool storage because it’s infinitely reconfigurable without putting new holes in your wall. The concept is beautifully simple: you cut long strips of plywood at a 45-degree angle along one edge, mount alternating strips to the wall with the angled edge facing up and outward, then hang matching strips — or holders built onto them — off the wall-mounted strips. The interlocking angles create a surprisingly strong hold, and anything hung on the system can be slid sideways or removed entirely in seconds.
To build a French cleat wall, you’ll need three-quarter-inch plywood, a table saw or circular saw with a guide, wood screws, a stud finder, and a level. Cut your plywood into strips four to six inches wide, then rip each strip at 45 degrees along one long edge. Mount the wall strips horizontally across your storage wall, spacing them about six to eight inches apart vertically, making sure each screw goes into a wall stud for solid anchoring. Use a level religiously — one crooked strip will throw off everything above it. Space the strips close enough together that you have flexibility in positioning your holders without large gaps in coverage.
The real magic of the French cleat system is what you can hang on it. For long-handled tools, build simple holders from short lengths of plywood with a matching 45-degree cut on the back and a few strategic notches or cup hooks on the face. For hand tools, small shelves with hooks work perfectly. You can build a dedicated holder for your most-used tools — a custom bracket shaped to hold your favorite hand fork at exactly the right angle, for instance — and the whole thing slides onto the cleat wall without a single additional fastener. Over time, as your garden grows and your tool collection evolves, you simply rearrange the holders to suit.
Materials You’ll Need for a Basic French Cleat System
- One or two sheets of three-quarter-inch plywood (the number depends on your wall size)
- A table saw, circular saw, or track saw capable of ripping at 45 degrees
- Two-and-a-half-inch wood screws for mounting to studs
- One-and-a-half-inch screws for assembling holders and brackets
- A stud finder and a long level
- Wood glue for reinforcing joints on holders
- Sandpaper and an optional coat of exterior wood primer for moisture resistance
- Assorted cup hooks, S-hooks, and PVC pipe lengths for customizing holders
Creative Hacks for Specific Tool Types
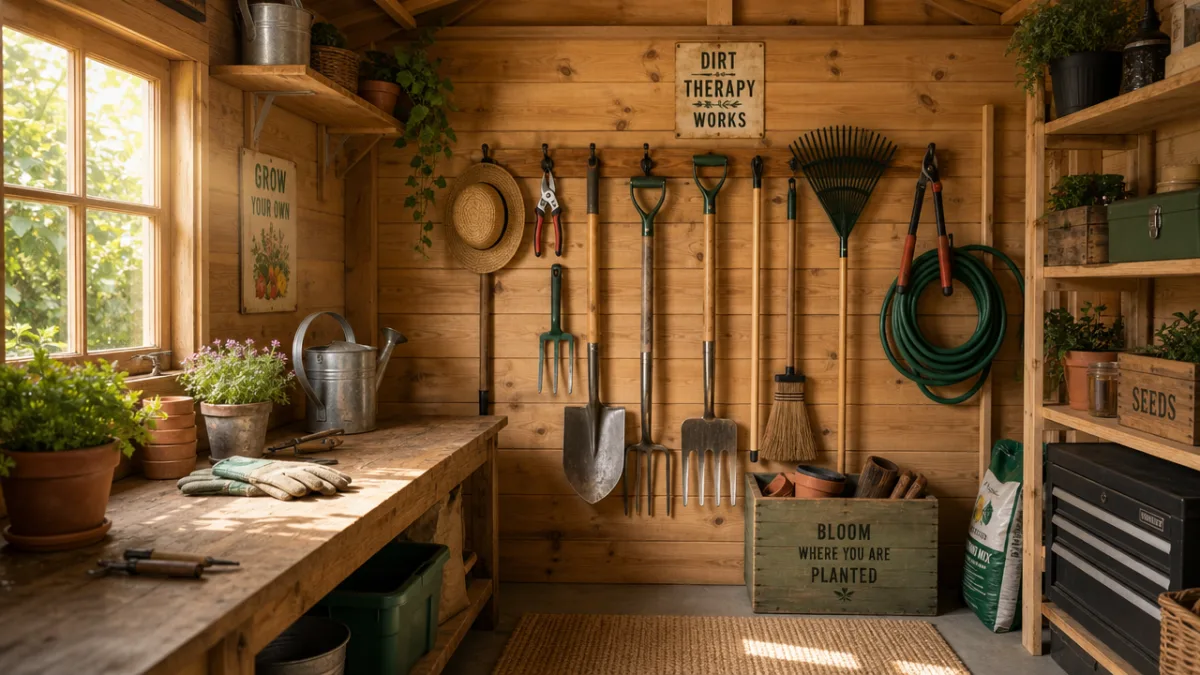
Long-handled tools — spades, forks, rakes, hoes — are the most spatially demanding part of any garden tool collection, and they need to be stored vertically to avoid taking up floor space and to keep their heads from creating tripping hazards. One of the simplest and most satisfying hacks for these tools is a PVC pipe holder. Cut six-inch lengths of four-inch diameter PVC pipe at a slight backward angle, mount them to a board or directly to your cleat wall system, and you have perfectly sized pockets that grip the handles of long tools without any hooks or hardware. The slight angle keeps the tools from sliding out while making them easy to grab and go.
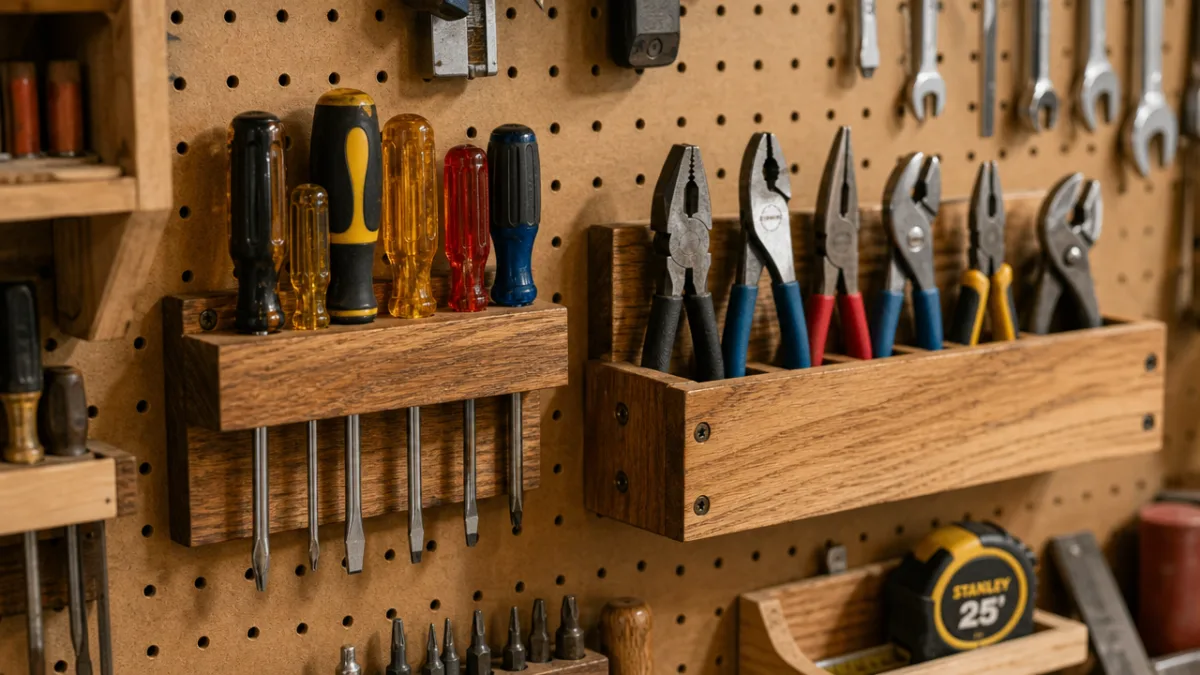
Hand tools present a different challenge: they’re small enough to get lost, valuable enough to be worth protecting, and numerous enough to create serious clutter if not given specific homes. A simple pegboard panel — either as a standalone addition or as part of your French cleat wall — is ideal for hand tools, and the key is to use the right hooks. Standard pegboard hooks work fine for lighter items, but for heavier hand tools like a cultivator or hori hori, use locking pegboard hooks that snap into place and won’t pull out when you grab the tool. Trace an outline of each tool on the pegboard with a marker so anyone can see at a glance where each tool belongs and what’s missing.
Cutting tools — pruning shears, loppers, hedge shears, and knives — deserve special attention because they’re both sharp and expensive. Storing them loose on a shelf or hook exposes the blades to damage and creates a safety hazard. A simple solution is to make individual sheaths from scrap leather or heavy canvas and hang them on dedicated hooks at a consistent height, blades pointed down. Alternatively, a wooden knife block style holder — essentially a slot cut through a thick block of wood at a slight angle — keeps pruners safely stored blade-down and easy to retrieve with a single hand. Label each slot if you have multiple pairs of shears of similar size.
Specialty Holders Worth Making
- Hose coiling station: Mount a large wooden dowel or a commercial hose hanger at a height where you can coil a full hose without bending, positioned near a water source if possible.
- Glove and small accessory bin: A simple open-fronted wooden box mounted at eye level keeps gloves, plant labels, twist ties, and hand sanitizer together and visible without a drawer to open.
- Potting supply shelf: A slanted shelf that tilts slightly toward the wall keeps bags of fertilizer and seed packets upright and prevents them from toppling.
- Bucket and pot rack: A series of large cup hooks at varying heights lets you hang buckets, trugs, and small pots off the wall rather than stacking them on the floor where they collect water and debris.
- Twine and tape dispenser: A mounted dowel or a purpose-made holder keeps twine feeding cleanly without the ball rolling across the floor every time you pull a length.
Finishing Touches That Make a System Actually Work
A storage system that’s physically built but poorly finished tends to drift toward chaos within a season. The finishing touches — labeling, weatherproofing, lighting, and a few small behavioral design choices — are what separate a system that stays organized from one that reverts to its old state within a few weeks. Start with labeling. Even if you’re the only person who uses the garden shed, labels remove the cognitive friction of deciding where something goes when you’re in a hurry, muddy-gloved, and tired after a long afternoon in the garden. A label makes the right choice the obvious and easy choice.
Weatherproofing is particularly important if your storage is in a shed, garage, or any space that experiences temperature swings and humidity changes. Bare plywood will swell, warp, and eventually rot in a damp environment. Apply at least one coat of exterior primer to all wooden components before mounting them, and follow up with a coat of exterior paint or a penetrating wood sealer. Pay particular attention to end grain, which absorbs moisture most readily. For metal hooks and hardware, choose galvanized or stainless steel fittings to prevent rust streaking on your freshly finished wood. These steps add less than an hour to the project and dramatically extend the life of your installation.
Lighting is the upgrade most people overlook and everyone appreciates after the fact. A garden shed or garage wall with no dedicated lighting forces you to work in shadow, makes it hard to see what’s on the back of a hook, and generally makes the space feel unwelcoming. A simple plug-in LED strip light along the top of your tool wall, or a single shop light positioned to illuminate the whole storage area, transforms the experience. Modern LED options are inexpensive, use very little electricity, and can be connected to a simple timer or motion sensor so the light comes on automatically when you open the shed door. It’s a small addition that pays dividends every single time you use the space.
Maintenance Habits to Keep the System Running
- Clean tools before returning them to storage — a quick brush-down and wipe prevents soil buildup and rust formation.
- Do a seasonal audit at the start of spring and end of autumn to sharpen blades, oil moving parts, and check that all hooks and mounts are still solidly anchored.
- Oil wooden handles once a year with raw linseed oil or tung oil to prevent cracking and splitting, particularly on spade and fork handles that take the most stress.
- Replace any bent or broken hooks immediately rather than leaving tools in improvised positions that break down the system’s logic.
Expanding and Adapting the System as Your Garden Grows
One of the best arguments for building a modular system like a French cleat wall rather than a fixed rack is that gardens are not static. A garden that starts as a small vegetable patch has a way of expanding into fruit trees, raised beds, a cutting garden, and eventually a greenhouse — each new area bringing new tools and new storage requirements. A well-designed modular storage wall grows with you, accommodating new tools without requiring you to tear out and rebuild what’s already there. You simply build new holders for new tools and slide them into available space on the cleat wall.
If you find yourself running out of wall space as your tool collection grows, think vertically before thinking horizontally. The area near the ceiling of a garden shed is almost always underused and is perfect for seasonal tools, rarely used accessories, or lightweight items stored in labeled bins. Install a simple shelf or a second cleat run at ceiling height and use it for things like seed trays, frost cloth, and empty pots. A step stool or small folding ladder kept nearby makes this high storage accessible without any real inconvenience, and it frees up the prime eye-level space for the tools you reach for every day.
Finally, don’t underestimate the value of sharing this system with everyone who uses the garden. If you garden with a partner, family members, or even hired help, a clearly organized and labeled storage system becomes a communication tool as much as a storage one. Anyone can see at a glance what tools are available, where they live, and what’s missing. The outline-tracing trick on pegboard — where you can literally see the silhouette of what belongs on each hook — is particularly effective for shared spaces because it makes the correct behavior visible and self-explanatory. A good system doesn’t just store your tools; it stores the knowledge of how the garden works, making it easier for everyone to contribute and care for the space.
Quick Reference: Estimated Costs for a DIY Storage Wall
- Plywood for French cleats (one sheet): approximately $40–$60 depending on grade and region
- Assorted hooks, cup hooks, and hardware: $15–$30 for a basic set
- PVC pipe lengths for long-tool pockets: $10–$20 for enough to hold eight to ten tools
- Paint or sealer for weatherproofing: $15–$25 for a quart, which will cover the project with leftover
- LED lighting strip or shop light: $20–$40 for a basic but effective solution
- Pegboard panel (optional addition): $25–$40 for a four-by-eight-foot sheet
- Total estimated cost: $125–$175 for a comprehensive, well-finished system covering a full garden shed wall
These figures make it clear that a well-organized, beautifully functional garden tool storage system is well within reach without a significant financial investment. The materials are available at any home improvement store, the skills required are basic carpentry at most, and the result is a space that actively supports better gardening — saving time on every single visit to the shed, protecting expensive tools, and turning what used to be a source of low-level daily frustration into something that genuinely brings satisfaction every time you step through the door.








What do you think?
It is nice to know your opinion. Leave a comment.