










Stop Spending $$$ on Luxury Planters! DIY Your Way to Stunning Garden Décor
Why Luxury Planters Are Draining Your Wallet (And What You Can Do About It)
Walk into any home décor store or scroll through a garden center’s website and you’ll quickly notice something alarming: planters have become outrageously expensive. A single ceramic pot with a trendy glaze can set you back $80 to $200, and that’s before you’ve even bought the soil or the plant that goes inside it. For gardening enthusiasts who want multiple planters throughout their home or outdoor space, these costs add up to hundreds — sometimes thousands — of dollars spent purely on containers.
The luxury planter industry has done a masterful job of convincing consumers that beautiful containers require a premium price tag. Brands market their pots with language like “artisan crafted,” “hand-thrown,” or “designer collection,” which justifies enormous markups on items that, fundamentally, just need to hold dirt and support root growth. The plant inside doesn’t care whether its container cost $5 or $500. What matters is drainage, appropriate sizing, and the right material for your climate — all things you can achieve yourself for a fraction of the cost.
The good news is that the DIY planter movement has exploded in recent years, and crafters, gardeners, and home décor enthusiasts have discovered that homemade planters are not only affordable but often more beautiful and unique than anything you can buy in a store. With a little creativity, some basic materials, and a few hours of your weekend, you can create stunning planters that become genuine conversation pieces in your garden or living space — without the financial regret that comes with a luxury purchase.
The True Cost Comparison
Let’s put some real numbers on the table. A high-end terracotta planter from a designer brand might retail for $120. The raw materials to make a comparable DIY version — including a bag of concrete mix, a mold, and sealant — typically cost between $8 and $15. Even accounting for your time, the savings are extraordinary, especially if you’re making multiple pieces. Many crafters report saving over $500 on a single patio refresh by switching entirely to DIY planters.
Beyond the direct cost savings, homemade planters give you complete control over size, color, texture, and finish. You’re not limited to what’s currently in stock or what some designer decided was trendy this season. If you need a planter that’s exactly 14 inches wide to fit a specific shelf, you can make it. If you want a finish that matches your outdoor furniture precisely, you can achieve it. This level of customization simply isn’t available at any price point in retail stores, which makes DIY planters not just more affordable but genuinely superior in practical terms.
The Best Materials for Budget-Friendly DIY Planters
One of the most exciting aspects of DIY planter making is the sheer variety of materials you can use. Concrete is perhaps the most popular choice among modern DIY enthusiasts, and for good reason. It’s inexpensive, widely available, and produces a sleek, contemporary look that mimics high-end designer pots almost perfectly. A standard bag of quick-setting concrete mix from a hardware store costs around $5 to $8 and can yield multiple small to medium-sized planters depending on your mold sizes.
Hypertufa is another fantastic option that many gardeners swear by. It’s a lightweight, porous material made from a mixture of Portland cement, peat moss, and perlite, and it has been used in garden design for decades. Hypertufa planters have a rough, organic texture that looks like aged stone, and they’re particularly well-suited for alpine plants, succulents, and herbs. Because the material is so lightweight compared to solid concrete, hypertufa is ideal for balconies, rooftop gardens, or any space where weight is a concern.
Upcycled and repurposed materials form another rich category of DIY planter options. Old wooden wine crates, galvanized metal buckets, vintage colanders, cracked ceramic bowls, worn leather bags, and even discarded boots have all been successfully transformed into charming planters by creative gardeners. The key with repurposed containers is ensuring adequate drainage — drill holes in the bottom if needed — and lining porous materials like wood with plastic sheeting to extend their lifespan.
Matching Materials to Your Space
Choosing the right material isn’t just about cost — it’s also about matching the aesthetic and functional needs of your specific space. For a sleek, modern interior, polished concrete or smooth terrazzo-inspired pots work beautifully. For a rustic farmhouse garden, weathered wood boxes and galvanized metal containers feel perfectly at home. Mediterranean-style outdoor spaces shine with painted terracotta and mosaic tile planters, while a bohemian balcony garden might feature macramé-wrapped pots and woven basket liners.
Climate is another important consideration when selecting your DIY planter material. In regions with harsh winters where temperatures regularly drop below freezing, concrete and hypertufa planters perform much better than ceramic, which can crack when water inside the walls freezes and expands. In very hot, dry climates, unglazed terracotta and concrete tend to dry out quickly, so glazed or sealed finishes help retain moisture. Understanding your climate will help you choose materials that look great and remain functional for years without needing replacement.
It’s also worth considering the weight of your finished planter, especially if you plan to move it indoors during cold months or rearrange your space seasonally. Very large concrete planters can be extremely heavy — sometimes requiring two people to lift — while hypertufa, foam-core, or fiber cement alternatives offer comparable aesthetics at a fraction of the weight. Planning ahead for mobility can save you a lot of frustration down the road and opens up more flexibility in how you arrange and display your plants throughout the year.

Step-by-Step Guide to Making Concrete Planters at Home
Making your first concrete planter is one of those genuinely satisfying DIY experiences that feels almost magical when it comes together. The process is simpler than most beginners expect, requires no specialized skills, and the results look professional even on a first attempt. The basic concept involves creating a mold using two nested containers — the outer one defines the exterior shape of your planter, and the inner one creates the hollow cavity where your plant will eventually sit.
For your first project, plastic containers work exceptionally well as molds. A large plastic bowl or bucket paired with a smaller one of a similar shape creates a classic round planter. Cardboard boxes lined with plastic wrap work for square or rectangular planters. Yogurt containers, takeout boxes, silicone baking molds, and even balloons have all been used successfully as concrete molds. The versatility of the molding process means your planter shapes are limited only by what containers you can find around your home or at a dollar store.
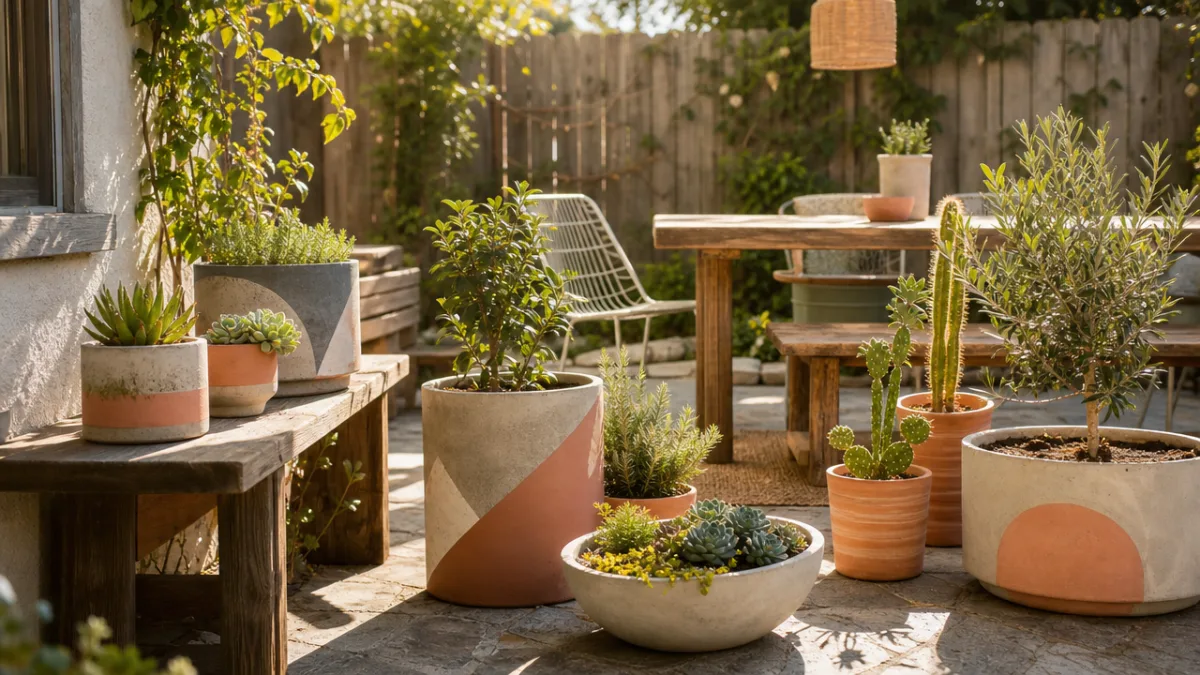
Once your planters have cured — typically 24 to 48 hours for a firm initial set, though a full cure takes about 28 days — the transformation when you remove the molds is genuinely exciting. The concrete surface can be left natural for an industrial look, sanded smooth for a refined finish, or painted and sealed for a pop of color. A coat of exterior masonry paint in a bold hue like terracotta orange, sage green, or matte black can make a simple concrete planter look like an expensive designer piece at a materials cost of just a few dollars.
The Basic Concrete Planter Recipe
Gather your materials before you begin so the process flows smoothly. You’ll need quick-setting concrete mix, water, your outer and inner molds, cooking spray or petroleum jelly for mold release, duct tape or rubber bands to hold the inner mold in place, and small stones or marbles to weigh down the inner mold while the concrete sets. Optional but recommended: rubber gloves, a dust mask for mixing, and a drop cloth to protect your work surface.
The mixing ratio is simple: follow the package instructions, which typically call for about one part water to two or three parts dry mix, adjusted to achieve a consistency resembling thick peanut butter. Too thin and the concrete won’t hold its shape; too thick and it won’t flow into the mold properly. Mix thoroughly in a disposable container or old bucket until no dry powder remains and the mixture is smooth and consistent throughout. Work relatively quickly once mixed, as concrete begins setting within 20 to 30 minutes.
Pour about an inch of the concrete mixture into the bottom of your outer mold, then press the inner mold down into the center, leaving equal gaps on all sides. Weight the inner mold with stones or fill it with water to keep it centered as you pour the remaining concrete into the gap between the two molds. Tap the outer mold gently against your work surface to release air bubbles, smooth the top with a small tool or your gloved finger, and set aside to cure. After 24 hours, carefully remove both molds and allow the planter to continue curing for several more days before planting.
Creative Painting and Finishing Techniques for a Designer Look
Once your planter is made, the finishing process is where you can truly transform a plain vessel into something that looks like it belongs in a high-end boutique. Paint is the most accessible finishing tool, and modern exterior-grade spray paints and masonry paints come in an enormous range of colors and finishes. Matte finishes are currently very popular for their sophisticated, understated look, while metallic paints in gold, copper, and bronze can add glamour and warmth to outdoor spaces without requiring expensive metallic pots.
Layering techniques can produce genuinely stunning effects. A dry-brush technique, where you load a stiff brush with a small amount of paint and drag it lightly across the surface, creates the appearance of aged stone or weathered paint without any artistic skill required. Sponging on two or three colors creates a marbled effect that closely resembles the kind of expensive stone planters sold at garden boutiques for hundreds of dollars. Color washing — applying a very diluted paint over a base coat and wiping it back with a cloth — adds depth and a handcrafted quality that factory-made planters simply cannot replicate.
Beyond paint, consider other finishing options that can elevate your planter’s appearance dramatically. Mosaic tile work using broken ceramics or glass tile creates eye-catching Mediterranean-inspired designs. Rope wrapping transforms a plain pot into a coastal or bohemian statement piece. Decoupage with waterproof outdoor Mod Podge allows you to apply fabric, paper, or pressed botanicals to the surface of a planter for a one-of-a-kind artistic finish. These techniques require minimal investment in materials but produce results that genuinely look expensive and professionally crafted.
Sealing and Weatherproofing Your Creations
Whatever finish you choose, sealing your DIY planter properly is essential for longevity, especially if it will live outdoors. An outdoor masonry sealer applied after painting will protect your work from UV fading, moisture penetration, and the freeze-thaw cycles that can cause surface damage over time. Most sealers are available in brush-on or spray formulas, dry clear, and add only a small additional cost to your project — typically $5 to $10 for a can that will seal multiple planters.
For planters that will hold water directly — rather than using a liner or drainage holes — sealing the interior is especially important. Food-safe epoxy resin or specialized pond paint creates a waterproof barrier inside the planter that prevents moisture from seeping through and causing efflorescence, the white mineral deposits that sometimes appear on the outside of unsealed concrete. Sealing also helps prevent the alkalinity of fresh concrete from harming plant roots, which is a real concern with newly made concrete planters that haven’t been allowed to cure and weather fully.
Displaying and Styling Your DIY Planters Like a Pro
Creating beautiful planters is only half the equation — knowing how to display them effectively can make the difference between a garden that looks casually pleasant and one that looks intentionally designed and magazine-worthy. Professional stylists and garden designers almost universally recommend grouping planters in odd numbers, typically threes and fives, as odd groupings feel more natural and organic than symmetrical pairs. Varying the heights within a grouping by using plant stands, upturned pots, or wooden crates as risers adds visual interest and dimension.
The rule of thriller, filler, and spiller is a classic planting formula that makes even the simplest DIY planter look professionally styled. The thriller is a tall, dramatic plant that commands attention and creates vertical interest — ornamental grasses, snake plants, or tall herbs like rosemary work beautifully. The filler is a mounding plant that fills in the middle zone and creates fullness — petunias, begonias, or compact succulents are popular choices. The spiller is a trailing plant that cascades over the edge of the planter and softens its lines — sweet potato vine, string of pearls, and creeping Jenny are excellent spillers.
Consider the overall color story of your outdoor or indoor space when choosing both planter finishes and plant combinations. A cohesive color palette — say, warm terracotta tones with deep greens and dusty pinks — creates a sense of intentional design throughout your space. This doesn’t mean everything needs to match exactly; rather, the colors should relate to one another in a way that feels harmonious and deliberate. Your DIY planters, because you control their colors and finishes exactly, give you an unparalleled ability to create this kind of cohesive, curated aesthetic throughout your home and garden.
Seasonal Updates and Refreshes
One of the greatest advantages of DIY planters over expensive luxury purchases is the freedom to update and change them as seasons, trends, or your tastes evolve. Because your planters cost so little to make, you can repaint them, replace the plants inside, or even make entirely new ones whenever you feel like refreshing your space. This seasonal flexibility is something that owners of expensive designer planters rarely enjoy, since repainting or altering a $200 pot feels psychologically difficult even when the style no longer suits the space.
Seasonal planting swaps are a wonderful way to keep your planter displays feeling fresh and current throughout the year. Spring calls for tulip bulbs, pansies, and trailing ivy; summer invites bold tropical plants, colorful annuals, and lush herbs; autumn is perfect for ornamental kale, mums, and miniature pumpkins tucked in alongside trailing plants; and winter arrangements of evergreen branches, berries, and pinecones can make outdoor planters look festive and intentional even in cold months when traditional plants aren’t thriving.
The financial freedom that comes with low-cost DIY planters ultimately changes your entire relationship with your garden and home décor. Rather than feeling locked into expensive purchases that you’re committed to using for years whether or not you still love them, you enter a more playful, experimental mindset where creativity is genuinely accessible. That mindset shift — from consumer to creator — is perhaps the most valuable thing the DIY planter movement offers, far beyond the considerable money it saves along the way.








What do you think?
It is nice to know your opinion. Leave a comment.