










She Turned Old Lampshades Into Glowing Cement Garden Sculptures ✨
The Magic of Upcycled Garden Art
There is something deeply satisfying about transforming an object destined for the landfill into something beautiful, functional, and enduring. When one creative gardener discovered she could use discarded lampshades as molds for cement garden sculptures, she stumbled onto a craft that has since captivated DIY enthusiasts around the world. The results are nothing short of breathtaking — organic, glowing forms that look as though they were sculpted by a professional artist, yet were made entirely at home with affordable materials and a little patience.
The concept is elegantly simple. Lampshades, with their graceful curves and varied silhouettes, create natural molds that give cement an almost floral or architectural quality. When the cement sets and the shade is removed, what remains is a hollow shell of stone-like material that can be used as a planter, a birdbath pedestal, a garden lantern base, or purely as a decorative accent. The variations in texture left by different fabric types — lace, burlap, woven rattan — press their patterns directly into the surface, creating sculptures that feel genuinely handcrafted and unique.
This project sits at the intersection of sustainability and artistry. By rescuing lampshades from thrift stores, garage sales, or one’s own attic, crafters are participating in the growing upcycling movement while producing genuinely stunning outdoor decor. The low cost of Portland cement and the near-zero cost of the molds mean an entire garden installation can be assembled for a fraction of what it would cost to purchase similar pieces from a boutique garden center. The appeal is universal — whether your garden is a cottage wildflower meadow or a sleek contemporary courtyard, cement lampshade sculptures can be shaped and finished to suit.
Gathering Your Materials and Choosing the Right Lampshades
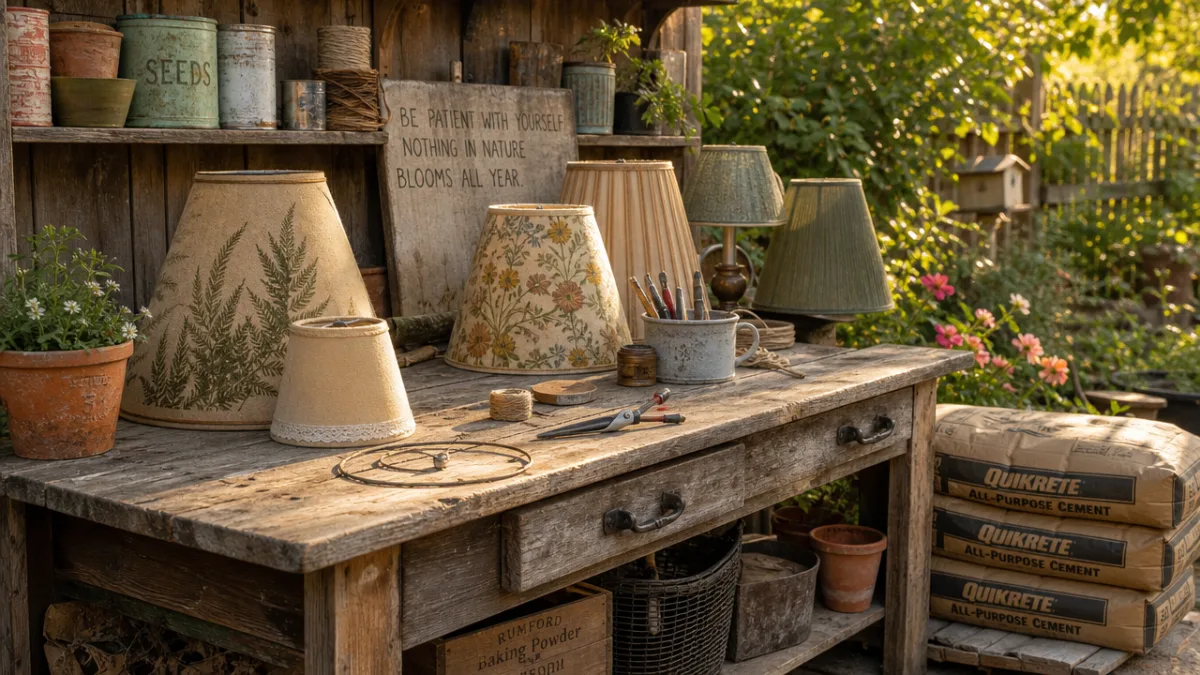
Before you mix a single spoonful of cement, the most important decision you will make is selecting the right lampshades. Not all shades work equally well, and understanding the differences will save you frustration and wasted materials. Fabric-covered shades with a wire or plastic frame are the most commonly used, because the fabric absorbs moisture from the cement mix, encouraging it to cure evenly while leaving a beautiful textured impression on the finished surface. Shades with loose open weaves — think burlap, lace, or loosely woven cotton — produce the most dramatic results, pressing their patterns deeply into the cement.
Rattan and wicker shades are particularly prized among experienced crafters. Their geometric patterns create sculptures that look almost like they were carved by hand, and the interlocking textures catch light and shadow in ways that change as the sun moves across the garden throughout the day. Drum shades produce wide, flat-topped forms ideal for use as birdbaths or shallow planters, while empire and bell-shaped shades create more sculptural, tapered forms reminiscent of oversized exotic flowers or toadstools. It is worth collecting a variety of shapes and sizes before you begin, since larger shades require significantly more cement and longer curing times.
Beyond lampshades, you will need a modest list of materials that are widely available at hardware and craft stores. Here is a checklist of everything required to get started:
- Portland cement or a pre-mixed hypertufa blend (cement, peat moss, and perlite)
- Fine sand for texture and strength
- Water in a bucket for mixing
- Rubber gloves and a dust mask for safety
- An old mixing container or wheelbarrow
- A stiff-bristled brush for applying cement to the shade
- Plastic sheeting or bin bags to keep the mold moist during curing
- Acrylic sealer to weatherproof the finished piece
- Optional: concrete pigment for color, glow-in-the-dark powder for night effects
The beauty of this supply list is how forgiving it is. Cement is inexpensive and available everywhere. Old mixing containers can be any plastic tub you no longer care about. The lampshades themselves, sourced from thrift stores, rarely cost more than a dollar or two each. Even the optional embellishments — glow powders, pigments, glass beads — are inexpensive and available online. The entire project, including multiple sculptures, can typically be completed for under thirty dollars, making this one of the most cost-effective garden DIY projects imaginable.
Step-by-Step: How to Create Your Cement Lampshade Sculpture
The process of creating a cement lampshade sculpture is methodical but not difficult, and most crafters find that their second and third attempts are dramatically better than their first as they develop an instinct for the right cement consistency and application technique. Begin by preparing your lampshade mold. If the shade has a fabric lining on the inside, you can leave it in place since it will simply become embedded in the cement. Place the shade upside down on a stable surface — a bucket turned on its side or a nest of crumpled newspaper works well — so that the wide opening faces upward and the shade sits at a comfortable working height.
Mix your cement to the consistency of thick peanut butter or a stiff hummus. It should hold its shape when pressed but not be so dry that it crumbles or so wet that it slides. This consistency is crucial — too wet and it will slump and fall off the shade before it cures; too dry and it won’t bond properly to the fabric and will crack during curing. Many experienced crafters recommend adding a small amount of acrylic fortifier to the mix in place of some of the water, as this significantly improves adhesion and reduces the likelihood of cracking on curved surfaces.
Apply the cement mixture to the outside of the upturned lampshade using your gloved hands or a stiff brush. Work in sections, pressing the cement firmly into the fabric so it makes full contact with the texture. The first coat should be relatively thin — about half an inch — and should cover the entire exterior of the shade. Pay particular attention to the rim and any structural wire elements, building up slightly more material at these stress points. Once the first coat is applied, cover the entire piece loosely with plastic sheeting and allow it to cure for at least twelve hours. This slow, moist curing is essential for strength.
After the first coat has set to a leather-hard stage — firm but not yet fully cured — apply a second coat of cement to build up the wall thickness to approximately one inch. This second coat is your opportunity to refine the shape, fill any gaps, and add decorative elements if desired. Pressed glass nuggets, tumbled sea glass, mosaic tiles, or even large decorative stones can all be embedded into this second coat before it cures. Once the second coat is applied, re-cover with plastic and allow the entire piece to cure slowly for at least 48 to 72 hours. Rushing this step is the most common cause of cracking and structural weakness.
When the cement is fully cured, carefully remove the lampshade mold. Fabric shades will peel away quite easily, often in satisfying strips that reveal the texture beneath. Wire frames can be bent and pulled out. Any remaining fabric can be left in place — it will rot away harmlessly over time — or it can be carefully cut away with scissors. Sand any sharp edges gently with coarse sandpaper, then seal the finished piece with an outdoor-rated acrylic sealer to protect it from frost, moisture penetration, and UV degradation. Your sculpture is now ready for the garden.
Creative Variations and Finishing Techniques
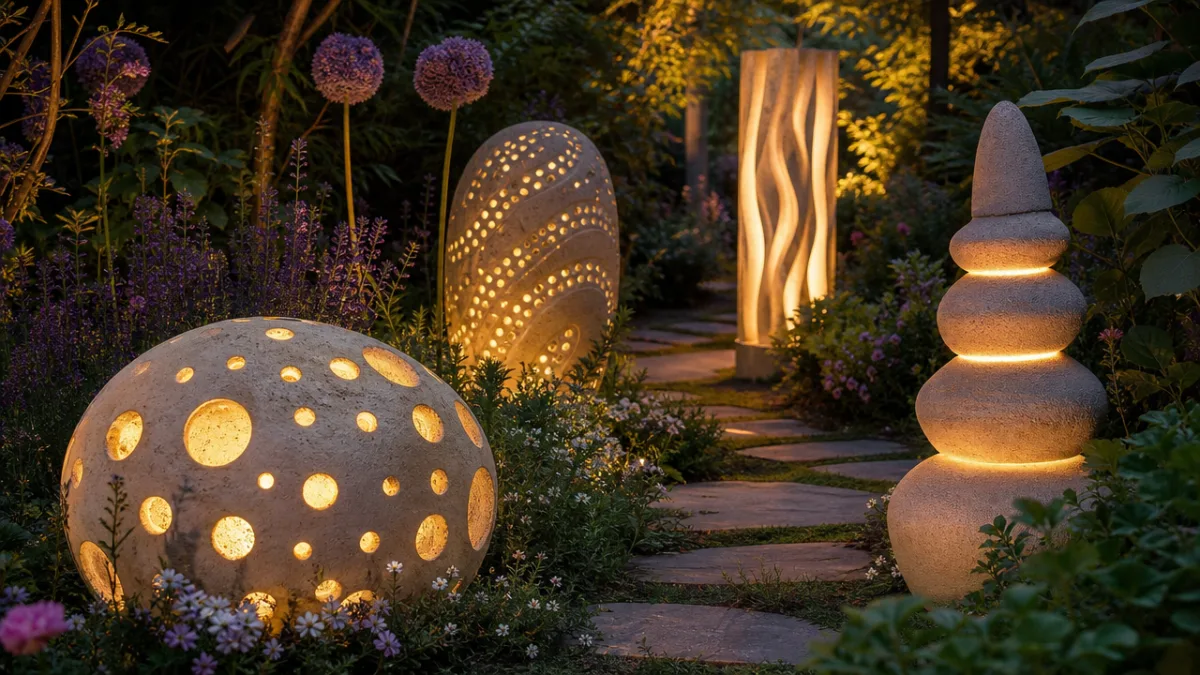
Once you have mastered the basic technique, the creative possibilities open up exponentially. One of the most popular variations is the glowing garden sculpture, achieved by adding photoluminescent (glow-in-the-dark) powder to the final cement coat or to a paint applied after curing. These powders charge during the day by absorbing sunlight and then emit a soft, ethereal glow throughout the night, creating a garden that is as magical after dark as it is during daylight hours. The effect is most dramatic with shades that have open weave patterns, where the light glows through the holes and gaps in the cement surface like a stone lantern.
Color is another dimension that transforms what would otherwise be gray concrete forms into genuine artistic statements. Concrete pigments are available in a wide range of earth tones — terracotta, ochre, slate blue, forest green, charcoal — and can be mixed directly into the cement before application. Alternatively, diluted acrylic paints can be applied to the cured surface and allowed to soak in, creating a stained effect that feels organic rather than painted-on. Many crafters use multiple pigments applied in layers, wiping back the outer layers to reveal the color beneath, a technique that creates astonishing depth and variation on a single sculpture.
Texture embellishment offers yet another avenue for personalization. Consider pressing these elements into the wet cement for stunning results:
- Fern fronds and large leaves, which leave delicate botanical impressions in the surface before decomposing during curing
- Rubber stamps pressed into the wet surface to create repeated motifs or lettering
- Shells, pebbles, and tumbled glass embedded while cement is still pliable
- Strips of copper or brass mesh pressed into the outer surface for a metallic accent
- Mosaic tile pieces arranged in patterns around the rim or across the top surface
Larger installations can be created by grouping multiple lampshade sculptures of different sizes together as a cohesive landscape feature. A cluster of three or five sculptures in graduated sizes, planted at varying heights using buried pedestals or rocks, creates a focal point that rivals anything available from a garden center. Some crafters even wire small LED fairy lights inside their hollow cement shells, running the cord discreetly through the garden to a nearby outlet, creating permanent outdoor lanterns that glow with warm light on summer evenings. The combination of heavy, ancient-feeling stone and delicate electric light is irresistibly atmospheric.
Using Your Sculptures in the Garden: Design and Placement Ideas
A cement lampshade sculpture is remarkably versatile, and thinking carefully about placement before you set it in the ground will help you get the most visual impact from your work. In cottage-style gardens, a group of smaller bell-shaped sculptures nestled among hostas, ferns, or astilbes creates a sense of discovered artistry — as though the sculptures grew naturally from the garden floor. The gray tones of uncolored cement complement the blue-greens and silvers of shade-loving foliage beautifully, while glow-in-the-dark finishes add a touch of whimsy that feels right at home in an informal, romantic garden style.
In contemporary or minimalist gardens, a single large sculpture used as a statement piece is often more effective than a cluster. A wide drum-shade form, finished in charcoal or slate-blue cement and placed at the end of a clean gravel path or beside an architectural plant like a phormium or ornamental grass, speaks the language of considered, intentional design. The handmade quality of the cement surface — with its subtle variations in texture and tone — provides exactly the kind of organic warmth that prevents modern garden spaces from feeling cold or sterile.
Functional uses should not be overlooked. The hollow forms created by lampshade molds make excellent planters for succulents, herbs, or alpine plants. The porous nature of cement allows moisture to escape gradually, creating excellent drainage conditions for plants that dislike wet feet. Drill one or two drainage holes in the bottom of the form before the cement fully cures, and your sculpture doubles as a planter that will look more beautiful every year as it weathers and develops a natural patina. Bird baths made from wide, shallow shade forms raised on a simple cement column are another highly practical application.
Pathway edging is a lesser-known but highly effective use for smaller lampshade sculptures. A series of small, rounded forms spaced evenly along either side of a garden path creates a defined edge that is far more interesting than conventional edging materials, while the varied textures of different shade fabrics ensure that no two pieces are identical. This approach works especially well in kitchen gardens and vegetable plots, where the sculptures can be used to mark the boundaries between beds while adding aesthetic interest to what can otherwise be a purely utilitarian space.
Troubleshooting, Maintenance, and Long-Term Care
Like any craft, cement lampshade sculpture comes with a learning curve and a handful of common pitfalls that are easily avoided once you know to watch for them. The most frequent problem beginners encounter is cracking during or after curing, which is almost always the result of the cement drying too quickly. Cement cures through a chemical process called hydration, which requires moisture — paradoxically, the wetter you keep your cement during the first 48 hours, the stronger the final result will be. Always cover your work with plastic sheeting, especially in warm or windy weather, and mist the surface lightly with water if the plastic is not providing adequate humidity.
Structural weakness and crumbling edges usually indicate that the cement mix was too dry when applied, or that the wall thickness was insufficient in certain areas. A minimum wall thickness of three-quarters of an inch is recommended for pieces intended to remain outdoors year-round, and any area that includes wire frame elements should be built up to at least an inch around the metal to prevent frost-driven expansion from cracking the cement along the frame lines. If a finished piece does develop minor cracks, they can be repaired easily with a small amount of cement mixed to a slightly wetter consistency than normal and worked into the crack with a gloved finger before resealing.
Long-term maintenance of cement garden sculptures is refreshingly minimal. Once a year, check the sealant coat and reapply if the surface feels rough or porous to the touch. Remove any moss or algae growth with a stiff brush and a diluted bleach solution if you prefer a clean look, or simply leave it in place if you appreciate the aged, weathered aesthetic — which many gardeners find more appealing than pristine gray cement. In areas that experience hard frosts, bringing smaller sculptures indoors for the winter will significantly extend their lifespan, though properly sealed pieces can tolerate frost well for many years before showing significant wear.
The joy of this craft is not only in the finished objects but in the ongoing creativity it invites. Each new lampshade is a new experiment, each mix of pigments an opportunity to discover unexpected color combinations, each pressing of a new texture a small act of artistic exploration. Gardeners who begin with a single test piece frequently find themselves scouring every thrift store and garage sale for unusual shades, experimenting with hypertufa blends for lighter weight, and developing their own signature techniques and finishes. What begins as a simple Pinterest project often becomes a long-term creative practice that transforms both the garden and the gardener’s relationship to making things by hand.
This is ultimately a project about reclamation — of discarded objects, of neglected outdoor spaces, and of the deeply human pleasure of making something lasting and beautiful from almost nothing. A lampshade that would have spent decades in a landfill instead becomes a glowing stone sculpture that marks the changing seasons, shelters garden birds, cradles a favorite succulent, or simply stands as a quiet testimony to what human hands and imagination can do with cement, fabric, and a little patience. That transformation, humble as it is, feels like a kind of magic.








What do you think?
It is nice to know your opinion. Leave a comment.