










Make Magic: 12 DIY Plastic Bottle Mushroom Crafts
The Charm of Upcycling: Why Plastic Bottles Make Perfect Mushroom Crafts
There is something genuinely magical about transforming an ordinary plastic bottle destined for a landfill into a whimsical mushroom decoration that brightens up your home or garden. The upcycling movement has grown enormously in recent years, and for good reason — it combines creativity with environmental responsibility in a way that feels both meaningful and fun. Plastic bottle mushroom crafts sit at a wonderful intersection of sustainability and artistry, offering a satisfying outlet for creative energy while reducing waste at the same time.
Plastic bottles come in a remarkable variety of shapes and sizes, making them surprisingly versatile crafting materials. The rounded bottom of a soda bottle can become a perfect mushroom cap, while the neck and body can be repurposed as the stem. Water bottles, juice containers, and even laundry detergent bottles each lend themselves to different mushroom styles and sizes, from tiny fairy-garden toadstools to large garden statement pieces that stand proudly among your flower beds and planters.
Beyond their shape versatility, plastic bottles are easy to cut, paint, decorate, and combine with other household materials. You do not need expensive tools or professional crafting skills to get started. A pair of sturdy scissors or a craft knife, some acrylic paint, and a little imagination are often all you need to begin your mushroom-making journey. This accessibility makes plastic bottle mushroom crafts a wonderful activity for adults, teens, and children alike, bringing families together over a shared creative project with a tangible, delightful outcome.
Essential Supplies and Tools You Will Need
Before diving into your first plastic bottle mushroom craft, it is worth taking stock of the materials and tools that will make the process smoother and more enjoyable. Having the right supplies on hand from the beginning prevents frustrating mid-project interruptions and helps ensure a polished finished result. Fortunately, most of what you need is either already in your home or inexpensive to purchase at any general craft or dollar store, keeping the overall cost of these projects remarkably low.
The core materials for most plastic bottle mushroom crafts include clean, dry plastic bottles in assorted sizes, acrylic craft paints in classic mushroom colors such as red, white, brown, and orange, and a selection of paintbrushes ranging from wide flat brushes for base coating to fine-tipped brushes for adding details like spots and texture lines. You will also want a strong, waterproof adhesive or hot glue gun for assembling components, and sandpaper or a flame tool for smoothing any rough cut edges on your plastic pieces.
For finishing and display, consider gathering the following additional supplies:
- Clear acrylic sealer spray to protect painted surfaces, especially for outdoor pieces
- Floral wire or wooden dowels for adding stability to stems
- Air-dry clay or foam for sculpting additional details like gills or textured caps
- Craft moss, pebbles, or decorative stones for base displays
- Twine, ribbon, or wire for hanging ornament versions
- Glitter, rhinestones, or sequins for extra sparkle on fairy-tale designs
Workspace preparation is just as important as gathering your materials. Cover your work surface with newspaper or a craft mat to protect it from paint and adhesive. Work in a well-ventilated area, particularly when using spray sealers or working with a heat tool to shape plastic. Wearing disposable gloves keeps your hands clean during painting sessions and makes the whole process feel more professional and manageable, even for beginners who are just getting started with repurposing crafts.
Classic Red and White Toadstool: A Step-by-Step Guide
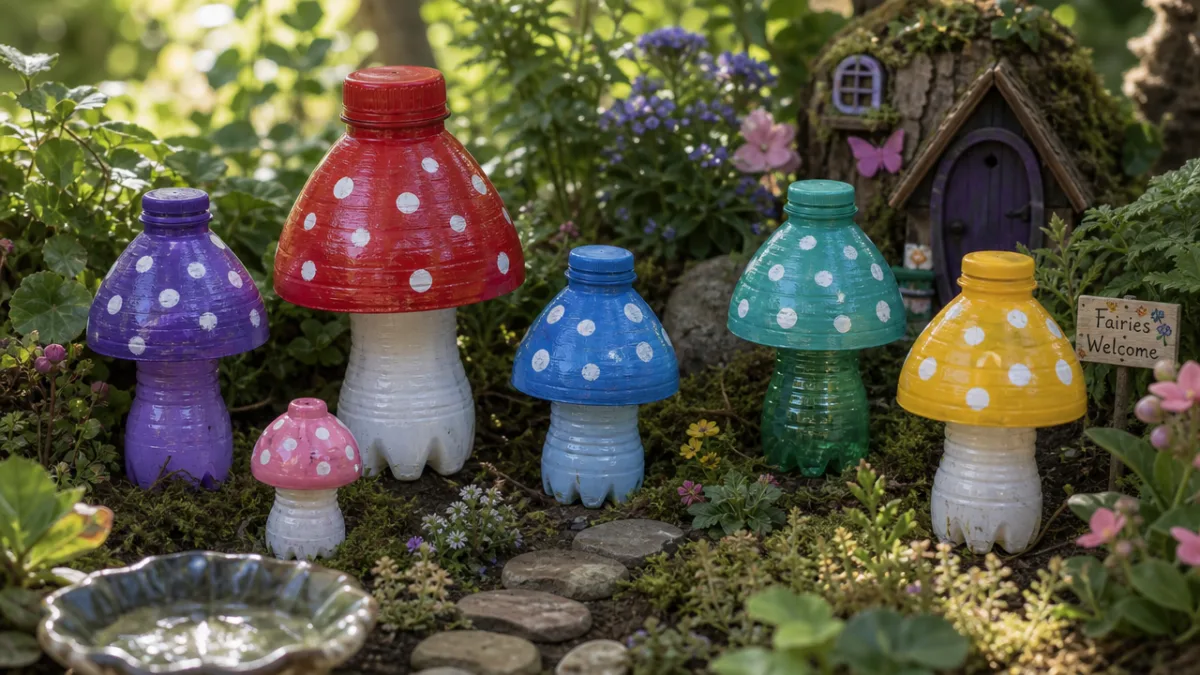
The classic red-and-white spotted toadstool is perhaps the most iconic mushroom design in the entire crafting world, instantly evoking images of fairy tales, enchanted forests, and magical gardens. Recreating this beloved look with plastic bottles is surprisingly straightforward, and the resulting decoration is charming enough to display with genuine pride. This project works particularly well with a standard 2-liter soda bottle, whose rounded base forms an almost perfectly shaped mushroom cap with minimal cutting or reshaping required.
Begin by carefully cutting the bottle approximately one-third of the way up from the base. This bottom portion will become your mushroom cap. Sand or smooth any sharp edges along the cut line. Next, take the upper portion of the bottle and trim it further to create a cylinder-like stem shape, removing the cap and cutting the neck portion away cleanly. If you prefer a more tapered stem, gently warm the plastic with a heat gun or near a candle flame to encourage slight reshaping — always exercise caution when using heat near plastic materials and keep good ventilation nearby throughout this step.
Once your cap and stem pieces are prepared, apply a base coat of bright red acrylic paint to the outside of the cap dome and a creamy white or light tan color to the interior-facing underside. Paint the stem white or off-white. After the base coats dry completely — usually within thirty to sixty minutes depending on the thickness of application — add the signature white polka dots to the top of the red cap using a round brush or even the eraser end of a pencil dipped in white paint. Seal everything with a waterproof clear coat before assembling with hot glue and displaying your finished toadstool.
Beyond the Basics: 9 More Creative Mushroom Craft Ideas
Once you have mastered the classic toadstool, the world of plastic bottle mushroom crafts opens up into an exciting range of styles, scales, and applications. From whimsical fairy garden accessories to functional home décor items like planters and wind chimes, creative crafters have found ingenious ways to push this simple concept in a dozen different directions. Exploring these variations keeps the hobby fresh and exciting, giving you a reason to save every plastic bottle that passes through your household rather than tossing it into the recycling bin.
Here are nine more creative plastic bottle mushroom project ideas to inspire your crafting sessions:
- Mushroom Fairy Garden Cluster: Use bottles of varying sizes to create a family of mushrooms grouped together in a shallow planter filled with moss and miniature figurines, building a complete enchanted scene.
- Glow-in-the-Dark Garden Mushrooms: Paint your mushrooms with phosphorescent paint for a magical nighttime garden display that glows softly after absorbing daylight throughout the day.
- Mushroom Wind Chimes: Thread small bottle mushrooms onto lengths of fishing line along with beads, shells, and bells to create a charming wind chime for a porch or garden fence.
- Mushroom Planter: Cut a large bottle to create a mushroom-shaped container and fill it with soil and small succulent plants, blending nature and craft in an eye-catching way.
- Hanging Ornaments: Scale the design down using small water bottles to create lightweight ornaments for a Christmas tree, holiday wreath, or year-round indoor mobile.
- Mushroom Lamp Shade: Cluster multiple bottle mushroom caps around a small string of LED fairy lights to diffuse the glow softly and create a cozy ambient lighting effect.
- Painted Mushroom Wall Art: Mount a series of flat-cut bottle caps painted with intricate designs onto a wooden board to create a framed mushroom art panel for indoor display.
- Mushroom Door Wreath: Attach multiple small bottle mushrooms to a wire or foam wreath base along with faux foliage, berries, and ribbon for a seasonal front door decoration.
- Mushroom Pencil or Brush Holder: Use a wide-base bottle mushroom shape as a functional desk organizer, painting it in earthy tones to complement a home office or craft room aesthetic.
Each of these project variations offers its own set of techniques and challenges that keep the crafting process engaging over time. Whether you prefer purely decorative pieces or functional objects that serve a daily purpose, there is a plastic bottle mushroom project that fits your lifestyle and creative style. The key is to approach each new idea with an open mind and a willingness to experiment, knowing that even imperfect attempts often yield surprisingly beautiful and usable results that bring a smile to everyone who sees them.
Painting Techniques and Finishing Tips for Professional-Looking Results
The difference between a plastic bottle mushroom craft that looks charming and polished versus one that looks rough and unfinished often comes down to painting technique and finishing touches. Many beginners underestimate just how much the application method matters when working on plastic surfaces, which are notoriously slippery and resistant to paint adhesion if not properly prepared. Taking the time to prime your surface and apply paint in thin, even layers will dramatically improve the final appearance of every project you undertake.
Start by lightly sanding the exterior of your plastic bottle with fine-grit sandpaper to create a slightly rough texture that helps paint grip the surface more effectively. Wipe away any dust with a damp cloth and allow it to dry fully. Apply a primer coat — either a spray primer designed for plastics or a brush-on gesso — before your base color. This foundational step prevents peeling and ensures your acrylic paint goes on smoothly and evenly. Thin layers applied with patience always yield better results than thick, globby coats that take forever to dry and often crack or peel over time.
For adding realistic texture and depth to your mushroom designs, consider these professional-level painting techniques:
- Dry brushing: Load a brush with a small amount of lighter paint, wipe most of it off on a paper towel, and lightly drag it across the surface to create a highlighted, textured effect that mimics natural mushroom surfaces beautifully.
- Wet blending: Apply two colors side by side while both are still wet and blend them together at the meeting point for smooth, gradient transitions that give caps and stems a dimensional, organic appearance.
- Stippling: Dab paint on with a sponge or stiff brush to create an irregular, spotty texture that resembles the grainy surface of real woodland mushrooms with impressive authenticity.
- Ink washing: Dilute dark paint or ink with water and brush it over a lighter base coat, letting it settle into recesses and seams to create natural-looking shadow and depth.
Once your painting is complete and fully dry, finishing is the step that elevates a good craft to a great one. Apply two or three coats of a clear acrylic sealer, allowing each coat to dry between applications. For outdoor pieces, choose a sealer specifically rated for exterior use and UV resistance to prevent fading and weathering. A matte finish gives a natural, earthy look well-suited to garden displays, while a gloss finish adds a pop of vibrancy perfect for indoor fairy-tale themed decorations or holiday ornaments that benefit from a little extra shine and visual impact.
Displaying Your Creations: Indoor and Outdoor Ideas
Creating beautiful plastic bottle mushroom crafts is only half the joy — the other half comes from finding the perfect places to display them where they can be admired and appreciated on a daily basis. Whether your decorating style leans toward cozy cottagecore, modern eclectic, or naturalistic garden aesthetic, there are countless ways to incorporate your handmade mushrooms into your living spaces and outdoor environments. The key is to think about scale, grouping, and context so that each piece looks intentional and thoughtfully placed rather than simply scattered around.
Indoors, plastic bottle mushrooms work beautifully as part of styled shelf vignettes alongside books, candles, potted plants, and natural objects like pinecones and stones. A cluster of different-sized mushrooms grouped together on a windowsill catches the light beautifully and creates a focal point that draws the eye. They also work wonderfully as part of a child’s bedroom or playroom decor, bringing a sense of storybook magic into an everyday space. Hanging mushroom ornaments from a curtain rod or ceiling hook adds vertical interest and movement to a room in a way that feels both playful and sophisticated.
Outdoors, your mushroom crafts can transform a garden, balcony, or patio into something truly enchanting with minimal effort and expense. Consider these placement ideas for maximum visual impact in exterior settings:
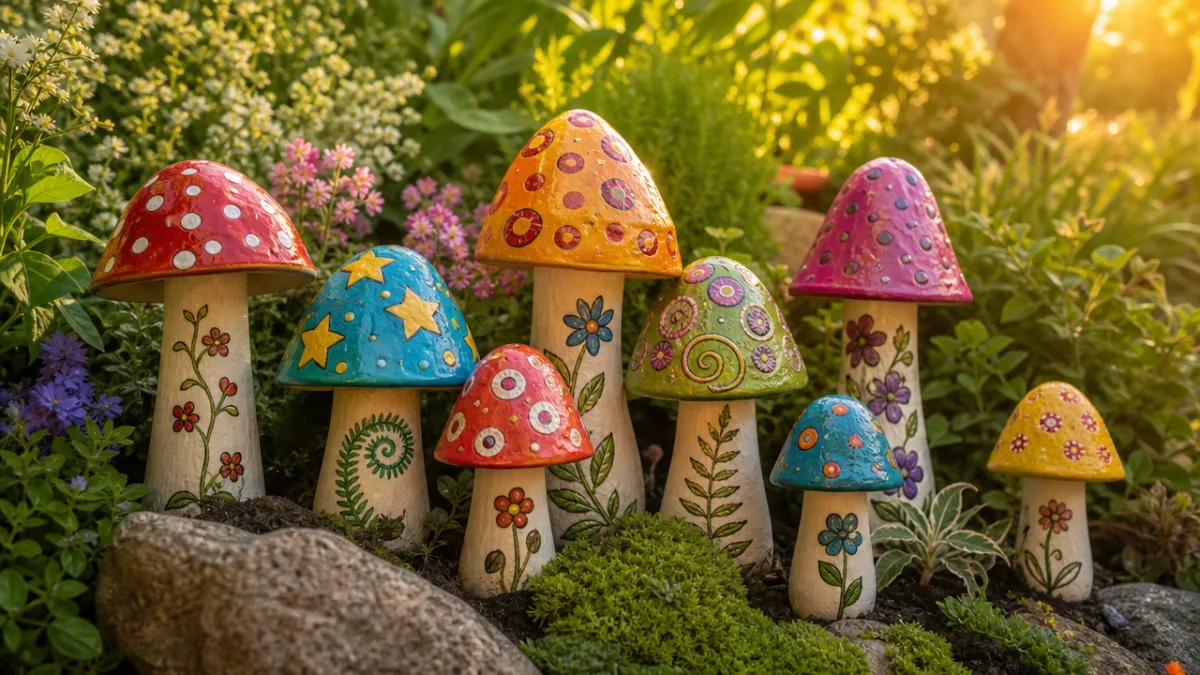
- Nestle clusters of mushrooms among ground covers, hostas, or ferns in a shaded garden bed to create a naturalistic fairy-ring effect that surprises and delights garden visitors.
- Line a garden path with evenly spaced mushrooms of graduated sizes to guide visitors through the landscape in a whimsical, storybook-inspired way.
- Place a single large statement mushroom at the base of a tree or among exposed roots to enhance the natural woodland atmosphere of your garden.
- Hang mushroom wind chimes from a pergola, fence post, or tree branch where they will catch the breeze and add gentle movement and soft sound to the garden soundscape.
- Group mushroom planters together on a balcony or patio to create a themed container garden that is both decorative and functional throughout the growing season.
The beauty of handmade decorations is that they carry a personal energy and warmth that mass-produced items simply cannot replicate. Every plastic bottle mushroom craft you create and display tells a story of creativity, resourcefulness, and care for the environment. Sharing these pieces as gifts with friends and family, or even selling them at local craft markets, spreads that positive energy further and inspires others to look at everyday objects like plastic bottles with fresh, imaginative eyes full of possibility and creative potential.
Teaching Kids and Community Crafting: Making Mushroom Crafts a Shared Experience
One of the most rewarding aspects of plastic bottle mushroom crafting is how naturally it lends itself to group participation. Whether you are a parent looking for a rainy-day activity, a teacher planning an art and environmental education lesson, or a community organizer seeking an accessible workshop project, these mushroom crafts offer something for participants of almost every age and skill level. The combination of hands-on making, colorful painting, and satisfying finished results makes for an engaging session that holds attention and produces genuine pride in participants.
For younger children, simplify the process by pre-cutting the bottle pieces and having adult supervisors handle any steps that involve heat tools or sharp implements. Children as young as three or four can participate meaningfully in the painting and decorating stages, choosing their own colors and adding stickers, glitter, or handprints to personalize their mushrooms in ways that feel completely their own. This sense of ownership and self-expression is enormously valuable for developing confidence and creative identity in young people, making mushroom crafting a genuinely enriching activity beyond its decorative outcome.
In school or community workshop settings, pairing the crafting activity with a brief discussion about plastic pollution, upcycling, and the importance of reducing landfill waste adds meaningful educational weight to the creative fun. When participants understand that the bottle in their hands might otherwise have spent five hundred years decomposing in a landfill, the simple act of transforming it into something beautiful takes on a powerful new significance. This environmental awareness component makes plastic bottle mushroom crafts an excellent fit for Earth Day events, school science fairs, community center workshops, and sustainability-themed festivals where inspiration and education go hand in hand.
Documenting and sharing your group crafting sessions through social media, community newsletters, or local gallery displays amplifies the impact of each project and invites others to join the movement. Photographs of children proudly holding their mushroom creations, or displays of a hundred bottle mushrooms arranged together in an installation, have a viral quality that spreads crafting inspiration far beyond the original workshop space. Building a community around shared creative and environmental values through something as accessible and joyful as plastic bottle mushroom crafts is a genuinely powerful reminder of how art, sustainability, and human connection can come together in the most delightful and unexpected ways.








What do you think?
It is nice to know your opinion. Leave a comment.