










How to Build a Garden Bed on Concrete or Other Hard Surfaces
Why Build a Garden Bed on Concrete?
You don’t need a big backyard or a patch of open dirt to have a thriving garden. Plenty of homeowners, apartment dwellers, and city gardeners find themselves wanting to grow vegetables, herbs, or flowers in spaces that are mostly concrete — patios, driveways, rooftop terraces, paved courtyards. The good news is that raised garden beds built right on hard surfaces have become a really practical solution, giving you flexibility and accessibility without having to rip up any paving or dig into the ground at all.
And honestly, gardening on concrete comes with some real perks that in-ground gardeners don’t always get to enjoy. You have complete control over your soil from day one — no fighting with clay, rocky ground, or soil that might be contaminated. Hard surfaces also absorb and radiate heat, which can warm your raised bed from below and actually extend your growing season a bit on both ends of the year.
Drainage is another area where concrete surprises people. When you design your bed thoughtfully, you get to decide exactly how water moves through and out of the system. In-ground beds can pool water in low spots or drain unevenly through compacted layers — a raised bed on concrete sidesteps all of that. It takes a little upfront planning, but the level of control you get is something most traditional gardeners never experience.
Choosing the Right Container or Frame
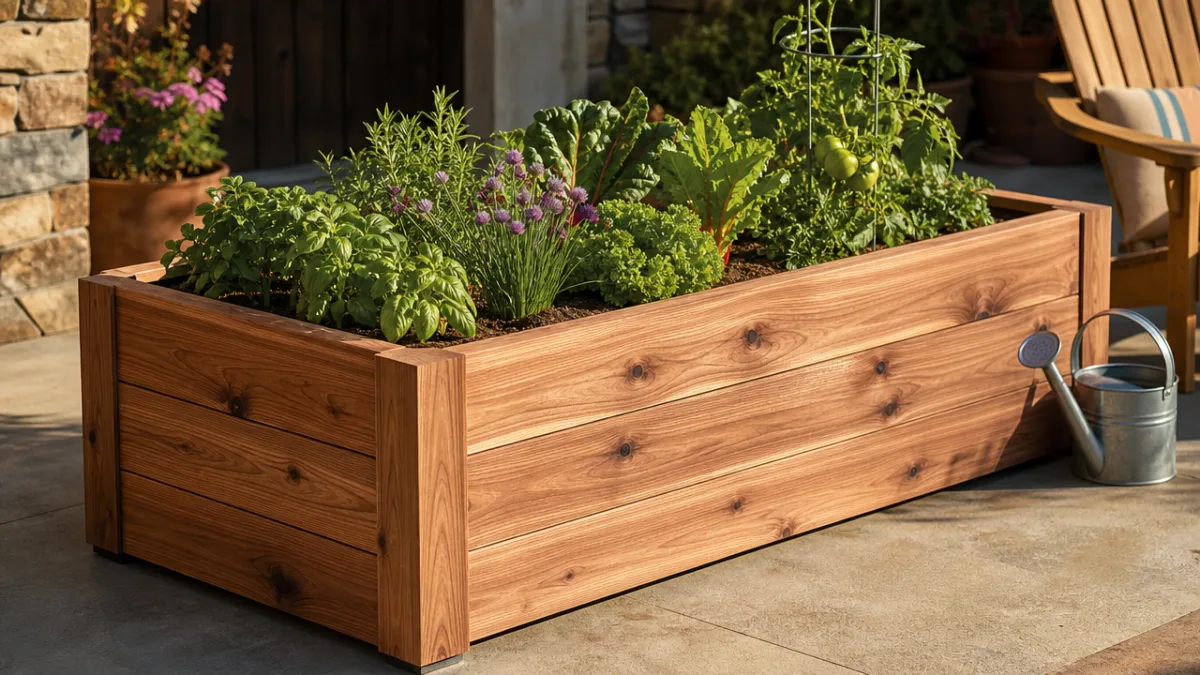
The structure holding everything together is really where this whole project starts. There are quite a few materials to choose from, and the right one depends on your budget, the look you’re going for, how much weight your surface can handle, and whether you want something permanent or easy to move around. The most popular options are untreated cedar or redwood lumber, galvanized metal raised bed kits, composite lumber made from recycled materials, and large fabric grow bags designed for exactly this purpose.
Cedar and redwood have been favorites among raised bed builders for a long time, and for good reasons. Both contain natural oils that fight off rot, fungal growth, and insects without any chemical preservatives that might leach into your soil — and eventually your food. A well-built cedar raised bed can realistically last ten to twenty years, so the upfront cost is a solid long-term investment. These woods are also relatively light compared to stone or brick, which really matters if you’re working on a rooftop or elevated deck with weight limits to consider.
Galvanized steel kits have gotten hugely popular in recent years, and it’s easy to see why. They look clean and modern, they don’t warp or crack through freeze-thaw cycles, and they’re usually designed to snap or bolt together without any special tools. If you’re worried about the metal getting too hot and cooking your soil in summer, just line the interior walls with cardboard or burlap before filling — it acts as a simple insulating buffer. And if you want maximum flexibility, large fabric grow bags (we’re talking fifty gallons or more) can sit right on concrete and be moved from spot to spot as the seasons change.
Essential Drainage Solutions for Hard Surfaces
If there’s one thing you absolutely have to get right when building a garden bed on concrete, it’s drainage. Unlike a regular in-ground bed where excess water percolates down through layers of earth and naturally disperses, a raised bed on concrete has nowhere for water to go unless you build in an escape route. Let that water sit and you’ll end up with root rot, anaerobic soil, fungal disease, and eventually dead plants — a hard lesson to learn after all that work.
The simplest fix is to elevate your raised bed frame slightly off the concrete using spacers, feet, or even a layer of gravel underneath. Just a half-inch gap between the bottom of your frame and the concrete surface is enough to let water flow freely out from the sides. A lot of commercial raised bed kits already include built-in feet for this reason. If you’re building your own wooden frame, screw some small blocks of pressure-treated lumber or plastic furniture feet to the exterior bottom corners before you set it in place — quick, cheap, and effective.
Inside the bed, you’ll also want to build a dedicated drainage layer at the very bottom before any growing medium goes in. Four to six inches of coarse gravel, broken pottery shards, or perlite lets water collect temporarily and then flow outward before it ever reaches your plant roots. On top of that layer, lay down a sheet of landscape fabric or some cardboard to keep your soil from sifting down and eventually clogging up the drainage material below. It’s a small extra step, but it makes a noticeable difference in how well your bed performs over the long run.
Selecting and Preparing the Right Soil Mix
One of the best things about building a raised bed on concrete is getting to choose exactly what goes into it. This is something in-ground gardeners rarely have the luxury of doing, and it’s worth taking seriously. The soil mix you put in will directly affect how well your plants root, how water and nutrients move through the bed, and how productive your garden turns out to be season after season.
The go-to formula that experienced raised bed gardeners love is commonly called Mel’s Mix, which comes from the square-foot gardening method. It’s equal thirds of blended compost, coarse vermiculite, and either peat moss or coco coir. The result is incredibly light and loose — it drains well but still holds enough moisture, and the compost gives your plants a solid nutritional foundation. The vermiculite keeps everything airy and prevents the compaction that tends to develop in heavier mixes over time. For a concrete surface where total weight can be a concern, this blend is a much better choice than heavy garden soil or topsoil.
If you need a simpler or more budget-friendly option, especially for a very large bed, a mix of sixty percent quality topsoil, thirty percent compost, and ten percent coarse perlite will do a great job for most vegetables and flowers. Just don’t use plain bagged topsoil straight out of the bag — it compacts quickly, drains poorly, and often brings along weed seeds you definitely didn’t invite. Whatever you go with, fill the bed to about two inches below the top edge so there’s room for a layer of mulch, which helps lock in moisture, regulate temperature, and keep weeds from getting comfortable.
To figure out how much soil you need, multiply the interior length, width, and depth of your bed in feet to get cubic footage. Most bagged potting mix or raised bed soil comes in two-cubic-foot bags, so divide your total by two to get your bag count. For bigger beds, it’s almost always worth ordering in bulk by the cubic yard from a local landscape supply company — it’s significantly cheaper than buying individual bags, and many suppliers will deliver right to your driveway or patio.

Watering Strategies for Raised Beds on Concrete
Raised beds on concrete dry out faster than in-ground beds — that’s just the reality, and it gets especially noticeable during a hot summer. Because the bed is surrounded by open air on all sides rather than insulated by surrounding earth, moisture evaporates from the walls of the frame as well as from the soil surface on top. Once you understand this, you can plan your watering approach accordingly and avoid the frustration of wilting plants that could have been prevented.
A simple drip irrigation system is honestly one of the best investments you can make for a concrete garden bed. Drip systems deliver water slowly and directly to the root zone, cutting down on the surface evaporation and leaf wetness that invite fungal disease. A basic timer-controlled drip kit is available at most garden centers for a pretty modest price, and you don’t need any plumbing experience to set one up. Set it to run in the early morning when evaporation rates are lowest, and adjust the frequency and duration as temperatures shift through the season. Your plants will noticeably respond to the consistency.
If you’d rather water by hand, building a reliable daily routine is key. During warm weather, check the moisture level by poking your finger two inches into the soil near the center of the bed — if it feels dry down there, water thoroughly until you see moisture starting to escape from the base. Laying down two to three inches of organic mulch like straw, shredded bark, or wood chips on top of the soil makes a huge difference in how often you need to water. It slows evaporation and keeps roots cooler on hot afternoons. Experienced raised bed gardeners treat mulching as non-negotiable, and once you try it you’ll understand why.
Best Plants for Concrete Surface Garden Beds
A well-built raised bed on concrete can technically grow just about anything you’d plant in a traditional garden, but some plants really shine in this kind of setup and will reward you far more readily than others. Shallow-rooted crops are a natural fit since they’re perfectly happy in the contained depth of a typical raised bed, which usually runs somewhere between eight and twenty-four inches. Matching your plant choices to your setup from the start makes for a much more enjoyable and productive first season.
Vegetables that do especially well in raised beds on concrete include the following categories and varieties worth putting on your planting list:
- Leafy greens: Lettuce, spinach, kale, Swiss chard, and arugula grow fast in shallow beds and keep producing when you harvest with cut-and-come-again techniques, stretching your yield across many weeks.
- Herbs: Basil, parsley, cilantro, chives, thyme, and oregano are compact, productive, and absolutely love the warm, well-drained conditions that a raised bed near concrete naturally creates.
- Root vegetables: Radishes, beets, and shorter carrot varieties like Chantenay or Danvers do great in beds with at least twelve inches of depth and loose, well-aerated soil.
- Fruiting vegetables: Tomatoes, peppers, cucumbers, and bush-type summer squash can all thrive in larger, deeper raised beds — just make sure you have appropriate support structures for anything that climbs or gets heavy with fruit.
- Flowers: Nasturtiums, marigolds, zinnias, and calendula look beautiful growing alongside vegetables, and they pull double duty by attracting pollinators and naturally deterring common pests.
Deep-rooted plants like full-size pumpkins, sprawling winter squash, or tap-rooted crops like parsnips are a bit trickier in a contained raised bed — not impossible, but they take more work. If you’re set on growing them, aim for at least eighteen to twenty-four inches of bed depth and be ready to water consistently, since these plants can get stressed when their roots hit concrete and are forced to spread sideways instead of down. Many seasoned raised bed gardeners find it’s easier to focus on crops that naturally thrive in contained conditions rather than pushing against what a hard-surface setup can realistically offer.

Maintenance Tips for Long-Term Success
Getting the bed built is just the beginning. The gardening relationship you build with this space over time is really where it gets rewarding — but a raised bed on concrete does depend on you in ways that an in-ground plot doesn’t. Because it’s a closed system, it can’t self-correct or replenish itself the way natural soil can. That means staying on top of nutrients, soil health, and small problems before they become big ones is genuinely important.
At the end of each growing season, refresh your soil by spreading a generous layer of compost across the whole surface of the bed. This top-dressing feeds the beneficial microbial life in your growing medium, replaces nutrients that last season’s crops used up, and slowly improves the soil’s structure and water-holding ability over the years. Many gardeners add three to four inches of finished compost each fall, let it sit through winter, then gently work it into the top few inches come early spring. It’s a simple habit that compounds noticeably over time — your third-year bed will outperform your first-year bed by a wide margin.
Keep a regular eye on your raised bed for signs of pests, disease, and wear on the frame itself. Wooden frames are worth inspecting once a year for rot, warping, or joints that are starting to pull apart — especially at the corners, where boards meet and moisture tends to linger. Tighten or swap out any rusting hardware, and consider applying a food-safe wood sealant to the exterior every few years to help cedar or redwood go the distance. Also make sure the drainage gap at the base of the bed stays clear — soil, debris, and moss can gradually block it over time, and a clogged drainage exit is the last thing you want at the root zone.
Crop rotation matters even in a small raised bed. Dividing your space into quadrants and moving your plant families to a different quadrant each year meaningfully reduces disease pressure and pest buildup in the soil. And if you don’t already keep a garden journal, now’s a great time to start — jot down what you planted where each season, what thrived, what struggled, and what you’d do differently. It sounds like extra work, but that record becomes one of your most useful tools as a gardener. Whether you’re working on concrete or open ground, a few notes at the end of each season adds up to noticeably more confident and productive growing years ahead.








What do you think?
It is nice to know your opinion. Leave a comment.