










Drip Irrigation System Install in 7 Raised Beds: A Complete Guide
Why Drip Irrigation Is the Smart Choice for Raised Bed Gardens
If you’ve ever spent a sweltering summer morning standing over your raised beds with a hose, watching water splash off leaves and evaporate before it even reaches the roots, you already understand the frustration that drives gardeners toward smarter solutions. Drip irrigation transforms that daily chore into an automated, efficient process that delivers water precisely where plants need it most — directly to the root zone. The result is healthier plants, less wasted water, and a whole lot more time to actually enjoy your garden rather than maintain it.
Raised bed gardens are uniquely well-suited to drip irrigation for a number of reasons. Because the beds are contained, defined spaces with known dimensions, it’s relatively straightforward to calculate how much tubing you need and where emitters should be placed. The controlled environment of a raised bed also means you’ve likely invested in quality soil with excellent drainage, which pairs perfectly with the slow, steady delivery that drip systems provide. Water seeps down through the soil profile rather than running off the surface, encouraging roots to grow deeper and plants to become more drought-resilient over time.
Beyond plant health, the water savings associated with drip irrigation are genuinely significant. Traditional overhead watering and sprinkler systems can lose anywhere from 30 to 50 percent of their water to evaporation, wind drift, and surface runoff. Drip systems, by contrast, operate at around 90 percent efficiency. Across an entire growing season — and especially across seven raised beds — that difference adds up to thousands of gallons saved and a meaningfully lower water bill. For gardeners in drier climates or those dealing with water restrictions, this efficiency isn’t just convenient, it’s essential.
Understanding the Basic Components
Before you buy a single piece of hardware, it helps to understand the core components that make up a drip irrigation system. The system starts at your water source — typically an outdoor spigot — and flows through a backflow preventer, which keeps garden water from siphoning back into your home’s drinking water supply. From there, water passes through a pressure regulator, because most home water systems operate at pressures too high for standard drip emitters, which are designed to function optimally between 15 and 30 PSI.
After pressure regulation, water moves through an inline filter to catch any sediment that might clog the tiny openings in your emitters, then into the main supply line — typically half-inch polyethylene tubing. From the main line, quarter-inch micro-tubing branches off to reach individual plants or sections of the bed. Emitters come in a variety of flow rates, usually measured in gallons per hour, and choosing the right emitter for each type of plant is one of the more nuanced skills you’ll develop as you dial in your system over time.
Optional but highly recommended additions include a timer, which automates the entire watering process and ensures consistent moisture levels even when you’re traveling or simply forget, and a pressure gauge, which helps you troubleshoot problems and confirm your regulator is working correctly. Mulch is also worth mentioning here — while not technically part of the irrigation system itself, laying two to three inches of straw, wood chips, or shredded leaves over your drip lines dramatically reduces evaporation from the soil surface and can increase the effectiveness of your system by another significant margin.
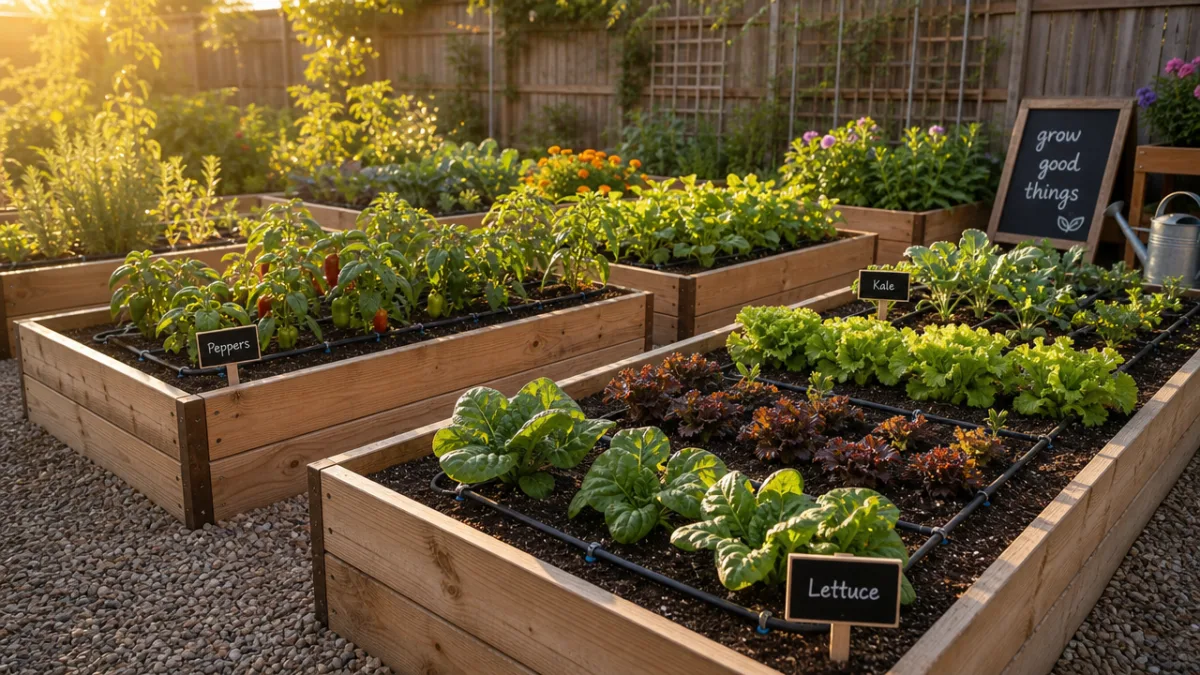
Planning Your Layout Across Seven Raised Beds
Planning is where most DIY irrigation projects succeed or fail, and with seven raised beds in play, taking time upfront to sketch out your layout will save you considerable frustration later. Start by measuring each bed — its length, width, and how far it sits from your water source. Draw a simple top-down diagram noting the position of each bed relative to one another and to the spigot. This map becomes your shopping list and your installation guide, preventing the all-too-common scenario of running out of tubing three beds short of the finish line.
Consider how your beds are grouped or arranged. If several beds are clustered together, you can run a single supply line past all of them and branch off into each one with minimal fittings. Beds that are more isolated or farther from the spigot may require longer runs of half-inch tubing, and it’s important to account for pressure loss over distance. As a general rule, half-inch supply lines can run effectively up to about 200 feet, but for very long runs or complex systems, consulting a drip irrigation flow calculator online will help you verify that your system will perform as intended at every point in the network.
Think also about what you’re growing in each bed, because different plants have very different water needs. Tomatoes and squash are thirsty plants that benefit from emitters rated at one to two gallons per hour. Herbs like rosemary and thyme prefer drier conditions and do well with lower-output emitters or even simple soaker-style tubing at reduced run times. Planning your beds with plant water needs in mind allows you to group similar plants together on the same zone, making timer programming much more effective and reducing the risk of overwatering drought-tolerant species while underwatering heavy drinkers.
Calculating Water Needs and Emitter Spacing
One of the questions that trips up beginners most consistently is how many emitters to use and how far apart to place them. A useful starting point is to aim for one emitter per plant for large specimens like tomatoes, peppers, and eggplant, and to use inline emitter tubing — tubing with emitters pre-installed at regular intervals — for densely planted beds containing greens, carrots, beets, and similar crops. Inline tubing with emitters spaced six or twelve inches apart provides even moisture distribution across the entire bed, which is ideal for these kinds of plantings.
To calculate how long your system needs to run each day, you’ll need to know both your emitter output and your plants’ daily water requirements. Most vegetables need about one inch of water per week during the main growing season, which translates to roughly 0.6 gallons per square foot per week. If your emitter delivers one gallon per hour and you’re watering a square foot, running the system for about 40 minutes three times a week will get you close to that target. These are starting points, not gospel — you should always observe your soil and plants and adjust accordingly.
Soil type matters enormously when setting run times. Sandy soils drain quickly and benefit from shorter, more frequent watering cycles, while clay-heavy soils absorb water slowly and are prone to puddling if run times are too long. Raised beds typically contain amended soil mixes that drain reasonably well, but the specific blend you’ve used will still influence how quickly water moves through the profile. A simple finger test — pushing your finger two inches into the soil before your scheduled watering — tells you immediately whether the soil is still adequately moist or genuinely needs water.
Gathering Your Materials and Tools
Once your plan is on paper and your measurements are confirmed, it’s time to assemble your materials. A well-organized shopping list prevents multiple frustrating trips to the hardware store and ensures your installation day goes smoothly. For a system covering seven raised beds, you’ll typically need a substantial length of half-inch main line tubing — budget generously and buy a bit more than your measurements suggest, since it’s easy to underestimate the amount needed to navigate around beds and make connections. Quarter-inch micro-tubing is needed for branching off to individual plants or emitters within beds.
For fittings, you’ll want a mix of tees, elbows, end caps, and barbed connectors. Tees allow you to split the main line to feed multiple beds from a single supply line. Barbed connectors join quarter-inch tubing to half-inch line, and end caps seal off the ends of supply lines to maintain pressure throughout the system. A hole punch tool designed specifically for drip irrigation tubing is essential — it creates the precise-sized holes needed for barbed connectors to seat properly without leaking. Trying to use a nail or drill bit is a frustrating shortcut that rarely ends well.
Here is a general materials checklist for a seven-bed system:
- Backflow preventer (1)
- Pressure regulator rated for 20–25 PSI (1)
- Inline Y-filter with 150-mesh screen (1)
- Timer — digital with multiple programs preferred (1)
- Half-inch polyethylene main line tubing (100–200 feet depending on layout)
- Quarter-inch micro-tubing (50–100 feet)
- Drip emitters in 0.5, 1, and 2 GPH varieties (quantity per plant count)
- Inline emitter tubing for dense plantings (length per bed)
- Barbed tees, elbows, and couplings (assorted)
- Figure-8 end caps or goof plugs
- Tubing stakes to hold lines in place
- Hole punch tool
In terms of tools, the list is refreshingly short. Beyond the hole punch, you’ll need a sharp pair of scissors or tubing cutters to cut your poly tubing cleanly, and a bucket of warm water to soak the ends of tubing before pushing barbed fittings in — warm tubing is significantly more pliable and much easier to work with. A measuring tape, your layout diagram, and a permanent marker for labeling zones complete the toolkit. No specialized plumbing knowledge is required, which is part of what makes drip irrigation such an accessible upgrade for home gardeners of any experience level.

Step-by-Step Installation Process
With materials in hand and a clear plan, installation day arrives. Begin by connecting your timer, backflow preventer, pressure regulator, and filter to the outdoor spigot in that order. Most modern drip irrigation starter kits include these components with threaded connections that hand-tighten easily — you typically don’t need plumber’s tape for these connections, but a single wrap can provide extra insurance against slow drips. Turn on the water briefly to confirm everything is seated correctly and that the timer is functioning before running any tubing.
Next, run your main half-inch supply line from the spigot out to your beds, laying it along the path you planned on your diagram. Use landscape staples or tubing stakes to pin the line to the ground every few feet, keeping it tidy and preventing it from being a tripping hazard. When you reach a point where you need to branch off to a bed, insert a barbed tee fitting — remember to soak the tubing end first — and run a length of supply line into the bed itself. At the end of each run, crimp the tubing and secure it with a figure-8 end cap.
Inside each bed, lay your emitter tubing or individual emitter lines according to your plant layout. For beds with transplants like tomatoes or peppers, punch holes near each plant and insert barbed emitters, then run quarter-inch micro-tubing from those emitters back to the main line. For densely planted beds, simply lay inline emitter tubing across the surface in parallel rows spaced about six inches apart, connecting one end to the main supply and capping the other. Push tubing stakes through the lines every foot or so to keep them flat against the soil and prevent them from shifting around during the season.
Testing and Troubleshooting Your System
Once all seven beds are plumbed and connected, it’s time for the satisfying moment of testing. Turn the system on manually and walk slowly through each bed, watching every emitter to confirm it’s dripping at the expected rate. Look for dry emitters, which indicate a clog or a connection that isn’t fully seated, and for geysers, which indicate a barbed fitting that has blown out of a hole that was punched too large. Both are easy fixes — a clogged emitter can often be cleared by removing it briefly and allowing the line to flush, and a leaking hole can be patched with a goof plug before reinserting the fitting nearby.
Check the pressure gauge at the spigot end to confirm your regulator is doing its job. If pressure is reading above 30 PSI, emitters may spit water inconsistently or connections may be under stress. If pressure is too low, emitters at the far end of long runs may drip too slowly. Most pressure-related issues at the fixture level are solved by adjusting or replacing the pressure regulator. If the problem is loss over long tubing runs, consider adding a second supply line running in the opposite direction to create a loop, which significantly improves pressure uniformity across large systems.
Common issues you may encounter include:
- Clogged emitters — Soak in a diluted vinegar solution overnight to dissolve mineral deposits, or simply replace them, as individual emitters are inexpensive.
- Uneven watering — Usually a pressure problem; verify your regulator is working and that no kinks exist in the main supply line.
- Timer malfunctions — Replace the battery, as low battery is the most common cause of erratic timer behavior.
- Tubing pulled loose by animals or foot traffic — Increase the number of stakes holding lines in place and consider covering lines with a thin layer of mulch.
- End cap blowouts — Flush the system at the start of the season before capping ends, and ensure caps are fully crimped.

Seasonal Maintenance and Long-Term Care
A drip irrigation system is a long-term investment, and like any investment, it returns more when properly maintained. At the start of each growing season, before you replant your beds, flush your entire system by opening the end caps and running water through the lines for several minutes. This clears out any debris, sediment, or insect nests that accumulated over winter and gives you a clean baseline from which to identify any lines that may have cracked or fittings that have separated due to frost. Replace any damaged components before reconnecting emitters and inline tubing.
During the growing season, a quick visual inspection once a week takes only a few minutes and catches small problems before they become large ones. Walk each bed while the system is running and look for dry spots in the soil, which indicate non-functioning emitters, or overly saturated zones, which might point to a line that has cracked or a connection that is leaking underground. Also check the filter screen monthly — in areas with hard water or high sediment, filters can clog surprisingly quickly and a blocked filter reduces flow to the entire system downstream.
At the end of the growing season, winterizing your system is critical in climates where freezing temperatures occur. Drain all water from the lines by opening end caps and allowing the system to gravity-drain, then disconnect the timer, pressure regulator, and filter from the spigot and store them indoors. Polyethylene tubing left in the beds can generally remain through winter without damage, but removing and coiling the main supply lines and storing them in a garage or shed significantly extends their lifespan. With reasonable care, a quality drip system can last five to ten years or more, making the initial investment highly cost-effective over time.
Adjusting Your System as Your Garden Evolves
One of the great advantages of a drip irrigation system is how easily it adapts to change. Unlike fixed sprinkler systems set in concrete or buried underground, drip components are modular and movable. When you rotate crops between beds — as good gardening practice demands — you can easily relocate emitters, swap out inline tubing sections for different spacing, or add entirely new lateral lines to accommodate a new planting layout. This flexibility means your system grows and evolves alongside your gardening ambitions without requiring you to start from scratch.
As you gain experience with your specific setup, you’ll naturally begin refining your timer programs to reflect what you observe in the garden. A stretch of hot, windy days calls for longer run times or an extra watering cycle. A cool, overcast week might mean cutting your scheduled frequency in half to avoid root problems associated with chronically wet soil. Many modern timers allow you to set seasonal adjustment percentages, which automatically scale your watering schedule up or down based on a simple percentage setting — a convenient feature that approximates the manual adjustments experienced gardeners would make based on observation.
Finally, consider the possibility of expanding your system over time. If you build additional raised beds, adding them to an existing drip network is straightforward — simply tee off the main supply line at the appropriate point, run new tubing to the new bed, and program the timer to account for the additional water demand. Some gardeners also incorporate drip irrigation into in-ground vegetable patches, container plantings, or even orchard trees using the same basic components and principles. What begins as a practical solution for seven raised beds has a way of quietly transforming the entire approach to how a gardener thinks about water, efficiency, and the health of their plants.








What do you think?
It is nice to know your opinion. Leave a comment.