










Introduction to Drip Irrigation: Why It’s the Smartest Watering Choice for Your Garden
Drip irrigation has revolutionized the way homeowners and gardeners approach watering their plants, landscapes, and vegetable beds. Unlike traditional sprinkler systems that spray water broadly and often inefficiently, drip irrigation delivers water directly to the root zone of each plant, minimizing evaporation and runoff. This targeted approach can reduce water usage by as much as 50 percent compared to conventional overhead watering methods, making it both an environmentally responsible and cost-effective choice for any garden setup.
The beauty of a well-planned drip system lies in its flexibility. Whether you’re maintaining a small raised bed with a handful of tomato plants, a sprawling ornamental garden with dozens of shrubs, or a container garden on an urban balcony, drip irrigation can be scaled and customized to meet your exact needs. The components are modular, widely available at home improvement stores, and designed to be installed by the average homeowner without any specialized plumbing experience or professional assistance.
Beyond water savings, drip irrigation promotes healthier plants by keeping foliage dry, which significantly reduces the incidence of fungal diseases like powdery mildew and leaf spot. Consistent moisture at the root level also prevents the stress cycles of drought and oversaturation that can weaken plants over time. When you invest the time upfront to plan and assemble a drip system properly, you’re setting your garden up for long-term success with minimal daily effort on your part.
Planning Your Drip Irrigation Layout: Mapping Water Zones and Flow Rates
Effective planning is the foundation of any successful drip irrigation system, and the process begins long before you purchase a single component. Start by drawing a rough sketch of your garden or landscape on paper, noting the location of all planting areas, the distance from your water source, and any obstacles like pathways, fences, or structures that will affect how you route your mainline tubing. A clear visual map allows you to estimate the total length of tubing required and helps you identify logical watering zones based on plant types and water needs.
Understanding flow rate and water pressure is critical at this stage. Most residential faucets deliver between 3 and 5 gallons per minute at standard household pressure, which typically falls between 40 and 80 PSI. Drip irrigation emitters, however, operate best at much lower pressures, usually between 15 and 30 PSI. Exceeding the recommended pressure can cause emitters to pop off, tubing to burst, or uneven distribution across the system. This is why a pressure regulator is a non-negotiable component in your assembly, and why you need to know your home’s water pressure before selecting emitter types and spacing.
Grouping plants with similar water requirements into the same zone is a principle known as hydrozoning, and it dramatically improves the efficiency and effectiveness of your system. Drought-tolerant plants like lavender and rosemary should not share a zone with water-hungry vegetables like squash or cucumbers. Each zone should be designed so that the total output of all emitters in that zone does not exceed the flow capacity of your water source. A simple calculation — adding up the gallons-per-hour (GPH) rating of all emitters in a zone — ensures you stay within safe operational limits.
- Measure the total square footage of each planting area to determine tubing length and emitter quantity needed.
- Identify your water source location and measure the maximum run distance from faucet to the farthest plant.
- Note sun exposure and soil type in each zone, as these affect how quickly water is absorbed and how often irrigation should run.
- Check local water pressure using an inexpensive gauge that attaches directly to your outdoor faucet before purchasing components.
- Account for any slopes in your garden, as gravity affects water distribution and may require pressure-compensating emitters on hillside plantings.
Essential Components of a Drip Irrigation System: What You Need and Why
A complete drip irrigation system is made up of several distinct components, each serving a specific and important function. Understanding what each part does before you begin shopping prevents costly mistakes and ensures your system performs reliably for years to come. The core components include a backflow preventer, a pressure regulator, a filter, a timer, mainline tubing, emitter tubing or soaker hose, emitters, and various connectors and end caps. While this may sound like a long list, most home improvement stores sell starter kits that bundle the essential pieces together at a reasonable price.
The backflow preventer, sometimes called a vacuum breaker, is installed directly onto your outdoor faucet and is one of the most important safety components in the entire assembly. Its job is to prevent irrigation water from being siphoned back into your household drinking water supply, which could introduce fertilizers, pesticides, or soil bacteria into the water you consume. Many local plumbing codes actually require a backflow preventer on any outdoor irrigation connection, so it’s wise to check your local regulations before installation to ensure compliance.
Emitters are the workhorses of the system, delivering measured amounts of water directly to each plant’s root zone. They come in a range of output ratings, typically from half a gallon per hour for small plants and herbs up to 2 gallons per hour for larger shrubs and trees. Emitters can be pressure-compensating, meaning they deliver a consistent flow rate regardless of slight pressure variations along the line, which is particularly useful in larger systems or those with elevation changes. Selecting the right emitter for each plant type is one of the most impactful decisions you’ll make in the planning process.
- Backflow Preventer: Connects directly to the faucet and protects your drinking water from contamination.
- Timer: Automates watering schedules and attaches between the faucet and the backflow preventer or pressure regulator.
- Pressure Regulator: Reduces household water pressure to the safe operating range of your drip components.
- Filter/Strainer: Catches sediment and debris before it reaches emitters, preventing clogging.
- Mainline Tubing: The primary half-inch polyethylene tubing that carries water from the faucet through the garden.
- Emitter Tubing: Smaller quarter-inch tubing that branches off the mainline to deliver water to individual plants.
- Emitters: The drippers themselves, available in various GPH ratings to match each plant’s watering needs.
- End Caps and Figure-8 Closures: Seal the ends of tubing runs to maintain pressure within the system.
Faucet Assembly Step-by-Step: Connecting Your System to the Water Source
The faucet assembly is the critical link between your home’s water supply and your drip irrigation system, and getting it right ensures the entire system operates safely and efficiently. Begin by turning off the outdoor faucet completely and wiping down the faucet threads with a clean cloth to remove any dirt or mineral buildup. Having a clean, debris-free connection point will prevent leaks and ensure each component threads on smoothly. Gather all your components in order before you begin assembling, as working in the correct sequence from faucet to mainline is essential for proper function.
Start the assembly by attaching your timer directly to the faucet threads, hand-tightening first and then giving it a firm quarter-turn with pliers if needed — be careful not to overtighten, as plastic threads can crack under excessive force. Next, connect the backflow preventer to the timer’s output port, followed by the pressure regulator, and then the filter. This sequence — timer, backflow preventer, pressure regulator, filter — is the industry-standard order and ensures water is properly controlled and cleaned before it enters your mainline tubing. Each connection point should have a rubber washer seated inside to create a watertight seal; if a washer is missing, leaks are almost guaranteed.
Once the faucet assembly components are secured, attach the adapter that connects the filter’s output to your half-inch mainline tubing. Most starter kits include a compression fitting or a barbed fitting for this purpose; barbed fittings grip the flexible polyethylene tubing tightly when the tubing is pushed firmly over the barb, while compression fittings use a threaded collar to create a more secure mechanical connection. Turn the faucet on slowly and check every connection point for leaks before running the line out into the garden. A simple visual inspection and a pass with a dry paper towel around each joint will reveal any drips that need to be addressed immediately.
After confirming that all faucet assembly connections are leak-free, you can begin routing the mainline tubing through your garden. Use tubing stakes every 2 to 3 feet to hold the line in place along the ground, keeping it close to the base of plant rows for a clean installation. When you reach a point where you need to branch off to an individual plant, use a hole punch tool to create a small hole in the mainline and insert a barbed connector that accepts the quarter-inch emitter tubing. This modular approach makes it easy to add or relocate emitters in the future as your garden changes and grows.
Installing Emitters and Running Tubing: Getting Water to Every Plant
With your faucet assembly complete and your mainline tubing running through the garden, the next phase involves punching emitter holes into the mainline and connecting quarter-inch tubing to bring water to each individual plant. The hole punch tool included in most drip irrigation kits makes this task straightforward — simply position the pointed end of the tool against the mainline at the desired location and apply firm, even pressure to create a clean hole. Avoid punching holes too close together, as each hole represents a draw on your system’s total flow capacity, and clustering too many in one area can reduce pressure for downstream emitters.
Once the hole is punched, insert a barbed tee or elbow connector firmly until the barb is fully seated inside the mainline. These barbed connectors serve as the junction between the mainline and the smaller quarter-inch distribution tubing. Cut a length of quarter-inch tubing appropriate to reach the base of your plant, then push one end firmly onto the barbed connector and attach an emitter to the other end. The emitter is then staked into the soil directly at the plant’s root zone using a small plastic anchor stake, which keeps it positioned correctly and prevents it from being knocked out of place during normal garden activity.
For plants that require more water or that have a larger root zone, such as tomatoes, peppers, or established shrubs, you may want to use multiple emitters per plant or opt for a short loop of soaker hose around the plant’s drip line. This distributes moisture more evenly across the root system and prevents dry spots from forming on one side of the root ball. For tightly spaced plantings like lettuce rows or groundcover beds, in-line drip tape — a flat, thin tubing with pre-installed emitters spaced at regular intervals — is a far more efficient and tidy solution than running individual quarter-inch lines to each plant.
Programming Your Timer and Maintaining the System for Long-Term Performance
A quality timer is what transforms a manually operated drip system into a hands-free, automated irrigation solution that waters your garden consistently even when you’re traveling or simply too busy to tend to it. Most battery-operated digital timers available at hardware stores allow you to program multiple watering cycles per day, set specific days of the week for irrigation, and control the duration of each watering event down to the minute. When setting your timer initially, it’s better to start with shorter, more frequent watering cycles and adjust based on how your plants respond, rather than overwatering from the start and risking root rot or fungal issues.
The optimal watering duration for a drip system depends on several interacting factors: soil type, emitter flow rate, plant water requirements, temperature, and the time of year. Sandy soils drain quickly and may require shorter but more frequent irrigation cycles, while clay-heavy soils absorb water slowly and benefit from longer, less frequent sessions that allow water to percolate deeply before the next cycle begins. As a general starting point, many gardeners run their drip systems for 20 to 45 minutes every one to two days during the growing season, adjusting upward during heat waves and scaling back significantly during cooler or rainy periods.
Routine maintenance keeps a drip irrigation system operating at peak efficiency and prevents the small issues that can become bigger problems if left unaddressed. At the beginning of each growing season, flush the mainline by removing end caps and running the system briefly to clear any sediment or debris that accumulated over winter. Inspect all emitters for clogging by observing whether water is dripping consistently from each one during a normal cycle; clogged emitters can often be cleared by removing them and soaking them in a dilute vinegar solution overnight. Check all tubing connections and emitter stakes after the first few waterings, as ground movement, foot traffic, and curious animals can dislodge components.
- Clean the inline filter screen at least once per season by unscrewing the filter housing and rinsing the mesh screen under running water.
- Inspect tubing for cracks, kinks, or rodent damage at the start and end of each growing season.
- Replace the battery in your timer annually or before the irrigation season begins to avoid unexpected failures.
- Winterize the system before the first freeze by draining all tubing, removing emitters, and storing plastic components indoors to prevent cracking.
- Periodically check that emitter stakes are firmly in place and that quarter-inch tubing has not pulled away from its barbed connectors.
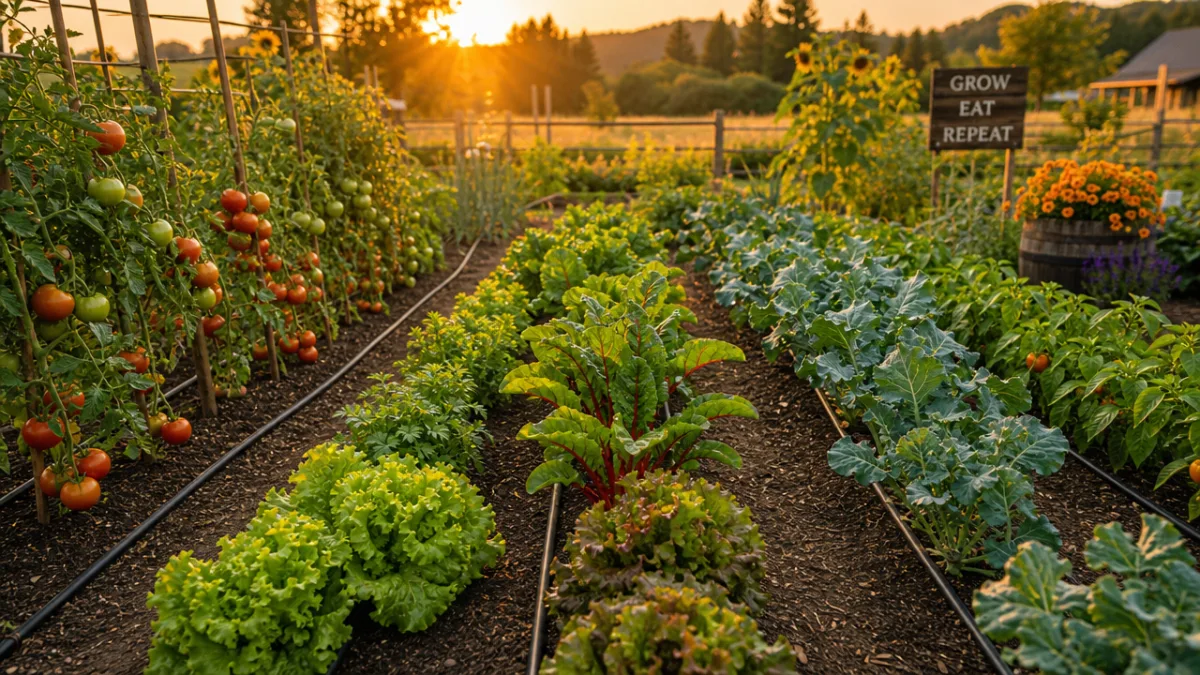
Troubleshooting Common Drip Irrigation Problems: Fixes You Can Handle Yourself
Even the most carefully installed drip irrigation system will occasionally encounter issues, but the good news is that nearly every common problem has a straightforward, do-it-yourself solution. The most frequently reported issue is uneven watering, where some plants receive noticeably more water than others despite having the same emitter rating. This is often caused by a pressure imbalance in the system, typically the result of too many emitters running on a single zone or a pressure regulator that is no longer functioning correctly. Start troubleshooting by checking the total GPH output of your zone against your faucet’s flow rate, and replace the pressure regulator if it’s more than a few seasons old.
Clogged emitters are another extremely common issue, particularly in areas with hard water that contains high levels of dissolved minerals like calcium and magnesium. When water evaporates from a drip emitter, these minerals are left behind and gradually build up until they restrict or completely block water flow. The first sign is often a plant that appears drought-stressed even though the irrigation system is running on schedule. To address this, remove the affected emitter, soak it in white vinegar for several hours to dissolve mineral deposits, then flush it with clean water before reinstalling. If the clogging is severe or recurring, switching to pressure-compensating emitters with self-flushing mechanisms can provide long-term relief.
Leaks at connection points are typically caused by one of three things: a missing or deteriorated rubber washer, a barbed fitting that wasn’t pushed fully into the tubing, or a hole punch hole that is slightly too large for the barb being used. Addressing these issues is usually quick — replace worn washers, reseat loose barbed fittings by pushing them in firmly until the barbs grip the tubing, or use a goof plug to seal an incorrectly placed hole and re-punch in the correct location. Keeping a small repair kit with spare emitters, barbed connectors, goof plugs, and extra quarter-inch tubing on hand means you can address most problems in minutes rather than making a special trip to the hardware store.
Animals and pests occasionally pose a challenge for drip irrigation systems, particularly in rural areas where deer, squirrels, or rodents may chew through tubing or knock emitter stakes out of the ground. Burying the mainline tubing an inch or two below the soil surface in vulnerable areas provides significant protection against both animal damage and UV degradation from prolonged sun exposure. Where burying isn’t practical, lengths of split corrugated conduit can be slipped over exposed tubing sections to add mechanical protection. Securing emitter stakes with an extra push into the soil and ensuring that tubing isn’t creating an interesting obstacle on a common animal pathway will also reduce the frequency of disruption from wildlife.








What do you think?
It is nice to know your opinion. Leave a comment.