










Building Your Own DIY Water Hose Post: A Complete Guide
A DIY water hose post is one of those backyard upgrades that seems simple on the surface but delivers an enormous return on both convenience and curb appeal. Instead of fumbling with hoses that kink across the lawn or dragging a heavy reel from the garage every time you need to water, a dedicated hose post gives you a fixed, functional, and attractive station right where you need it most. Whether you are tending a vegetable garden, washing down a patio, or keeping flower beds hydrated through a dry summer, having your water source properly organized changes everything about the experience.
The concept is straightforward: a vertical post anchored in the ground or mounted to a surface, fitted with one or more hose bibs, and often paired with a hose reel or hooks to keep everything tidy. But the execution can range from a basic galvanized pipe setup to an elaborate cedar or brick structure that looks like it was always meant to be there. This guide covers the full spectrum, from planning and materials to installation and finishing touches, so you can build a version that suits your space, your skill level, and your sense of style.
One of the best reasons to go the DIY route rather than purchasing a pre-made unit is the ability to customize dimensions, materials, and placement to your exact needs. Pre-built hose stations are often too short, too lightweight, or positioned in ways that do not align with your water supply lines. Building your own means the post height, the number of outlets, and the mounting depth are all decisions you make based on real conditions in your yard, not assumptions made by a manufacturer halfway across the country.
Why a Dedicated Hose Post Makes Sense for Any Yard
Many homeowners underestimate how much time and frustration is saved by having a fixed, well-placed hose station. A properly installed hose post eliminates the daily ritual of unspooling a hose from an awkward location, dragging it across landscaping, and then reversing the whole process when you are done. When your hose has a designated home with a convenient bib and a reel or hook to wind onto, the entire routine becomes something you actually want to do rather than put off until the garden is begging for water.
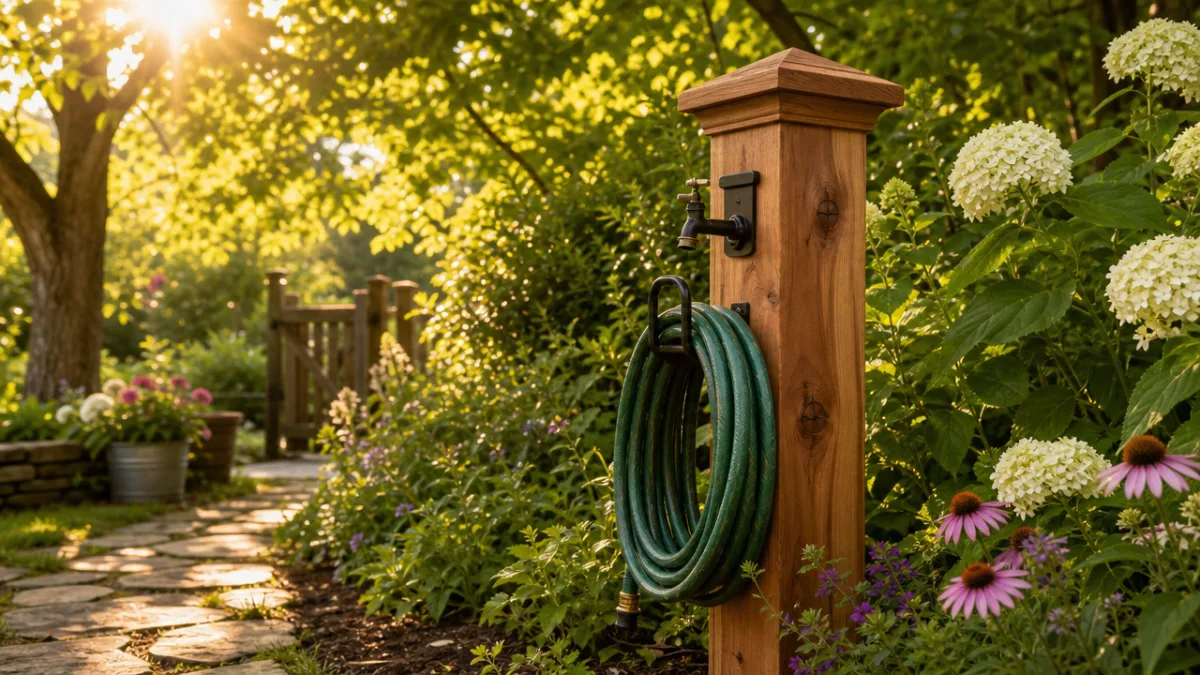
There is also the matter of aesthetics. A tangled hose lying across a beautifully maintained lawn or patio does not exactly complement the surrounding landscape. A thoughtfully designed hose post, finished in materials that echo your fence, your raised beds, or your home’s exterior, becomes a deliberate design element rather than an eyesore. Cedar posts with black iron fittings, for instance, have become a popular choice precisely because they look intentional and fit naturally into rustic or farmhouse-style outdoor spaces.
Beyond aesthetics and convenience, a hose post can also extend the life of your hose and your outdoor plumbing. When hoses are stored properly off the ground and disconnected from a bib that drains after use, they suffer less UV degradation, fewer kinks, and reduced wear at the connection points. Freeze damage to exterior faucets is also less likely when you have a frost-free hose bib installed as part of the post, since these valves are engineered to keep the shutoff point inside the warmer wall of your home rather than at the exterior surface where pipes can freeze.
Planning Your Hose Post: Location, Height, and Water Access
Before you buy a single piece of lumber or dig a single hole, spend some time thinking carefully about placement. The ideal location for a hose post is close enough to the area you water most often that a 25- to 50-foot hose can reach every corner without being stretched. Walk your yard and note where you spend the most time with a hose in hand, whether that is around a raised bed, beside a container garden, or along a fence line, and place the post in the center of that activity rather than at the nearest convenient wall.
Water access is the other major planning consideration. Your hose post will need to connect to your home’s water supply, which typically means running a supply line from an existing outdoor spigot or from a point inside the home where a pipe can be tapped and routed underground. If you are simply extending an existing spigot with a post-mounted bib a short distance away, the project remains fairly simple. If you are running a new line across the yard, you will need to think about trench depth, pipe material, and whether you want to add a shutoff valve or backflow preventer in the line.
Height is a detail that many first-time builders overlook, and it matters more than you might think. A hose bib mounted too low means you are constantly crouching to connect and disconnect, which becomes tiresome quickly. One mounted too high can be awkward to reach with the hose fitting. A height of about 24 to 36 inches from the ground to the center of the bib works well for most adults and allows comfortable one-handed operation even when your other hand is occupied with the hose itself. If you are adding a reel or storage hooks above the bib, plan for the total post height to reach at least 48 to 60 inches so everything is accessible without stretching.
Choosing the Right Materials for Durability and Style
The material you choose for your hose post will largely determine how long it lasts and how much maintenance it requires over the years. Pressure-treated lumber is the most practical choice for posts that will be set in the ground, as it resists rot and insect damage far better than untreated wood. However, many builders prefer the look of naturally rot-resistant species like cedar, redwood, or black locust, which weather to an attractive silver-gray and hold up well without chemical treatment, especially when the buried section is protected with a concrete footing or a metal post base.
Metal options including galvanized steel pipe, black iron pipe, and copper tubing each have their own appeal. Galvanized and black iron pipe are extremely durable and can be assembled using standard threaded fittings available at any hardware store, making them a functional choice that also looks intentional in industrial or farmhouse-style gardens. Copper is softer in appearance and develops a beautiful patina over time, though it is more expensive and requires soldering skills to assemble properly. For most DIYers, a wooden structural post with iron or brass plumbing fittings strikes the right balance between accessibility and visual appeal.
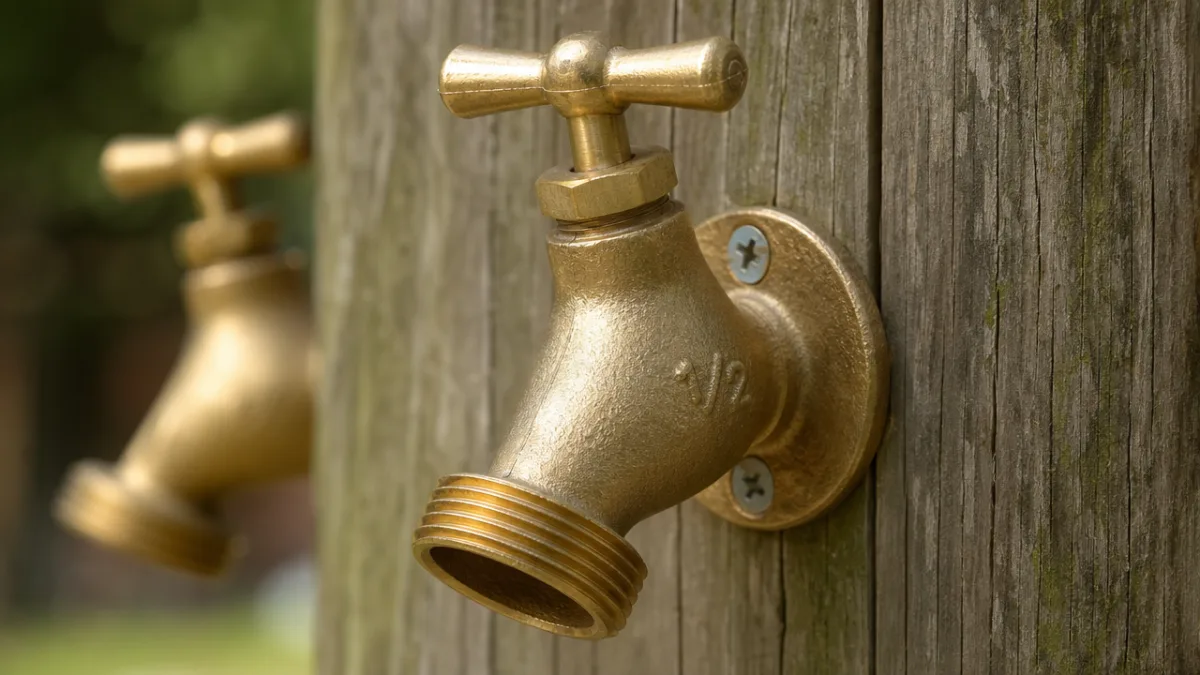
Hardware choices matter as well. Use solid brass or stainless steel hose bibs rather than the inexpensive zinc alloy versions, which corrode quickly and develop leaks within a season or two. A quarter-turn ball valve bib is easier to operate than a traditional compression-style faucet and tends to seal more reliably over time. If your climate includes hard freezes, invest in a frost-free sillcock rated for exterior use, which costs a few dollars more but prevents the costly damage that can result from a burst pipe on the first hard frost of the season.
Step-by-Step Construction: Building the Post Structure
With your planning complete and materials gathered, construction begins with preparing the post itself. If you are using a wooden post, a 4×4 or 6×6 in cedar or pressure-treated pine works well for most applications. Cut the post to your desired height, accounting for the depth it will be buried or set in concrete. As a general rule, bury at least one-third of the total post length to ensure stability, so a post you want to stand 48 inches above grade should be cut to at least 72 inches total length, giving you 24 inches below ground.
Dig your post hole using a manual post-hole digger or a rented power auger, going down at least 12 inches below the local frost line to prevent heaving during freeze-thaw cycles. A hole diameter of about 10 to 12 inches allows room for a concrete collar around the post base, which dramatically improves stability and keeps the post from twisting or leaning over time. Before setting the post, consider wrapping the buried section in roofing felt or applying a wood preservative to any cut ends to extend the life of the wood below grade.
Mix and pour your concrete according to the bag instructions, setting the post plumb in all directions using a level held against two adjacent faces. Brace the post in position with temporary stakes and boards while the concrete cures, which typically takes 24 to 48 hours depending on temperature and humidity. Do not rush this step. A post that sets while slightly out of plumb will look wrong and may cause problems when you attach plumbing hardware and try to get a clean, level appearance with your fittings and reel. Once the concrete has cured fully, the braces come off and you have a rock-solid foundation for the rest of the build.
Running the Water Line and Connecting the Plumbing
With the post standing firm, the next task is getting water to it. If you are connecting to an existing outdoor spigot and the post is close by, you may be able to use a simple above-ground or shallow-buried hose to make the connection, though a buried, rigid supply line is always the cleaner and more durable option. Use Schedule 40 PVC or flexible polyethylene pipe for underground runs, keeping the trench at a depth that places the pipe below the frost line in your climate, typically 12 to 18 inches in most of the continental United States and deeper in northern regions.
Route the pipe from your water source to the base of the post, bringing it up through a hole bored through the post itself or through an exterior conduit attached to the post’s face. Using the post itself as a chase for the supply line gives the installation a cleaner look and protects the pipe from UV exposure and mechanical damage. At the top of the run, transition from your supply pipe to threaded fittings using appropriate adapters, then thread on your hose bib, wrapping all male threads with several layers of PTFE tape to ensure a leak-free seal.
Test every connection before backfilling your trench or making any final cosmetic decisions. Turn the water on slowly and check each joint and fitting under pressure. Even a small drip at a threaded connection will become a significant leak over time, and catching it now while everything is accessible costs you a few minutes rather than a future afternoon of excavation and repair. Once you are confident the system is leak-free, backfill the trench in layers, tamping each layer down firmly before adding the next to prevent settling that could stress the pipe or leave a depression across your lawn.
Adding Storage and Functional Features to Your Hose Post
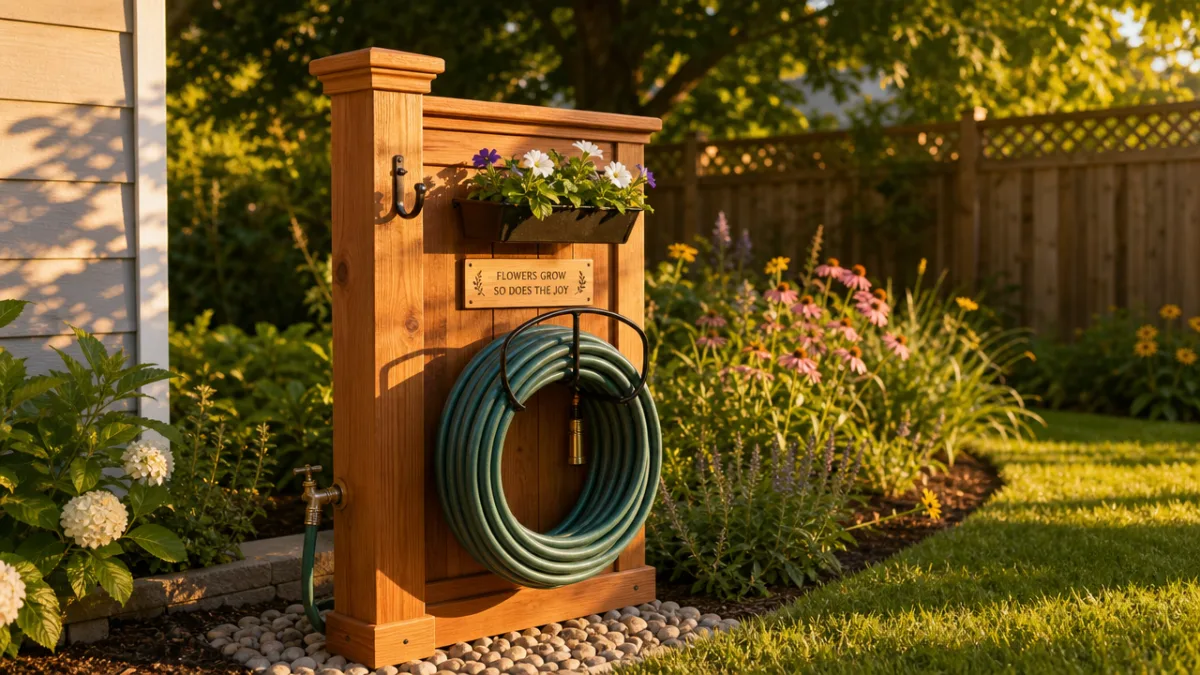
A bare post with a single hose bib is functional, but a few thoughtful additions can turn your hose station into a genuinely enjoyable part of your outdoor routine. A wall-mounted or post-mounted hose reel is the most impactful upgrade, allowing you to wind and unwind your hose smoothly without fighting tangles. Choose a reel sized for your hose length and diameter, and select one with a locking mechanism that holds the reel at any position while you are pulling hose out rather than requiring two hands to operate.
Storage hooks or arms mounted to the post give you a place to hang spray nozzles, watering wands, and spare fittings so that everything you need is right there at the station rather than scattered across the garage. A simple pair of large cup hooks or S-hooks on a horizontal arm can hold an impressive amount of gear in a minimal footprint. If you want something more polished, metal pegboard panels cut to size and mounted to the post face create a versatile, expandable storage system that can be reconfigured as your needs change.
Consider adding a small shelf or box at the base of the post for storing hose repair kits, extra washers, and a pair of work gloves. A simple cedar box with a hinged lid sits naturally at the base of a wooden post, adds visual weight that makes the station feel more substantial, and keeps small items from disappearing into the chaos of the garage. If you want to go further, a built-in planter box on one or both sides of the post base softens the transition between the structure and the surrounding garden and turns a purely utilitarian object into something that genuinely contributes to the landscape.
Finishing and Weatherproofing Your Hose Post
The finishing stage is where your hose post goes from a construction project to a polished feature of your outdoor space. For wooden posts, the choice of finish has both aesthetic and practical implications. A penetrating oil finish like teak oil or linseed oil feeds the wood and highlights its natural grain without building up a film that can peel or crack. These finishes require annual reapplication but are easy to maintain and never look dated. Exterior paint gives you far more color options and provides a stronger barrier against moisture, but requires more preparation and periodic repainting as it ages.
If you opted for a stain, choose an exterior-grade product rated for ground contact or high-exposure applications, since the lower portion of the post near grade level will experience the most moisture stress. Apply at least two coats, allowing full drying time between each, and pay special attention to any cut ends where the wood is most absorbent and most vulnerable to moisture intrusion. A final coat of exterior sealant over the stain adds an additional layer of protection and extends the time between maintenance cycles.
Metal components including bibs, hooks, and brackets should be inspected annually and lubricated lightly with a silicone-based spray to keep threads moving freely and prevent corrosion at connection points. If you used black iron pipe as a structural or decorative element, a coat of exterior metal primer followed by rust-inhibiting enamel will keep it looking sharp for years. Clear coat finishes over metal give a more natural look while still providing meaningful protection against the oxidation that would otherwise turn your carefully chosen hardware into a rusty eyesore within a couple of seasons.
Maintenance Tips and Seasonal Care for Long-Term Performance
A well-built hose post requires relatively little ongoing maintenance, but the small amount of attention it does need should be given consistently to prevent small issues from becoming expensive ones. At the start of each outdoor watering season, inspect every fitting and connection for signs of leakage, corrosion, or mechanical damage that may have developed over the winter. Turn the water on slowly and walk the full length of any buried supply line, watching for soft spots in the lawn that might indicate a slow leak underground. Catching these issues early makes the repair simple; ignoring them turns a minor fix into a major excavation project.
Before the first hard freeze of the season, winterizing your hose post is essential in cold climates. Disconnect and drain your hose completely, then shut off the water to the post at the nearest interior valve and allow the exterior bib to drain by opening it fully. If you installed a frost-free sillcock, this process is somewhat automated, but you should still disconnect the hose, as a connected hose prevents the frost-free valve from draining and defeats its entire purpose. Cover the bib with an insulated faucet cover for added protection during extended cold snaps.
The wooden components of your post will benefit from a fresh coat of finish every one to three years depending on your climate and the type of product you used. Watch for signs of checking or cracking in the wood, particularly at the top of the post where end grain is exposed to rain, and seal any openings promptly to prevent water from infiltrating and accelerating decay from the inside out. A well-maintained wooden hose post built from quality materials can easily last 15 to 20 years or more, making the modest investment of time and materials one of the best long-term values in outdoor DIY.
Customization Ideas to Inspire Your Own Design
One of the genuine pleasures of a DIY project is the freedom to take a basic concept and make it entirely your own. If your garden has a cottage or English garden aesthetic, consider wrapping the lower section of the post in stone veneer or surrounding it with a small mortared brick skirt that ties it visually to a nearby pathway or wall. These additions require more time and skill but create a result that looks thoroughly professional and permanent rather than assembled from hardware store components on a weekend afternoon.
For a more industrial or modern look, EMT conduit painted matte black, combined with minimalist black iron fittings and a simple powder-coated reel, creates a sleek station that suits contemporary landscape design. Pair it with a poured concrete pad underfoot and matching black gravel as ground cover, and you have something that looks like it belongs in a design magazine rather than a typical backyard. The beauty of working with plumbing components is that the variety of fittings, adapters, and pipe types available lets you build virtually any visual style you can imagine.
Solar-powered lighting added to the top of the post or integrated into a small cap piece makes the station useful after dark and adds a charming glow to the garden in the evening hours. A simple post cap light runs on a small rechargeable battery kept topped up by a compact solar panel, requires no electrical work, and provides enough illumination to find the bib and connect a hose without fumbling in the dark. Small details like this are what elevate a functional structure into something that you find yourself genuinely proud to show off to visitors, and they are almost always simpler to add than they look from the outside.








What do you think?
It is nice to know your opinion. Leave a comment.