










The Ultimate DIY Supplies Collection: Everything You Need to Create, Build, and Craft
Why Building a Thoughtful DIY Supplies Collection Changes Everything
There’s a real difference between having a few random tools rattling around in a junk drawer and actually putting together a DIY supplies collection you can rely on. When your materials are organized, well-chosen, and easy to grab, starting a project suddenly feels a lot less daunting. You stop talking yourself out of small repairs or weekend builds just because hunting down supplies feels like more work than the project itself. A good collection turns “I should really do that” into actually doing it.
It’s actually worth thinking about the psychology here. Research on creative productivity keeps coming back to the same idea: environmental friction — those little obstacles standing between you and what you want to do — has a surprisingly big impact on whether you follow through. If every project means a hardware store run just to grab the basics, you lose steam before you’ve even started. But when the sandpaper, the wood glue, and the clamps are already sitting there waiting for you? The project happens. Your collection is really an investment in your future creative self.
And honestly, there’s something satisfying about building a collection over time that goes beyond just having the right stuff on hand. Every item you add represents a skill you’ve picked up, a project you finished, or something you’re deliberately working toward. Whether you’re just getting started with a basic toolkit or you’ve got a workshop that’s been evolving for years, the process of thoughtfully putting together your DIY supplies is its own kind of creative work — one that says a lot about what you value and the kind of maker you’re becoming.
The Essential Foundation: Tools Every DIY Collection Must Include
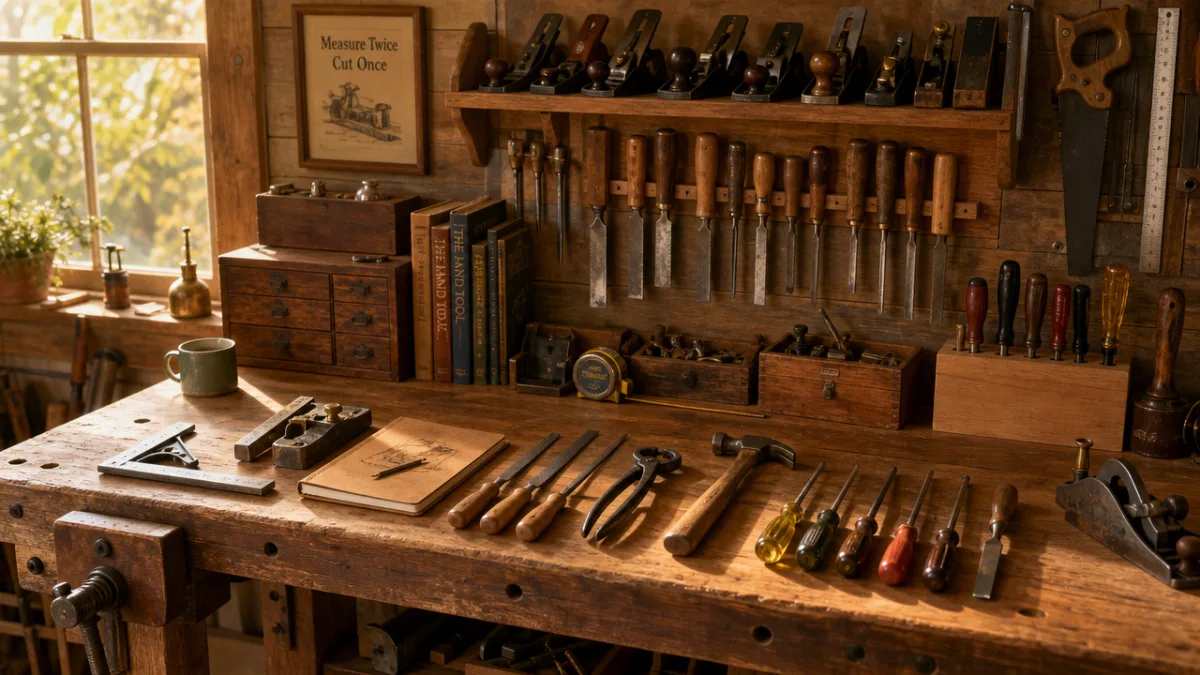
No matter what kind of projects you’re drawn to — woodworking, home repair, fabric arts, general crafting — some foundational tools belong in every serious DIY collection. A quality tape measure is non-negotiable, and it’s worth spending a little extra for one with a wide, sturdy blade that doesn’t flop around at longer extensions. Likewise, a reliable set of screwdrivers in multiple sizes and head types — both flathead and Phillips in a range of sizes — will come in handy across pretty much every project category you can think of.
Cutting tools deserve some real attention when you’re building your foundation. A sharp utility knife with replaceable blades is one of the most versatile things you’ll own, useful for everything from scoring drywall to trimming materials with precision. A good pair of scissors — dedicated to crafting and kept far away from the household pair that ends up cutting everything from tape to cardboard — will stay sharp much longer and make your work cleaner. For anyone working with wood or larger materials, a quality handsaw or a basic circular saw opens up a whole new range of possibilities.
Adhesives are a surprisingly important category too. You’ll want a hot glue gun with extra sticks for quick, flexible bonding across all kinds of materials. Wood glue, super glue in both gel and liquid forms, and a roll of double-sided tape will cover most situations you’ll run into. A strong contact cement and a tube of construction adhesive rounds things out for heavier-duty applications. Keep these in a clearly labeled bin or drawer so you’re always reaching for the right product instead of just grabbing whatever’s closest.
Measuring and marking tools are the unsung heroes of any DIY collection. A combination square, a carpenter’s pencil, a chalk line, and a good level might not be exciting, but the difference between a project that looks polished and one that looks a little off usually comes down to how carefully things were measured and marked before any cutting or fastening happened. Throw in a few rolls of painter’s tape in different widths, and you’ve got something that does triple duty — marking boundaries, protecting surfaces, and creating clean edges for paint — without leaving any residue behind.
Consumable Supplies: The Materials That Keep Your Projects Moving
Consumables are what keep an active DIY practice actually running. Unlike tools, which you buy once and take care of over the years, consumable supplies are the things you use up and replace regularly — and running out of them right in the middle of a project is one of the most frustrating things that can happen. Building a solid inventory of consumables means figuring out what you go through most often and keeping a comfortable buffer on hand. That one habit alone will do a lot for your creative momentum.
Sandpaper is one of those things nobody thinks about until they desperately need it. A good sanding supply covers a range of grits, from aggressive 60-grit for removing material fast to fine 220-grit for smooth pre-finish prep. Sanding sponges are especially handy for curved or irregular surfaces. If you do a fair amount of woodworking or furniture refinishing, investing in a random orbit sander and keeping an assortment of disc grits on hand will save you an enormous amount of time and effort over the course of a year.
Paint and finishing supplies are another major consumable category. Beyond the paint itself, a well-stocked collection includes a range of brush sizes and styles, foam rollers in different nap thicknesses, stir sticks, paint trays and liners, and quality painter’s tape. It’s worth keeping primer on hand in both spray and brush-on formulations. Finishing products like polyurethane, wax, and shellac extend the category further. A dedicated spot for paint supplies — one that keeps your brushes clean and properly stored — pays off in both the life of your tools and the quality of your finished surfaces.
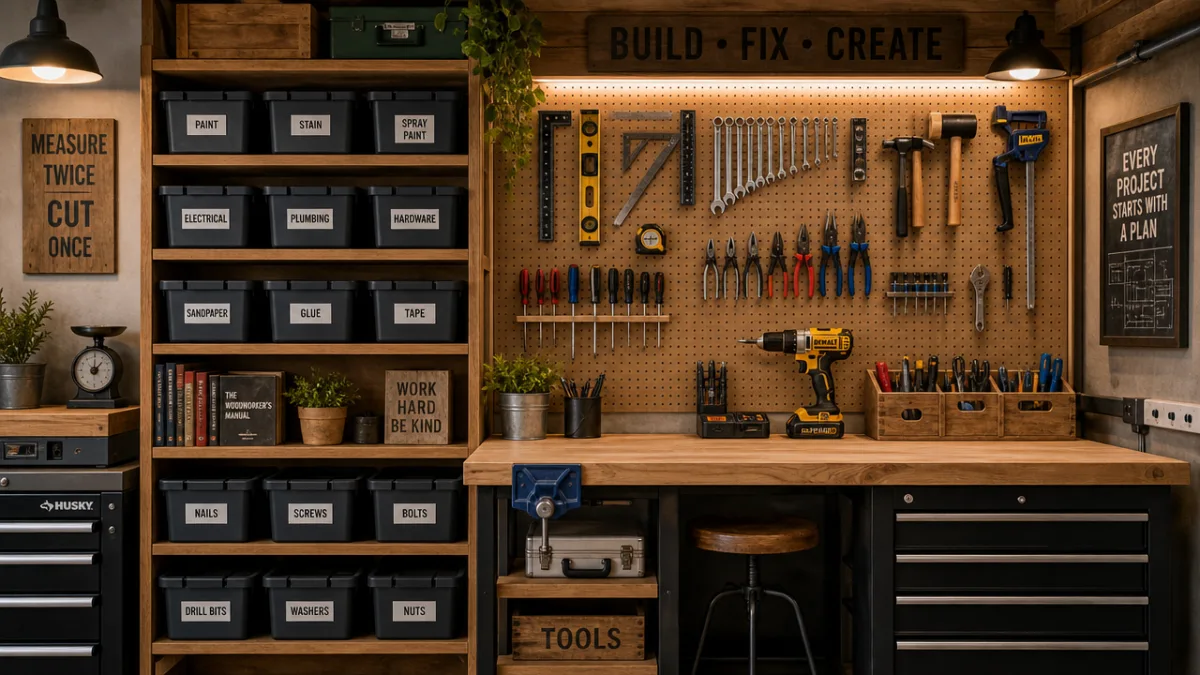
Hardware consumables deserve their own drawer or parts organizer. Screws in a range of lengths and gauges, nails sorted by size, picture-hanging hardware, cabinet hardware, and assorted drywall anchors are the kinds of things you never think about until you need one very specific size at eight in the evening when no store is open. A lot of experienced makers invest in a multi-compartment parts organizer and spend an afternoon getting everything sorted and labeled. It feels like a lot of work in the moment, but you’ll be glad you did it the very next time a project needs a specific fastener on short notice.
Craft-Specific Supplies: Tailoring Your Collection to Your Interests
Once you’ve got a solid foundation in place, the next layer of a truly personal DIY supply space is all about the materials specific to what you actually love making. If fabric work is your thing — sewing, quilting, upholstery — that means building an inventory that includes a range of thread weights and colors, different needle types, interfacing, batting, zippers, and elastic in multiple widths. Having the right notions on hand means a project can start and finish without a supply run derailing the whole thing.
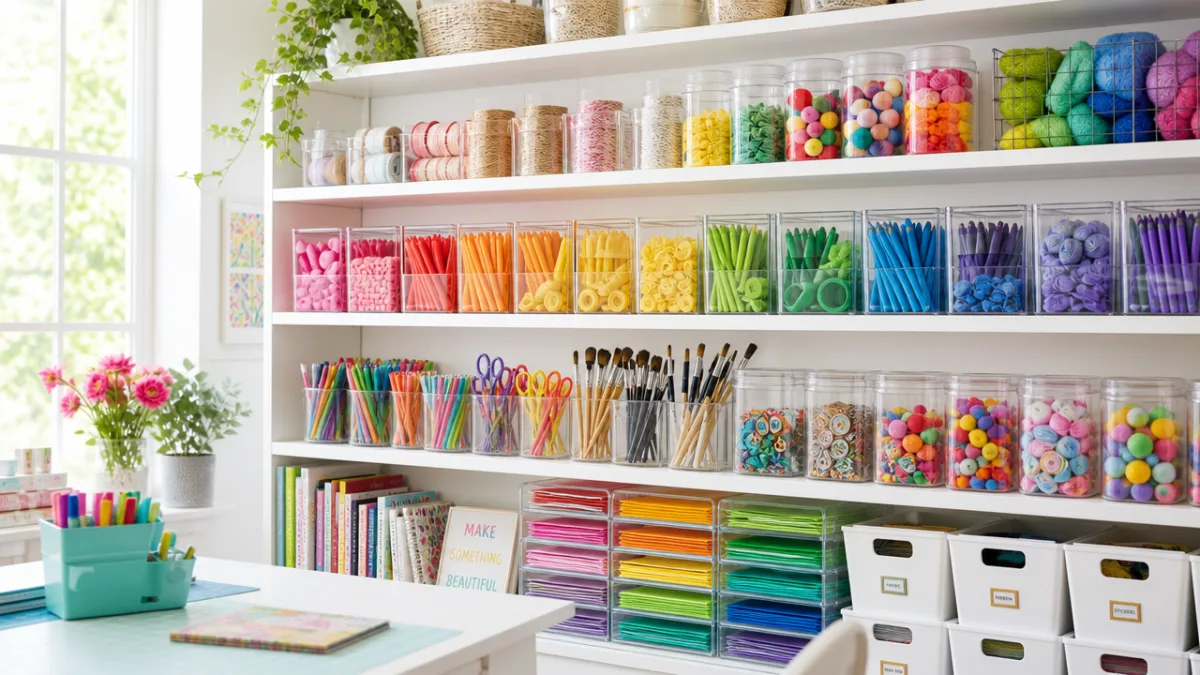
For mixed-media art and paper crafting, the list expands to cardstock in a range of weights and colors, decorative paper, stamps and ink pads, embossing powders, die-cutting tools, and embellishments like brads, eyelets, ribbons, and washi tape in various patterns. These supplies also lend themselves to some really satisfying organization — clear containers, labeled drawers, and color-coded storage systems make finding exactly the right piece of patterned paper an actual pleasure instead of a rummaging session.
Woodworkers and structural DIY folks benefit from keeping a curated selection of lumber, dowels, and sheet goods in their workspace. You don’t need to stock large quantities — that’s really a per-project purchase — but having a few key pieces around, like a sheet of plywood, some common dimensional pine, and a handful of hardwood boards for detail work, means small projects and repairs can happen without a special trip. Just make sure you’re storing wood properly: off the ground, with good air circulation, so your materials stay flat and workable.
A tiered approach based on frequency of use works really well for organizing craft-specific supplies. The things you reach for constantly should be the most accessible, while specialty supplies for specific project types can live a little further away. A mature craft collection might shake out something like this:
- Tier one — daily use items on open shelves or desktop organizers at eye level, right within arm’s reach
- Tier two — weekly use items in labeled drawers or bins nearby, but not necessarily in your main work zone
- Tier three — specialty or seasonal supplies in clearly labeled boxes on higher shelves, in a closet, or in auxiliary storage
- Tier four — bulk backstock of consumables in a dedicated supply closet or storage bin, with a reorder trigger marked on each container
Organization Systems That Transform a Supply Pile Into a Functional Collection
Accumulating supplies without a real commitment to organization is probably the most common mistake developing makers make. The supplies that actually get used are the ones you can find quickly and put back easily. If your collection keeps growing without a system that grows with it, you’ll end up buying things you already own because you couldn’t find them, and your workspace will start feeling more like a source of stress than a place of inspiration. Organization isn’t separate from building your collection — it’s a core part of it.
Container choice matters more than most people realize. Clear containers are almost always better than opaque ones for craft and tool storage because you can see what’s inside without opening anything. Stackable containers with secure lids protect supplies from dust and moisture while making the most of vertical space. For small items like beads, hardware, and embellishments, multi-compartment organizers — the kind originally designed for fishing tackle — offer great storage density and flexibility, with adjustable dividers you can reconfigure as your collection changes.
Labeling is the other half of a functional system, and it’s where a lot of otherwise organized people fall short. A label that just says “miscellaneous craft” doesn’t actually help you find anything. Good labels are specific, consistent in format, and placed where you can read them without moving the container. A label maker produces clean, durable results, but handwritten labels on masking tape work just fine if they’re legible and consistently placed. For drawers and bins holding a mix of items, listing the three to five most important contents on the label gives you what you need to make a fast retrieval decision.
Building Your Collection Over Time: A Strategic Approach to Acquisition
One of the most freeing realizations you can have as a maker is that a great DIY collection doesn’t need to be put together all at once. Trying to buy everything upfront is both impractical and a little counterproductive — you’ll end up with things you don’t actually need while missing what your real projects actually call for. A much better approach is building deliberately over time, letting your project history guide what you buy rather than some idealized version of who you imagine yourself being as a maker.
Project-driven purchasing is one of the best frameworks for growing a collection with intention. When a project needs a tool or supply you don’t have, take a moment to research the right option at a quality level that matches how often you expect to use it. If it’s a one-time need, a budget option or a borrowed tool makes total sense. If it’s something you’ll reach for regularly, buy quality from the start. Experienced makers say this all the time, and it’s true: it’s almost always cheaper to buy a good tool once than to replace a frustrating cheap one over and over again.
Thrift stores, estate sales, and secondhand marketplaces online are genuinely invaluable for building a collection without breaking the bank. Hand tools in particular — hammers, chisels, hand planes, clamps — were often made to higher standards in past decades and can be found in great condition for a fraction of retail prices with a little patience and basic cleaning or sharpening. Power tools need a closer look when bought used, but a well-maintained used router, sander, or drill from a reputable brand will outperform a new budget model from an unknown manufacturer in almost every way that matters.
Keeping track of your collection — even in a simple spreadsheet, a notes app, or an index card system — pays off in ways you might not expect. Knowing what you own prevents duplicate purchases, helps you spot real gaps in your toolkit, and gives you a handy reference when someone asks to borrow something specific. A simple inventory updated once or twice a year, noting what you have, its condition, and where it lives, turns a chaotic pile of stuff into a managed asset. For anyone with a significant investment in tools and supplies, that documentation also has real practical value for insurance purposes.
Maintaining, Protecting, and Evolving Your DIY Collection
A DIY supplies collection is a living thing — it needs ongoing attention to stay genuinely useful. Tools that aren’t maintained deteriorate. Consumables that aren’t monitored run out at the worst possible moment. Organizational systems that never get revisited slowly fill up with clutter and confusion. Building some maintenance habits into your creative practice — brief, regular check-ins instead of massive periodic overhauls — keeps your workspace functional without a ton of effort and protects everything you’ve invested in your supplies over time.
Taking care of your tools is one of the highest-leverage habits you can build. Cutting tools — scissors, utility knives, chisels, saw blades — perform dramatically better when they’re sharp, and learning to sharpen or replace blades yourself saves both money and frustration over the long run. Metal tools benefit from a light coat of oil to prevent rust, especially in humid environments. For power tools, staying on top of maintenance — cleaning dust from vents, checking cords for wear, lubricating moving parts per the manufacturer’s recommendations — can extend the life of expensive equipment by years or even decades.
Protecting your supplies from environmental damage is an aspect of maintenance that’s easy to underestimate. Adhesives have a finite shelf life and degrade faster with temperature extremes. Paint separates and spoils. Fabric and paper are vulnerable to moisture, mold, and insects. Storing sensitive supplies away from the dramatic humidity and temperature swings that garages and basements in many climates see regularly will go a long way toward keeping everything usable. Rotating your stock, using older supplies before newer ones, and checking expiration dates on adhesives and finishes before you start a project prevents that particularly annoying discovery of unusable materials when you’re already in the middle of something.
Finally, let your collection evolve honestly as your interests and skills change. Take stock occasionally of whether what you own actually reflects the projects you want to make right now. Supplies that accumulated around an interest you’ve moved on from can be donated to schools, community centers, or maker spaces where they’ll genuinely get used, freeing up space and mental overhead for wherever your creativity is headed next. A collection that honestly reflects your current practice is far more valuable and inspiring than one stuffed with aspirational purchases that mostly make you feel guilty. The best DIY collection is simply the one that keeps inviting you to make something.








What do you think?
It is nice to know your opinion. Leave a comment.