










DIY Corner Flower Bed: Easy Concrete Block & Wood Planter
Why a Corner Flower Bed Is the Perfect Outdoor Upgrade
You know that awkward corner in your yard or patio that just kind of… sits there? Maybe it collects leaves, or maybe you’ve just been ignoring it for years. You’re not alone — corners are some of the most overlooked spots in any outdoor space, but they’re also secretly one of the best places to create something really special. Building a DIY corner flower bed out of concrete blocks and wood is one of those weekend projects that punches way above its weight. A neglected nook becomes a lush, eye-catching focal point, and the whole yard just looks better for it.
Beyond just looking great, a raised corner planter has some real practical perks over planting straight into the ground. You get full control over your soil, so you can dial in exactly what your plants need. Drainage is much better than in-ground beds, which means healthier roots and far less chance of rot. And the raised height is genuinely a game-changer — no more hunching over to weed or plant. Your back will thank you, and it makes gardening accessible for just about everyone.
The concrete-and-wood combo is also a surprisingly smart pairing. The blocks bring the muscle — they’re heavy, stable, and don’t budge even when the weather turns nasty. The wood brings the warmth. It softens all that industrial gray with natural texture and a handcrafted look that blends right into most garden styles. Put them together and you’ve got a planter that looks like it cost a lot more than it actually did.
Planning Your Corner Planter: Measurements, Materials, and Layout
Before you touch a single block or fire up a saw, take a little time to plan things out — it’ll save you a lot of headaches and extra trips to the hardware store. First, measure your corner carefully. Figure out how far you want each arm of the L-shape to run along the two walls or fence lines. For most backyards, somewhere between four and six feet per side hits the sweet spot: generous enough to plant in but not so big it swallows a smaller space. Sketch a quick top-down layout on paper with measurements written in, and keep it handy throughout the build.
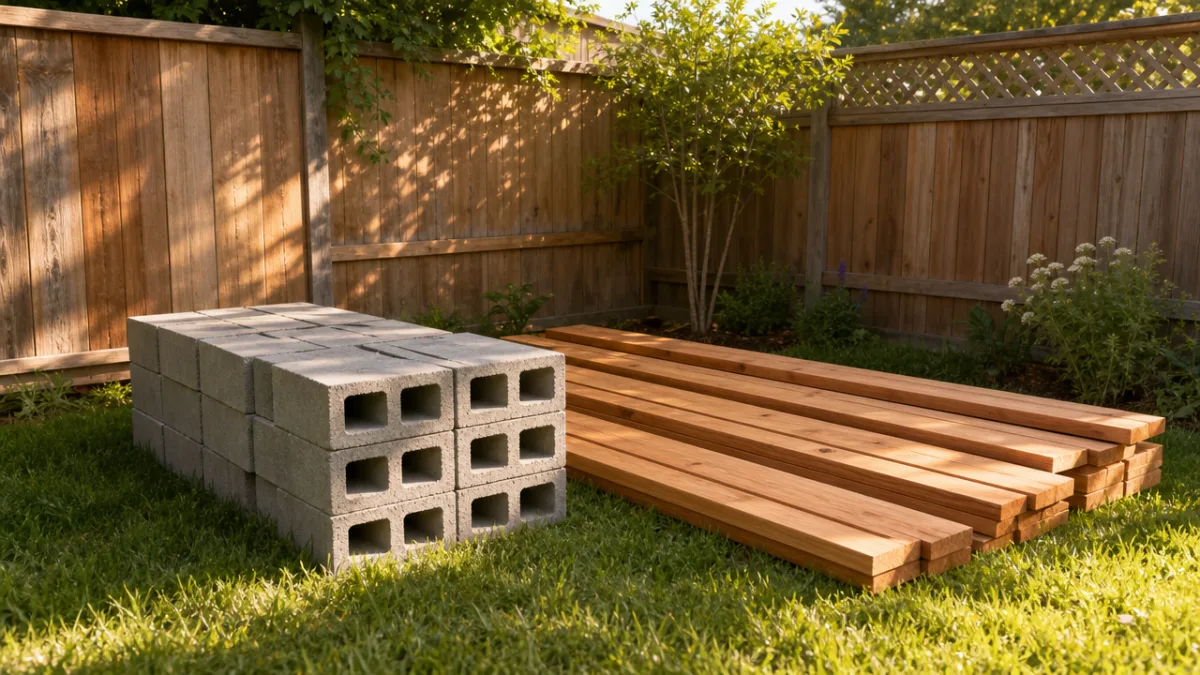
For blocks, standard 8×8×16-inch cinder blocks are your go-to — they’re cheap, easy to find, and stack up really well. The hollow cores are a bonus too, since you can fill them with soil for extra planting real estate or leave them open for drainage. To figure out how many you need, decide how many courses (rows) tall you want to go. Two to three courses gets you a finished height of 16 to 24 inches, which feels comfortable to work at and looks substantial in the yard. Order about 10% more than your count to cover any breakage or cuts.
For the wood, you’ll want pressure-treated lumber or something naturally rot-resistant like cedar or redwood, since it’ll be living near soil and moisture. Two-by-six or two-by-eight boards are great for facing panels and cap rails. Before you start, round up all your supplies so you’re not stopping mid-build to make a run for something you forgot.
- Concrete adhesive or landscape construction adhesive for bonding block courses
- Gravel or crushed stone for the base drainage layer (two to four inches deep)
- Landscape fabric to line the interior and prevent soil from washing through
- Exterior wood screws and galvanized brackets for securing wood elements
- A level, rubber mallet, tape measure, and speed square for accurate assembly
- High-quality potting mix or a blend of topsoil, compost, and perlite for filling
Step-by-Step Construction: Building the Concrete Block Foundation
Everything else depends on how well you lay that first course of blocks, so don’t rush this part. Start by clearing your corner completely — pull any grass, weeds, or roots, and use a flat spade to cut clean edges along your planned footprint. Dig out about three to four inches of soil inside the planter area for your drainage layer. Tamp the base down firm, pour in your gravel, and rake it level. Now you’re ready to actually start building.
Place your first corner block right at the point where the two sides meet — this is your anchor, and everything else lines up from here. Work your way out along both arms of the L, checking constantly with your level. Even a small tilt in the first course will snowball as you add rows on top of it. Tap blocks gently into position with a rubber mallet rather than forcing them. Once your first course is perfectly level, run a bead of landscape construction adhesive along the tops before setting the second row.
On the second and third courses, stagger your joints like a bricklayer would — never stack one seam directly above another. That running bond pattern is what gives the wall its real strength and keeps it from splitting along a weak line. At the open ends of each arm, you can use half blocks or turn a full block sideways to cap things off neatly. Once the last course is down and the adhesive has had a few hours to cure, you’ve got a foundation that honestly looks like it was done by a pro and should hold up for decades.
Now cut your landscape fabric to fit and press it against the interior walls and floor of the planter. Overlap any seams by at least six inches and tuck it snugly into the corners. You can pin the top edge down with landscape staples, or just let the weight of the soil hold it in place once you start filling. Don’t skip this step — it keeps your soil from eroding through the block cores while still letting water drain freely through the gravel underneath.
Adding the Wood Elements: Facing Panels, Cap Rails, and Finishing Touches
With the blocks cured and solid, it’s time for the part that really pulls everything together: the wood. The most impactful piece is the cap rail — boards laid flat across the top of the block walls. It does a few things at once: it hides those raw cinder block edges, gives you a clean finished surface, and honestly just makes the whole thing feel more intentional. It’s also a great spot to set down your coffee or a trowel while you’re working. Cut your two-by-sixes to length with a miter saw and secure them with masonry screws or construction adhesive.
For an even more polished finish, try adding vertical wood facing panels along the outside of the block walls. Cut your boards to match the height of your stacked courses and attach them horizontally across the block faces using galvanized screws and L-brackets. Done right, this essentially wraps the whole concrete structure in wood, and the planter ends up looking much more like a custom carpentry project than a wall of stacked blocks. Go with uniform-width boards for something clean and modern, or mix up the widths for a more rustic, cottage-garden vibe.
Before installation, sand all your cut edges smooth and give everything two coats of exterior stain, sealer, or paint in a color that works with your home’s palette. Rich walnut and weathered gray are both really popular choices — they play nicely with the cool gray of concrete and let your plants’ colors really pop. If your planter is tucked against a fence or wall, think about adding a simple trellis panel at the back corner to support climbing vines or trailing plants. It adds vertical interest and turns the corner into a destination rather than just a planter.
One more thing worth doing: interior bracing. If the planter runs along a wall or fence, drive a few galvanized rebar stakes down through the hollow block cores into the ground. Wet soil is surprisingly heavy, and that lateral pressure builds up over time. A little rebar costs almost nothing and takes five minutes, but it can make a real difference in keeping the walls from bowing after a few seasons of freeze-thaw cycles and soggy soil.

Filling, Planting, and Designing Your Corner Flower Bed
Getting your soil mix right is just as important as building the structure — and it’s the step most first-timers underestimate. Whatever you do, don’t just shovel dirt from your yard into a raised bed. In-ground soil packs down hard in a contained space and basically chokes your plant roots. What you want instead is something light, loose, and well-draining. A mix that works really well for most people is roughly 40% quality topsoil, 40% aged compost, and 20% perlite or coarse horticultural sand to keep things from compacting over time.
Fill the planter to about two inches below the top of the cap rail — that margin is important so soil and mulch don’t wash over the edge when it rains. Water everything thoroughly before you plant so the mix settles and any air pockets collapse. The level will probably drop an inch or two after that first good soak, and that’s totally normal. Just top it off and you’re ready for the best part: picking your plants.
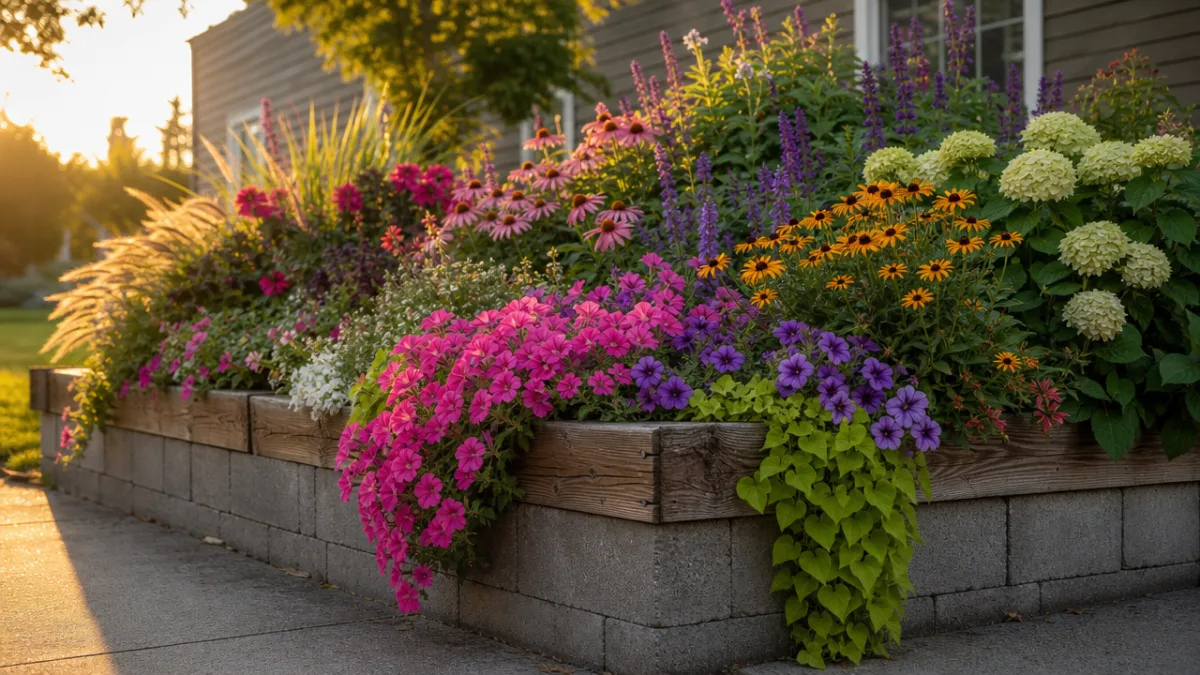
Corner planters are a natural fit for the classic thriller-filler-spiller formula that container gardeners swear by. The thriller is a tall, dramatic plant anchored at the back corner — think ornamental grasses, tall salvias, crocosmia, or a compact shrub rose. Fillers are mid-height mounding plants that flesh out the rest of the bed: petunias, calibrachoa, impatiens, and geraniums all do great. Spillers go at the front edges and trail over the cap rail, softening the hard lines of the wood and concrete with something loose and flowing.
Here are a few planting combinations that work particularly well in this kind of corner bed, though the real limit is just your climate and taste.
- Cottage Romantic: Climbing roses on a rear trellis, surrounded by lavender, catmint, and trailing white bacopa for a soft, fragrant English garden atmosphere.
- Bold Tropical: A central canna lily or elephant ear flanked by bright orange marigolds and deep purple sweet potato vine for maximum visual drama in warm climates.
- Pollinator Paradise: Echinacea, rudbeckia, salvia, and trailing verbena to attract butterflies, bees, and hummingbirds throughout the entire growing season.
- Edible Beauty: Cherry tomatoes or compact peppers as the thriller, basil and parsley as fillers, and trailing nasturtiums as spillers that are both decorative and edible.
Maintenance Tips and Seasonal Care for Long-Lasting Results
One of the nicest things about a concrete block and wood planter is that the structure itself is pretty low-maintenance once it’s built right. The blocks are basically indestructible under normal conditions — just rinse them off with a garden hose if algae or moss starts creeping up the shaded sides. The wood needs a bit more love. Check your cap rails and facing panels each spring for cracking, splintering, or fading, and plan to reapply stain or sealer every two to three years so moisture doesn’t work its way in.
On the gardening side, the most important habit to build is watering deeply but not constantly. Less frequent, deeper watering encourages roots to push down into the soil rather than staying near the surface where they’ll struggle in heat and drought. A two-inch layer of organic mulch — shredded bark, wood chips, or straw — spread over the soil in late spring does a lot of the work for you: it slows evaporation, keeps weeds down, and buffers the soil temperature through summer. Top it up each spring as it breaks down.
Feeding your plants through the season is probably the single biggest thing you can do for bloom production. Mix a slow-release granular fertilizer into the top inch of soil at planting time to give everything a steady nutritional base for the first few months. Then starting mid-summer, supplement with a liquid bloom-booster every two to three weeks when flowering really kicks into high gear. And deadhead regularly — snipping off spent blooms on petunias, marigolds, and zinnias redirects the plant’s energy away from making seeds and back into making more flowers.
When the season winds down, don’t just abandon the bed for winter. Pull out spent annuals, cut back perennials as appropriate for your climate, and top dress with two to three inches of fresh compost mixed lightly into the existing soil. That annual refresh replaces what a full season of growing has pulled out of the mix and keeps your planter just as productive next year as it was in its first.
Most of all, think of this corner planter as something that grows and changes with you rather than a one-and-done project. That’s one of the real joys of a raised bed this size — you can completely reimagine it each season. Swap out summer annuals for cool-season pansies, ornamental kale, and mums for a gorgeous autumn display. In milder climates, a planting of evergreen sedges, hellebores, and seasonal bulbs keeps the corner looking cared for even in winter. Your concrete block and wood planter isn’t just a weekend build — it’s a permanent piece of your garden that will bring structure, color, and a little personal flair to your outdoor space for years to come.








What do you think?
It is nice to know your opinion. Leave a comment.