










Cheap Walkway Ideas DIY That Look Stunning Without the Price Tag
Why Your Walkway Matters More Than You Think
The walkway leading to your front door is one of the first things visitors notice about your home. It sets the tone for everything inside, creating an immediate impression that speaks to your taste, your attention to detail, and the overall care you put into your property. A cracked, overgrown, or simply dull pathway can undermine even the most beautifully landscaped yard, while a thoughtfully designed walkway can elevate a modest home into something that genuinely turns heads on the street.
Many homeowners assume that a beautiful walkway requires a professional contractor, expensive materials, and a budget that stretches into the thousands of dollars. The reality is quite different. With a weekend’s worth of effort, some creativity, and materials that often cost less than a couple of grocery runs, you can transform a tired or nonexistent walkway into something that looks like it was designed by a landscape architect. The key is understanding which materials offer the best visual payoff for the lowest cost.
Beyond pure aesthetics, a well-planned walkway also serves very practical purposes. It protects your lawn from being worn down by foot traffic, reduces mud being tracked into the house, improves drainage in areas prone to puddles, and can even add measurable resale value to your property. Real estate studies consistently show that strong curb appeal can increase a home’s perceived value by five to eleven percent, making even a modest DIY walkway investment one that pays for itself many times over.
Assessing Your Space Before You Begin
Before purchasing any materials or picking up a shovel, spend some time observing how people naturally move around your property. Where do they walk? Where does water pool after rain? Are there existing plants or trees whose roots might interfere with a rigid surface? These observations will save you significant time and money by helping you design a walkway that works with your landscape rather than against it. A path that follows the natural desire line — the route people instinctively take — will always feel more comfortable and look more intentional than one imposed arbitrarily on the space.
Measuring your space accurately is another step many enthusiastic DIYers skip in their excitement to get started. Take the total length and average width of the path you want to create, and then calculate the square footage. This number is your foundation for estimating material quantities. It’s always wise to order or purchase ten to fifteen percent more material than your calculations suggest you need, accounting for cuts, breakage, and the occasional miscalculation. Running short of a specific material midway through a project is both frustrating and costly, especially if a particular product goes out of stock or the dye lot changes.
Consider also the long-term maintenance commitment of whatever style you choose. Some walkway options, like poured concrete or mortared stone, require very little ongoing attention once installed but involve more complex initial installation. Others, like loose gravel or wood chip paths, are extremely easy to put down but need periodic replenishment. Matching your walkway style to your actual maintenance habits — not your idealized version of them — will ensure the path continues to look great years down the line rather than becoming an eyesore you regret.

The Best Budget-Friendly Walkway Materials Available Today
Gravel and crushed stone consistently rank among the most affordable and versatile walkway materials available to DIY homeowners. Depending on your region, pea gravel typically costs between one and three dollars per square foot, making it dramatically cheaper than pavers, concrete, or natural stone. It drains exceptionally well, which makes it a smart choice for areas prone to water accumulation. It also compacts over time to create a surprisingly stable walking surface. Available in a range of colors from warm amber tones to cool blue-grays, gravel can complement virtually any architectural style from rustic farmhouse to modern minimalist.
Concrete stepping stones represent another budget champion for DIY walkways. Pre-cast concrete pavers purchased from home improvement stores often cost as little as fifty cents to two dollars per piece, and with careful spacing, a single pack of them can create a charming path that covers a significant distance. For those who want to go even further with savings and customization, casting your own stepping stones using simple molds, basic concrete mix, and decorative elements like pebbles, glass pieces, or leaf impressions can bring the cost down to almost nothing while producing something genuinely unique and personal.
Reclaimed and salvaged materials offer perhaps the most exciting possibilities for budget walkway projects. Old bricks salvaged from demolition sites, broken concrete chunks repurposed as “flagstones,” railroad ties, and even thick wooden rounds cut from fallen trees can all form the basis of a beautiful, character-rich walkway. Local online marketplaces like Facebook Marketplace and Craigslist regularly list free or very low-cost construction remnants that people are simply trying to remove from their properties. One person’s construction debris can truly become another person’s picturesque garden path.
Mulch and Wood Chip Paths: Underrated and Underused
Wood chip and mulch pathways are perhaps the most underrated option in the DIY walkway world. They are extraordinarily inexpensive — in many municipalities, you can get free wood chips delivered directly to your home simply by contacting your local arborist services or checking apps like Chip Drop, which connects homeowners with tree trimming companies looking to offload freshly chipped material. Spread four to six inches deep over a layer of landscape fabric, wood chips create a soft, natural-looking path that feels wonderful underfoot and suits cottage gardens, woodland landscapes, and informal backyard settings beautifully.
The main consideration with mulch paths is longevity. Wood chips decompose over time, which actually benefits your surrounding garden soil but does mean you’ll need to replenish the path every year or two. This replenishment is typically very quick and inexpensive, and some gardeners actually appreciate the ritual of refreshing their paths each spring as part of their general garden maintenance routine. Using a thicker initial layer and topping it with a slightly denser material like shredded bark can extend the interval between replenishments noticeably.
Edging is what transforms a wood chip path from looking like an accidental pile of debris into a deliberate design statement. Simple metal landscape edging, bamboo borders, reclaimed bricks set on their sides, or even lines of larger stones can cleanly define the edges of a mulch path and give it a finished, intentional appearance. The edging itself doesn’t need to be expensive — some of the most beautiful path borders are assembled entirely from materials found on the property or purchased second-hand — but it makes an enormous visual difference and is well worth the small extra investment of time and money.

Step-by-Step: Installing a DIY Stepping Stone Path
A stepping stone path is one of the most approachable DIY walkway projects for homeowners of any skill level. You don’t need specialized tools, advanced technical knowledge, or a large budget to create something genuinely lovely. The basic process involves planning your layout, preparing the ground, setting your stones, and filling the gaps — steps that nearly anyone can complete over a single weekend with satisfying results. The tools you’ll need are minimal: a shovel or spade, a rubber mallet, a level, some sand, and whatever stones or pavers you’ve chosen.
Begin by laying your stones out on top of the existing ground without digging anything yet. Walk along the proposed path at a natural pace and adjust the stone spacing so that each step lands comfortably on a stone without requiring you to stretch or shuffle. The average comfortable stride for most adults places stones approximately eighteen to twenty-four inches apart when measured from center to center. Once the layout feels natural and comfortable underfoot, use marking paint or small flags to mark the outline of each stone’s position before you remove them.
For each stone, dig out a shallow depression that is roughly two inches deeper than the thickness of your stone. Fill the bottom of this depression with coarse sand or fine gravel and compact it firmly. This base layer is crucial because it provides drainage — preventing water from pooling under your stones and causing them to shift or heave during freeze-thaw cycles — and creates a stable, level foundation. Set your stone into the prepared depression, check it with a level, and use a rubber mallet to tap it gently into final position. The finished stone should sit slightly above the surrounding soil to prevent grass and weeds from encroaching over its edges.
Filling the Gaps: Where Style Really Comes Together
The material you choose to fill the spaces between your stepping stones has an enormous impact on the final look and feel of the finished path, and there are many inexpensive options that can dramatically change the character of the same basic stone layout. Low-growing ground cover plants like creeping thyme, Irish moss, or clover create a lush, cottage-garden feeling and have the added benefit of softening hard edges, releasing pleasant fragrance when walked upon (in the case of thyme), and suppressing weeds naturally. These plants are often available inexpensively as plugs or can be propagated from a friend’s garden.
For a cleaner, more contemporary aesthetic, fine gravel or decomposed granite between stepping stones creates a sharp contrast that emphasizes the geometry of the path and pairs beautifully with modern architectural styles. Dark Mexican beach pebbles between light-colored concrete pavers creates a dramatic monochromatic effect that looks far more expensive than it is. River rock in warm tans and grays suits natural stone stepping stones and creates a look that feels as though it grew naturally from the landscape rather than being carefully constructed.
Whatever gap-filling material you choose, don’t skip the landscape fabric layer beneath it. This simple, inexpensive material — available in large rolls at any garden center — prevents weeds from growing up through your beautiful new infill while still allowing water to drain through. Without it, you’ll find yourself pulling weeds from between your stones within a single growing season, and that maintenance burden quickly becomes tiresome. A single roll of landscape fabric costs very little and can cover an entire average-length front walkway, making it one of the highest-value investments in any DIY path project.
Creative Design Ideas That Look High-End on a Low Budget
One of the most effective tricks for making a budget walkway look expensive is to create a deliberate pattern rather than laying materials randomly or in a simple straight line. Even inexpensive concrete pavers can look stunning when laid in a herringbone, basketweave, or running bond pattern. The pattern itself communicates effort and intentionality, which the eye naturally associates with quality and care. If you’re working with irregularly shaped stones, practicing the arrangement on your driveway or garage floor before setting anything permanently allows you to create a puzzle-like fitting that looks far more artisanal than random placement would.
Incorporating plants directly into and alongside your walkway is one of the most powerful and affordable design upgrades available to you. Low border plants like lavender, ornamental grasses, salvia, or catmint planted along both edges of a path soften the transition between the hardscape and the lawn, add fragrance and movement, and make even the simplest path look like it belongs to a carefully designed landscape. Many of these plants are extremely inexpensive as small starts, propagate readily through division, or can be started from seed for nearly nothing, and they contribute enormously to the overall impression of quality.
Lighting transforms any walkway after dark and can be added very inexpensively using solar-powered stake lights. Modern solar path lights have improved dramatically in quality and brightness over the past few years, and sets of eight or ten can be purchased for under thirty dollars at many retailers. Placed alternately on both sides of the path or grouped in clusters at key moments like curves or entry points, they create a welcoming, magical quality to evening arrivals that no amount of expensive hardscaping can replicate. Solar lights require no wiring, no electrician, and no ongoing electricity cost, making them one of the very best value-to-impact upgrades in outdoor design.
Curved Paths vs. Straight Paths: Which Is Right for Your Space
The debate between curved and straight walkways is really a question of the feeling you want your outdoor space to convey. Straight paths communicate formality, efficiency, and a sense of order. They pair well with symmetrical plantings, classic architectural styles, and front yards where a clean, direct approach to the door is desirable. Straight paths are also generally easier and faster to install, as they require less planning and fewer material cuts. For a DIYer working on their first walkway project, a straight design is often the most sensible starting point.
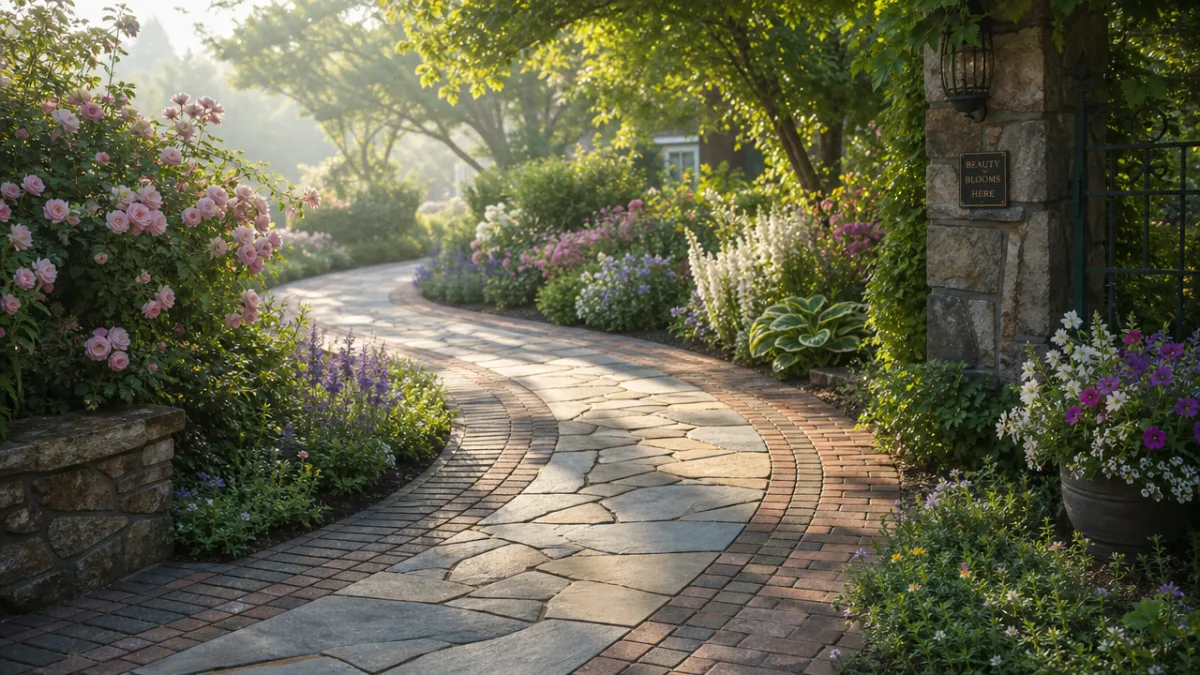
Curved paths, on the other hand, create a sense of discovery and relaxed informality. They invite the eye to follow the path’s journey rather than jumping immediately to the destination, making a property feel larger and more interesting than it might actually be. A gently curving path through a cottage garden or woodland-inspired landscape can feel like a work of art in itself. The curves don’t need to be dramatic — even a subtle S-curve in a twenty-foot front path adds considerable visual interest and sophistication compared to a dead-straight approach.
When designing a curved path, avoid the common mistake of making curves that feel arbitrary or unnatural. Curves should follow the logic of the landscape — curving around a tree, following the edge of a planting bed, or echoing the contour of a slope. To lay out a curve accurately before digging, use a garden hose as a flexible marker and stand back to assess the shape from a distance before committing to it. Adjust the hose until the curve looks intentional and graceful, then mark the line with spray paint and proceed with installation. This simple technique costs nothing and prevents the regret of a poorly planned curve.
Maintenance Tips to Keep Your DIY Walkway Looking Stunning for Years
Even the most beautifully installed walkway will deteriorate quickly without some basic ongoing maintenance, but the good news is that maintaining a DIY path requires far less effort than most homeowners fear. For gravel and loose-material paths, the primary maintenance task is raking the material back into place periodically after rain or heavy foot traffic displaces it toward the edges. Adding fresh material every year or two restores the depth and appearance of the path. A dedicated walkway rake — a small, lightweight tool — makes this job quick and easy and is worth keeping near the path for regular use.
Stepping stone paths benefit most from regular weeding between the stones and occasional releveling of any stones that have shifted due to soil movement or freeze-thaw cycling. Both of these tasks are far easier to stay on top of with small, frequent sessions than to tackle after years of neglect. Setting aside fifteen minutes every few weeks during the growing season to pull any emerging weeds before they establish deep root systems will keep the path looking pristine with minimal effort. A narrow hand weeder or old kitchen knife is the perfect tool for extracting weeds growing in tight gaps between stones.
Concrete and stone pavers can develop a dusty, dingy appearance over time from accumulated dirt, algae, and mineral deposits. A simple annual cleaning with a stiff brush and a solution of water and white vinegar will remove most surface staining without the need for expensive cleaners or pressure washing equipment. For more stubborn algae or lichen growth — common on shaded paths — a diluted bleach solution applied and left for thirty minutes before scrubbing is very effective. Always rinse thoroughly after any cleaning treatment to prevent residue from affecting surrounding plants.
Seasonal Updates: Keeping Your Walkway Fresh Year-Round
One of the great advantages of a DIY walkway over a professionally installed one is the freedom to evolve and update it over time without feeling like you’re destroying a large financial investment. Seasonal updates can be as simple as switching out the potted plants flanking the path, adding seasonal flowers to the adjacent beds, or refreshing the mulch with a new top layer that brings back that rich, fresh color. These small gestures of seasonal attention keep the walkway feeling cared for and current without requiring any significant new expenditure.
For those in climates with harsh winters, protecting certain walkway materials during the cold months is worth considering. Natural stone and concrete can be damaged by de-icing salts, so using sand for winter traction rather than chemical melters will preserve the surface integrity of your pavers. Wood elements like timber edging or round wood stepping stones benefit from a seasonal application of outdoor wood sealant to prevent moisture penetration and the cracking that freeze-thaw cycles cause in untreated wood. These protective measures are quick and inexpensive but can extend the life of your walkway materials by years.
Finally, don’t underestimate the power of the surrounding plantings in maintaining the overall impression of your walkway. A beautifully installed path flanked by overgrown, weedy, or struggling plants will never look its best, while a simple gravel path bordered by well-tended, thriving plants can look absolutely spectacular. Regular deadheading, trimming, and dividing of border plants keeps the walkway’s setting as beautiful as the walkway itself. The path and its plantings should always be thought of together as a single design composition, because that is truly how visitors experience them.








What do you think?
It is nice to know your opinion. Leave a comment.