










Affordable & Easy DIY Raised Garden Beds: A Complete Guide to Growing Your Own
Why Raised Garden Beds Are Worth Every Penny
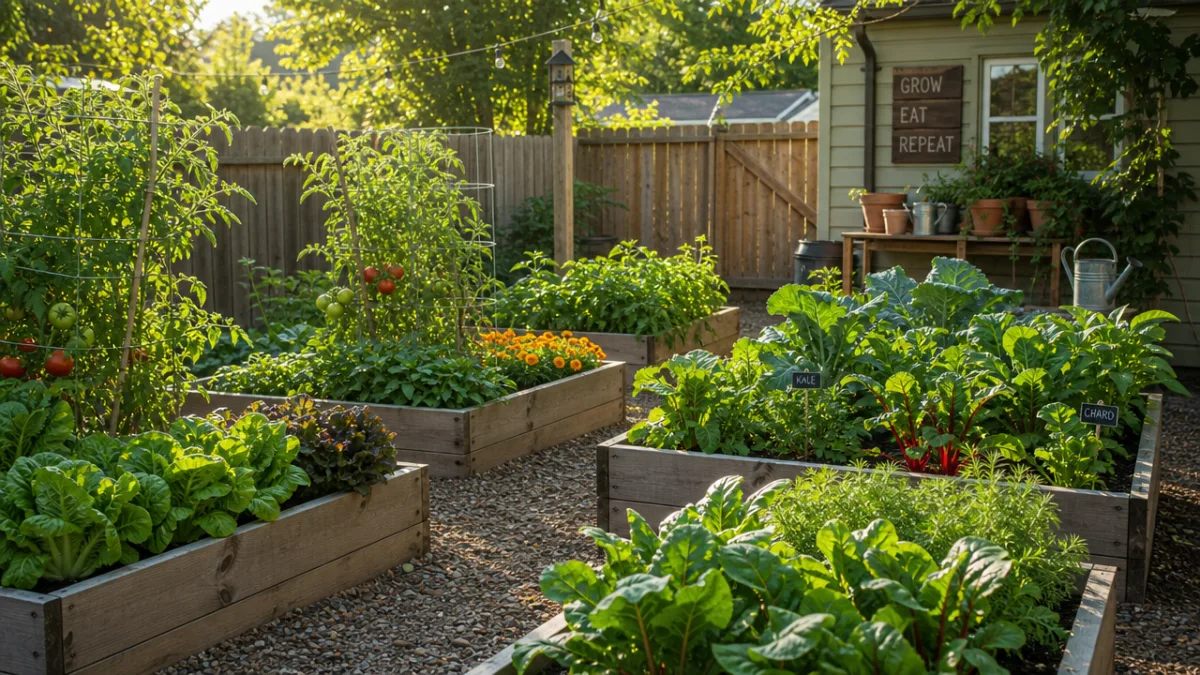
If you have ever dreamed of growing your own vegetables, herbs, or flowers but felt intimidated by the cost of landscaping or the complexity of traditional gardening, raised garden beds might be exactly the solution you have been looking for. These simple, contained growing spaces offer a practical and visually appealing way to start gardening without breaking the bank or requiring years of experience. The beauty of a raised bed is that it puts you in complete control of your growing environment from day one.
One of the most compelling reasons to choose raised beds over traditional in-ground gardening is the dramatic improvement in soil quality you can achieve right from the start. When you garden directly in the ground, you are at the mercy of whatever soil your yard happens to have — which might be too sandy, too clay-heavy, full of rocks, or depleted of nutrients. With a raised bed, you fill it with exactly the blend of soil, compost, and amendments that your chosen plants need, giving them the best possible start and dramatically improving your yield season after season.
Beyond soil control, raised beds offer a range of practical benefits that make gardening more enjoyable and productive. They warm up faster in the spring, extending your growing season by several valuable weeks. They drain more effectively than compacted ground soil, reducing the risk of root rot. Weeds are far easier to manage because you are working in a defined space with clean soil. And perhaps most importantly for many gardeners, the elevated height reduces the back-bending, knee-straining labor that makes traditional gardening so physically demanding over time.
The Cost Reality: Cheaper Than You Think
Many people assume that building raised garden beds will require a significant upfront investment, but this assumption tends to dissolve quickly once you start pricing out your options. A basic 4-by-8-foot raised bed can be built for well under fifty dollars using untreated lumber from your local hardware store, a handful of screws, and a free afternoon. Compare that to the cost of buying fresh produce throughout the growing season, and the math quickly tips in favor of building your own growing space and harvesting your own food.
The key to keeping costs low is to resist the temptation to over-engineer your first bed. You do not need cedar, composite materials, or decorative hardware to grow excellent vegetables. Simple pine or Douglas fir boards cut to length and fastened at the corners will last for several seasons and serve your plants perfectly well. As you gain experience and confidence, you can always upgrade materials in future builds. Starting simple is not cutting corners — it is a smart approach that lets you learn without a large financial commitment.
It is also worth remembering that many of the best materials for raised beds can be sourced for free or nearly free if you are willing to look around. Untreated pallets can be broken down for lumber. Fallen logs can be used to create rustic hugelkultur-style beds. Friends who are renovating might have surplus lumber they are happy to give away. Community groups and online marketplaces frequently list free or discounted building materials. With a creative eye and a bit of patience, you can build a beautiful, productive raised bed for almost nothing.
Choosing the Right Materials for Your Build
Selecting the right materials for your raised garden bed is one of the most important decisions you will make, and it involves balancing cost, durability, safety, and aesthetics. The most common and accessible choice for beginners is untreated dimensional lumber from a home improvement store. Boards that are two inches thick and cut to your preferred dimensions are easy to work with, readily available, and inexpensive. They may not last as long as more premium options, but they are a perfectly respectable starting point for a first-time builder.
Cedar is the gold standard in raised bed lumber for good reason. It is naturally resistant to rot and insect damage without any chemical treatment, which means it stays safe for growing food over many years. While cedar costs more than pine or fir upfront, its longevity means you are often spending less in the long run since you will not need to replace the bed as frequently. If you are building a bed you intend to keep and use for a decade or more, the investment in cedar is genuinely worthwhile and many experienced gardeners swear by it.
If you are looking for an even longer-lasting alternative and do not mind a more industrial look, galvanized steel raised beds have surged in popularity in recent years. These corrugated metal panels are extremely durable, resistant to rot and pests, and actually add a sleek, modern aesthetic to a garden space. They are available in kits online at a range of price points and can be assembled in under an hour. Many gardeners also appreciate that they warm up quickly in spring, giving cool-season crops a head start during transitional weather.
Materials to Avoid and Why
Not every material that might seem convenient or affordable is appropriate for a food-growing bed. Pressure-treated lumber, particularly older varieties that use chromated copper arsenate as a preservative, can leach chemicals into the soil that you definitely do not want in your food supply. While modern pressure-treated lumber uses different formulations that some experts consider safer, many gardeners prefer to err on the side of caution and stick with naturally rot-resistant wood or untreated alternatives when growing edibles. The small cost savings are rarely worth the concern.
Similarly, painted or stained wood should be avoided unless you can confirm the coatings are food-safe and non-toxic. Railroad ties, which are sometimes suggested as a rustic and inexpensive option, are typically treated with creosote, a tar-like preservative that is toxic and not appropriate for food gardens. Recycled plastic lumber can be a reasonable choice in terms of safety, but its environmental impact and tendency to warp in extreme temperatures make it a less-than-ideal option for many gardeners who prioritize sustainability alongside practicality.
When in doubt about a material, a useful rule of thumb is to ask yourself whether you would feel comfortable eating food that had been in contact with it over a long period. If the answer is no or even maybe, choose something else. Gardening is fundamentally about nourishing your body and your connection to natural systems, and that philosophy should extend to the materials you build your beds with. Fortunately, the safest options — untreated wood, cedar, and galvanized steel — are also among the most practical and accessible ones.
Step-by-Step: Building Your First Raised Bed
Building a basic raised garden bed is one of those satisfying projects that requires very little woodworking experience and yields immediate, tangible results. Before you pick up a single tool, start by deciding on your dimensions. The most important measurement to keep in mind is width: you should be able to reach the center of the bed comfortably from either side, which typically means a maximum width of four feet. Length is more flexible — four by eight feet is a classic choice because it works well with standard lumber lengths and provides substantial growing space.
For depth, a minimum of six inches is workable for many crops, but most experienced gardeners recommend twelve inches as a sweet spot that accommodates the root systems of the widest variety of plants, from shallow-rooted lettuce to deeper-rooted tomatoes and carrots. If your native soil is good quality and you want to give roots access to even more depth, you can skip a bottom on the bed entirely and let roots grow down into the earth below. If your soil is poor, compacted, or potentially contaminated, a deeper bed of eighteen inches or more with a landscape fabric or solid base is a better choice.
Here is a simple overview of the basic build process for a standard 4-by-8-foot raised bed using 2-by-10-inch lumber:
- Cut or purchase two boards at 8 feet long and two boards at 4 feet long (accounting for the thickness of the end boards).
- Stand the boards on edge and arrange them into a rectangle with the shorter boards fitting inside the longer ones at each corner.
- Pre-drill holes at each corner to prevent splitting, then fasten the boards together using 3-inch exterior-grade screws — at least two screws per corner for stability.
- For beds taller than ten inches, add a middle crossbar across the width of the bed to prevent the sides from bowing outward under the weight of the soil.
- If desired, line the interior with landscape fabric or hardware cloth to deter burrowing pests from below.
- Place your assembled frame in your chosen location, level it as best you can, and fill it with your growing mix.
The filling stage is where the real magic happens. A popular and highly effective mix used by many raised bed gardeners is often referred to as Mel’s Mix, developed by the square foot gardening pioneer Mel Bartholomew. It combines equal parts compost, vermiculite, and peat moss or coco coir. This blend is light, well-draining, and nutrient-rich right from the start, giving your plants an exceptional foundation. You can also use a simpler mix of high-quality topsoil blended with compost at a roughly 60/40 ratio for a more affordable version that still performs very well.
Location, Location, Location
No matter how well you build your raised bed or how carefully you blend your soil, your garden’s success will be heavily influenced by where you place it. Most vegetables and herbs need a minimum of six hours of direct sunlight per day to thrive, and eight to ten hours is even better. Before you commit to a location, observe how sunlight moves across your yard throughout the day at different times of year, keeping in mind that the sun sits lower in the sky in spring and fall, which can cause shadows from fences and structures to reach further than they do in midsummer.
Proximity to a water source is another crucial practical consideration. Raised beds dry out faster than in-ground gardens because they are surrounded by air on all sides and have excellent drainage. This means they typically need more frequent watering, especially during hot summer months. Placing your bed close to an outdoor spigot or within easy reach of a garden hose will make the task of watering much less burdensome and reduce the chance that you skip it on busy days when you are tired. Drip irrigation systems are also wonderfully compatible with raised beds and can be set up affordably.
Consider foot traffic patterns and accessibility as well. You want to be able to walk around all sides of your bed comfortably, especially if you plan on growing taller plants that need staking or trellising. Placing your bed where it is easy to observe daily means you will catch problems — pests, disease, drought stress — much earlier. And frankly, placing your garden somewhere you walk past frequently simply makes you more likely to tend it, harvest from it, and enjoy it. The best garden location is one that fits naturally and pleasantly into your daily routine.
What to Grow: Best Plants for Raised Beds
One of the most enjoyable parts of setting up a new raised garden bed is deciding what to grow in it, and the good news is that an enormous variety of plants thrive in this setting. Vegetables are the most popular choice, and almost every common edible plant will perform well in a properly prepared raised bed. The controlled soil conditions, excellent drainage, and warmer temperatures that raised beds provide tend to accelerate growth and increase yields compared to in-ground alternatives, making your gardening efforts feel noticeably more rewarding.
For beginner gardeners, it pays to start with plants that are known for their ease and reliability. Lettuce and salad greens are among the fastest and most forgiving crops you can grow, producing harvestable leaves in as little as four to six weeks from planting. Radishes mature even faster. Cherry tomatoes are a wonderful choice for a first-season gardener — they are prolific producers, less fussy than large-fruited varieties, and provide the incomparable satisfaction of picking a warm, ripe tomato straight from the vine. Zucchini, green beans, and herbs like basil, parsley, and chives are similarly rewarding and easy to manage.
Some plants are particularly well-suited to the raised bed format because of the superior root environment it provides. Carrots, for instance, often struggle in native soil that is rocky or clay-heavy, but thrive in the loose, deep, stone-free medium of a well-filled raised bed. Beets, parsnips, and other root vegetables similarly benefit from the friable texture. Even crops like potatoes can be grown beautifully in deep raised beds, where hilling them up as they grow becomes a much simpler task than in traditional row gardening.
Companion Planting and Space Maximization
Raised beds encourage a more intensive planting approach than traditional row gardening, which means you can fit a surprising amount of productivity into a small footprint. Rather than leaving wide walking rows between plants, you arrange everything within the bed in a grid pattern with spacing based only on the needs of each individual plant. A single 4-by-8-foot bed, managed thoughtfully, can produce enough salad greens, herbs, and vegetables to meaningfully supplement a household’s fresh produce intake throughout the growing season.
Companion planting — the practice of growing mutually beneficial plants near each other — works especially well in the raised bed context. The famous Three Sisters combination of corn, beans, and squash is a classic example: the corn provides a structure for beans to climb, the beans fix nitrogen that feeds the corn and squash, and the squash’s large leaves shade the ground to retain moisture and suppress weeds. On a smaller scale, pairing basil with tomatoes is both a culinary convenience and reportedly a mutually beneficial arrangement, as basil may help repel certain pests that trouble tomato plants.
Succession planting is another powerful technique that raised bed gardeners can use to maximize productivity across the full growing season. Rather than planting everything at once and then having a glut followed by a gap, you stagger plantings of fast-maturing crops every two to three weeks. As one batch of lettuce reaches maturity, the next is coming along behind it. When a spring crop of peas finishes for the season, you pull it and immediately transplant a summer tomato or pepper start in its place. This kind of deliberate, layered approach to the growing calendar transforms a modest raised bed into a continuous, high-yielding food source.
Maintenance, Seasonal Care, and Long-Term Success
Once your raised bed is planted and growing, the ongoing maintenance required is genuinely manageable even for busy people. Watering consistently is the single most important task, and the frequency will depend on your climate, the time of year, and what you are growing. A general guideline is to water when the top inch of soil feels dry to the touch. Deep, infrequent watering that encourages roots to grow down is preferable to shallow daily sprinkling that keeps roots hovering near the surface. Installing a simple drip irrigation timer can almost fully automate this task if your schedule is unpredictable.
Weeding in a raised bed is dramatically less laborious than in a traditional garden, but it is not entirely absent. Seeds blow in on the wind, and any compost that was not fully processed may introduce weed seeds of its own. The key is to catch weeds early, when they are tiny and pull out easily, before they establish root systems and begin competing seriously with your crops. A quick ten-minute walk through the garden every few days, pulling anything that does not belong, is generally sufficient to keep weeds from becoming a real problem. Mulching the surface of the bed with straw or wood chips is an excellent way to further reduce weed pressure.
Fertilizing your raised bed is important for long-term productivity because plants remove nutrients from the soil with every harvest. A rich initial soil mix will carry your plants through their first season quite well, but by the following year you will want to replenish what has been used. Top-dressing with an inch of compost at the beginning of each season is the simplest and most sustainable approach. Side-dressing heavy feeders like tomatoes and corn with additional compost or a balanced organic fertilizer midway through the season gives them the boost they need to produce abundantly through to the end of harvest.
Preparing for Winter and Planning Ahead
As the growing season winds down, a little end-of-season care will set your raised bed up for an even stronger performance the following year. Once frost has killed off summer crops, pull out any spent plant material and add it to your compost pile. Leaving dead plant material in the bed over winter can harbor disease pathogens and overwintering pests that will cause problems come spring. Once the bed is cleared, spread two to three inches of fresh compost over the surface and let it sit over the winter months, slowly integrating into the soil below.
In milder climates, a raised bed does not have to sit empty through the colder months at all. Cool-season crops like kale, spinach, arugula, mache, and certain varieties of lettuce can continue producing well into fall and even through mild winters, especially if covered with a simple row cover or cold frame. These inexpensive additions extend your growing season meaningfully and allow you to enjoy fresh, homegrown greens at times of year when most outdoor gardening has paused. The contained nature of a raised bed makes it particularly easy to fit a simple hoop house or cloche over the top.
Finally, at the end of each season, take a few moments to assess what worked well and what you would like to change. Which crops produced abundantly? Which ones disappointed? Were there pest or disease problems that you could address through different plant choices or companion planting next year? Gardening is an iterative practice, and each season’s experience makes you a more skilled and intuitive grower. The raised bed gardener who keeps simple notes and reflects thoughtfully on each season’s lessons is the one who, year after year, enjoys an increasingly productive, beautiful, and deeply satisfying garden.








What do you think?
It is nice to know your opinion. Leave a comment.