










Building Your Dream Greenhouse: A Complete Guide to 8′ x 16′ DIY Greenhouse Construction
Why an 8′ x 16′ Greenhouse Is the Perfect Size for Home Gardeners
For the dedicated home gardener, few projects offer as much reward as building your own greenhouse. An 8′ x 16′ structure strikes a remarkable balance between functionality and practicality, giving you 128 square feet of protected growing space without overwhelming your backyard or your budget. This size is large enough to house dozens of seedling trays, a collection of tropical plants, and year-round vegetable beds, yet compact enough to be a manageable solo build over a few dedicated weekends.
One of the most compelling reasons to choose this specific footprint is its adaptability to standard building materials. Lumber, polycarbonate panels, and framing hardware typically come in dimensions that align neatly with an 8-foot width, minimizing waste and unnecessary cutting. The 16-foot length provides a generous interior corridor that allows two people to work comfortably side by side, with room for staging benches along both walls and a clear walking path down the center. This ergonomic layout transforms the space from a simple storage structure into a true working garden room.
Beyond practical dimensions, an 8′ x 16′ greenhouse is large enough to create its own microclimate. The thermal mass of the soil, water containers, and structural materials will buffer temperature swings, keeping the interior warmer on cold nights and cooler during summer heat waves than a smaller cold frame or mini greenhouse ever could. For gardeners in temperate climates looking to extend their growing season by two or three months in each direction, this size represents an investment that pays dividends in fresh vegetables and thriving plants for years to come.
Planning Your Build: Choosing the Right Plans and Materials
Before a single board is cut or a fastener driven, the success of your greenhouse project depends almost entirely on the quality of your planning. Purchasing professionally drafted greenhouse plans, such as those available through platforms like Etsy from experienced designers and builders, gives you a significant head start. These plans typically include detailed cut lists, materials schedules, step-by-step assembly sequences, and often annotated diagrams that show exactly how each component connects to the next. The small upfront investment in good plans can save you from costly mistakes and structural revisions later in the project.
When evaluating plans, look for several key features. The document should specify the type of foundation required, whether that is a poured concrete slab, a gravel base with treated lumber perimeter, or a series of concrete piers. It should clearly identify the wall framing system, the roof pitch and rafter spacing, and the recommended glazing material. Plans that include a comprehensive bill of materials with estimated quantities allow you to price the project accurately before committing to a purchase. Reputable plan sets will also note local building code considerations and suggest when a permit may be required.
Material selection is equally critical to your planning process. The two primary glazing options for DIY greenhouses are twin-wall polycarbonate panels and tempered glass. Polycarbonate is far lighter, easier to cut and install, virtually shatterproof, and provides excellent insulation due to its hollow channel construction, while glass offers superior optical clarity and a more traditional aesthetic. For framing, pressure-treated lumber is the standard choice for foundation sills and any member in contact with soil, while standard dimensional lumber handles the wall studs, top plates, and rafter framing. Galvanized or stainless steel hardware resists the humid greenhouse environment far better than standard zinc-plated fasteners.
Foundation and Site Preparation: Getting Started the Right Way
Choosing the right location for your greenhouse is a decision that will affect every growing season for as long as the structure stands. The ideal site receives at minimum six hours of direct sunlight daily, with southern or southeastern exposure preferred in the Northern Hemisphere. You should also consider proximity to a water source, access to electrical service if you plan to install heating or supplemental lighting, and shelter from prevailing winter winds without sacrificing airflow during warmer months. A location that is slightly elevated will help prevent waterlogging around the foundation and improve drainage away from the structure.
Site preparation begins with clearing and leveling the footprint. For an 8′ x 16′ greenhouse, even a modest slope of a few inches across the length of the site needs to be addressed before construction begins. An unlevel foundation leads to racking stress in the frame, doors that refuse to close properly, and glazing panels that may crack or leak at their joints over time. Most DIY builders achieve adequate leveling by removing the top layer of sod and soil, establishing a level perimeter using batter boards and string lines, and then filling the interior with compacted gravel for drainage.
The foundation itself can take several forms depending on your climate, soil conditions, and intended permanence. A perimeter foundation of pressure-treated 4×4 or 4×6 lumber anchored to the ground with rebar stakes or ground anchors is the most accessible option for DIY builders. This approach requires no concrete work, allows for some future relocation of the structure, and still provides a solid, square base for the framing above. In colder climates where frost heave is a concern, extending the foundation below the frost line with concrete piers or a full perimeter concrete footing will prevent seasonal movement that could damage the frame and glazing.
Framing the Structure: Walls, Roof, and Doors
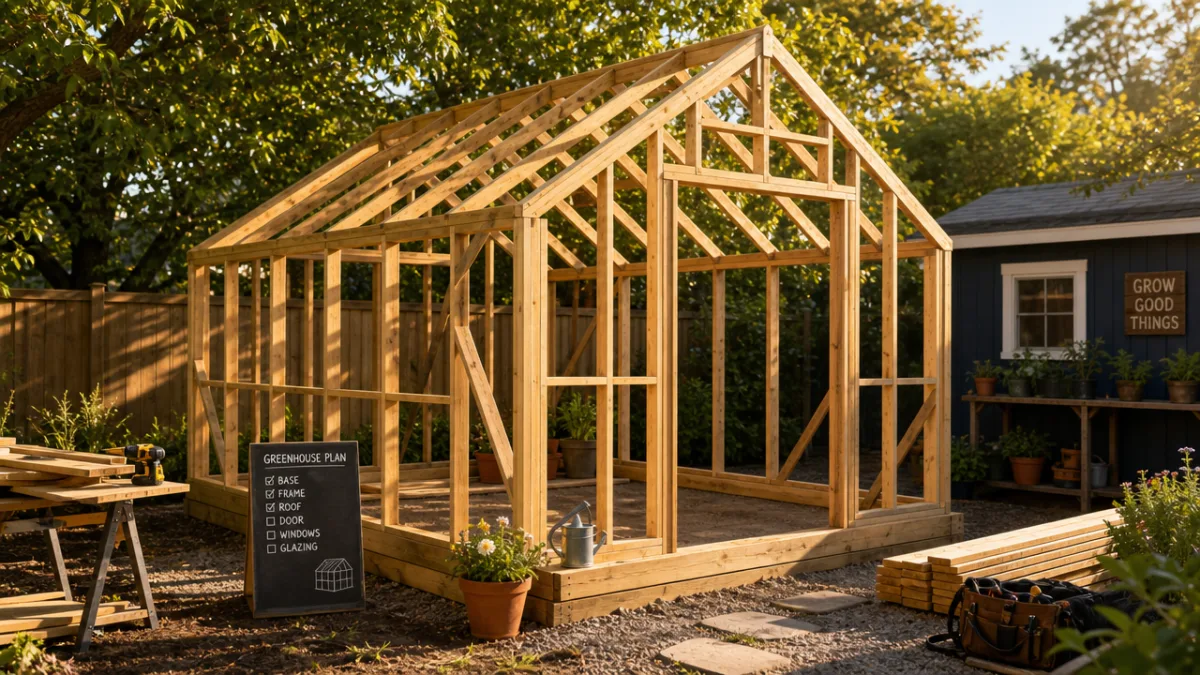
With a solid foundation in place, framing the walls of your 8′ x 16′ greenhouse is a deeply satisfying stage of the project. Standard wall framing follows the same principles as residential construction: a bottom plate attached to the foundation, vertical studs spaced at regular intervals, and a doubled top plate that ties the wall assembly together and provides bearing for the roof structure above. For a greenhouse, stud spacing of 24 inches on center is common because the glazing panels, typically available in 24-inch or 48-inch widths, align naturally with this layout, simplifying the installation of the covering material.
The roof design is one of the most consequential choices in any greenhouse build. A simple gable roof with a pitch between 4-in-12 and 6-in-12 is the most popular choice for DIY projects of this scale. This pitch sheds snow and rain effectively, creates comfortable headroom along the ridge, and allows for straightforward rafter layout using standard framing techniques. The ridge board runs the full 16-foot length of the structure, supported at each end by a ridge post or bearing wall, and the paired rafters attach to it at the top and to the wall top plates at the bottom with metal hurricane ties for added strength and wind resistance.
Doors and ventilation openings deserve careful attention during the framing phase. A standard 36-inch entry door on one gable end gives you comfortable access for wheelbarrows and garden carts. Many greenhouse builders also frame a secondary door on the opposite gable end to facilitate through-ventilation during hot summer days. Roof vents, typically one or two per side, are framed into the rafter layout and can be fitted with manual or automatic vent openers that respond to temperature, opening when the interior heats up and closing as it cools. These passive ventilation features are essential for preventing heat stress on plants during warm weather.
- Frame walls with pressure-treated bottom plates and standard dimensional lumber studs at 24 inches on center to align with glazing panel widths.
- Install a doubled top plate on all walls to distribute roof loads evenly and provide a solid nailing surface for rafter connections.
- Use metal hurricane ties or rafter ties at every rafter-to-plate connection to resist uplift forces from wind.
- Frame roof vents into the rafter layout during initial framing rather than cutting them in after sheathing is applied.
- Include a header above the door opening sized to carry the roof load spanning the opening without deflection.
Installing Glazing and Weatherproofing Your Greenhouse
Installing the glazing panels is the transformation moment of any greenhouse build, the point where the bare skeleton of lumber suddenly becomes an enclosed, luminous space. Twin-wall polycarbonate panels are the dominant choice for modern DIY greenhouses and for good reason. The material is available in 4-foot-wide sheets of varying lengths, weighs a fraction of equivalent glass, can be cut with a standard circular saw or fine-tooth handsaw, and provides an R-value of approximately 1.5 to 2.0 depending on thickness, making it a genuinely insulating glazing material rather than simply a transparent barrier.
Proper installation of polycarbonate panels requires attention to a few critical details that determine whether the finished greenhouse will be weathertight for years or become a source of leaks and drafts within a season. Panels must always be installed with the internal channels running vertically to allow condensation to drain out at the bottom. The bottom edge of each panel should be covered with a vented U-channel that allows air circulation within the channels while excluding insects and debris. The top edge receives a solid U-channel that prevents water from entering the channels from above. Side-by-side panels are joined with an H-channel profile that bridges the gap between them and creates a weathertight yet expansion-accommodating connection.
Sealing the greenhouse against drafts and moisture infiltration is as important as the glazing installation itself. Apply foam glazing tape between each panel and its supporting framing member before securing the panels to create a compressible, conforming seal that accommodates the slight surface irregularities of both wood and polycarbonate. Foam backer rod and UV-resistant silicone sealant handle the transitions at corners, around door frames, and at the junction of the glazing with the foundation. The roof ridge cap, typically a specialized aluminum extrusion designed for greenhouse use, covers the uppermost joint between opposing roof panels and is sealed on both edges to prevent rain infiltration at the highest and most exposed point of the structure.
Interior Setup: Creating a Productive Growing Environment
Once your greenhouse shell is complete and weathertight, the interior transformation into a productive growing space begins. The most fundamental element of any greenhouse interior is the bench system. Sturdy growing benches positioned along both 16-foot side walls provide the primary growing surface and are typically constructed at a height of 30 to 36 inches, comfortable for standing work. The benches should be slatted rather than solid to allow air circulation around pots and trays, reducing humidity-related fungal disease. A central path of 24 to 30 inches between facing benches gives adequate room to work without feeling cramped.
Heating and temperature management are essential considerations for any gardener planning to use the greenhouse through cold months. A small electric heater with a built-in thermostat is the simplest solution for mild climates, capable of maintaining frost-free temperatures on all but the coldest nights. For colder regions, a propane or natural gas unit heater provides higher output and lower operating costs. Thermal mass, in the form of water-filled black barrels, stone pavers, or brick flooring, absorbs heat during sunny days and releases it slowly at night, reducing heating demand and moderating temperature swings naturally without any operating cost.
Water management inside the greenhouse requires planning a supply line and drainage system before the space is fully furnished. Running a dedicated hose bib inside the greenhouse, fed from the home’s supply line, eliminates the daily inconvenience of dragging a hose from an exterior faucet. Installing a simple drip irrigation system or overhead misting line can automate watering for seed trays and propagation areas. Equally important is managing water that leaves the space: a gravel or crushed stone floor allows irrigation water and rainfall to drain naturally, preventing the puddles and mud that make a greenhouse unpleasant to work in and create conditions favorable to root rot and slug infestations.
- Install growing benches along both side walls at a comfortable working height of 30 to 36 inches with slatted tops for airflow.
- Position heating equipment near one end of the greenhouse and ensure even heat distribution with a small circulation fan.
- Add thermal mass in the form of water barrels or stone pavers to buffer overnight temperature drops and reduce heating costs.
- Run a dedicated water supply line and install a hose bib inside the greenhouse for convenient irrigation access.
- Lay a gravel or crushed stone floor to facilitate drainage and maintain a clean, workable surface throughout the growing season.
- Install supplemental grow lights on a timer above propagation areas to support seedling growth during short winter days.
Maintaining Your Greenhouse for Seasons of Productivity
A well-built greenhouse requires consistent maintenance to continue performing at its best year after year. At the end of each growing season, a thorough cleaning of the interior is one of the most valuable investments of time a greenhouse gardener can make. Remove all plant material, sanitize benches and pots with a diluted bleach solution, and clean the glazing panels inside and out to restore maximum light transmission. Algae, mineral deposits from hard water, and general grime accumulate surprisingly quickly on polycarbonate surfaces, and a clean start to each new season means more light reaching your plants from the very first days of spring.
Inspect the structural elements of your greenhouse at least once annually, preferably in the fall before winter weather arrives. Check the condition of all caulked and sealed joints, paying particular attention to the roof ridge and the transitions between glazing panels and framing. Polycarbonate expands and contracts significantly with temperature changes, and sealants eventually fatigue and crack. Resealing any compromised joints before winter prevents ice dam formation and water infiltration that can cause significant damage to both the glazing and the framing below. Inspect all hardware for signs of corrosion and replace any fasteners that show significant rust, as corroded fasteners compromise structural integrity over time.
Pest and disease management inside the greenhouse is an ongoing responsibility that rewards attentive observation. The warm, humid environment that makes a greenhouse ideal for plant growth is equally hospitable to a range of pests including aphids, whitefly, fungus gnats, and spider mites. Regular scouting, the practice of examining plants closely and frequently for early signs of infestation, is far more effective than reactive treatment after a population has become established. Introducing beneficial insects such as predatory wasps or ladybugs as biological control agents can manage pest populations with minimal chemical intervention. Good ventilation, careful watering practices that avoid wetting foliage unnecessarily, and prompt removal of diseased plant material together form the foundation of a healthy greenhouse ecosystem that supports productive growing season after season.








What do you think?
It is nice to know your opinion. Leave a comment.