










7 Easy Steps to a Stunning Rustic Garden Pathway: The Ultimate Vintage DIY Guide
Introduction: The Timeless Charm of Rustic Garden Pathways
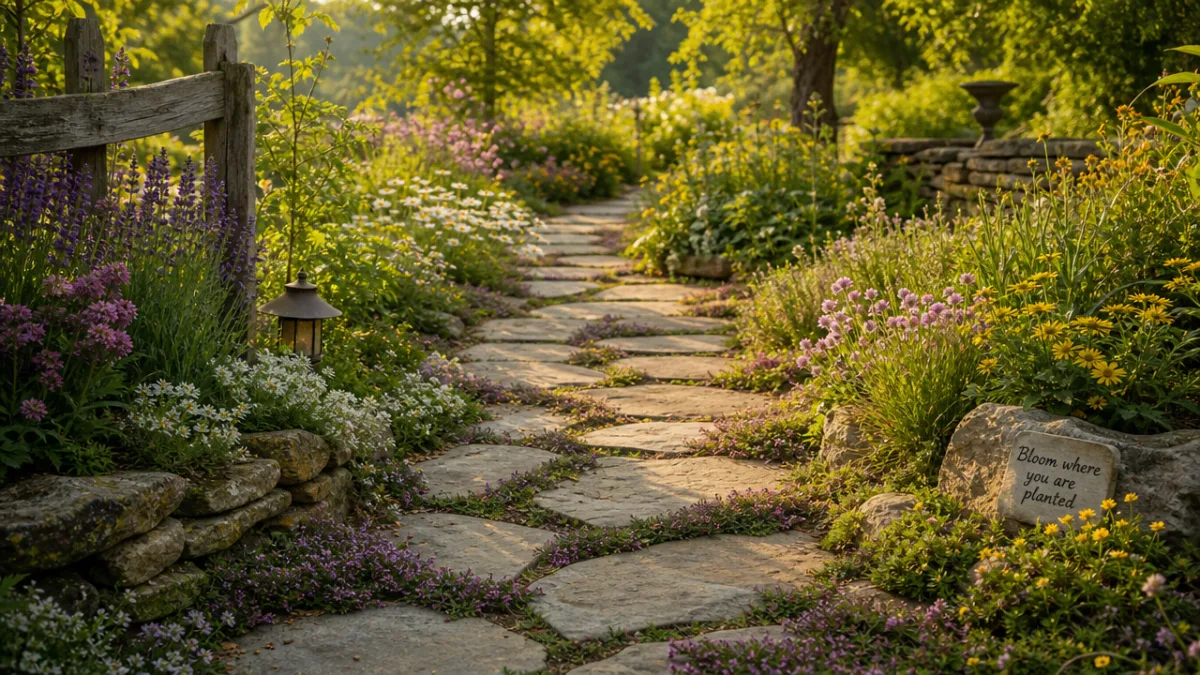
There is something deeply satisfying about walking through a garden where the path beneath your feet feels like it has always belonged there, worn smooth by decades of quiet footsteps and softened by creeping moss and trailing herbs. A rustic garden pathway does not merely connect two points in your outdoor space — it tells a story, creates an atmosphere, and transforms an ordinary backyard into something that feels genuinely enchanted. Whether you are working with a sprawling country garden or a modest urban courtyard, the vintage aesthetic of a well-crafted rustic path has the power to elevate everything around it.
The beauty of the rustic style lies in its forgiving nature. Unlike formal garden designs that demand precision and perfection, the vintage DIY approach embraces irregularity, texture, and the passage of time. Crooked stones, weathered timber, and gaps filled with chamomile or thyme are not mistakes — they are features. This philosophy makes rustic pathway building one of the most accessible and rewarding projects a home gardener can undertake, regardless of experience level or budget.
In this comprehensive guide, we will walk you through seven carefully considered steps to creating your own stunning rustic garden pathway from scratch. You will learn how to choose the right materials, plan your layout, prepare the ground, and finish the path in a way that looks as though nature herself had a hand in its design. By the end, you will have everything you need to begin transforming your garden into the vintage retreat you have always imagined.
Step 1 — Planning Your Pathway Layout and Vision
Before you lift a single stone or dig a single inch of earth, the most important work happens in your imagination and on paper. Begin by walking the route you envision and paying close attention to how the path will interact with the existing elements of your garden. Consider where sunlight falls during the morning and afternoon, where shadows pool beneath trees or along fence lines, and how the ground naturally slopes or levels. These environmental details will inform not only the shape of your path but also the materials that will serve it best over time and through changing seasons.
Sketch your layout on paper — it does not need to be a masterpiece of draftsmanship, simply a working map that captures your intentions. Rustic pathways almost never run in perfectly straight lines, and this is part of their charm. Allow your design to curve gently, following the natural contours of your garden rather than imposing a rigid geometry upon them. Mark any existing plants, trees, or garden features you want the path to wind around or highlight. Think of your pathway as a frame for the living artwork of your garden, drawing the eye toward beautiful moments rather than racing past them.
Consider the functional purpose of the path alongside its aesthetic one. Will it primarily be decorative, or does it need to bear the weight of a wheelbarrow or frequent foot traffic? Will it be used in wet weather, requiring better drainage and more stable footing? Answering these questions honestly at the planning stage will save you considerable effort later and ensure your finished pathway is as practical as it is beautiful. Jot down your answers alongside your sketch and refer back to them as you move through each subsequent step.
Step 2 — Choosing the Right Rustic Materials
The character of your pathway will largely be determined by the materials you choose, so this step deserves careful and enthusiastic attention. For a truly rustic, vintage feel, the most authentic options include irregular natural flagstone, reclaimed brick, weathered timber sleepers, salvaged cobblestones, and rough-cut sandstone or slate. Each of these materials carries its own visual warmth and develops a beautiful patina over time as moss, lichen, and weathering add layers of character that no factory-produced product can replicate. Many of the best rustic pathway materials can be sourced inexpensively from demolition salvage yards, estate sales, or even generous neighbours replacing old driveways.
Natural flagstone is perhaps the most versatile and popular choice for rustic garden paths. It comes in irregular shapes that fit together like a puzzle, and its earthy tones of grey, tan, ochre, and rust blend seamlessly with planting beds and lawn edges. Reclaimed brick offers a warmer palette of terracotta and weathered red that suits cottage-style and kitchen gardens especially well. Timber rounds — cross-sections cut from logs — bring an almost fairy-tale quality to woodland or shade gardens, though they require treatment to prevent decay and can become slippery when wet if not positioned carefully.
Do not overlook smaller details when gathering your materials. You will also want to consider what will fill the gaps between your main stepping stones or pavers. Popular options include:
- Creeping thyme, which releases a delicious fragrance when walked upon and produces tiny purple flowers in summer
- Corsican mint, which is extremely low-growing and tolerates light foot traffic admirably
- Baby’s tears, which forms a lush, dense green carpet perfect for shaded paths
- Fine gravel or decomposed granite, which drains well and adds a pleasing crunch underfoot
- Reindeer moss or preserved moss, for sections where living plants struggle to establish
The combination of your primary paving material and your gap filler will define the entire personality of your pathway, so take time to experiment by laying a few pieces out in situ before committing to a full purchase. Look at them in different lights, wet and dry, and alongside your existing garden plants before making your final decision.
Step 3 — Preparing the Ground Properly
Thorough ground preparation is the invisible foundation upon which a successful rustic pathway is built, and skipping or rushing this stage is the single most common reason that DIY paths sink, shift, or become overrun with weeds within their first few seasons. Begin by marking out your path with garden twine and pegs, following the gentle curves you established during your planning stage. A standard pathway width of 60 to 90 centimetres allows comfortable single-file passage and gives your chosen plants enough room to soften the edges without encroaching dangerously upon the walking surface.
Once your path is marked, excavate the soil to a depth appropriate for your chosen materials. For flagstone or brick paths set in sand, you will typically need to dig down 15 to 20 centimetres to allow for a layer of compacted hardcore or gravel beneath a sand-setting bed. For stepping stone paths where individual stones are simply set into the lawn or soil, a shallower excavation of 8 to 12 centimetres per stone will suffice. Remove all perennial weed roots as you work — this labour is time well invested, as established weeds like bindweed and couch grass can disrupt a path within a single growing season if left unchecked beneath the surface.
For paths requiring a more stable base, spread and compact a layer of hardcore or crushed stone approximately 10 centimetres deep using a hand tamper or plate compactor hired from a local tool shop. Over this, lay a 5-centimetre bed of sharp sand and screed it level with a long straight board or timber batten. This base will support your paving materials and allow excellent drainage, preventing the waterlogging that causes stone to heave during frost and creates unsafe, slippery surfaces after rain. If your garden is particularly prone to poor drainage, consider laying a sheet of water-permeable landscape fabric between the hardcore and sand layers to further suppress weed germination.
Step 4 — Laying Your Stones with Rustic Precision
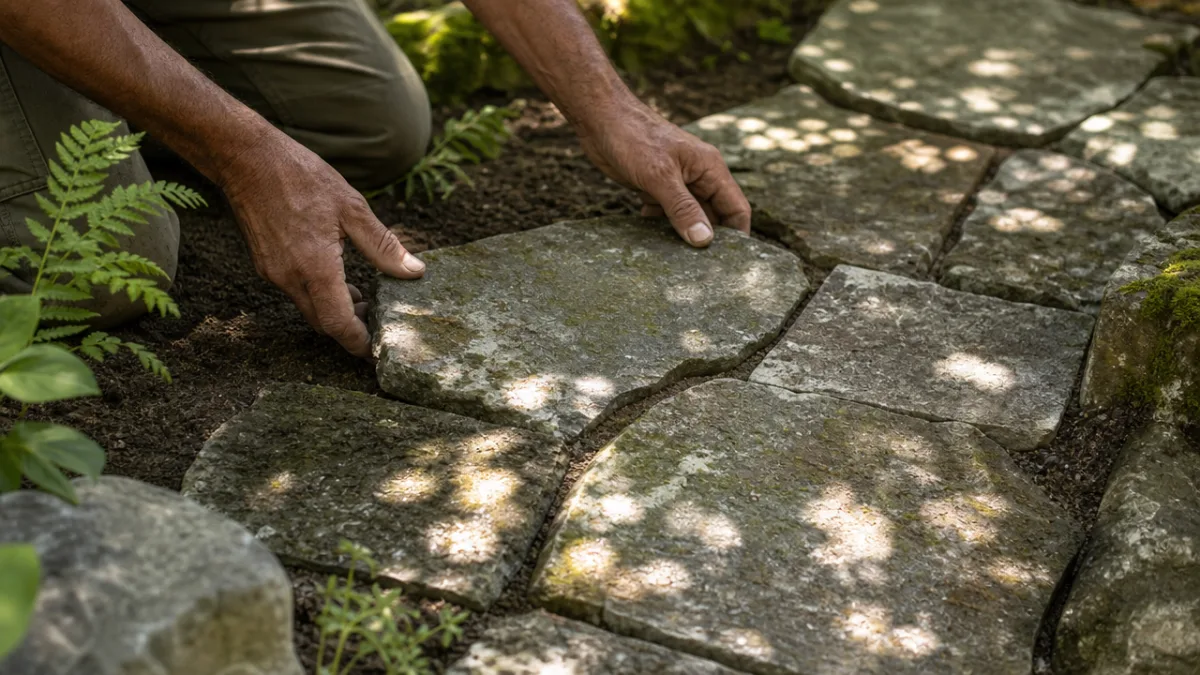
With your ground beautifully prepared, the most visually satisfying phase of the project can finally begin. Start laying your largest and flattest stones or pavers first, placing them at natural footfall intervals — roughly 50 to 60 centimetres from centre to centre for a comfortable walking pace. Stand on each stone as you place it and shift your weight to test for rocking or instability. A stone that wobbles underfoot is not just irritating but potentially hazardous, and the solution is straightforward: simply remove it, adjust the sand or soil beneath, and relay it until it sits solid and level.
Embrace imperfection as you work. The essence of the rustic aesthetic lies in the organic irregularity of naturally shaped materials fitted together with care but without rigid uniformity. Rotate stones to find their best orientation, allow gaps to vary in width, and resist the temptation to reach for the spirit level every few minutes. Your eye is a remarkably reliable guide when it comes to rustic stonework — if it looks right when you stand back and regard it from a short distance, it almost certainly is right. The authentic imperfections you build in today are what will give your pathway its vintage soul in years to come.
As you lay each stone, consider the following practical checklist to ensure quality and longevity:
- Test each stone for stability by standing fully on it and shifting your weight in all directions before moving to the next
- Ensure no stone protrudes more than 15 millimetres above its neighbour, to prevent tripping hazards
- Fill any hollow points beneath a stone with additional sand or fine soil rather than leaving voids
- Work from one end of the path to the other to avoid disturbing already-laid sections
- Step back every six to eight stones to assess the overall visual rhythm and make adjustments early
- Keep a bucket of spare sand nearby to top up the setting bed where needed
Step 5 — Filling the Gaps and Planting Between Stones
The spaces between your stones are where a rustic pathway truly comes alive, and filling them thoughtfully is what separates a genuinely beautiful vintage path from a merely adequate one. For paths that will receive regular foot traffic, a combination of fine horticultural grit pressed firmly between stones and a low-growing plant like creeping thyme or chamomile provides both stability and incredible sensory delight. For purely decorative or lightly used paths, you have considerably more freedom to plant more delicate species or to allow naturally occurring mosses to colonise the gaps at their own unhurried pace.
To encourage moss establishment — one of the most coveted features of the vintage garden aesthetic — prepare a simple moss slurry by blending together a handful of fresh moss, a cup of natural yoghurt or buttermilk, and enough water to create a thick, paintable consistency. Apply this mixture generously to the gaps between your stones and to the surface of any stones you would like to age more quickly. Keep the treated areas moist for the first few weeks, and in the right conditions — reasonable humidity and indirect light — you will begin to see soft green growth appearing within four to six weeks, lending your new path the look of something decades old.
Beyond moss and creeping plants, consider adding small clusters of self-seeding cottage garden annuals along the edges of your path — plants like alchemilla mollis, forget-me-nots, and hardy geraniums will gradually colonise the border between your path and surrounding beds, softening the transition and reinforcing the feeling that your garden has grown up organically around the path rather than the other way around. This sense of nature gently reclaiming and integrating human handiwork is the very heart of the rustic garden philosophy, and it becomes more beautifully pronounced with each passing season.
Step 6 — Adding Vintage Decorative Accents
Once your pathway is laid and planted, the addition of carefully chosen vintage decorative accents will amplify its character and make it feel truly curated rather than simply constructed. This is the stage where personal expression comes fully into play, and there are no strict rules beyond the guiding principle of restraint — a few well-chosen pieces placed with intention are infinitely more effective than a crowded collection of garden ornaments jostling for attention. Think of each accent as a punctuation mark in the visual sentence your path creates, adding rhythm and meaning rather than noise.
Suitable vintage accents for rustic garden pathways include antique terracotta pots planted with trailing herbs or succulents, old cast iron lanterns converted to hold pillar candles for atmospheric evening illumination, vintage metal watering cans repurposed as planters, and weathered wooden signs bearing plant names or whimsical garden quotations. Stone birdbaths positioned at a gentle curve in the path create a compelling focal point and invite wildlife into your garden. Salvaged iron gates or arched trellises draped with climbing roses or clematis can be used to frame the entrance or exit of the path, creating a theatrical sense of arrival and departure.
Solar-powered garden lighting deserves special mention for its ability to transform a daytime pathway into an entirely different and equally magical experience after dark. Low-profile solar stake lights placed at intervals along the path edge, or small lanterns hung from nearby branches or fence posts, will bathe your rustic stonework in warm amber light on summer evenings and make the space usable and enchanting well beyond sunset. Choose fittings in bronze, copper, or aged iron rather than bright chrome or white plastic, as these warmer tones integrate far more harmoniously with the natural materials and vintage mood of your pathway design.
Step 7 — Maintaining Your Rustic Pathway Through the Seasons
A rustic garden pathway is not a build-it-and-forget-it project, but the maintenance it requires is minimal, pleasurable, and very much in keeping with the broader rhythms of garden stewardship. The most important seasonal task is checking for any stones that have shifted or settled unevenly over winter, when frost can push stones upward through a process called heaving. Walk the entire length of your path in early spring and press firmly on each stone to identify any that wobble. These can be easily re-levelled by lifting them, adjusting the sand or soil beneath, and replacing them — a job that rarely takes more than a few minutes per stone.
Managing the plants growing between your stones requires a light touch and a discerning eye. The goal in a rustic pathway is controlled naturalism — you want things to look beautifully overgrown without becoming genuinely impassable or unsafe. Trim creeping plants back from the walking surface a couple of times during the growing season using handheld shears, but allow them to spread freely across the gap spaces and softly onto the stone edges. Remove any truly invasive species promptly before they establish deep root systems beneath your stones. A good rule of thumb is to ask yourself whether a feature looks intentional or accidental: intentional wildness is the essence of rustic style; genuine neglect is something else entirely.
An annual top-dressing of fine horticultural grit or sharp sand worked between the stones will replenish any material lost to weather and foot traffic over the year and help maintain good drainage throughout the path. In autumn, clear fallen leaves regularly to prevent them from creating a slippery layer over your stones and to stop them from suppressing the ground-covering plants you have worked so hard to establish. A gentle wash with a low-pressure hose or a soft brush will keep the surface of your stones clean without disturbing the beautiful moss and lichen growth you have encouraged. With this modest seasonal attention, your rustic pathway will grow more beautiful with every year that passes.

Conclusion: Your Garden’s Most Beautiful Chapter Begins Here
Creating a rustic garden pathway is one of those deeply rewarding projects that rewards you not once but continuously — in the satisfaction of the making, in the beauty of the finished result, and in the slow unfolding of character that happens over months and years as your chosen plants establish, the stones weather, and the whole composition settles into its surroundings with increasing ease and grace. You began with raw materials and a sketch on paper, and you end with something that feels as though it has always belonged exactly where you placed it. That is the particular magic of the vintage garden aesthetic done well.
What makes this project so especially worthwhile is its accessibility. You do not need professional landscaping skills, expensive equipment, or a large budget to create a pathway that will genuinely take people’s breath away. What you need is patience, a willingness to embrace imperfection, a good eye for proportion and texture, and the readiness to put in the physical work of careful preparation. The steps laid out in this guide are designed to give anyone — from a first-time DIY gardener to a seasoned outdoor enthusiast — the confidence and knowledge to approach this project successfully.
We encourage you to start small if the full pathway feels daunting: lay a few stepping stones from your terrace to your garden shed this weekend, plant thyme in the gaps, and watch what happens over the next few months. Chances are that modest beginning will inspire you to extend the path, add accents, and gradually develop the vintage garden landscape you have been imagining. The most beautiful gardens are never finished — they are always becoming, always evolving, and your rustic pathway will be no different. It is not simply a garden feature. It is an invitation to slow down, look closely, and fall a little more in love with the living world just outside your door.








What do you think?
It is nice to know your opinion. Leave a comment.