










45 Budget-Friendly Garden Edging Ideas to Transform Your Outdoor Space
Why Garden Edging Makes a Difference
Garden edging is one of those small touches that can completely change how a yard feels. When you give clear boundaries to your lawn, flower beds, and pathways, the whole space starts to look like it was actually planned — not just thrown together. Even the most gorgeous, flower-packed planting can look a little chaotic without something to anchor those edges and hold everything in place.
There’s also a really practical side to all this. A good edge acts as a physical barrier — it keeps grass from sneaking into your flower beds and stops mulch from washing out onto the lawn every time it rains. Without it, you end up spending way more time on upkeep: yanking grass roots out from between your perennials, raking mulch back where it belongs, and constantly trimming that fuzzy line where the lawn meets the bed. The right edging handles all of that for you, more or less on autopilot.
And here’s the really good news: you don’t need to spend a lot to make it happen. Whether you’ve got twenty dollars to spare or two hundred, there are creative, good-looking solutions within reach. From materials you can gather in your own backyard to cheap finds at the hardware store or thrift shop, budget-friendly edging options are everywhere — and a lot of them are genuinely beautiful in their own right.
Natural and Organic Edging Materials
Some of the prettiest garden edges you’ll ever see are made from stuff found straight out in nature. Logs, branches, pinecones, stones from a nearby riverbed, even packed soil — all of these can work surprisingly well as edging. Natural materials tend to blend right in with your plantings, giving off that relaxed, organic vibe that feels perfectly at home in cottage gardens, woodland settings, and naturalistic landscapes.
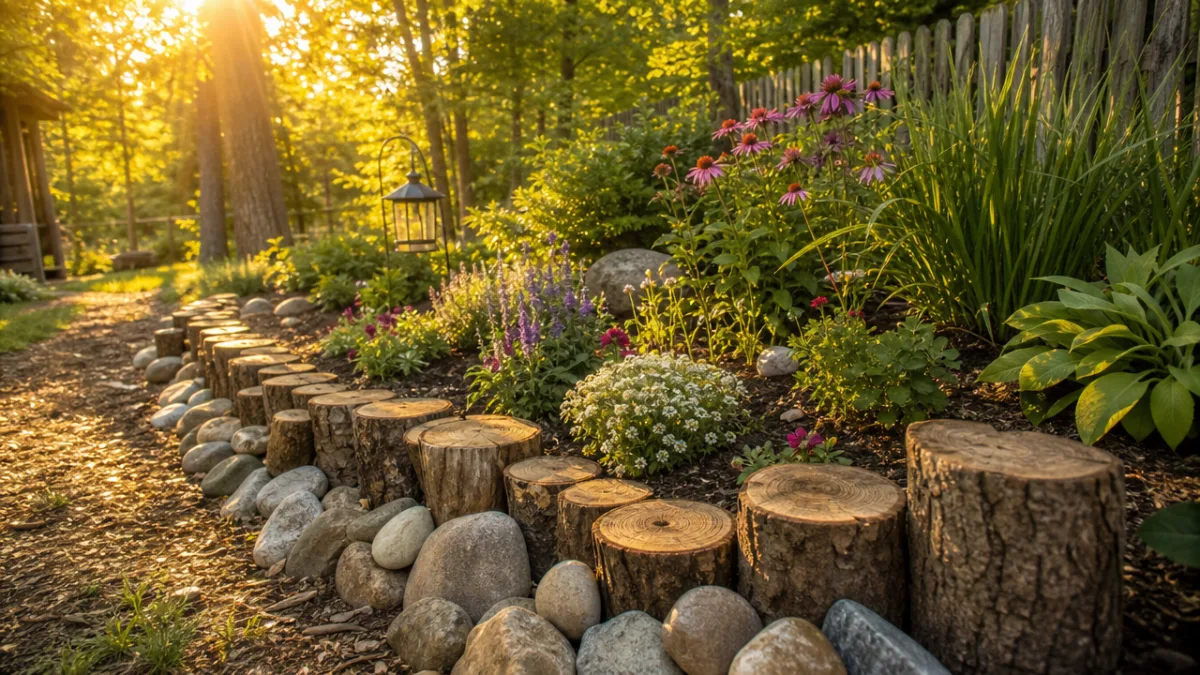
Log edging is a fan favorite for good reason — it’s charming, rustic, and often completely free. If you have access to fallen trees or branches (from your own yard, a neighbor’s cleanup, or a local firewood supplier), you can slice logs into short rounds and press them upright into the soil for a sweet woodland border. Or just lay longer branches end-to-end along the bed, stacked a layer or two high, for a low, easygoing edge that looks right at home in a wildflower garden.
River rocks and fieldstones are another great option, especially if you live somewhere where rocks aren’t hard to come by. Line up a row of similarly sized stones along your bed edge and you’ve got a clean, solid-looking border that can honestly last for decades with almost zero upkeep. You can collect these yourself from streams, fields, or construction sites (just ask first), which makes this one of the most genuinely cost-free edging solutions out there.
- Sliced log rounds pressed vertically into the soil for a rustic woodland look
- Stacked branches or twigs woven together in a simple wattle-style border
- River rocks or fieldstones arranged in a single or double row
- Pinecones packed tightly together along the edge of a bed
- Moss-covered stones collected from shaded areas of the garden
- Bamboo canes tied together for a clean, contemporary natural edge
Repurposed and Upcycled Edging Ideas
One person’s junk is another gardener’s perfect border material. The world of upcycled garden edging is genuinely full of fun ideas, and going that route saves money while also feeling pretty good for the planet. Before you spend anything at a garden center, take a slow walk around your home, garage, and shed — you might be surprised what’s hiding in there that could become a great bed edge.
Old wine bottles are a classic upcycled edging choice, and once you see them done well, you’ll understand why. Buried neck-down in the soil at a slight angle, glass bottles catch the light in this lovely, jewel-like way. Green bottles give you a consistent, elegant look, while a mix of colors has a playful, mosaic quality that works great in relaxed, informal gardens. And despite looking delicate, glass holds up to weather and the occasional shovel bump better than you’d expect.
Salvaged bricks, roof tiles, and old clay chimney pots are worth tracking down too. Check demolition sites, architectural salvage yards, or local online marketplaces — you can often find these for next to nothing, or even free when someone’s renovating and just wants the stuff gone. Set old bricks on their ends in a soldier row or zigzag pattern and you’ve got an instantly classic cottage-garden edge with real character. Broken terracotta pot pieces pressed into the soil in overlapping layers can do something similar, creating a pretty, handcrafted-looking mosaic border.
- Wine or beer bottles buried neck-down for a colorful, glittering edge
- Salvaged bricks set on end in a soldier-course or herringbone pattern
- Old roof tiles pressed into the soil at angles for a fan-shaped effect
- Broken terracotta pot shards arranged as a mosaic border
- Metal colanders, baking tins, or watering cans repurposed as corner accents
- Reclaimed pallet wood cut into stakes and driven into the ground
- Old rubber boots or wellies planted along a pathway as quirky markers
Scrap metal and old piping are also worth considering. Lengths of copper pipe, rusted rebar, or bent sheet metal can create an industrial-chic edge that looks surprisingly pulled-together, especially in modern or minimalist outdoor spaces. Copper develops that gorgeous blue-green patina over time, and rust takes on warm, earthy tones that actually complement foliage and flowers really nicely. What starts out looking rough can become something genuinely beautiful.
Low-Cost Purchased Edging Solutions
Sometimes you just want something uniform, neat, and built to last — without paying a lot for it. The good news is that garden centers and hardware stores carry a solid range of affordable edging products that fit the bill. Plastic lawn edging strips, metal landscape edging, and basic concrete or resin pavers can all be found at reasonable prices, especially if you shop end-of-season sales or look at off-brand options instead of the premium stuff.
Flexible black plastic edging doesn’t win any beauty contests, but it gets the job done and gets it done reliably. It bends around curved beds, stays put once it’s anchored, and keeps grass where it belongs for several years running. Pair it with a clean layer of mulch on the bed side and a tidy lawn on the other, and even plain plastic edging creates that crisp, well-kept look. For anyone who cares more about function than form, it’s really hard to argue with the price.
Metal landscape edging — steel or aluminum — has gotten much more popular lately, and the price has come down a lot as a result. It has a clean, architectural quality that works in all kinds of garden styles, from formal to naturalistic. It bends to gentle curves, holds its shape against roots and foot traffic, and doesn’t rust nearly as fast as you might think. If you’ve got a bigger project on your hands, buying in bulk lengths and cutting to fit is usually the most economical way to go.

Creative DIY Edging Projects
If you enjoy getting your hands dirty with a project, making your own edging is an incredibly satisfying way to go. You can tailor everything — the shape, size, color, style — exactly to your garden, and the materials usually cost very little. A lot of the best DIY edging projects need nothing more than basic tools, a bit of patience, and stuff that might otherwise go to waste.
Concrete is one of the most flexible and affordable DIY edging materials out there. Mix your own and pour it into simple molds — old cardboard boxes, plastic food containers, or timber forms you knock together yourself — and you can make custom border blocks and stepping stones for a fraction of what they’d cost at a store. Mix in some pigment if you want color, or press leaves, pebbles, or shells into the surface before it sets for a beautiful handmade texture. It’s easier than it sounds and the results are really satisfying.
Hypertufa is another fun one to try, especially if you like that aged, mossy stone look. It’s a lightweight mixture of Portland cement, peat moss, and perlite that you can sculpt by hand or press into molds to create border pieces that look remarkably like carved stone — except they weigh much less and cost a fraction of the price. Over time, hypertufa weathers into something that genuinely looks antique, picking up moss and patina in a way that’s hard to fake any other way.
- Gather your materials: cement or hypertufa mix, molds, pigment if desired
- Prepare the molds by lining with plastic sheeting or releasing agent
- Mix according to package directions and pour into molds
- Press decorative elements like pebbles or leaves into the surface
- Allow to cure fully (at least 24–48 hours) before unmolding
- Set the finished pieces in place along your garden border
- Backfill soil on each side and tamp firmly to secure
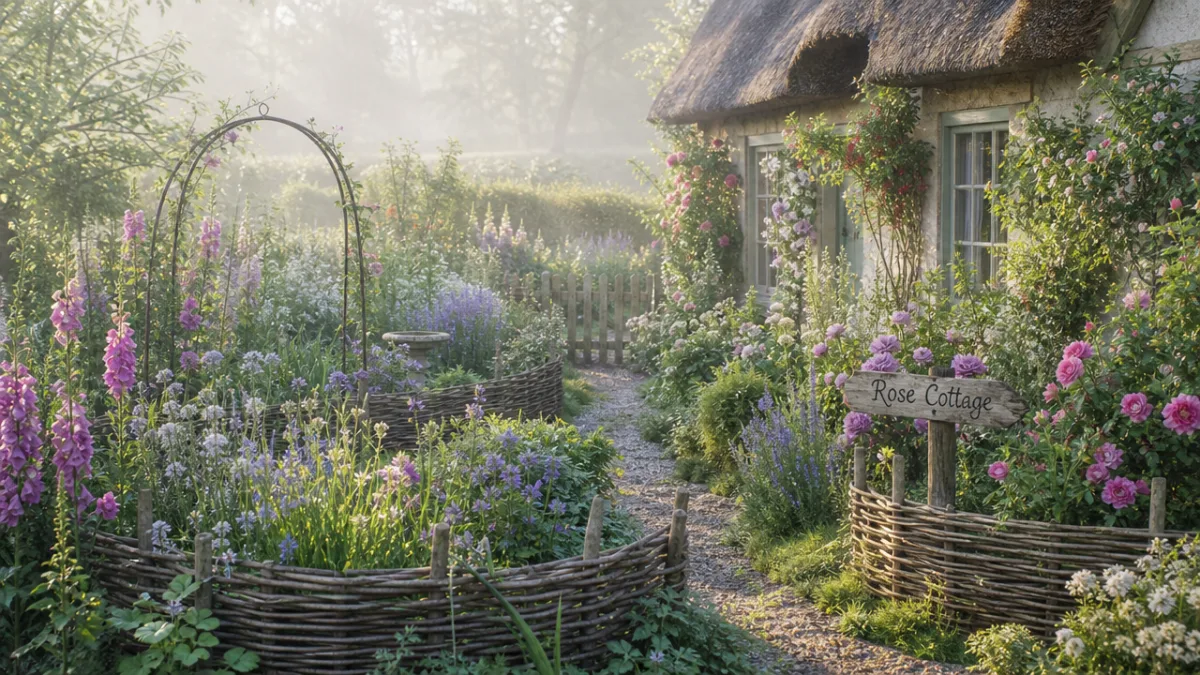
Wattle edging is another project worth trying if you have access to the right wood. It’s an old traditional technique where you weave flexible young branches between upright stakes — willow, hazel, and dogwood all work great. The finished result has this wonderful handcrafted, old-world quality that looks fantastic in cottage gardens and kitchen gardens. It’s also completely biodegradable, which is a big plus if you care about keeping your garden as sustainable as possible.
Edging for Specific Garden Styles
The edging that works best for your garden is always the one that actually fits the vibe of the space. A sleek steel edge looks right at home in a modern, minimalist garden — but that same edge can feel cold and out of place in a rambling wildflower meadow. And while woven wattle adds all the right rustic charm to a cottage garden, it would look pretty strange flanking a clipped formal parterre. A little thought about your garden’s overall personality before you commit to an edging style can save you time, money, and some regret later.
For formal or traditional gardens, clean lines are everything. Straight-edged borders in brick, stone, or metal deliver that structured, symmetrical look that formal spaces need. Low clipped hedges of box, lavender, or santolina can also pull double duty as living edging in formal settings, adding fragrance and texture along with their structural role. They need more regular trimming than hard materials, but the effect — that kind of timeless, old-estate elegance — is really hard to match.
Cottage and naturalistic gardens call for something softer and more irregular. Log rounds, wattle, loose pebbles, and informally arranged stones all feel right here. The thing to avoid is anything too rigid or ruler-straight — gentle curves and slightly uneven arrangements feel much more in keeping when the planting itself is relaxed and abundant. Even a simple mown grass edge, cut with a half-moon edging tool, makes a beautifully natural transition between lawn and bed without costing you anything extra.
Maintaining Your Garden Edging Over Time
Getting the edging in is only half the job — keeping it looking good takes a little ongoing effort too. The reassuring part is that most edging materials, once they’re properly installed, really don’t ask much of you. A short maintenance session every few weeks during the growing season is usually all it takes to keep your borders looking crisp and defined.
For hard materials like metal, stone, and brick, the main thing to stay on top of is soil and plant overgrowth creeping up against the edge. Soil tends to heap up over time — especially in beds that get regularly cultivated and mulched — and if you let it go too long, it can cause sections to shift or get buried. Scraping back the excess with a trowel now and then, and releveling any bits that have sunk or tilted, keeps everything working well for years. If you’re in a cold climate, it’s also worth checking for cracks in concrete or stone edging after winter frost does its thing.
Natural edging materials like logs, branches, and wattle will break down over time, but that’s actually not a bad thing — the decomposing wood adds humus and nutrients back into your soil as it goes. Just plan to replace or top up these materials every few years as they age. In the meantime, the weathering process often makes natural edging look even better than it did to start with, as it picks up mosses, lichens, and a lovely patina that gives the whole garden a sense of depth and age. There’s something really nice about edging that evolves right along with the garden around it.
Living edges — clipped hedges and mown grass borders — need the most regular attention of all. A clean grass edge cut every two to four weeks in summer, using a long-handled edging tool or half-moon spade, keeps that sharp boundary between lawn and bed looking intentional. Low hedges of lavender, box, or similar plants should be trimmed at least twice a year to stay compact and tidy. It’s not a huge time commitment, and the payoff — a garden that looks genuinely cared for and beautifully put-together — makes every minute of it worthwhile.








What do you think?
It is nice to know your opinion. Leave a comment.