










Caring For Potted Calla Lilies: Lifespan Tips
Understanding the Calla Lily: A Timeless Beauty in a Pot
Calla lilies (Zantedeschia aethiopica) are among the most elegant flowering plants you can grow in a container. Their distinctive trumpet-shaped blooms and deep green foliage have made them a beloved choice for gardeners and interior decorators alike. Whether you are growing them indoors on a sunny windowsill or outdoors on a sheltered patio, potted calla lilies bring a sense of refined beauty that few other plants can match. Understanding their natural origins is the first step toward giving them the care they truly deserve.
Native to the marshy regions of southern Africa, calla lilies evolved in environments with rich, moist soils and warm temperatures. This background explains much of their behavior in cultivation — they love consistent moisture, warmth, and nutrient-rich growing mediums. When grown in pots, you become entirely responsible for replicating these conditions, which means paying close attention to watering schedules, soil composition, and seasonal temperature changes. The good news is that with a little knowledge and consistency, potted calla lilies are surprisingly rewarding plants to maintain.
One of the most common misconceptions about calla lilies is that they are difficult or temperamental. In reality, they are quite adaptable once you understand their growth cycle, which includes an active growing season and a necessary dormant rest period. Respecting this natural rhythm is the single most important factor in determining how long your calla lily will thrive in a pot. Plants that are forced to grow year-round without rest often weaken and fail to bloom, while those given proper dormancy return each year with renewed vigor and more abundant flowers.
Choosing the Right Pot and Soil
The foundation of a healthy potted calla lily begins with selecting an appropriate container. Calla lilies prefer pots that offer good drainage while being large enough to accommodate their rhizomes comfortably. A container that is at least 12 inches in diameter and 12 inches deep will give a single rhizome adequate room to establish itself and spread slightly. Using a pot that is too small will restrict root development and lead to stunted growth, reduced flowering, and a shorter overall lifespan for the plant.
Drainage holes at the bottom of the pot are absolutely non-negotiable. Calla lilies are moisture-loving plants, but they cannot tolerate waterlogged roots, which leads to a devastating condition known as root rot. Choose a well-draining potting mix that retains some moisture without becoming compacted or soggy. A blend of high-quality potting soil with added perlite, coarse sand, or bark chips works exceptionally well. Some gardeners also incorporate a small amount of compost to enrich the mix with organic matter that slowly releases nutrients to the growing roots.
The material of the pot itself also matters more than many gardeners realize. Terracotta pots are excellent for calla lilies because their porous walls allow excess moisture to evaporate, reducing the risk of overwatering. Plastic pots retain moisture longer, which can work well in hot or dry climates but may cause problems in cooler, damper environments. Glazed ceramic pots fall somewhere in between. Whichever material you choose, the priority is always ensuring that water can flow freely out of the pot after each watering, keeping the rhizomes in a healthy, breathable environment.
Watering and Feeding Your Potted Calla Lily
Watering is perhaps the most nuanced aspect of calla lily care, and getting it right will dramatically extend the plant’s lifespan and blooming potential. During the active growing season, which typically runs from spring through summer, calla lilies need consistently moist soil. This does not mean the soil should be wet or waterlogged, but it should never completely dry out between waterings. A reliable approach is to check the top inch of soil with your finger — if it feels dry, it is time to water thoroughly until moisture flows from the drainage holes.
The frequency of watering will vary depending on your climate, the size of the pot, and the time of year. In warmer months or in heated indoor environments, you may need to water every two to three days. In cooler conditions, once or twice a week may be sufficient. Always observe your plant for signs of stress: yellowing leaves can indicate overwatering, while wilting and dry, crispy leaf edges often signal that the plant is not receiving enough moisture. Learning to read these visual cues will help you fine-tune your watering routine to suit your specific conditions.
Feeding your calla lily with the right fertilizer at the right time is equally important for promoting strong growth and vibrant blooms. During the active growing season, apply a balanced, water-soluble fertilizer every two to four weeks. Look for formulas that are slightly higher in potassium and phosphorus than nitrogen, as excessive nitrogen promotes lush foliage at the expense of flowers. Liquid fertilizers are particularly convenient for potted plants because they can be applied simultaneously with watering, ensuring the nutrients are quickly available to the roots without the risk of salt build-up that can occur with slow-release granules.
Recognizing and Correcting Nutrient Deficiencies
Potted plants are more susceptible to nutrient deficiencies than those grown in garden beds, simply because the limited volume of soil in a container becomes depleted over time. Common signs of nutrient problems in calla lilies include pale or yellowing leaves, poor flower production, and stems that appear weak or spindly. Iron deficiency, which causes yellowing between the leaf veins while the veins themselves remain green, is particularly common and can usually be corrected with a dose of liquid iron chelate applied to the soil.
If you notice that your calla lily is producing an abundance of large green leaves but few or no flowers, this is often a sign of excessive nitrogen. Nitrogen encourages vegetative growth, which sounds beneficial but actually signals the plant to prioritize leaves over blooms. In this case, switch to a fertilizer formula with a lower first number (nitrogen) and higher second and third numbers (phosphorus and potassium) to rebalance the plant’s energy toward flower production. Bone meal is a natural amendment that can be worked gently into the top layer of soil to add a slow-release source of phosphorus.
Maintaining the proper soil pH is another often-overlooked aspect of feeding. Calla lilies prefer a slightly acidic to neutral pH ranging from 6.0 to 6.5. When the pH falls outside this range, even a well-fertilized plant may struggle to absorb the nutrients that are present in the soil. You can test your potting mix with an inexpensive pH meter or paper test strips, and adjust accordingly using garden lime to raise pH or sulfur-based amendments to lower it. Regular repotting with fresh potting mix every one to two years also helps reset the soil environment and replenish depleted nutrients.
Light, Temperature, and the Ideal Growing Environment
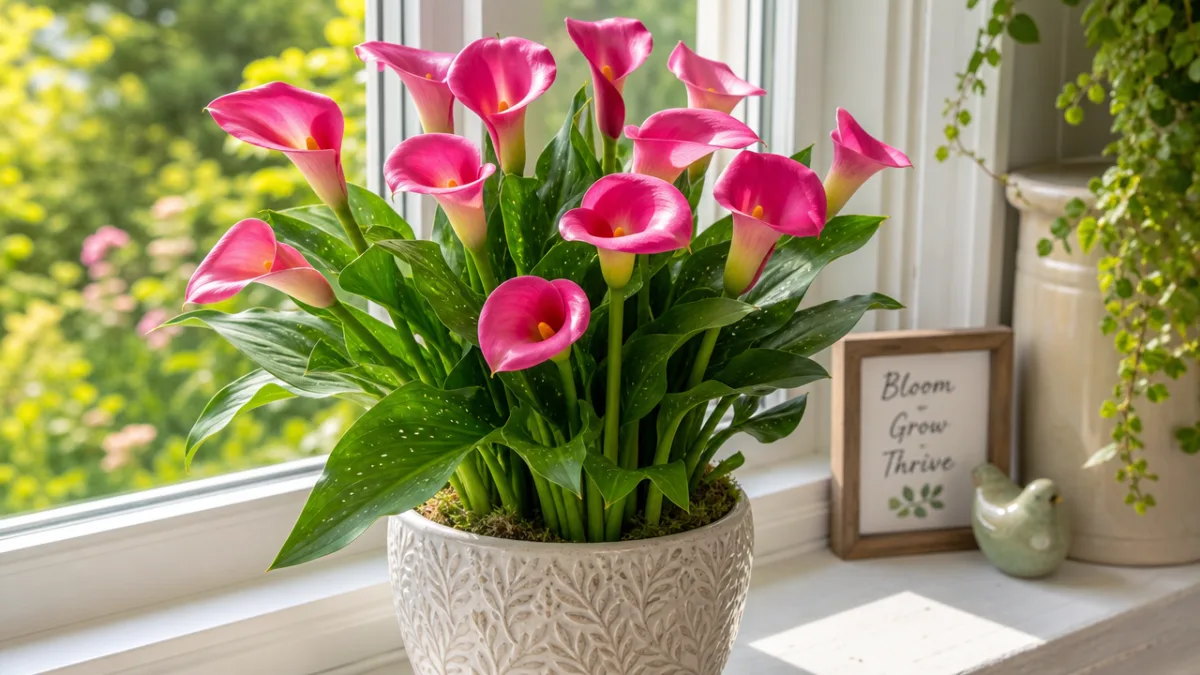
Calla lilies are adaptable when it comes to light, but they do have clear preferences that directly influence their health and blooming capacity. Outdoors, they thrive in full sun to partial shade, particularly appreciating some protection from the intense afternoon sun in hotter climates. Indoors, they perform best in a location that receives bright, indirect light for most of the day. A south or east-facing windowsill is often ideal, providing enough light to fuel strong growth without the risk of scorching the delicate foliage. Insufficient light is one of the leading reasons why indoor calla lilies fail to produce flowers.
Temperature plays a critical role in the health of potted calla lilies, and sudden fluctuations can cause significant stress. These plants prefer daytime temperatures between 60°F and 75°F (15°C to 24°C) and are sensitive to frost, which can damage or kill the rhizomes. If you move your potted calla lily outdoors in summer, be sure to bring it inside before nighttime temperatures drop below 50°F (10°C). Avoid placing pots near air conditioning vents, cold drafts from windows, or heating radiators, as these artificial temperature extremes can cause the plant to drop leaves and decline unexpectedly.
Humidity is another environmental factor that calla lilies appreciate, particularly when grown indoors where central heating can create very dry air. Aim for relative humidity of around 50 to 60 percent around your plant. If your home is particularly dry, you can increase local humidity by placing the pot on a shallow tray filled with pebbles and water, ensuring the base of the pot sits above the waterline to avoid root rot. Misting the leaves occasionally also helps, though it should be done in the morning so the foliage has time to dry before nightfall, reducing the risk of fungal issues.
Seasonal Transitions and Moving Plants Safely
Moving potted calla lilies between indoor and outdoor environments is a common practice that requires care and gradual acclimatization. When transitioning a plant from indoors to an outdoor setting in spring, do not place it immediately in direct sun or exposed conditions. Instead, begin by setting it in a sheltered, partially shaded outdoor spot for a few hours each day, gradually increasing the duration and light exposure over one to two weeks. This process, known as hardening off, prevents transplant shock and sunscald, which can cause the leaves to bleach, curl, or develop dry brown patches.
When moving the plant back indoors in autumn, inspect it carefully for pests before bringing it inside. Outdoor plants can harbor aphids, spider mites, and mealybugs that would quickly spread to other houseplants in your home. Treat any infestations with insecticidal soap or neem oil spray before the plant crosses the threshold. Wipe down the pot exterior as well, as soil on the outside of pots can harbor fungus gnats and other nuisances. Taking these precautions during seasonal transitions will protect both your calla lily and the rest of your indoor plant collection.
As autumn approaches and temperatures begin to cool, your calla lily will naturally start to signal that it is preparing for dormancy. Leaves will begin to yellow and die back, and the plant will stop producing new growth. This is entirely normal and should not be mistaken for the plant being sick or dying. Rather than continuing to water and fertilize at the same rate, begin gradually reducing both to ease the plant into its rest period. This transition signals the rhizome to store energy for the next growing season, which is fundamental to the plant’s long-term survival and annual return.
Managing Dormancy: The Key to Long-Term Survival
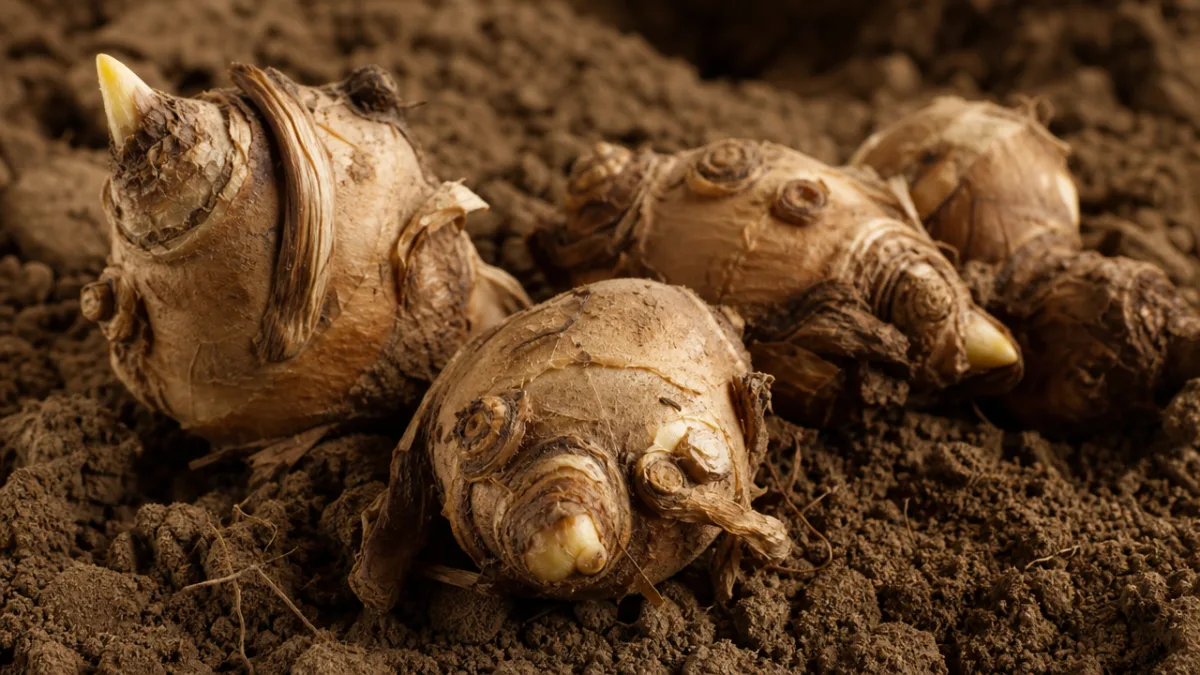
Dormancy is not a sign of failure — it is one of the most important phases in a calla lily’s life cycle, and managing it correctly is perhaps the single greatest factor in determining how many years your plant will thrive. After the blooming season ends and the foliage begins to die back naturally, it is time to shift your care approach dramatically. Stop watering gradually over a period of two to three weeks, allowing the soil to dry out almost completely. This reduction in moisture signals the rhizome to enter its resting state, during which it conserves energy and rebuilds its reserves.
Once the foliage has fully died back, you have two main options for storing your calla lily through dormancy. The first is to leave the rhizome in its pot and simply store the entire container in a cool, dark, dry location — a basement, garage, or garden shed works well — where temperatures remain between 45°F and 55°F (7°C to 13°C). The second option is to remove the rhizome from the pot, brush off the old soil, allow it to cure and dry for a few days, and then store it in a breathable container filled with dry peat moss, sawdust, or vermiculite. Both methods are effective, and the choice largely depends on your storage space and personal preference.
The duration of dormancy typically lasts between two and three months, though this can vary based on the variety and your local climate. Resist the temptation to revive the plant early by watering or warming it prematurely, as the rhizome needs this full rest period to replenish its energy stores. When the dormancy period has passed — usually in late winter or early spring — you can repot the rhizome in fresh soil, move it back to a warm and bright location, and resume careful watering. Within a few weeks, you should begin to see new shoots emerging from the soil, a deeply satisfying sign that your plant has successfully completed its cycle.
Repotting for Continued Health and Vigor
Repotting is a vital maintenance task that keeps potted calla lilies performing at their best over the years. Every one to two years, or when you notice roots beginning to emerge from the drainage holes or circle visibly at the soil surface, it is time to move your plant to a slightly larger container. Choose a new pot that is two to three inches wider in diameter than the current one, which gives the rhizome room to expand without placing it in a container so large that excess soil stays wet and promotes rot.
The best time to repot is at the end of dormancy, just before you are ready to restart the growth cycle in spring. At this point, you can refresh the soil entirely, inspect the rhizome for any soft, dark, or rotting sections, and trim these away with a clean, sharp knife before repotting. Dusting the cut surfaces with powdered sulfur or cinnamon acts as a natural fungicide and helps prevent infection. If you notice that the original rhizome has produced offsets — small daughter rhizomes attached to the main one — this is an excellent opportunity to carefully separate and pot them individually, effectively propagating your plant for free.
Fresh potting mix at repotting time provides a clean nutritional slate and improves drainage and aeration that may have become compromised in old, compacted soil. After repotting, water the plant lightly and place it in a warm, bright location. Hold off on fertilizing for the first four to six weeks to give the roots time to settle into the new medium without the risk of fertilizer burn on newly forming root tips. Once you see vigorous new growth, you can resume your regular fertilizing schedule and enjoy watching your refreshed calla lily build toward another beautiful blooming season.
Common Problems, Pests, and How to Extend Your Plant’s Lifespan
Even with attentive care, potted calla lilies can encounter a range of problems that, if left unaddressed, will shorten their lifespan considerably. Root rot is the most common and most serious issue, caused by consistently wet soil or inadequate drainage. The earliest symptoms include yellowing lower leaves and a general wilting despite adequate watering. If you suspect root rot, remove the plant from its pot immediately and inspect the roots. Healthy roots are firm and white or tan, while rotted roots are brown, mushy, and may smell unpleasant. Trim away all affected tissue, treat the cuts, and repot in fresh, well-draining soil.
Pests can also take a significant toll on calla lilies, particularly when plants are grown indoors or in close proximity to other plants. The most common culprits include:
- Aphids: Small, soft-bodied insects that cluster on new growth and undersides of leaves, sucking sap and causing distorted, curling foliage. Treat with insecticidal soap spray or a strong jet of water.
- Spider mites: Tiny arachnids that thrive in dry conditions, creating fine webbing and causing a stippled, pale appearance on leaves. Increase humidity and treat with neem oil spray.
- Mealybugs: White, cottony insects that hide in leaf joints and on stems. Remove manually with a cotton swab dipped in rubbing alcohol and follow up with neem oil treatments.
- Fungus gnats: Their larvae live in moist potting soil and feed on roots. Allow soil to dry out more between waterings and apply a soil drench of Bacillus thuringiensis var. israelensis (Bti) to eliminate larvae.
Botrytis blight, a fungal disease that causes gray, fuzzy mold on leaves and stems, is another issue that affects calla lilies in humid conditions with poor air circulation. Remove any affected plant parts immediately and improve ventilation around the plant. Avoid wetting the foliage when watering and never allow water to pool in the curved folds of the spathes. Keeping the growing environment clean, well-ventilated, and appropriately dry during the dormancy period significantly reduces the likelihood of fungal problems taking hold.
Long-Term Strategies for a Thriving, Multi-Year Plant
Extending the lifespan of a potted calla lily beyond a single season requires a consistent, thoughtful approach to care across all four seasons. The plants that live and bloom for many years are not those that receive occasional intense attention but those that benefit from reliable, moderate care sustained throughout their entire growth cycle. Establishing a simple care calendar — noting when to begin watering, when to fertilize, when to reduce care for dormancy, and when to repot — takes the guesswork out of the process and ensures nothing critical is overlooked.
Beyond the basics, there are several additional strategies that experienced growers use to maximize the health and longevity of their potted calla lilies. Deadheading spent flowers promptly by cutting them at the base of the stem prevents the plant from investing energy in seed production and redirects that energy toward strengthening the rhizome. Keeping the foliage clean by gently wiping leaves with a damp cloth removes dust, improves the plant’s ability to photosynthesize, and makes it easier to spot the early signs of pest activity before populations grow out of control.
Finally, observing your calla lily with genuine curiosity and attention is perhaps the most valuable habit you can cultivate as a caretaker. Plants communicate their needs constantly through the color, texture, and posture of their leaves and stems. A gardener who regularly takes a close, unhurried look at their plant will catch problems early, respond appropriately to changing conditions, and build an intuitive understanding of what their particular calla lily needs to thrive. With this attentive, informed approach, it is entirely realistic to enjoy the same potted calla lily — more beautiful and vigorous each year — for a decade or more.








What do you think?
It is nice to know your opinion. Leave a comment.