










The Perfect Crochet Hostess Gift: A Complete Guide to the Wine Carrier Free Pattern
Why a Handmade Wine Carrier Makes the Ultimate Hostess Gift
When it comes to showing appreciation for someone who has opened their home to you, few gestures carry as much warmth and thoughtfulness as a handmade gift. A crocheted wine carrier combines practicality with heartfelt effort, creating something the recipient will use again and again long after the evening has ended. Unlike a box of chocolates or a bouquet of flowers, a hand-crocheted gift carries a story — the hours spent, the care taken, and the intention behind every stitch. It transforms a simple bottle of wine into something truly memorable.
The beauty of a crochet wine carrier lies in its dual purpose. On one hand, it serves as elegant packaging that elevates even a modestly priced bottle of wine into a luxurious-looking present. On the other hand, it becomes a reusable tote that the host can repurpose for carrying bottles to future gatherings, storing kitchen items, or even holding a small plant. This kind of lasting utility is what separates a genuinely thoughtful gift from one that ends up in the recycling bin the following morning.
From a crafter’s perspective, the wine carrier pattern is an exceptionally satisfying project. It works up quickly enough to be completed in an evening or two, making it ideal for last-minute gifting situations. It requires only a modest amount of yarn, which means it’s easy on the budget while still producing a polished, professional-looking result. Whether you’re a seasoned crocheter or someone who picked up a hook just a few months ago, this project offers the perfect balance of accessible technique and impressive outcome.
Materials and Tools You Will Need
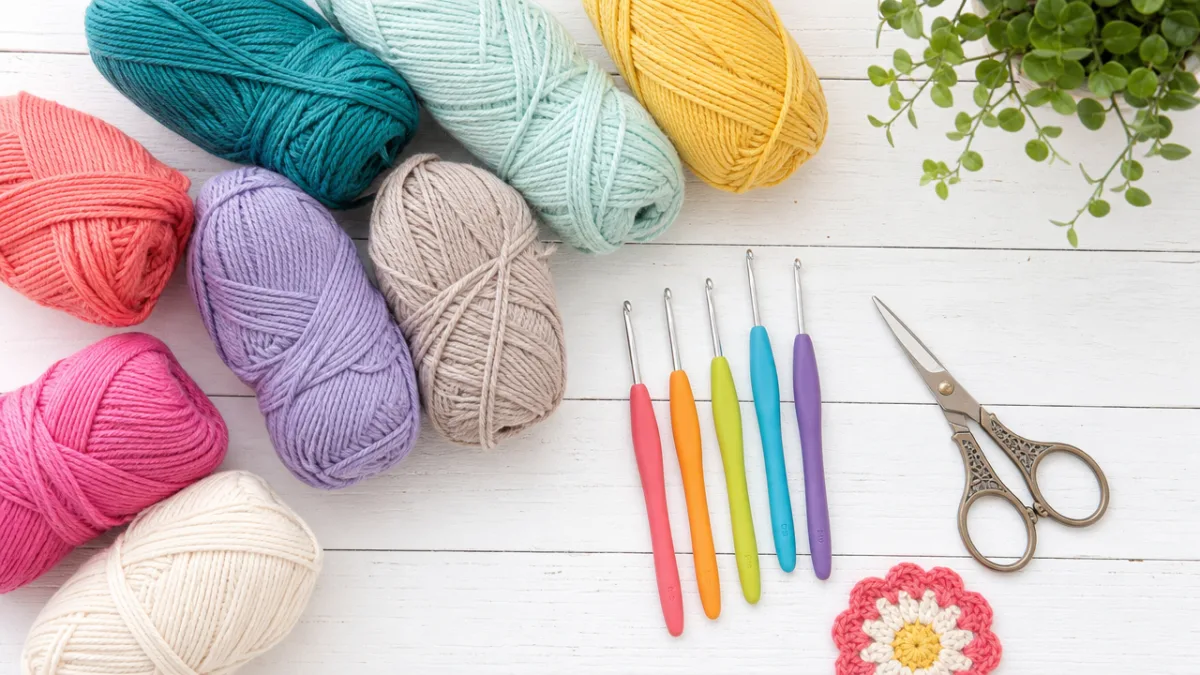
Before you cast on your first stitch, gathering the right materials will set you up for a smooth and enjoyable crafting experience. For a standard wine bottle carrier, you’ll want to select a yarn that offers both structure and softness. Cotton yarn is widely considered the gold standard for this type of project because it holds its shape beautifully, washes easily, and comes in an enormous range of colors. A worsted weight cotton, such as Lion Brand 24/7 Cotton or Paintbox Simply DK Cotton, gives you the ideal drape and sturdiness without making the finished carrier feel stiff or uncomfortable to carry.
In terms of quantity, most wine carrier patterns require between 100 and 200 yards of yarn, depending on the height and design of the carrier you choose. This makes it a wonderfully economical project — a single skein of worsted cotton is usually more than sufficient, and you may even have enough left over to make a matching accessory or start another carrier in a coordinating color. Choosing a colorway that complements the recipient’s kitchen aesthetic or personal style adds an extra layer of thoughtfulness to the gift.
Beyond yarn, your toolkit for this project is refreshingly minimal. You will need a crochet hook sized to match your yarn’s recommended gauge — typically a 5mm or 5.5mm hook works well with worsted cotton. A yarn needle for weaving in ends, a pair of scissors, and optionally a stitch marker to track your rounds are all you need. Some crafters also like to have a small piece of cardboard cut to the base dimensions of a wine bottle to help block and shape the bottom of the carrier once it’s finished, ensuring a neat and tidy result.
- Worsted weight cotton yarn (100–200 yards in your chosen color)
- Crochet hook, size 5mm or 5.5mm
- Yarn needle for finishing
- Scissors
- Stitch markers (optional but helpful)
- Tape measure or ruler
- Small cardboard circle for blocking the base (optional)
Understanding the Pattern: Stitches and Structure
Most free crochet wine carrier patterns are built around a few foundational stitches that even beginners will quickly recognize and master. The base is typically worked in the round using single crochet stitches, beginning with a magic ring or a chain joined into a circle. From this center point, you increase gradually over several rounds to create a flat circular base that fits snugly beneath a standard wine bottle. Getting this base right is the most important step, as it determines how well the carrier will sit and how stable it will look when displayed.
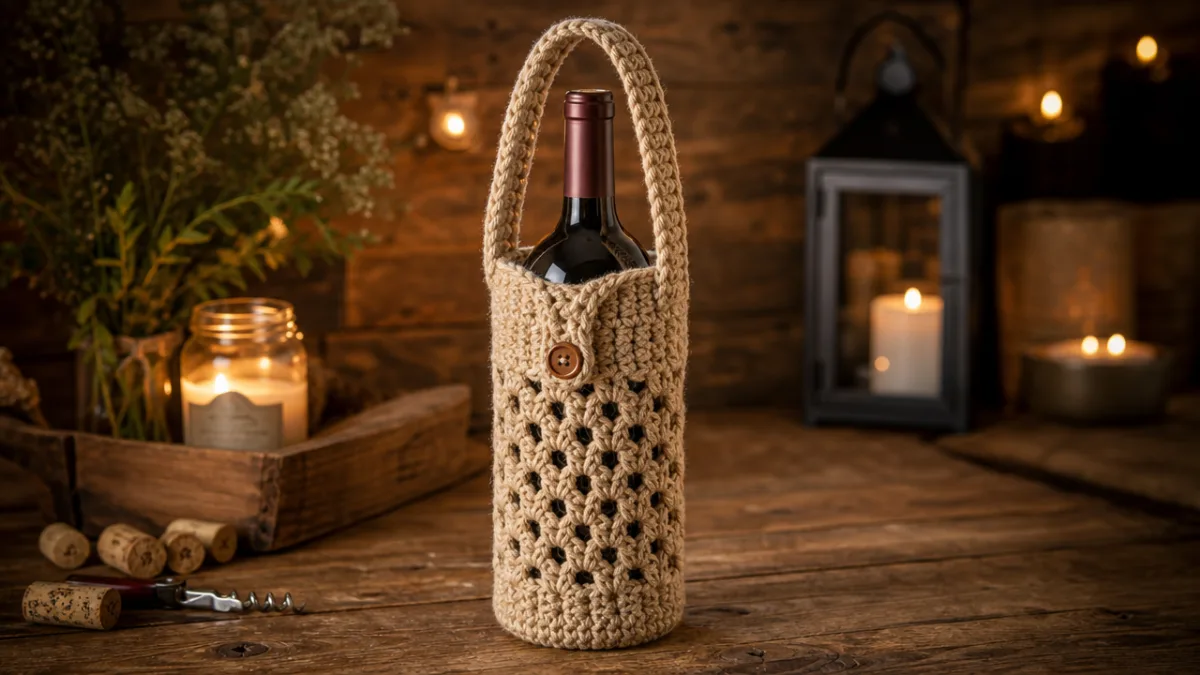
Once the base reaches the desired diameter — usually around 3.5 to 4 inches to accommodate a standard 750ml wine bottle — the pattern transitions into working straight rounds without increases to build up the body of the carrier. This is where you can begin to introduce texture and visual interest. Many popular patterns incorporate a mesh or lattice stitch at this stage, alternating between chain spaces and single or double crochet stitches to create an open, lacy look. This not only adds visual appeal but also allows the color of the wine bottle label to peek through, which creates a charming layered effect.
The handle is the final structural element and one that offers the most opportunity for customization. Some patterns call for a simple chain handle that’s reinforced with slip stitches for durability, while others use a more substantial twisted cord or even a braided yarn handle. The handle should be long enough to carry comfortably over the wrist or in the hand, typically somewhere between 10 and 14 inches from one attachment point to the other. Reinforcing the attachment points with extra stitches or a few whipstitches will ensure the handle holds up to repeated use.
Many free patterns also include optional embellishments at this stage, such as a decorative flower motif, a woven ribbon threaded through the mesh body, or a simple button-and-loop closure at the top to keep the bottle secure. These finishing touches are entirely up to you and can be tailored to the preferences and personality of your intended recipient. A minimalist might appreciate clean lines and a solid color, while a more eclectic host might love a pop of contrasting color or a cheerful appliqué.
Step-by-Step Instructions for the Wine Carrier
Begin by making a magic ring or chaining 4 and joining with a slip stitch to form a small loop. Into this ring, work 6 single crochet stitches, then pull the tail of the magic ring tight to close the center hole. Place a stitch marker in the first stitch of the round so you can easily track your progress. This initial ring of 6 stitches forms the very center of your base, and from here every subsequent round will build outward to create the flat circular foundation.
For Round 2, work 2 single crochet stitches into each stitch around, giving you a total of 12 stitches. In Round 3, alternate between 2 single crochet stitches in one stitch and 1 single crochet stitch in the next, repeating this sequence all the way around to reach 18 stitches. Continue in this pattern of incremental increases — adding 6 stitches per round by spacing your increases evenly — until the base measures approximately 3.5 to 4 inches in diameter. At this point, you are ready to begin building the body of the carrier.
To transition into the body, simply stop increasing and work one single crochet stitch into every stitch around for one round to stabilize the edge. From Round 8 onward (or whichever round marks the start of your body), you can switch to your chosen body stitch pattern. For a classic mesh look, try the following sequence: chain 2, skip 1 stitch, single crochet into the next stitch, and repeat all the way around, joining at the end of each round. Repeat this mesh pattern for 10 to 12 rounds, or until the body of the carrier is tall enough to comfortably enclose a standard wine bottle — aim for approximately 8 to 10 inches of body height.
- Create magic ring and work 6 single crochet stitches into the ring.
- Increase over the next several rounds to build the circular base.
- Transition to straight rounds once the base measures 3.5 to 4 inches.
- Work mesh or chosen stitch pattern for 10 to 12 rounds for the body.
- Finish the top edge with a round of single crochet for a clean border.
- Attach the handle by chaining the desired length and joining at two opposite points on the top edge.
- Weave in all ends securely and block if needed.
To finish the top of the carrier, work one full round of single crochet stitches into the top edge to create a neat, stable border. This round also helps close up any gaps that may have formed between the mesh body and the top opening, giving the whole piece a polished look. Once this finishing round is complete, you can attach your handle, weave in your ends, and give the carrier a gentle steam or wet block to help it settle into its final shape. A light press with a damp cloth and iron on a cool setting works beautifully for cotton yarn.
Customization Ideas and Color Inspiration
One of the greatest joys of making a handmade gift is the ability to tailor it completely to the person receiving it. When it comes to color, the options are essentially limitless, but a few thoughtful approaches will help you make a choice that feels truly personal. If you know the host’s kitchen colors, matching or complementing those tones will ensure the carrier becomes a fixture rather than an oddity. Classic neutrals like cream, natural linen, and soft grey are universally flattering and pair elegantly with almost any bottle or setting.
For a more festive touch, consider working the carrier in seasonal colors that suit the occasion. Deep burgundy and gold make a stunning combination for autumn dinner parties and holiday gatherings. Bright turquoise or coral are wonderful choices for a summer outdoor celebration. A crisp white or pale mint green feels fresh and cheerful for spring. If you want to add visual complexity without changing your main color, try carrying a thin metallic thread alongside your cotton yarn for the entire project — the subtle shimmer it adds elevates the piece without being overwhelming.
Beyond color, texture is another powerful avenue for customization. Switching from a simple mesh stitch to a more textured body stitch, such as the puff stitch, bobble stitch, or crocodile stitch, will dramatically change the look and feel of the finished carrier. A bobble-stitch body, for example, creates a chunky, dimensional surface that looks luxurious and substantial, while a simple shell stitch repeat gives a delicate, vintage-inspired appearance. Don’t be afraid to swatch a few options before committing — the time spent will reward you with a carrier that truly reflects the recipient’s style.
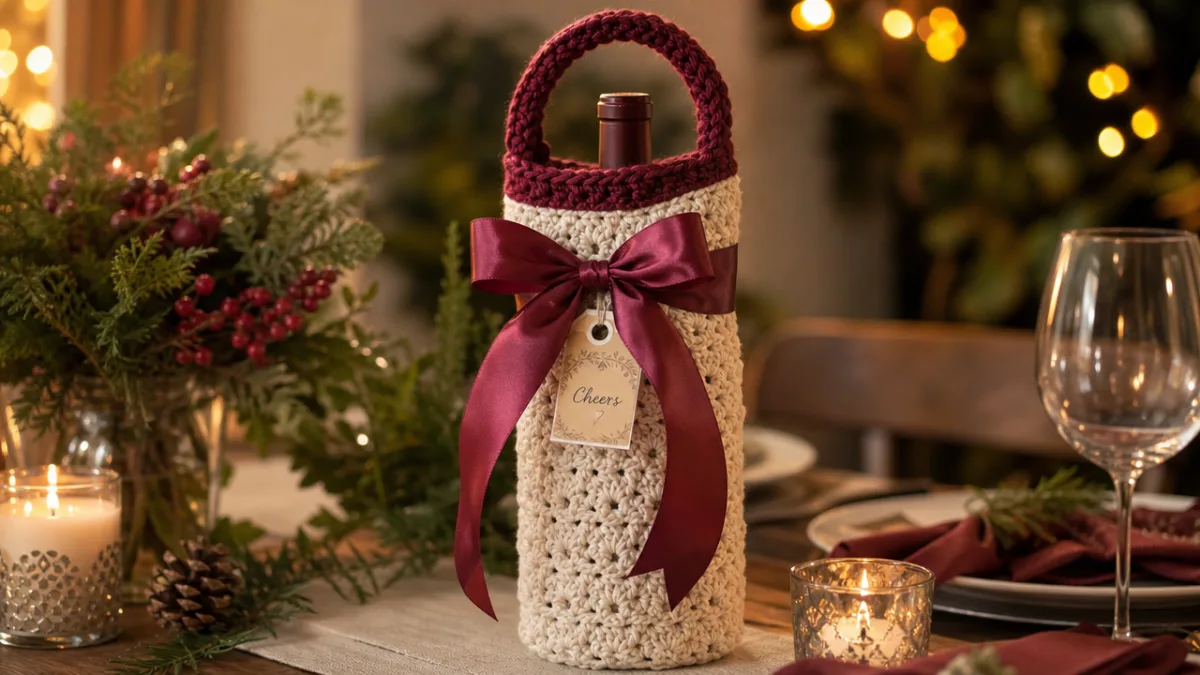
Embellishments offer one final layer of personalization. A simple crocheted flower or leaf, worked separately and sewn onto the body, adds a charming handmade detail. A satin ribbon woven through the top mesh rounds and tied into a bow transforms the carrier into something gift-ready without any additional wrapping needed. You might also consider attaching a small luggage tag or kraft paper label with a handwritten note, turning the practical object into a keepsake that the recipient will want to hold onto long after the wine is gone.
Gifting Tips and How to Present Your Handmade Carrier
The way you present a handmade gift can be just as meaningful as the gift itself. For a crochet wine carrier, presentation is delightfully straightforward because the carrier is its own packaging. Simply select a bottle of wine that you know the host will enjoy — or opt for a sparkling cider, a bottle of olive oil, or even a flavored vinegar if you’d prefer to gift something non-alcoholic — and tuck it inside the carrier. Pull the handle up and tie a ribbon or a small sprig of dried lavender around the top to secure everything and add a finishing flourish.
If you want to elevate the presentation further, consider tucking a few small extras into the carrier alongside the bottle. A pair of wine stoppers, a small cheese knife, or a packet of gourmet crackers can all fit neatly inside a generously sized carrier and turn a single bottle into a curated little gift set. Wrapping any extras in a single sheet of tissue paper before placing them inside adds a layer of visual softness and makes the whole thing feel intentional and considered. The finished result looks impressive enough to sit proudly on a gift table at any dinner party or celebration.
Including a handwritten card that explains the carrier’s origin adds an extra dimension of connection. Let the host know that you crocheted it yourself, share a brief note about the pattern or the yarn you chose, and perhaps mention that the carrier is fully washable and reusable. Many people are unfamiliar with the care instructions for cotton crochet items, so a quick note explaining that it can be machine washed on a gentle cycle and laid flat to dry will ensure the carrier remains beautiful for years to come. This kind of attentive detail is what transforms a lovely gift into an unforgettable one.
Finally, consider the timing of your gifting. Arriving at a dinner party or gathering with a handmade item carries a different energy than purchasing something at the last minute from a store. If you have the time to make the carrier in advance, wrapping it carefully and keeping it fresh will ensure it looks its absolute best when it changes hands. If you find yourself crafting close to the deadline, a quick steam will revive any creases and restore the carrier’s neat shape. However you choose to present it, the fact that you made it with your own hands will be unmistakably evident — and deeply appreciated.
Finding Free Patterns and Building Your Crochet Community
The internet has never been a richer resource for free crochet patterns than it is today, and wine carrier patterns are no exception. Platforms like Ravelry, AllFreeCrochet, and Yarnspirations host hundreds of free patterns in every style imaginable, from the simplest beginner-friendly designs to intricate lacework that will challenge even experienced crafters. Pinterest, as a visual discovery platform, is particularly well suited to finding wine carrier patterns because you can quickly browse dozens of variations by style and color before clicking through to the full instructions, making it easy to find the perfect match for your skill level and aesthetic preferences.
YouTube is another invaluable resource, especially for crafters who find written patterns difficult to follow. Many talented crochet designers publish full tutorial videos walking viewers through their patterns stitch by stitch in real time. For a project like a wine carrier, a well-produced video tutorial can make the difference between a frustrating afternoon and a deeply satisfying crafting session. Searching terms like “crochet wine bag tutorial” or “free crochet bottle carrier video” will surface a wealth of options, many of them completely free to access. Watching even a few minutes of a tutorial before beginning a new pattern can help you identify potential challenges and plan your approach accordingly.
Beyond patterns and tutorials, connecting with a broader crochet community can enrich your crafting practice in ways that go far beyond technical skill. Online communities on Facebook, Reddit’s r/crochet forum, and Instagram bring together crafters of all levels who share their work, offer encouragement, troubleshoot problems, and celebrate each other’s achievements. Posting a photo of your finished wine carrier in one of these spaces often generates a flood of enthusiastic responses and helpful suggestions that can inspire your next project. Many crafters have found their closest creative friendships through these virtual communities, proving that the social dimension of crafting is every bit as meaningful as the making itself.
Local crafting groups and yarn shops are equally worthwhile to explore. Many independent yarn stores host regular stitch-and-chat sessions or organized craft circles where you can work on projects in good company, ask questions in person, and get hands-on guidance from more experienced crafters. If you’ve been working in isolation and feel like your skills have plateaued, spending an afternoon among fellow enthusiasts can reignite your creativity and introduce you to techniques you might never have discovered on your own. The crochet community, whether online or in person, is famously welcoming, and newcomers are almost always embraced with warmth and generosity.








What do you think?
It is nice to know your opinion. Leave a comment.