










Summer Festival Crochet Halter Top: Your Complete Free Pattern Guide
Introduction to the Summer Festival Crochet Halter Top
There is something undeniably magical about wearing a garment you have crafted entirely with your own two hands. The Summer Festival Crochet Halter Top is exactly the kind of project that reminds us why so many people fall in love with crochet in the first place. It is a design that strikes a perfect balance between bohemian charm and modern wearability, making it ideal for warm-weather festivals, beach days, casual outings, and everything in between. Whether you are a seasoned crocheter or someone who has just graduated beyond the beginner stage, this halter top pattern offers a deeply satisfying creative experience from start to finish.
Crochet fashion has seen an extraordinary resurgence in recent years, and festival culture has played no small part in driving that trend. From Coachella to local summer fairs, handmade crochet tops have become a staple of warm-weather style. The open-stitch construction that defines this halter top is not just beautiful — it also makes the garment breathable and lightweight, which is precisely what you want when you are spending long hours outdoors under the sun. The design typically features a fitted bodice, delicate tie closures at the neck and back, and an eye-catching stitch pattern that catches the light in the most appealing way.
What makes this particular pattern so beloved within the crochet community is its accessibility combined with its impressive visual impact. When finished, the top looks like something you might find in a high-end boutique, yet the techniques involved are well within reach of any intermediate crocheter willing to invest a weekend or two. Free patterns like this one democratize fashion design, allowing makers of all economic backgrounds to participate in the joy of creating their own wardrobe. Throughout this guide, we will walk you through everything you need to know — materials, techniques, sizing, and finishing — to bring this gorgeous summer essential to life.
Materials and Tools You Will Need
Before you cast on a single chain, gathering the right materials will make your crochet journey significantly smoother and more enjoyable. For the Summer Festival Crochet Halter Top, yarn selection is arguably the most important decision you will make. Most versions of this pattern call for a lightweight cotton or cotton-blend yarn in a weight of DK (size 3) or light worsted (size 4). Cotton is the gold standard for summer garments because it is naturally breathable, absorbs moisture rather than trapping it, and holds stitch definition beautifully — which matters a great deal when your pattern features intricate open lacework or mesh-style sections.
When it comes to hook size, always refer to the gauge specified in your chosen version of the pattern, since halter tops need to fit snugly and predictably across the bust and ribbing. Most cotton halter top patterns suggest a crochet hook in the range of 3.5mm to 5mm, depending on the yarn weight and the desired drape. Beyond yarn and hook, you will want to have a few essential accessories on hand. A yarn needle for weaving in ends is non-negotiable. Stitch markers will become your best friends, especially when working in the round or tracking pattern repeats. Scissors, a flexible measuring tape, and a notepad for tracking your row counts round out your toolkit nicely.
Choosing your color palette is one of the most personally expressive parts of this project. The Summer Festival Halter Top is incredibly versatile when it comes to color. Classic choices include sun-bleached white, sandy cream, warm terracotta, or ocean-inspired turquoise — all of which photograph beautifully and complement summer skin tones. However, do not shy away from bold choices like deep burgundy, marigold yellow, or even a variegated multicolor yarn if you want your finished piece to truly stand out in a crowd. The open stitch work of the pattern will showcase whatever yarn you choose, so pick something you love and will feel excited to wear all season long.
- Yarn: Approximately 200–400 yards of DK or light worsted weight cotton or cotton-blend yarn, depending on your size
- Crochet Hook: 4mm or 4.5mm (always check against your gauge swatch)
- Stitch Markers: At least 4–6 locking stitch markers
- Yarn Needle: For weaving in ends and seaming if required
- Measuring Tape: Flexible fabric tape for checking your gauge swatch and body measurements
- Scissors: Sharp craft scissors for clean yarn cuts

Understanding the Stitch Pattern and Construction
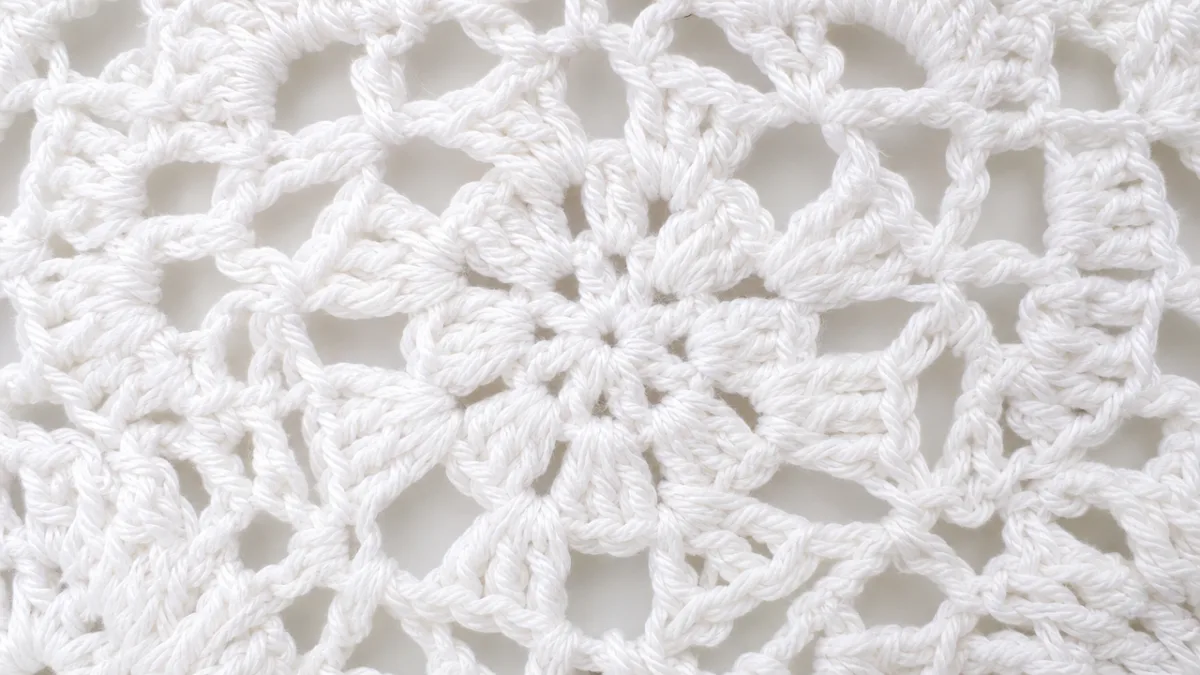
The beauty of the Summer Festival Crochet Halter Top lies in its stitch construction, which typically combines a few fundamental techniques in creative and visually striking ways. Most variations of this pattern make use of the classic granny square or mesh-style open work, often incorporating double crochet clusters, chain spaces, and shell stitches to create that signature airy, lace-like appearance. Understanding how these stitches interact is essential before you begin, because the stitch pattern will repeat throughout the bodice and needs to remain consistent for your finished garment to look polished and professional.
Construction of the halter top usually follows one of two approaches. The first and most common method for beginners is working the bodice as two flat panels — a front and a back — which are then seamed together along the sides. This method is wonderfully intuitive because it allows you to lay each panel flat and measure against your body as you go, making adjustments easy. The second approach involves working in the round from the bottom up or top down, which eliminates side seams and creates a seamless finish but requires a more confident understanding of shaping with increases and decreases. Both methods produce beautiful results, and your choice may depend on which construction style you find more comfortable.
The halter top’s defining structural features are its neck tie and back strap system. The neckline is typically formed by long crocheted ties that wrap around the neck and tie in a bow or knot at the nape, providing adjustable support and a delicate feminine silhouette. The back is similarly finished with ties that cross or wrap around the torso, allowing the wearer to customize the fit and create that iconic festival-style look. Some patterns include a small crocheted band or waistband at the bottom hem to give the top a clean edge and help it maintain its shape throughout the day. Paying attention to these finishing details will elevate your finished top from homemade to truly handcrafted.
- Step 1: Create a gauge swatch using your chosen yarn and hook, then block it and measure carefully before beginning the main piece.
- Step 2: Chain the foundation row according to your size, then work the first few rows of the bodice stitch pattern.
- Step 3: Continue building the bodice panels, following the stitch repeat and shaping instructions for your chosen size.
- Step 4: Shape the cups or bust area using increases or by following the cup shaping rows specified in the pattern.
- Step 5: Work the neck tie chains and back ties, attaching them securely to the bodice at the marked anchor points.
- Step 6: Seam the side panels if working flat, then add any edging or bottom band as required.
Sizing, Gauge, and Fit Considerations
Getting the fit right on a crochet halter top is both the most critical and most rewarding part of the process. Unlike a shawl or bag, a wearable garment needs to fit your body in a way that is comfortable, flattering, and functional. The absolute first step before beginning any garment crochet project is working a gauge swatch. Gauge refers to the number of stitches and rows per inch that your specific combination of yarn, hook, and personal tension produces. Even a small discrepancy — say, half a stitch per inch — can translate to a significant size difference across the entire width of a garment, so this step is genuinely non-negotiable.
Most Summer Festival Halter Top patterns are written in multiple sizes, typically ranging from XS through 3XL or beyond, to accommodate a wide variety of body shapes and measurements. The key measurement you will need is your bust circumference, although underbust measurement can also be helpful if the pattern includes a fitted band beneath the cups. Take these measurements snugly but not tightly, using a soft fabric tape measure, and compare them against the finished measurements listed in your pattern’s size chart. Always account for ease — the amount by which the finished garment differs from your body measurement. A halter top generally has negative to zero ease at the bust for a close, supportive fit.
One of the most valuable habits you can develop as a garment crocheter is the practice of trying on your work in progress. If you are working flat panels, you can hold them up against your body every few rows to confirm you are on track. If you are working in the round, you can slip the piece over your head periodically as it grows. Crochet is wonderfully forgiving compared to knitting in that it is relatively easy to frog (unravel) and rework sections if you notice a fit issue early. The time you invest in checking your work as you go is always less than the heartbreak of finishing a complete garment only to discover it does not fit as expected.
Do not be discouraged if you need to make adjustments to the written pattern to achieve your ideal fit. Pattern modifications are a completely normal and even celebrated part of the garment crochet process. Common adjustments include adding or subtracting rows to increase or decrease the height of the bodice, working extra or fewer stitches in the cup shaping section to accommodate different cup sizes, or lengthening the tie straps for more wrapping options. As you gain confidence with the construction of this pattern, you will likely find yourself naturally understanding where and how to make these tweaks — and that growing knowledge is one of the most empowering aspects of learning to crochet your own clothing.
Finishing Techniques and Blocking Your Halter Top
The finishing stage of any crochet project is where the work truly transforms from a collection of stitches into a polished, wearable piece. For the Summer Festival Crochet Halter Top, finishing encompasses several important steps: weaving in all yarn ends securely, seaming the panels if applicable, adding any edging details, and — most importantly — blocking the finished garment. Blocking is the process of wetting or steaming your crocheted piece and then pinning or shaping it to its final dimensions while it dries. For cotton yarn in particular, blocking makes a dramatic and undeniable difference in the appearance of your work.
To block your halter top, begin by submerging the finished piece in cool water and gently squeezing out the excess moisture without wringing or twisting the fabric, which can distort the stitches. Lay the damp top flat on a blocking mat or a thick folded towel, and use rust-proof pins to stretch it gently to the dimensions specified in your pattern’s finished measurements. Pay particular attention to the open lace or mesh sections, using pins to open up and define each stitch repeat so that the pattern is clearly visible. Allow the piece to dry completely — this can take anywhere from several hours to a full day depending on your climate and yarn thickness — before removing the pins.
Weaving in ends is a step many crocheters rush, but taking the time to do it properly will ensure your halter top holds up through many wears and washes. Thread each yarn tail onto your yarn needle and weave it through the backs of several stitches in multiple directions — first one way, then back the other — to create a secure lock that will not slip loose. For cotton yarn, it can be helpful to split the plies of the yarn slightly as you weave, which helps the ends integrate more deeply into the fabric. Trim the tails close to the fabric once you are satisfied they are secure, and your top should be virtually seamless on the wrong side.
- Always weave ends in multiple directions for maximum security, especially in stretchy or open stitch patterns.
- Block your finished top every one to two washes to help it maintain its shape and stitch definition over time.
- Hand wash in cool water with a gentle wool or delicate wash; machine washing is not recommended for most handmade crochet garments.
- Lay flat to dry after each wash rather than hanging, which can cause the top to stretch out of shape under its own weight.
- Store your finished top folded rather than on a hanger to preserve the shape of the ties and overall structure.
Styling Your Finished Crochet Halter Top
Once your Summer Festival Crochet Halter Top is complete, blocked, and ready to wear, the real fun begins: styling it for the many occasions it is perfectly suited to. The halter top’s open-work construction and feminine silhouette make it an incredibly versatile wardrobe piece that can be dressed up or down with equal ease. For a quintessential festival look, pair it with high-waisted denim cutoff shorts, a wide-brimmed straw hat, and leather sandals. Add some layered jewelry — think long pendant necklaces and stacked bracelets — and you have a look that is effortlessly boho-chic without appearing overly costumed or contrived.
The halter top also transitions beautifully into beach and poolside settings. Worn over a solid-color bikini top, it functions as a stylish cover-up that provides a bit of shade and visual interest while remaining easy to remove when you are ready to take a dip. In this context, a flowy maxi skirt or wide-leg linen trousers in a coordinating neutral creates a sophisticated resort-wear ensemble that is both comfortable and polished. If your halter top is worked in a rich jewel tone, consider pairing it with simple white or cream separates to let the color and stitch work take center stage without competing with other bold elements.
For those who want to extend the wearability of their crochet halter top beyond strictly warm-weather occasions, layering offers exciting possibilities. Worn over a fitted tank top or bralette in a complementary color, the halter becomes suitable for cooler festival evenings or transitional spring days. A lightweight denim jacket or oversized blazer thrown casually over the shoulders instantly shifts the look toward something more urban and street-style inspired while still honoring the handmade, artisanal quality of the crochet piece. The fact that you made this garment yourself is, quite arguably, the most stylish thing about it — wear it proudly and enjoy every compliment that inevitably comes your way.
Photographing your finished handmade garments is a wonderful way to document your crochet journey and share your work with the broader maker community. If you plan to share your Summer Festival Halter Top on social media or Pinterest, natural outdoor light is your greatest ally — golden hour in the early morning or late afternoon creates a warm, flattering glow that shows off the stitch texture beautifully. Position yourself near greenery, textured walls, or natural settings that complement the handmade, earthy quality of your crochet work. Tag your posts with relevant hashtags and consider linking back to the free pattern so that other makers can discover it and be inspired to create their own version of this gorgeous summer essential.
Tips for Customizing and Making the Pattern Your Own
One of the greatest joys of working from a free crochet pattern — as opposed to purchasing a ready-made garment — is the freedom to customize and adapt the design to perfectly suit your personal taste and body. The Summer Festival Crochet Halter Top is particularly well-suited to creative modification because its construction is straightforward enough to accommodate changes without unraveling the entire design concept. The first and perhaps most impactful way to customize your top is through yarn choice and color. The same stitch pattern worked in a chunky, rustic jute-look cotton will produce an entirely different aesthetic than the same stitches worked in a fine, silky mercerized cotton — yet both can be equally stunning in their own right.
Stitch substitutions are another exciting avenue for personalization, provided you have a solid understanding of how different stitches affect the drape, stretch, and density of your fabric. If the original pattern uses a basic mesh or granny-square motif, consider experimenting with a shell stitch border along the hem, or replacing a section of plain double crochet with a more decorative cluster stitch. These kinds of modifications allow you to put a genuinely unique signature on your finished piece while still benefiting from the structural guidance of the original pattern. If you are uncertain how a stitch substitution will behave, always work a small swatch first to evaluate the results before committing to the change in your actual garment.
Embellishments offer yet another layer of creative opportunity. Crochet flowers worked separately and then sewn to the bodice can add a whimsical, garden-party charm. A row of small shell edging along the neckline or hem elevates the finish and adds visual weight to areas that might otherwise appear plain. Some makers choose to add fringe along the bottom edge by cutting short lengths of yarn and attaching them with a simple lark’s head knot, creating a bohemian tassel effect that is perfectly in keeping with the festival aesthetic of this design. The possibilities are genuinely endless, and the best part is that your customized version will be completely one of a kind — an authentic expression of your creativity and craftsmanship that no one else in the world possesses.
- Yarn Swaps: Try linen for a more structured, rustic feel, or bamboo blend for extra drape and sheen.
- Color Blocking: Work different sections of the top in complementary colors for a modern, fashion-forward look.
- Embellishments: Add crochet flowers, fringe, or beaded accents to make the design uniquely your own.
- Strap Variations: Experiment with braided or twisted tie straps instead of simple chain ties for added texture and visual interest.
- Length Modifications: Add extra rows to the bottom to create a cropped long-line version that sits at the natural waist rather than above it.
- Lining: Sew a simple fabric lining into the cup area for added modesty and support if desired.
Sharing your finished project and any modifications you make is a generous contribution to the crochet community. When you post your finished Summer Festival Halter Top online, whether on Instagram, Pinterest, Ravelry, or a personal blog, include notes about the yarn you used, any modifications you made to the pattern, and any tips you discovered along the way. These real-world notes from actual makers are invaluable to the next person who attempts the pattern and may be struggling with a particular section. The crochet community thrives on this culture of sharing and generosity, and your experience — including the mistakes and the lessons learned from them — has real value for makers at every skill level. By contributing to that collective knowledge, you become part of a creative tradition that has been passed down through generations and continues to inspire new crafters every single day.








What do you think?
It is nice to know your opinion. Leave a comment.