










Halloween Crochet Garland Pattern: The Ultimate Guide to Creating Spooky Seasonal Décor
There is something deeply satisfying about handcrafting your own Halloween decorations, and a crochet garland sits at the perfect intersection of seasonal festivity and timeless craft. Whether you are a seasoned crocheter looking for a fun autumn project or a beginner eager to dive into holiday making, a Halloween crochet garland offers endless creative possibilities. From tiny pumpkins and ghosts to bats and black cats, the motifs you can stitch together are as varied as the holiday itself, allowing you to design something completely unique to your home.
Unlike store-bought plastic decorations that end up in landfills after a single season, a handmade crochet garland is a lasting heirloom that you can bring out year after year. Crocheted in durable cotton or acrylic yarn, these garlands can be stored in a small bag and pulled out each October to instantly transform your mantle, staircase, or front porch. The tactile quality of yarn gives your home a cozy, artisan feel that no mass-produced decoration can replicate, and guests will inevitably ask where you bought it — giving you the proud satisfaction of saying you made it yourself.
This comprehensive guide walks you through everything you need to know about creating a Halloween crochet garland from scratch. We will cover the materials you need, the foundational crochet techniques involved, step-by-step pattern instructions for several classic Halloween motifs, tips for assembling and finishing your garland beautifully, and creative ideas for displaying it throughout your home. By the end, you will have all the knowledge and inspiration necessary to pick up your hook and start stitching a piece of festive magic.
Why Halloween Crochet Garlands Are the Perfect Seasonal Project
Halloween crochet garlands are ideal seasonal projects for several compelling reasons. They are relatively small and portable, meaning you can work on individual motifs while watching a movie, sitting in a waiting room, or enjoying a quiet evening outdoors. Each element of the garland — whether a miniature ghost or a tiny pumpkin — is a self-contained project that can be completed in an hour or two, making the overall garland feel achievable even when you only have short windows of crafting time available throughout the busy autumn season.
The repetitive nature of crocheting small motifs is also deeply meditative and stress-relieving, which feels especially meaningful during the hectic weeks leading up to Halloween. Many crafters report that the rhythm of the hook and yarn creates a mindfulness effect similar to journaling or gentle yoga. As you work through each motif, you enter a calm, focused state that quiets the noise of daily life and allows creativity to flourish. This makes a Halloween garland not just a decorative project but a genuine act of self-care and seasonal celebration rooted in handcraft tradition.
From a practical standpoint, garlands are also wonderfully versatile in terms of difficulty level. A beginner can make a simple chain-link garland with basic single crochet shapes, while an advanced crocheter can incorporate intricate lacework, three-dimensional elements, and textured stitches that make the finished piece look gallery-worthy. This scalability means the project grows with your skill level over the years, and each new Halloween season gives you the opportunity to add more sophisticated motifs to your collection or redesign the garland entirely with a fresh color palette or theme.
Materials and Tools You Will Need
Before you begin any crochet project, gathering the right materials makes the process smoother and more enjoyable. For a Halloween garland, you will primarily need yarn in a classic Halloween color palette. Traditional choices include black, orange, purple, white, and green, though modern interpretations often incorporate dusty rose, sage, and terracotta for a more muted, cottagecore aesthetic. Choose yarn weights appropriate for your hook size; most garland motifs work best in worsted weight or DK weight yarn, which produces motifs large enough to be visible from across a room without becoming bulky or heavy on the garland string.
In terms of specific yarn fiber, cotton yarn is often preferred for Halloween garlands because it holds its shape beautifully, has a slight sheen that photographs well, and is easy to care for between seasons. Acrylic yarn is a budget-friendly alternative that comes in a vast range of Halloween colors and is equally durable for long-term seasonal use. If you want your garland to have a slightly rustic or organic feel, consider blending a cotton-linen yarn for some motifs, which adds beautiful texture and a natural matte finish that contrasts nicely with the glossy orange and black yarns.
Beyond yarn, your essential tools include a crochet hook in the appropriate size for your chosen yarn — typically a 3.5mm to 5mm hook for DK to worsted weight — as well as a yarn needle for weaving in ends, scissors, and stitch markers to help you keep track of rounds. Polyfill stuffing is useful if you want to create three-dimensional motifs like plump little pumpkins or rounded ghost bodies. You may also want a thin piece of twine, jute rope, or decorative ribbon to serve as the base string on which all your individual motifs will be suspended or attached.
Essential Crochet Stitches for Garland Motifs
Even if you are relatively new to crochet, a Halloween garland is accessible because most motifs rely on a core set of stitches that are easy to learn and quick to execute. The magic ring, also called the magic loop or adjustable ring, is the starting point for nearly every circular motif you will encounter in garland patterns. It allows you to begin working in the round and pull the center hole completely closed, which gives pumpkins, skulls, and circular ghost faces a clean, professional finish without any gaps or loose threads at the center.
The single crochet stitch forms the foundation of many garland elements. It produces a tight, dense fabric that holds its shape well and keeps polyfill stuffing neatly contained inside three-dimensional motifs. The half double crochet and double crochet stitches are useful when you want to create taller motifs like elongated bat wings or arched cat backs, adding height quickly without the density of single crochet. Learning to work slip stitches for joins and to work in both rounds and rows will cover virtually every technique required for the motifs in this guide, making the project truly beginner-friendly at its most basic level.
For more advanced crafters, textured stitches like the bobble stitch, popcorn stitch, and front-post or back-post stitches can add incredible dimension to your Halloween motifs. A bobble stitch pumpkin, for instance, creates naturalistic ridges that mimic the segmented surface of a real pumpkin in a way that flat single crochet simply cannot achieve. Similarly, a ghost worked in reverse single crochet around its edges has a beautifully polished outline that makes it look finished and intentional. Taking time to practice these stitches on a small swatch before diving into your motifs will save frustration and produce results you are genuinely proud to display.
Step-by-Step Pattern Instructions for Key Halloween Motifs
The pumpkin is perhaps the most iconic Halloween crochet motif, and it is also one of the most satisfying to complete. To begin, make a magic ring and work six single crochets into it before pulling the ring closed. Then increase evenly across subsequent rounds until your circle reaches the desired diameter — typically around six to eight rounds for a garland-sized pumpkin. Work a few rounds even without increases to build a shallow cylinder, then decrease evenly back to the center. Before closing completely, add a small amount of polyfill stuffing for a gently rounded shape, then close and fasten off, leaving a long tail for attaching to the garland string.
The classic ghost motif begins similarly with a magic ring, working into it and increasing across the first few rounds to create the rounded head. Rather than decreasing symmetrically, however, you shift into rows to create the wavy, trailing lower body of the ghost. Work back and forth across the base of the circle, decreasing one stitch on each end of every row to create a tapering shape, then add a picot or scalloped edging along the bottom to suggest the fluttery hem of a ghost’s body. A few French knot eyes embroidered in black yarn complete the expression, giving your ghost a charmingly spooky or endearingly friendly face depending on the placement.
Bat motifs are slightly more complex because the wings require working in two separate flat panels that are then joined at the body center. Begin with a small oval for the bat body, then attach yarn at the widest point of each side and work outward in increasing rows to form the angular, pointed wing shape characteristic of Halloween bats. A pair of tiny pointed ears worked in slip stitch at the top of the body completes the silhouette. Working bats in deep charcoal or true black yarn gives them maximum visual impact against lighter garland elements like white ghosts and orange pumpkins, and the contrast creates a beautifully balanced finished piece.
Tips for Assembling Your Garland Perfectly
Assembly is the stage where your individual motifs transform from a charming collection of small crocheted shapes into a cohesive, professional-looking garland, and the decisions you make here have a significant impact on the final aesthetic. Begin by laying all your completed motifs out on a flat surface and arranging them in a sequence you find visually pleasing. Varying the shapes, colors, and sizes creates visual rhythm — for example, alternating a large orange pumpkin with a small white ghost and a medium-sized bat creates a repeating pattern that is satisfying to the eye and feels deliberate rather than random.
When it comes to the base string, your choice of material matters as much as the motifs themselves. A natural jute twine gives the garland a rustic, organic feel that pairs beautifully with a cottagecore or farmhouse Halloween aesthetic. A satin ribbon in deep purple or burnt orange elevates the garland for more glamorous or maximalist styling. You can also crochet your own chain base using the same yarn as your motifs, which creates a seamless, unified look where the garland feels like a single cohesive object rather than separate elements strung together. Use your yarn needle to securely attach each motif to the base string, weaving through multiple points of contact for motifs that will receive a lot of movement or handling.
Spacing is another crucial assembly consideration. Garlands that are too densely packed lose the individual charm of each motif, while garlands with too much space between elements can look sparse and unfinished. A general guideline is to leave approximately two to four inches between each motif, though this varies depending on the size of your elements and the total length of your garland. Adding small accent details between motifs — a simple crocheted leaf in rust or gold, a tiny star worked in yellow yarn, or a few beads threaded onto the base string — fills the gaps elegantly and adds layers of seasonal texture to the overall composition.
Displaying Your Halloween Crochet Garland Throughout Your Home
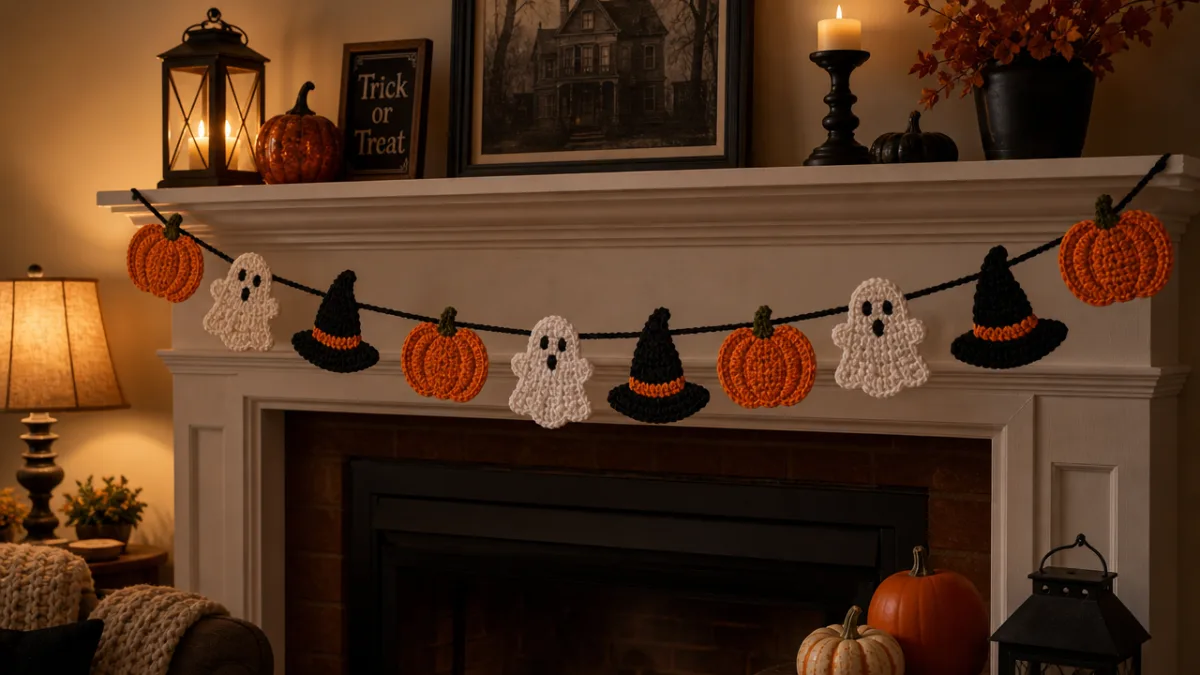
Once your garland is assembled and all the ends are neatly woven in, the delightful challenge becomes deciding where to display it. The mantelpiece is the most traditional location for a garland of any kind, and a Halloween crochet garland looks especially magical draped across a fireplace surround, where the warmth and flickering light of a fire catches the colors and textures of the yarn in a way that feels genuinely enchanting. Layer it with candles in black and orange holders, small ceramic skull figurines, and a few dried eucalyptus branches for a styled display that is equal parts spooky and sophisticated.
Staircases offer another dramatic display opportunity. Attach small loops of twine or removable command hooks at regular intervals along the banister, then drape the garland loosely from one hook to the next, allowing it to dip gently between attachment points in the classic festoon style. This works particularly well for longer garlands of five feet or more, and the movement of the garland as people walk up and down the stairs gives it a lively, animated quality. If you have children in the house, a staircase garland at their eye level makes the Halloween decorations feel wonderfully immersive and exciting from a small person’s perspective.
Beyond the obvious interior placements, consider using your crochet garland in unexpected locations that guests might not anticipate. Stretched across a bookshelf between stacked books and Halloween-themed trinkets, it creates a styled vignette that feels curated and intentional. Hung above a window with the light filtering through, it casts soft, textured shadows on the wall and floor. Draped across the back of a dining chair or around a table centerpiece, it integrates seamlessly with your Halloween table setting. The portability and lightness of a yarn garland means you can move it wherever it works best each year, experimenting with new display ideas each Halloween season.
Caring for and Storing Your Garland Between Seasons
A handmade crochet garland represents a meaningful investment of time and creative energy, so caring for it properly between seasons ensures it remains beautiful for many Halloweens to come. Before storing, give the garland a gentle hand wash in cool water with a mild wool wash or delicate detergent if it has collected any dust or odors during the season. Lay it flat on a clean towel to dry completely before storing, as folding or packing a garland while damp can lead to mildew and an unpleasant smell that is difficult to remove from yarn fibers.
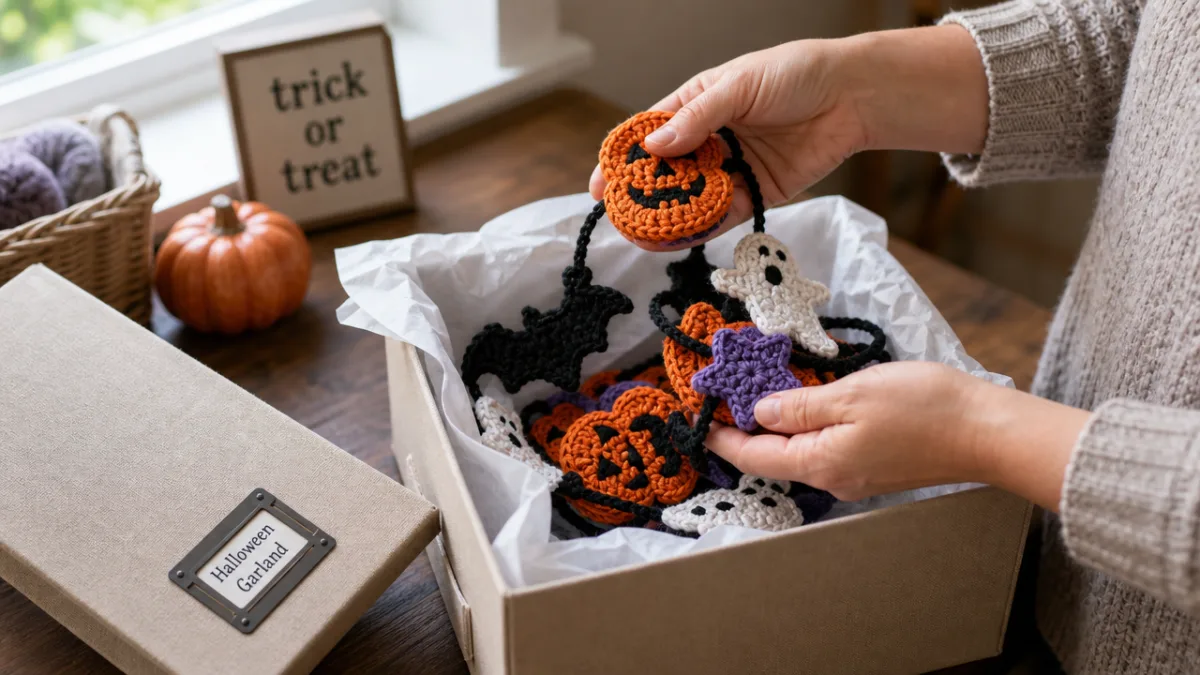
Storage is most effective when the garland is kept loosely coiled rather than tightly bundled, which can distort the shape of individual motifs over time. A large zip-lock bag or a fabric drawstring pouch works well for most garlands up to about six feet in length. For longer or more elaborate garlands, consider loosely wrapping the piece around a cardboard tube — similar to how you would store a poster — which keeps it from developing permanent creases or kinks in the base string. Add a small sachet of lavender or cedar inside the storage container to deter moths, which are particularly attracted to natural fiber yarns like wool and cotton.
Each year when you unpack your garland, take a few minutes to inspect it for any loose ends that need re-weaving, motifs that have come partially detached from the base string, or any small repairs needed to the crocheted elements themselves. A yarn needle and a few inches of matching yarn are all you need to make most minor repairs, and maintaining the garland with this small annual attention means it will stay looking as beautiful and intentional as the day you first hung it. Many crafters find that this yearly unpacking ritual becomes a beloved tradition in itself — a tangible, sensory marker that Halloween season has officially arrived.
Customizing Your Pattern for a Truly Unique Creation
One of the greatest joys of making your own Halloween crochet garland is the freedom to customize every aspect of the pattern to reflect your personal aesthetic and your home’s existing décor. If your interior leans toward a modern, minimalist style, consider a monochromatic garland worked entirely in shades of black, white, and gray with occasional touches of metallic silver yarn for a sophisticated, editorial Halloween look. If your home is warm and maximalist, go wild with deep jewel tones — burgundy, forest green, mustard gold, and cobalt blue — that evoke the richness of a Victorian haunted house aesthetic.
You can also customize your garland by leaning into a specific Halloween sub-theme rather than using generic motifs. A witch-themed garland might feature tiny pointed hats, broomsticks, and cauldrons alongside classic crescent moons and stars. A more literary Halloween garland could incorporate motifs inspired by classic horror stories — tiny white whales for Moby Dick, miniature ravens for Poe, small red apples for fairy tales with darker undertones. A candy-themed garland full of crocheted lollipops, candy corn pieces, and chocolate bars appeals particularly to households with young children and creates a festive, playful atmosphere in a kitchen or dining room.
Incorporating non-yarn elements into your garland also opens exciting customization possibilities. Threaded wooden beads painted in Halloween colors add weight and movement between motifs. Small bells attached to ghost and bat motifs create a delightful jingling effect when the garland moves in a draft. Miniature LED fairy lights woven through the base string transform the garland into an illuminated display piece that glows warmly in the evenings of October. The possibilities for personalization are genuinely endless, and this is precisely what makes a handmade crochet garland such a uniquely meaningful and personal Halloween decoration to both create and display in your home each year.








What do you think?
It is nice to know your opinion. Leave a comment.