










Free Crochet Emotional Support Monster With Cozy Charm: Your Complete Guide
What Is a Crochet Emotional Support Monster?
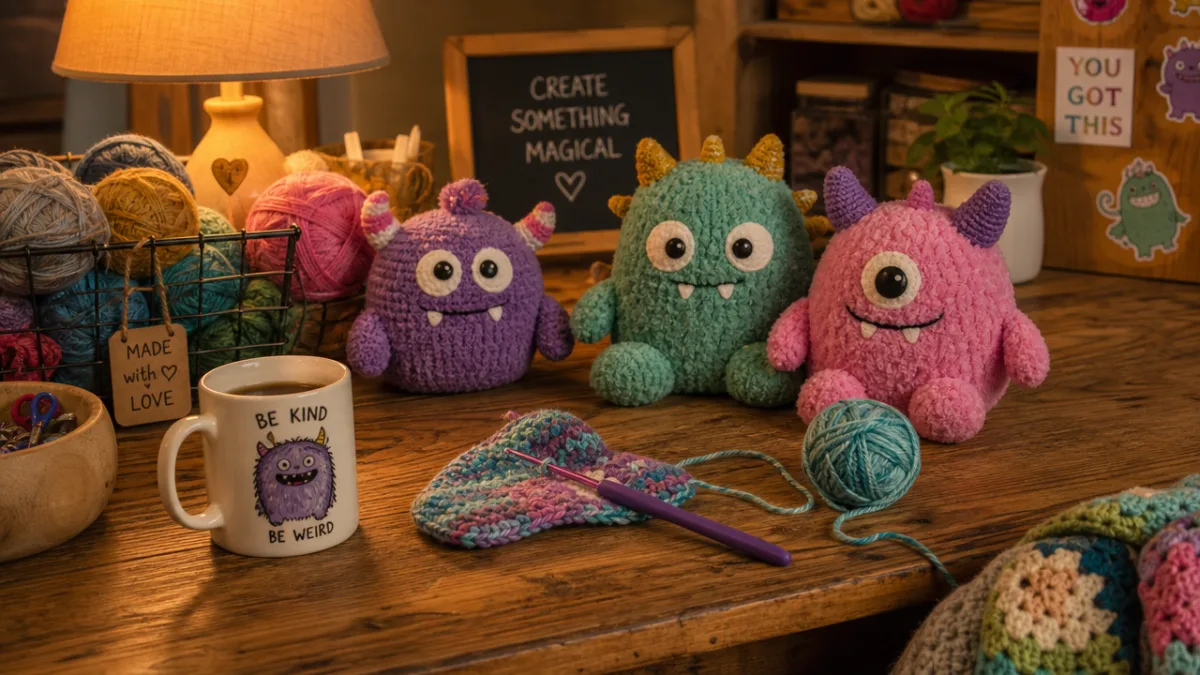
If you haven’t stumbled across crochet emotional support monsters yet, you’re in for a treat. These wonderfully weird little creatures have been quietly winning hearts across the handmade crafting world, and honestly, it’s not hard to see why. They’re soft, squishy, amigurumi-style plushies with one very clear job: to offer comfort and companionship to whoever gets to hold them. Make one for yourself, or give one to a friend who’s going through a rough patch — either way, these quirky little guys carry a surprising amount of emotional weight for something so small and simple.
What sets these apart from your typical stuffed animal is that they’re intentionally a little odd. We’re talking mismatched eyes, wildly expressive faces, stubby limbs, and color combos that look like they were chosen by a very enthusiastic five-year-old — and that’s completely the point. The imperfection is the charm. They look like something straight out of a child’s imagination: strange enough to be interesting, soft enough to be soothing, and small enough to tuck into a bag or perch on your desk as a quiet little reminder that someone out there cares about you.
There’s also something genuinely meaningful about the “emotional support” side of things. Therapists and counselors have long recognized the value of comfort objects for people of all ages — not just kids. Something soft and tactile to hold during moments of anxiety or grief can actually help your body calm down. And when that object was made by hand, stitch by stitch, by someone who was thinking about you the whole time? A factory-made toy just can’t compete with that.
Why Crochet Is the Perfect Craft for This Project
Crochet is honestly a perfect match for emotional support monsters, and a big part of that comes down to how sculptural the craft is. While knitting tends to produce flat fabric, crochet worked in the round creates solid three-dimensional shapes — which is exactly what amigurumi (the Japanese art of crocheting small stuffed figures) is all about. Working with a slightly smaller hook than usual gives you a tight, dense fabric that holds polyfill stuffing beautifully without any of it poking through the gaps.
It’s also a surprisingly beginner-friendly craft for this kind of project. Most emotional support monster patterns stick to just a few basic stitches: the magic ring, single crochet, increases, decreases, and slip stitches. Get comfortable with those, and you genuinely have everything you need to build a creature from scratch. Even if you’ve never picked up a hook before, it’s completely reasonable to finish your first monster within a weekend of practice. The learning curve is real, but it’s gentle.
Then there’s the sheer creative freedom that comes with choosing your yarn. There are so many options out there — silky bamboo blends, fluffy mohair, chunky merino, you name it — but for emotional support monsters, crafters tend to gravitate toward things that feel extra cozy against the skin. Velvet yarn, chenille, and soft worsted weight acrylic are all popular choices. The yarn you pick shapes the whole personality of your monster, and honestly, spending twenty minutes in a craft store squishing different skeins is its own kind of mindful, joyful experience.
Finding and Understanding Free Crochet Patterns
One of the best things about the crochet community is how freely people share their work. Talented designers post high-quality free patterns on Ravelry, Pinterest, personal blogs, and YouTube all the time, and emotional support monsters are no exception — there are tons of them out there. A quick Pinterest search will turn up everything from super simple designs you can knock out in a single afternoon to more elaborate monsters with embroidered details, extra appendages, and all kinds of personality. Whatever your skill level, there’s something waiting for you.
When you’re looking at a pattern for the first time, it helps to know what you’re reading. Most amigurumi patterns use US crochet terminology and standard abbreviations: MR for magic ring, sc for single crochet, inc for increase (two stitches into one), dec for decrease (two stitches together), and sl st for slip stitch. The pattern will also tell you what hook size and yarn weight to use, plus any extras you’ll need like safety eyes, polyfill stuffing, and a yarn needle.
One thing beginners sometimes skip — and really shouldn’t — is checking the stitch count at the end of each round. These little numbers are your checkpoints. If your count matches, you’re on track. If it doesn’t, it’s much easier to catch and fix a mistake now than to figure out what went wrong three rounds later with a lumpy, misshapen piece. Also worth knowing: many free patterns come with photo tutorials or YouTube companions, and watching a few rounds worked before you start can save you a lot of confusion. Written crochet instructions can feel cryptic at first, but seeing someone’s hands do it makes everything click.
Materials and Tools You Will Need
The good news is that getting started won’t cost you much. Amigurumi projects are small by nature, so you don’t need a lot of yarn — often a single skein is more than enough, and some monsters can be made entirely from scraps you already have sitting around. If you’ve been hoarding odd bits of leftover yarn (no judgment), this is their moment. Scrappy monsters made from whatever colors happen to be in your stash often turn out to be the most charming ones of all.
Here is a list of the core materials and tools you will typically need to make an emotional support monster:
- Worsted weight or bulky yarn in your chosen colors (soft acrylic, chenille, or velvet yarn are especially lovely)
- A crochet hook sized slightly smaller than the yarn label recommends, typically a 3.5mm to 5mm hook depending on yarn weight
- Polyfill stuffing, enough to firmly stuff your finished monster
- Safety eyes in assorted sizes, typically 6mm to 15mm for amigurumi
- A blunt yarn needle for seaming pieces together and weaving in ends
- Scissors
- Stitch markers to keep track of round beginnings
- Optional: embroidery floss for stitching on additional facial details like mouths, eyebrows, or stitched-on eyes for baby-safe versions
Beyond the materials themselves, it’s worth taking a moment to set up a comfortable workspace before you dive in. Good lighting makes a real difference, especially when you’re working with dark yarn and trying to see individual stitches. And if you can prop your pattern up on a tablet beside you rather than holding your phone in one hand while you crochet with the other, your future self will thank you. These might sound like small things, but they add up to a much more enjoyable session at the hook.
Step-by-Step Guide to Crocheting Your Monster
Every emotional support monster starts with a magic ring, which is the standard way to begin any amigurumi worked in the round. To make one, wrap your yarn around your fingers to form a loop, insert your hook through it, and pull up a working loop. Chain one to anchor it, then work your starting single crochets into the ring and pull the tail end tight to close the center hole. It looks tidy, lies flat, and produces a much cleaner start than the chain-ring method — once you get the hang of it, you won’t want to do it any other way.
From there, the body is built up through a continuous spiral of rounds. You’ll increase stitches in the early rounds to make the shape expand outward, work a few even rounds at the widest point to build some height, and then start decreasing to close the shape back up. Before those final decrease rounds make the opening too small to reach into, you’ll want to attach your safety eyes — your pattern will tell you exactly which rounds to place them between. Get the eyes in, stuff the body firmly with polyfill, and keep decreasing until the hole is fully closed.
The arms, legs, horns, ears, and whatever other quirky bits your monster has are crocheted separately and then sewn onto the body with a yarn needle. Don’t rush this part. Neatly attached limbs genuinely transform how a finished monster looks, and taking an extra few minutes to pin everything in place and check the positioning from a few different angles before you commit to sewing is absolutely worth it. That little bit of extra care at the end is usually what separates a good monster from a great one.
Personalizing Your Monster for Maximum Emotional Impact
Here’s where things get really fun. When you’re making a monster as a gift, think about the person you’re making it for — their favorite colors, the textures they love, the palette that feels like them. Are they someone who gravitates toward warm earth tones and natural fibers, or do they come alive around hot pink and neon green? Working those details into your yarn choices turns a generic pattern into something that clearly says “I was thinking about you specifically when I made this.” People feel that, even if they can’t quite explain why the monster feels so personal.
Facial expression is another thing worth playing with. Wide, surprised eyes with a tiny open mouth gives you a completely different vibe than narrow, sleepy eyes and a gentle smile — and you can achieve both within the exact same pattern just by adjusting the placement and spacing of the safety eyes. Some makers add embroidered rosy cheeks with pink floss, tiny French knot freckles, or little felt accessories like hats and scarves. Each small addition makes the creature feel more specific and more alive, like it was made for one particular person and no one else.
You might also consider tucking a little handwritten tag onto your finished monster. Something simple like “This is your emotional support monster. It’s here whenever you need a hug” can be surprisingly moving to receive. Some crafters take it a step further and write a brief backstory — a name, a special power, a specific kind of support this particular monster provides, whether that’s absorbing anxious thoughts or standing guard against bad dreams. It sounds small, but those storytelling touches turn a handmade gift into something genuinely memorable.
Sharing Your Makes and Joining the Crafting Community
Once your first monster is finished, there’s a very good chance you’ll want to show it off — and the crochet community is one of the warmest corners of the internet to do exactly that. Instagram, Pinterest, and Ravelry are full of makers who celebrate each other’s work with real enthusiasm. Post a photo of your finished creature with tags like #amigurumi, #crochetmonster, or #emotionalsupportmonster and you’ll quickly find yourself among thousands of people who get it immediately and will respond accordingly.
But the community goes well beyond social media likes. Plenty of makers participate in stitch-alongs, where a group works through the same pattern together and shares progress photos along the way. Others get involved in charity drives — donating handmade monsters to children’s hospitals, mental health organizations, crisis centers, and shelters. There’s something genuinely powerful about making something with your own hands and giving it to someone who really needs it. It’s one of the most direct ways a craft can connect to something bigger than yourself.
And if you fall in love with making these little guys, you might eventually find yourself wanting to design your own. Starting with a basic sphere and experimenting with proportions, appendage placement, and embellishments is a wonderful way to deepen your understanding of how amigurumi actually works. A lot of beloved independent crochet designers started exactly like this — one quirky creature, then another, then slowly a recognizable style started to emerge. The emotional support monster might just be your first project, but for a lot of people, it turns out to be the beginning of something much longer and more meaningful than they ever expected.








What do you think?
It is nice to know your opinion. Leave a comment.