










Craft Stick Ballerina: A Complete Guide to Creating Adorable Dancing Figures with Kids
Introduction: Why Craft Stick Projects Are Perfect for Young Creators
Craft stick projects have been a staple of childhood creativity for generations, and for very good reason. These simple, inexpensive wooden sticks offer an almost limitless canvas for imagination, transforming humble materials into something truly delightful. Whether you are a parent looking for a rainy afternoon activity, a teacher searching for a classroom project, or simply someone who loves making things with their hands, craft stick ballerinas bring a touch of elegance and whimsy to the world of DIY crafts.
One of the greatest things about craft stick ballerinas is that they sit perfectly at the intersection of fun and educational value. As children work through the steps of creating their little dancer, they are simultaneously developing fine motor skills, learning about symmetry and design, and practicing patience and focus. These are all foundational abilities that will serve them well far beyond the crafting table, making this activity much more than just a fun way to pass the time on a slow afternoon.
The project is also wonderfully frugal, which is something every parent and educator can appreciate. Craft sticks, often called popsicle sticks, are available in bulk for just a few dollars at any craft store or online retailer. Combined with a handful of other supplies that most households already have on hand, this craft delivers an impressive and cherished result without putting any strain on the family budget. It is the kind of activity that proves creativity does not require expensive materials to produce something genuinely beautiful and meaningful.
Gathering Your Supplies: Everything You Need Before You Begin
Before diving into the crafting process, taking a few minutes to gather all your materials will make the entire experience smoother and more enjoyable. There is nothing more frustrating for an excited child than having to pause mid-project to hunt down a missing supply. Laying everything out on a protected work surface before you start ensures the creative momentum stays strong from beginning to end, and it also gives kids a chance to familiarize themselves with the materials they will be working with.
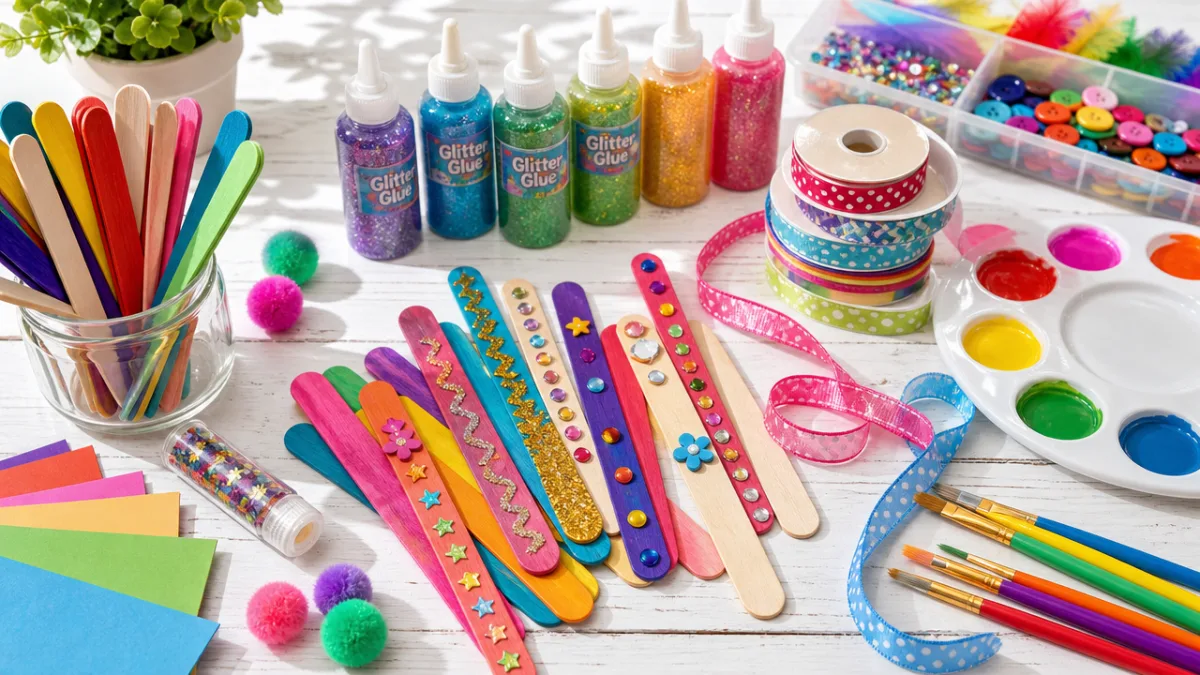
For a basic craft stick ballerina, your core supply list is refreshingly simple and affordable. You will need large craft sticks for the body and limbs, small round wooden beads or a small wooden ball for the head, white cardstock or foam sheets for the tutu, craft glue or a low-temperature glue gun, and acrylic paint in skin tones, black, and your ballerina’s costume color of choice. Pipe cleaners in coordinating colors work wonderfully for arms, and a small piece of ribbon or lace adds a genuinely lovely finishing touch to the outfit.
Optional but highly recommended supplies include fine-tipped permanent markers for drawing the ballerina’s facial features, glitter glue or loose glitter for adding sparkle to the tutu, small googly eyes if your child prefers not to draw faces, and colored tissue paper for creating a layered, dimensional skirt effect. A length of thin thread or fishing line attached to the finished figure turns it into a charming hanging decoration or ornament, extending the project’s usefulness well beyond a simple display piece on a shelf.
- Large and small craft sticks (popsicle sticks)
- Small wooden bead or ball for the head
- White cardstock or foam sheets for the tutu
- Craft glue or low-temperature glue gun
- Acrylic paints in skin tones, black, and costume colors
- Pipe cleaners for arms
- Ribbon, lace, or tissue paper for embellishment
- Fine-tipped permanent markers for facial details
- Glitter glue or loose glitter for sparkle
- Optional: thin thread or fishing line for hanging
Step-by-Step Instructions: Building Your Ballerina from the Ground Up
The first step in creating your craft stick ballerina is to paint the sticks that will form her body and legs. Use a skin-tone acrylic paint on the upper portion of two large craft sticks, which will serve as her legs, and on a smaller section of stick that will become her torso. Allow these to dry completely before moving on, as working with wet paint will smear your careful work and make gluing much more difficult. Patience at this stage pays off enormously when the finished figure looks clean and polished.
Once your painted pieces are dry, it is time to begin assembly. Lay two leg sticks side by side and glue them together at the top, creating a slight V-shape to suggest a ballet pose or a straight parallel stance, depending on your preference. Glue the torso stick horizontally across the top of the legs, then attach the pipe cleaner arms by bending them into graceful curved shapes and securing them to either side of the torso with a good dab of craft glue. Position the arms in a classic ballet pose with one arm raised overhead and one extended gracefully to the side for maximum elegance and visual impact.
The head is attached next by gluing the wooden bead or ball securely to the top of the torso stick. Once dry, this is the moment to give your ballerina her face. Use a fine-tipped permanent marker to draw two small oval eyes, a tiny curved mouth in a gentle smile, and if you like, two small curved lines for eyebrows. Add a rosy circle to each cheek using a pink marker or a tiny dab of pink paint applied with a cotton swab. Draw or paint her hair in whatever style suits her, from a classic bun to flowing locks, using a brown or black marker with confident, gentle strokes.
Painting the Costume
With the basic figure assembled, you can now turn your attention to the costume details. Paint the torso section of your ballerina in her chosen costume color, whether that is a classic pink, a regal purple, a vibrant red, or any color that makes her feel uniquely hers. Add a small horizontal line at her waist to define the bodice of her leotard, and paint her leg sticks from the mid-point down in black to suggest ballet slippers and tights. These small details make a remarkable difference to the final appearance of the figure.
For the ballet slippers specifically, add a thin line of matching pink or black paint across the foot area, and if you have a very steady hand or a fine-tipped brush, you can even suggest the ribbons that typically wrap around a ballerina’s ankles by painting thin crossing lines. This level of detail is entirely optional and depends on the age and patience of the crafter involved, but it does elevate the finished piece considerably. Older children and adults will find this a satisfying and enjoyable challenge that rewards careful attention.
Creating the Tutu
The tutu is arguably the most exciting and satisfying part of the entire project, and there are several approaches you can take depending on your materials and the look you are going for. The simplest method involves cutting a strip of white cardstock or foam into a rough circle with a hole in the center to fit around the ballerina’s waist, then cutting fringe around the outer edge to create the layered look of a tutu skirt. This approach is quick, clean, and very effective, especially when decorated with glitter glue or painted in a coordinating color.
A more dimensional and visually impressive tutu can be created using tissue paper or crinkle paper cut into small circles or squares, then gathered in the center and layered around the waist like little ruffles. Glue each gathered piece in place, overlapping slightly, and continue all the way around until you have a full, fluffy skirt. The effect is genuinely beautiful and surprisingly close to what a real tutu looks like, making children absolutely delighted with the end result. You can use multiple colors of tissue paper for a rainbow tutu effect that is particularly festive and eye-catching.
Personalizing Your Ballerina: Tips for Making Her Uniquely Yours
One of the most wonderful aspects of this craft is how easily it lends itself to personalization. No two ballerinas need to look alike, and encouraging children to make creative decisions throughout the process builds confidence and a sense of ownership over their creation. Ask your child what color tutu their ballerina should have, what her hair looks like, and whether she is performing in a big fancy theater or dancing in a sunny meadow. These imaginative prompts help children invest emotionally in the craft and take greater pride in the finished result.
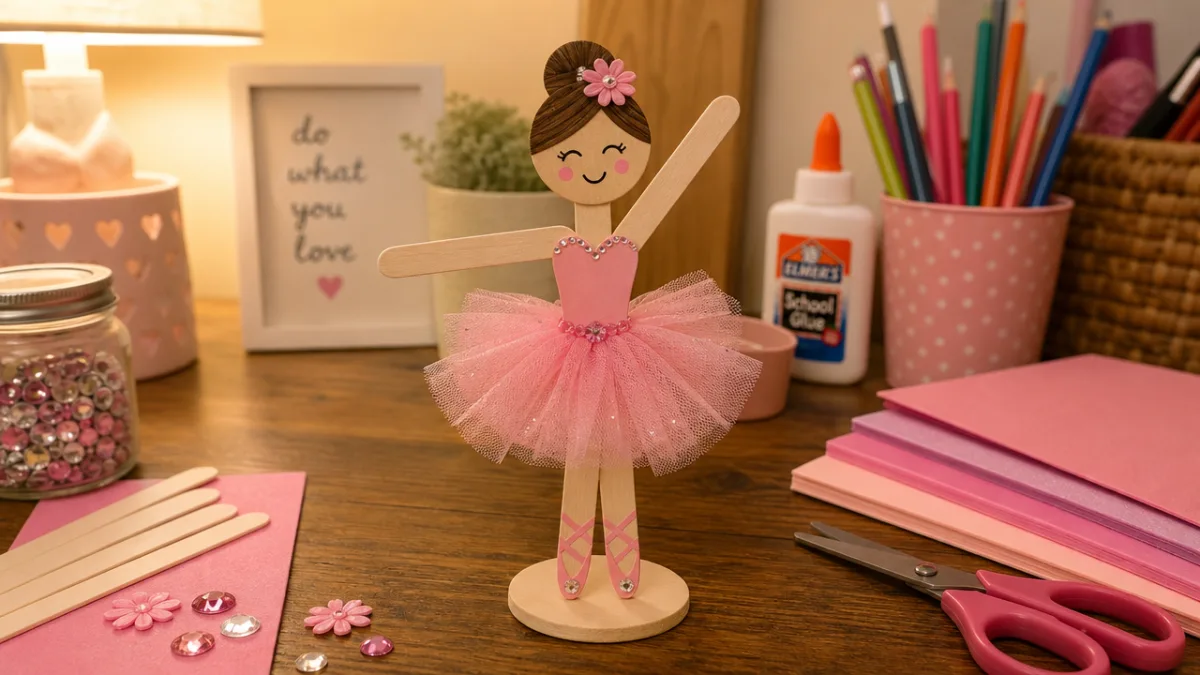
You can personalize the ballerina’s appearance in many small but meaningful ways. Adding tiny rhinestones or sequins to the bodice creates a glamorous costume worthy of a principal dancer at a professional ballet company. Gluing a miniature paper tiara cut from gold or silver cardstock to the top of her head transforms her into a prima ballerina or even a princess dancer. A tiny rose made from twisted red pipe cleaner held in one hand adds a narrative element to the figure, suggesting she has just received flowers after a triumphant performance on stage.
For children who love storytelling, consider making a small group of ballerinas in coordinating costumes to represent an entire corps de ballet. Each figure can be slightly different in hair color, skin tone, or costume detail, celebrating diversity and reflecting the wide range of people who love and practice ballet around the world. Arranging them together on a small decorated stage made from a shoebox lid transforms the craft project into a complete imaginative play scenario that children can return to again and again for hours of creative entertainment.
Theme Variations to Explore
While the classic pink-tutu ballerina is always a timeless choice, there are many exciting theme variations worth exploring once you have mastered the basic technique. A Nutcracker-inspired ballerina in a red and gold costume makes a wonderful Christmas ornament that can be personalized with a child’s name and the year for a keepsake gift. A fairy ballerina with tiny paper wings and a wand made from a toothpick topped with a star-shaped foam sticker is another enormously popular variation, especially with younger children who love all things magical and whimsical.
For older crafters or those looking for a more challenging project, consider creating a boy ballet dancer, or danseur, using the same basic technique but adapting the costume to white tights, a fitted top, and swapping the tutu for a small paper cape or costume jacket. This is a wonderful way to challenge gender assumptions around ballet and remind children that dance belongs to everyone. You might also explore creating ballerinas inspired by different world dance traditions, adapting the costume and decorations to reflect the rich diversity of dance cultures found across the globe.
Display and Gifting Ideas: Sharing Your Creations with the World
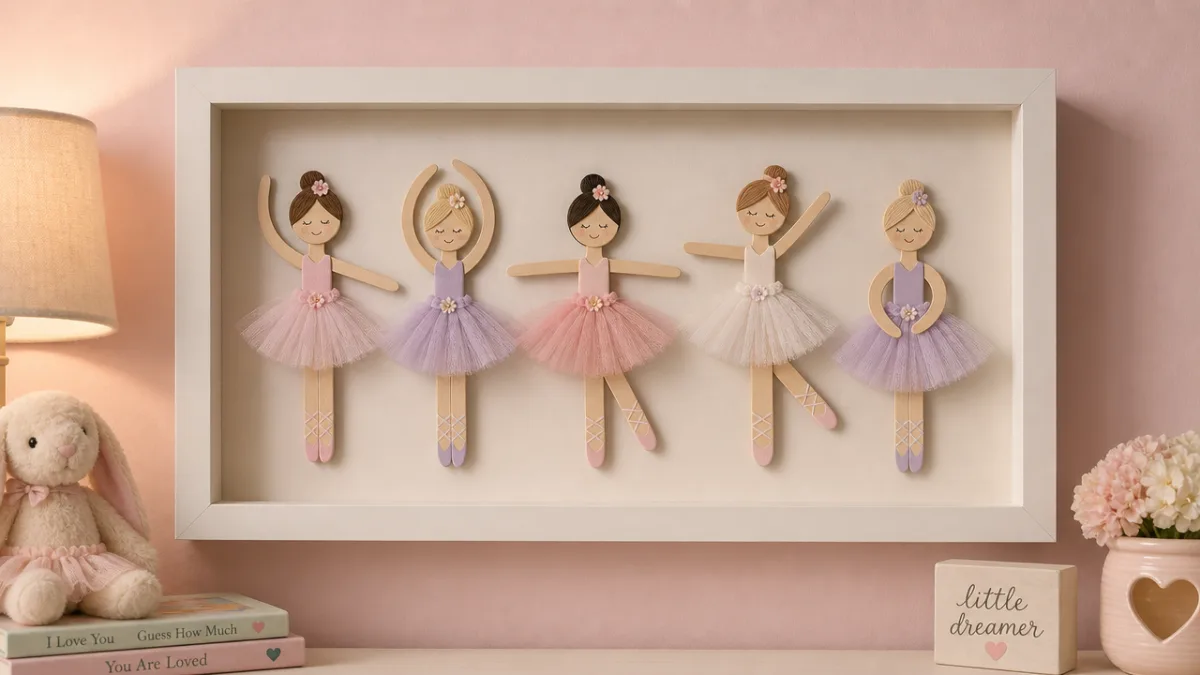
Once your craft stick ballerina is complete, you will want to find the perfect way to display or share her. For home display, leaning her against a small picture frame on a child’s bookshelf or nightstand creates a charming and personal touch to a bedroom or playroom. A group of ballerinas arranged in a shallow shadow box frame, mounted on the wall with a backdrop of painted sky or a simple floral pattern, makes a genuinely lovely piece of children’s wall art that visitors will inevitably stop to admire and compliment.
Craft stick ballerinas make incredibly thoughtful and personal handmade gifts that recipients of virtually any age tend to treasure. A grandmother receiving one made by her grandchild has something truly priceless, a tangible expression of love and creative effort that no store-bought gift can replicate. Teachers, neighbors, family friends, and anyone who appreciates handmade items will be charmed by the care and creativity that goes into each little figure. Consider packaging the ballerina in a small clear gift bag tied with a ribbon in the same color as her tutu for a presentation that feels special and complete.
For birthday parties or classroom celebrations, craft stick ballerinas can serve double duty as both the party activity and the party favor. Set up a crafting station with pre-painted sticks and all the embellishment supplies, let each child create their own unique dancer during the party, and send them home with their finished creation at the end of the event. This approach is far more memorable and meaningful than a bag of plastic trinkets, and the children leave with a genuine sense of accomplishment and pride in something they made entirely themselves with their own two hands.
- Display on a child’s bookshelf or nightstand as a personal room decoration
- Arrange a group in a shadow box frame for charming wall art
- Give as a heartfelt handmade gift packaged in a ribbon-tied gift bag
- Use as a party activity and take-home favor at ballet or princess themed parties
- Attach a loop of thread to create a Christmas tree ornament or hanging decoration
- Create a whole ballet scene in a decorated shoebox stage for imaginative play
The Broader Benefits: What Children Gain from Craft Stick Projects
It would be easy to look at a craft stick ballerina and see only a charming little figure made of wood and paper, but the developmental benefits children gain from making her are quite significant. Fine motor skills are exercised throughout the entire process, from carefully painting small surfaces to cutting paper into precise shapes and applying glue with accuracy and control. These same fine motor abilities underpin a child’s ability to write, draw, button clothing, and perform countless other daily tasks, meaning that time spent crafting is time invested in genuine developmental progress.
Creative problem-solving is another major benefit that emerges naturally from open-ended craft projects like this one. When a child realizes their tutu is not lying flat the way they imagined, or that the head bead keeps sliding before the glue sets, they must think critically about how to solve the problem. Do they need more glue? Should they hold the piece longer? Is there a different approach they could take? Working through these small challenges builds resilience, flexible thinking, and confidence in one’s ability to figure things out, all qualities that transfer powerfully to academic and social situations throughout a child’s life.
Perhaps most importantly, craft projects create opportunities for connection between children and the adults in their lives. Sitting together at a table, working on something creative, sharing ideas, laughing at small mishaps, and celebrating the finished product together builds memories and strengthens bonds in ways that screen-based entertainment simply cannot match. The craft stick ballerina is ultimately not just a figure made of wood and glitter. She is a small, tangible symbol of time spent together, of imagination exercised freely, and of the enduring joy that comes from making something beautiful with your own hands.
Encouraging Ongoing Creativity
Once a child has experienced the satisfaction of completing a craft like this one, they are often eager to explore what else they can make with similar materials. Craft sticks can be transformed into picture frames, miniature furniture, model buildings, puppets, animals, and so much more. Keeping a small craft box stocked with sticks, pipe cleaners, foam sheets, beads, and basic paint supplies gives children the raw ingredients they need to follow their imagination wherever it leads, without needing to make a special trip to the store every time inspiration strikes.
Parents and educators can extend the ballerina project further by incorporating it into broader learning themes. A unit on dance history could feature craft stick representations of famous ballerinas throughout history, each accompanied by a small written card with a few interesting facts. A study of different world cultures could lead to crafting figures in traditional dance costumes from countries around the globe, turning the humble craft stick into a vehicle for learning about the richness and diversity of human expression across time and geography.
The craft stick ballerina is a project that asks very little in terms of cost and preparation, yet gives back generously in terms of joy, learning, and creative fulfillment. It is the kind of simple, timeless activity that reminds us all of the profound value of making things with our hands, of the quiet satisfaction that comes from turning raw materials into something with personality and beauty. Whether you make one together on a quiet afternoon or set up a whole crafting party around the idea, you are certain to create something worth keeping, and memories worth treasuring long after the glitter has settled and the paint has dried.








What do you think?
It is nice to know your opinion. Leave a comment.