










DIY Free Crochet Boot Cuffs Patterns: A Complete Guide to Cozy Footwear Accessories
Introduction to Crochet Boot Cuffs
If you haven’t discovered crochet boot cuffs yet, you’re in for a treat. These little accessories sit at the top of your boots and peek out just enough to add some personality to your outfit — without requiring you to go out and buy a whole new pair of boots. Whether you’re going on an autumn walk or heading to a winter get-together, a well-chosen boot cuff adds warmth, texture, and a bit of charm in one small package.
What really makes boot cuffs so appealing is how approachable they are. Unlike full socks or leg warmers, a pair of boot cuffs uses only a small amount of yarn — so they’re a great way to use up leftovers from other projects. For anyone just getting into crochet, they’re one of the friendliest starting points out there. Many free patterns are written specifically with beginners in mind, and even someone who’s only learned the basics can turn out a beautiful, polished-looking cuff in just a few hours.
And the free patterns? There are so many of them. Designers from all over the world share their work online, which means you can build a whole collection of boot cuffs without spending a cent on patterns. Chunky and rustic, delicate and lacy, everything in between — the variety is genuinely impressive. This guide covers everything you’ll need to get started, from picking the right yarn to finishing your work so it looks like something you bought in a shop.
Essential Materials and Tools for Boot Cuff Projects
Before you cast on your first stitch, it’s worth thinking about your yarn choice — it’ll have a bigger impact on the final result than almost anything else. Worsted weight yarn is the go-to for most boot cuff patterns because it works up quickly, holds its shape nicely, and comes in just about every color you could want. That said, bulky yarns are fantastic if you want something thick and cozy, and lighter DK or sport weight yarns are great for more intricate, delicate looks.
Fiber content is another thing to consider depending on what matters most to you. Wool and wool blends are classic choices — they’re warm, springy, and help your cuffs keep their shape through lots of wear. Acrylic is the practical pick if you want something budget-friendly and easy to throw in the washing machine. Cotton doesn’t come up as often for cold-weather accessories, but it’s lovely for transitional seasons and shows off stitch detail really well. A lot of crafters land on a wool-acrylic blend as a happy middle ground that gives you warmth, durability, and easy care all at once.
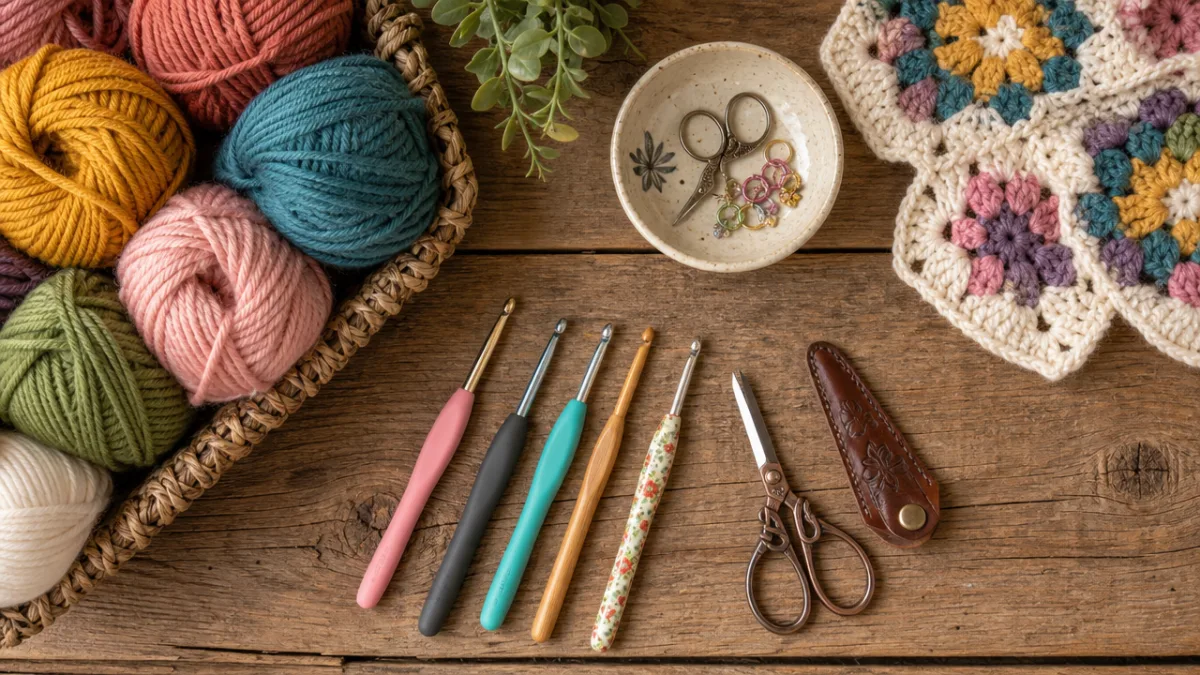
As for tools, you don’t need much. Your hook size should match your yarn weight and whatever gauge the pattern calls for — most worsted weight patterns ask for a 5mm to 6mm hook, while bulkier ones might need a 8mm or larger. Beyond that, a yarn needle for weaving in ends and seaming, a pair of scissors, and some stitch markers to keep track of your rounds are really all you need. A tape measure is handy too, especially if you want to check the fit before committing to the whole project.
- Worsted, bulky, or DK weight yarn in your preferred fiber and color
- Crochet hook sized to match your yarn (typically 5mm to 8mm for boot cuffs)
- Yarn needle for finishing and seaming
- Stitch markers to track pattern repeats and round beginnings
- Scissors and a tape measure
- Optional: decorative buttons, ribbon, or lace trim for embellishment
Understanding Common Crochet Stitches Used in Boot Cuff Patterns
Boot cuff patterns are honestly one of the best ways to build up your crochet stitch vocabulary, even if you’re just starting out. Most free patterns draw from a core set of stitches that, once you’ve got them down, open the door to a huge range of designs. Single crochet is the most basic of all — it creates a tight, dense fabric with good structure, and plenty of beginner-friendly boot cuff patterns are worked entirely in single crochet, sometimes with a few chains thrown in to make simple shells or mesh effects.
Half double crochet and double crochet are taller stitches that work up faster, which makes them popular for projects where you want to see progress quickly. Double crochet in particular shows up constantly in boot cuff patterns, often arranged into shells, clusters, or fans that create gorgeous texture. Front post and back post double crochet deserve a special mention because they’re what creates ribbing — that stretchy, ridged fabric that helps a cuff hug the top of your boot without sliding down. It’s both practical and classic-looking, and once you get the hang of it, you’ll use it all the time.
As you get more comfortable, you’ll start running into things like bobbles, puff stitches, and popcorns — all of which create raised, three-dimensional texture that makes a cuff really stand out. Shell stitches and V-stitches produce a beautiful lacy look that’s actually simpler to work than it appears, once you understand the idea of working multiple stitches into a single space. Most free patterns these days include photo tutorials or links to video walkthroughs, so if you hit an unfamiliar stitch, you’re never far from a clear explanation. Abbreviations like sc, hdc, dc, ch, and sl st will feel like second nature before you know it.
Top Free Crochet Boot Cuff Pattern Styles to Try
One of the best things about the online crochet community is the sheer number of free patterns available in every style imaginable, from cozy farmhouse to bohemian to clean and modern. The classic ribbed boot cuff is probably the most popular style, and for good reason — it’s simple, it looks great on everyone, and it works up fast. Whether you make it in rows and seam the ends together or crochet it in rounds using post stitches, a ribbed cuff sits neatly at the top of a boot and looks tidy and intentional. These are the patterns to reach for when you want something reliably satisfying to make, especially if you’re newer to crochet.
Lacy boot cuffs are at the other end of the spectrum — open and airy, more decorative than warm, with a vintage or feminine feel that photographs beautifully. Fans, shells, and mesh grids made from chains and double crochets are the building blocks of most lacy designs, and even though they look intricate, many of them are built on simple repeating stitch patterns that start to feel intuitive after the first few rows. They’re perfect for intermediate crocheters ready to try something a little more refined.
Cabled and textured cuffs sit right in the middle — more visually interesting than a basic ribbed cuff, but without the fine detail work of lace. Front and back post stitches are used to mimic the look of woven or braided cables, giving you something that genuinely resembles traditional Aran knitting but in crochet form. The result feels substantial and luxurious, and a chunky cable cuff worked in bulky yarn comes together faster than you’d expect given how impressive it looks. They also make excellent gifts — the kind that look like they took much longer to make than they actually did.
- Classic ribbed boot cuffs — perfect for beginners, fast to work, and universally flattering
- Lacy shell stitch cuffs — elegant and decorative, ideal for special occasions
- Chunky cable cuffs — cozy and impressive, great for cold weather and gifting
- Bohemian fringe or tassel cuffs — trendy and fun, excellent for personalizing with colors
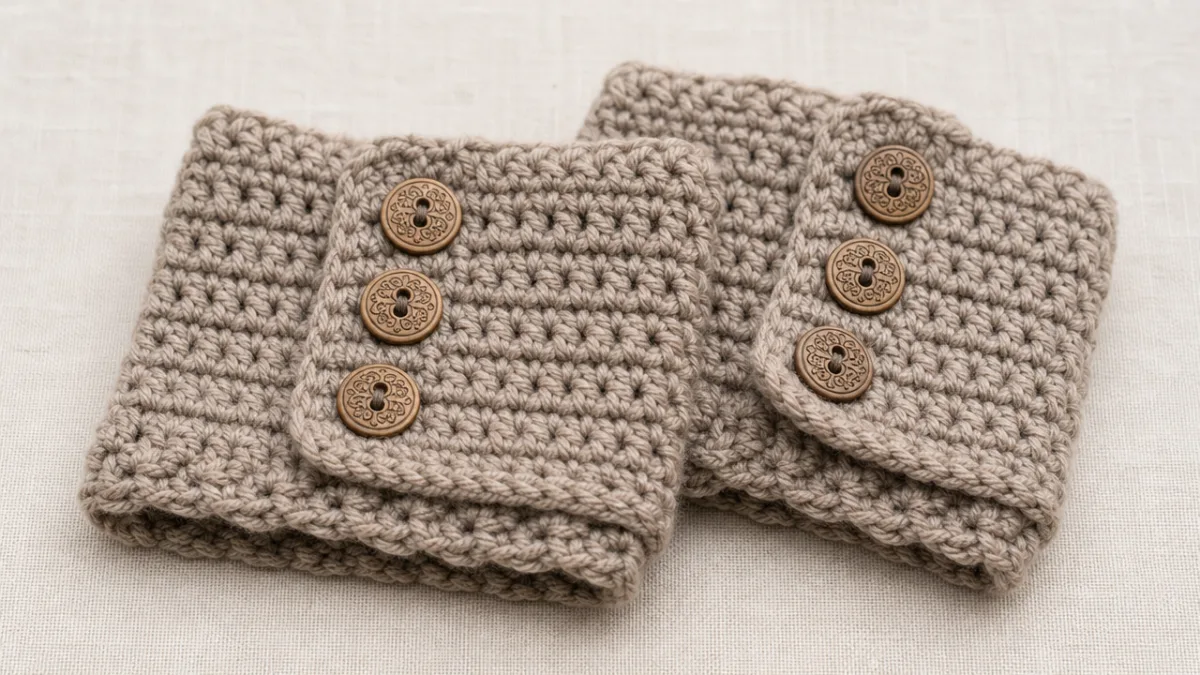
- Button-accent cuffs — functional closures that add a charming, vintage detail

Step-by-Step Tips for Following Free Crochet Patterns Successfully
One of the things that trips up new crocheters most often is gauge — understanding what it is and why it actually matters. Gauge is simply the number of stitches and rows per inch your crochet produces with a specific yarn and hook combination. Even if you’re using the exact materials a pattern calls for, your natural tension might make your stitches slightly bigger or smaller than the designer’s. For boot cuffs, this matters because a cuff that’s too loose won’t stay up, and one that’s too tight might be hard to put on or just uncomfortable to wear.
Before you start the real project, take a few minutes to make a gauge swatch — at least four inches square with your chosen yarn and hook. Measure it against the gauge listed in the pattern. Too many stitches per inch means your tension is tight, so try a larger hook. Too few means you’re working loosely, so go down a hook size. It might feel like an annoying extra step, but it saves a lot of frustration, especially when you’re making cuffs as a gift and won’t have the chance to test the fit on your recipient’s boots partway through.
It’s also really worth reading through the entire pattern before you pick up your hook. Experienced crocheters do this almost automatically, and it’s especially useful with free online patterns that haven’t always been through professional editing. Look for notes on special stitches, sizing, and any tips the designer has shared. Pay attention to how beginning and turning chains are handled — it varies from designer to designer and can throw off your stitch count if you’re not expecting it. If there’s a stitch or technique you haven’t tried before, look up a tutorial before you sit down to work rather than hitting a wall in the middle of a project.
Finishing Techniques and Customization Ideas
A lot of what separates a boot cuff that looks handmade from one that looks polished and intentional comes down to how you finish it. Weaving in your yarn ends properly is the most important step, and it’s worth doing carefully. Instead of just darning the tail in one direction, weave it back and forth through the stitches in a few different directions, pulling through the loops of existing stitches to really anchor it. This keeps ends from working loose over time and gets rid of that little dangling tail that gives away a rushed finish. It’s tempting to rush this part when you’re excited to be nearly done, but taking the extra few minutes makes a real difference.
Blocking is another finishing step that can genuinely transform your finished cuffs, especially if you’ve worked a lacy or textured pattern. Wet blocking just means dampening your finished piece, coaxing it into the right shape and dimensions, and letting it dry flat. It smooths out uneven tension, opens up lace to its full effect, and helps ribbing relax into a more comfortable, flexible fit. Wool and natural fibers respond beautifully to wet blocking; acrylic may need steam blocking to get similar results. You don’t need any special equipment — a spray bottle or a plastic bag with a little water is plenty to get started.
Once you have the basics down, customizing your cuffs is where things get really fun. Even a dead-simple free pattern can become something completely your own with the right embellishments. Buttons are the most popular addition — sewn onto a flap or band closure, they add instant charm and a vintage or rustic feel. Ribbon threaded through a row of chain spaces gives you a feminine, adjustable tie closure. A row of faux fur yarn worked into the top edge of a cuff adds warmth and a touch of glamour. You can also try crocheting in two complementary colors, using a contrast yarn for the ribbed border or a stripe through the middle. Because individual cuffs are so quick and inexpensive to make, you can afford to experiment and see what you love.
- Weave in ends carefully in multiple directions to secure them permanently
- Block your cuffs for a professional, even appearance
- Add decorative buttons for a charming vintage or rustic detail
- Use contrast yarn for borders, stripes, or accent rows
- Thread ribbon through open stitches for an adjustable, feminine finish
- Incorporate faux fur or novelty yarn into the cuff edge for added texture
Building a Collection and Sharing Your Crochet Work
Once you’ve finished your first pair of boot cuffs, there’s a good chance you’ll want to make another. They’re quick, satisfying, and endlessly variable — and having a collection in different colors and styles means you can swap them out to suit whatever you’re wearing. A neutral, oatmeal-toned ribbed cuff pairs perfectly with jeans and a cozy sweater, while a deep burgundy lacy cuff might be just the thing with a floral dress and tall boots. Making multiple pairs also gives you the chance to try new stitches and construction methods with each project, so your skills grow naturally as your collection grows.
Boot cuffs also happen to make wonderful gifts. They’re small enough to finish in a reasonable amount of time, which makes them ideal for cranking out a few pairs during the holiday season. Making them in a recipient’s favorite color, or coordinating them with a hat or scarf you’re also making, turns them into a really thoughtful set. Tuck them into a small gift box or wrap them in tissue paper with a handwritten note letting the person know they’re handmade — that detail alone makes the gift feel special in a way that nothing from a store can quite replicate.
Sharing your finished work with the online crochet community is a genuinely lovely thing to do, both for yourself and for others. Instagram, Pinterest, and Ravelry are full of makers who love seeing how other people interpret and put their own spin on patterns. When you post your work, consider tagging the designer and leaving a comment or review on the original pattern page. That kind of feedback means a lot to designers — it helps them see how their patterns are landing in the real world and encourages them to keep sharing their work freely. It’s one of those small things that helps keep the whole generous, creative ecosystem going.








What do you think?
It is nice to know your opinion. Leave a comment.