










Crochet Lace Collar: The Art of the Elegant Detachable Collar
A Renaissance of Vintage Elegance
There’s something about a lace collar that just commands attention — quietly, without trying too hard. From the towering ruffs of Elizabethan courts to the sweet Peter Pan collars on Victorian blouses, collars have always been where people put their personality on display. Right now, the crochet lace collar is having a real moment, drawing in both dedicated crafters and fashion lovers who want something handmade and genuinely beautiful to wear. And of all the variations out there, the detachable version has become one of the most talked-about projects in the crochet world — vintage charm you can actually clip on and off.
What makes a detachable collar so practical — and honestly, kind of brilliant — is the flexibility. Instead of being stitched onto one garment forever, you can pop it off, wash it separately, and move it between any top, dress, or sweater you own. One collar, a dozen different looks. If you’re someone who cares about building a thoughtful wardrobe rather than buying constantly, this is a genuinely smart approach to accessorizing with intention.
The slow fashion movement has a lot to do with why these collars are everywhere right now. More people are stepping back from the churn of fast fashion and finding real satisfaction in making things by hand. Crocheting a lace collar asks something of you — patience, focus, a willingness to slow down — and a lot of crafters find that deeply satisfying in a world that usually rewards doing everything as fast as possible.
Understanding the Pattern: What to Expect
A well-written PDF pattern for a crochet lace collar is a whole lot more than just a list of steps. Good patterns — especially those written in US crochet terms — walk you through finished dimensions, recommended yarn weights, hook sizes, and gauge information. Gauge matters more than most beginners expect, especially when you’re working with fine thread. Even a small difference in your tension can change how the finished collar drapes and looks, so it’s really worth taking the time to work a gauge swatch before you dive into the actual project. Adjust your hook size if needed — it’s a small step that saves a lot of headaches later.
One thing worth knowing upfront: US and UK crochet terminology can trip you up if you’re not paying attention. What the US calls a single crochet, the UK calls a double crochet. The US double crochet is the UK treble crochet. A good pattern will be upfront about which system it uses, and many include a quick conversion chart near the beginning for crafters who work in both. Before you start any pattern, just double-check which terminology it’s using — takes thirty seconds and could save you from frogging an entire row later.
Most lace collar patterns are built outward from a neckband, adding increasingly decorative rows as you go. The neckband comes first, then the lace fans out in a series of rows that incorporate chain spaces, picots, shells, fans, and other classic motifs. Honestly, the single best thing you can do before picking up your hook is to read the whole pattern through from start to finish. It sounds obvious, but getting a sense of the overall structure before you begin makes it so much easier to follow along — and to find your place again if you have to set the work down for a few days.
Materials and Tools: Setting Yourself Up for Success
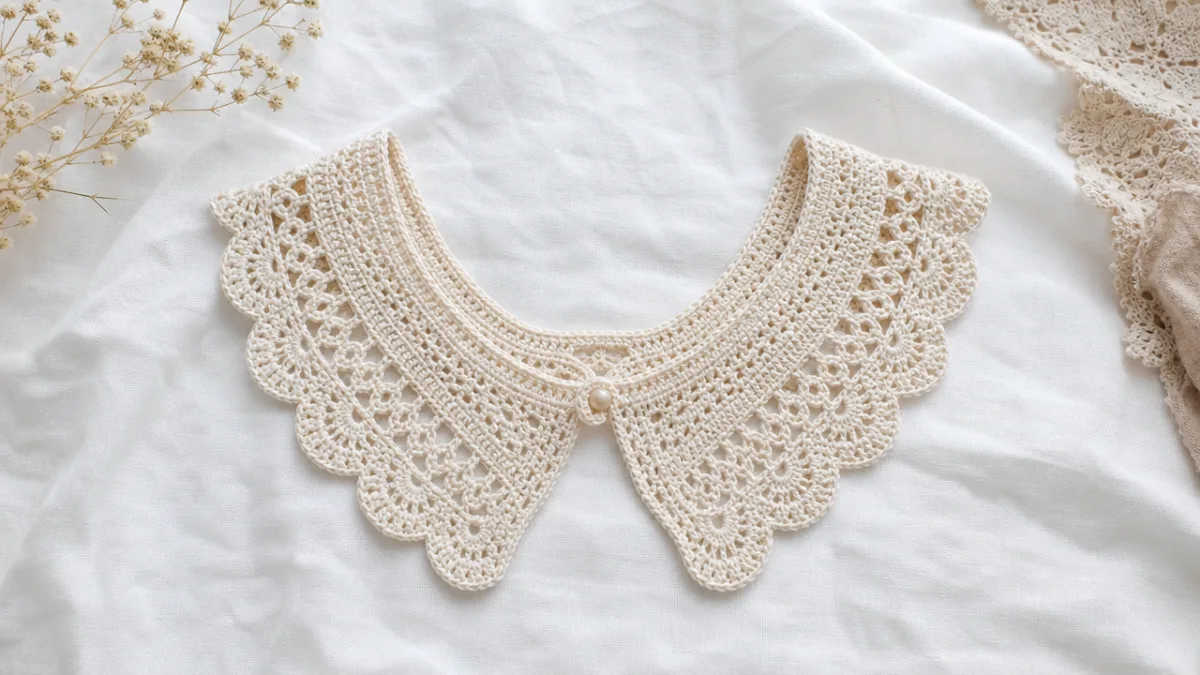
The yarn — or thread, more accurately — is probably the most important choice you’ll make for this project. Size 10 crochet cotton is the classic option for lace work, and it earns that reputation. Cotton has a natural crispness that helps lace stitches hold their shape, and it blocks beautifully: after a soak and a gentle pin-out, the finished collar opens up with remarkable clarity. You’ll also find size 10 cotton in a great range of colors, from the timeless whites and ivories to blush, sage, and deep jewel tones if you want something a little more unexpected.
For tools, a steel crochet hook sized for your thread is the obvious starting point — typically somewhere between 1.5mm and 2.5mm for size 10 cotton. If you’re planning extended work sessions (and lace can pull you in for hours), an ergonomic grip or a longer handle can make a real difference in how your hand feels by the end. You’ll also want rust-proof blocking pins, a foam blocking mat, a tape measure, and a blunt-tipped yarn needle for weaving in ends without shredding the delicate thread.
Don’t overlook the closure. The way you attach and detach your collar matters both practically and aesthetically. Button loops and small buttons give it an antique, tailored look. Snap fasteners are clean and easy. A length of ribbon threaded through the neckband edge and tied at the throat reads as soft and romantic — especially lovely with flowy dresses or vintage-inspired pieces. Think about what you’re planning to wear the collar with before you decide; the right closure can really pull the whole thing together.
Step-by-Step: How Lace Collar Construction Works
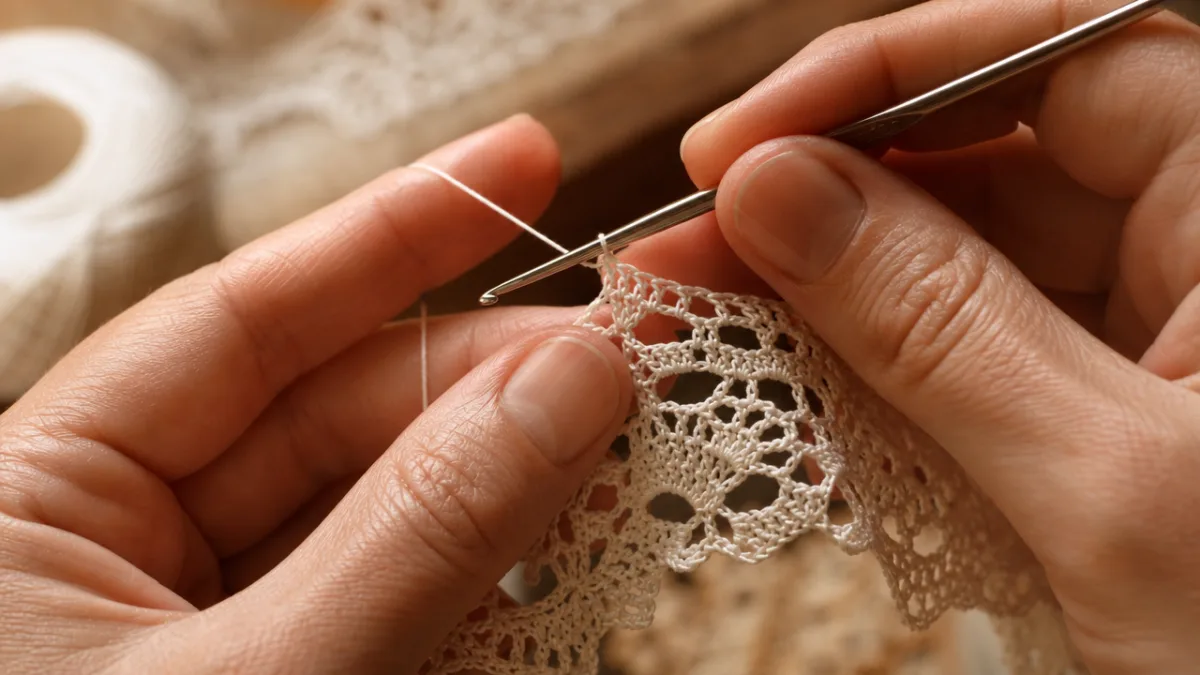
The construction follows a logical sequence that starts to feel intuitive pretty quickly. You begin with the neckband — the inner edge that sits against your neck or along the neckline of a garment. This part is usually worked in a simple stitch like single crochet or slip stitch, which creates a firm, stable foundation that won’t stretch out of shape with regular wear. Getting the neckband length right is important, so measure it against the actual neckline of the garment you plan to wear it with before moving on to the decorative section.
From the neckband, the collar grows outward through alternating pattern rows. Structural rows set up the skeleton of the lace — establishing chains and clusters — while decorative rows layer in the detail: picots, shells, extended stitches. Keeping your stitch counts accurate at the end of each row is what keeps the collar symmetrical and lets it fan out evenly without bunching or pulling. Stitch markers at the beginning and center of each row are a small habit that pays off big in accuracy.
Blocking is where the collar really comes into its own. Soaking it briefly in cool water, gently pressing out the moisture (no wringing — that can distort the thread), pinning it into shape on a foam mat and stretching each picot and shell to its full extent, then leaving it to dry overnight — the transformation is honestly remarkable. What goes on the mat looking a bit crumpled and vague comes off it looking crisp, clear, and beautifully defined. After that, all that’s left is attaching your closure and wearing it.
- Foundation neckband: Worked first, forms the inner edge, should be measured against your intended garment’s neckline for a comfortable fit.
- Structural pattern rows: Establish chain spaces and clusters that form the underlying skeleton of the lace design, maintaining even stitch counts throughout.
- Decorative detail rows: Add picots, shells, fans, and ornamental stitches that give the lace its distinctive texture and visual richness.
- Blocking: An essential finishing step that opens up the lace, defines the pattern, and gives the collar its elegant, polished appearance.
- Closure attachment: Buttons, snap fasteners, or ribbon ties are all excellent options; the choice should complement the overall aesthetic of the collar and the garments it will be worn with.
Styling Your Detachable Collar: Infinite Possibilities
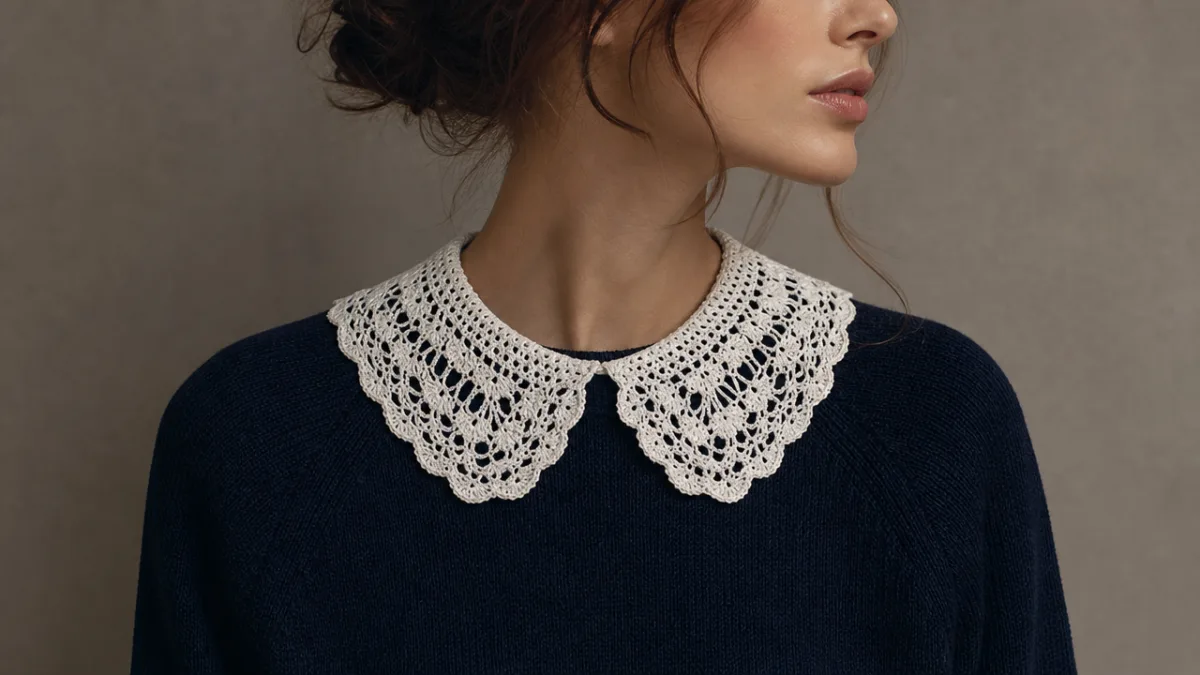
One of the best things about a handmade detachable collar is how many ways you can wear it. Draped over a plain crew-neck sweater in a solid neutral, a white or ivory collar instantly elevates the whole outfit — makes it look considered and put-together without being fussy. On a dark sweater — charcoal, navy, deep burgundy — the contrast between the rich background and the pale intricate lace is especially striking. It’s that combination of sophisticated and slightly whimsical that’s made collars a signature look for the cottagecore and vintage-inspired crowds on social media.
A lace collar over a button-down shirt turns a crisp white Oxford into something with a lot more personality. Over a blazer, it adds an unexpected softness to a sharp, tailored silhouette — that push and pull between structured and delicate is what makes it genuinely interesting rather than just decorative. For something more relaxed, try it over a linen tee or a light summer dress. The effect is effortless but intentional, like you put thought into it without overthinking it.
And if you’re looking for a gift idea — a handmade lace collar is hard to beat. One made in the recipient’s favorite color, or in a style that really suits them, carries a warmth that nothing off the shelf can replicate. Many crafters say that collars made as gifts end up being among their most meaningful projects, because the making is so tied up with the person you’re making it for. For a birthday, a holiday, or just because — it’s the kind of gift that’s beautiful, useful, and genuinely personal all at once.
Building Your Skills: Growing as a Lace Crocheter
For anyone just getting into lace crochet, a detachable collar is just about the perfect place to start. It’s small enough to finish in a dedicated weekend — or spread across several evenings if life is busy — but complex enough to teach you the core techniques that carry across all kinds of lace work. Working cleanly into chain spaces, keeping accurate stitch counts through intricate repeats, blocking a finished piece properly — these are skills that will serve you for years, and a collar is a low-stakes, high-reward way to build them.
Once you’ve got a few collars under your belt, you’ll naturally start wanting to experiment. Switching thread weights alone can completely change the character of the finished piece — a heavier thread gives the collar more body and presence, while an ultra-fine thread makes something that’s almost gossamer. Color is another whole dimension to play with. The same lace pattern worked in deep teal or dusty rose has a totally different emotional feel than it does in white. Some crafters love working the neckband in one color and the outer decorative rows in a complementary shade — subtle but really effective.
Getting connected with other lace crocheters makes the whole journey so much richer. Online fiber arts communities — pattern repositories, social media groups — are full of people sharing their finished projects, helping troubleshoot tricky rows, and genuinely cheering each other on. Posting your own finished collar, asking when a pattern section isn’t clicking, and getting excited about someone else’s work — it turns what can feel like a solitary craft into something that feels much more like belonging to something. The crochet lace collar, for all its modesty, is a thread — quite literally — connecting makers across time, distance, and experience.
- Start with a beginner-friendly pattern: Choose a collar pattern that clearly explains each step and includes stitch abbreviation guides, especially if you are new to working with fine thread.
- Practice your gauge: Work a small swatch before beginning the collar itself to ensure your tension matches the pattern’s specifications and your finished collar fits as intended.
- Read the pattern through first: Familiarize yourself with the entire sequence of construction before beginning, so that you understand how each section connects to the next.
- Master blocking early: Learning to block effectively is one of the highest-value skills in lace crochet; practice on small swatches before blocking your finished collar for the first time.
- Experiment and personalize: Once you have completed your first collar following the pattern precisely, try adjusting colors, thread weights, or closure styles to make subsequent versions uniquely your own.
- Join a community: Engaging with other lace crocheters online provides encouragement, technical advice, and inspiration that will accelerate your growth and deepen your enjoyment of the craft.








What do you think?
It is nice to know your opinion. Leave a comment.