










Creative DIY Bookmark Ideas That Are Cute, Easy, and Affordable
Why DIY Bookmarks Are Worth Making
We live in a world of Kindles and reading apps, but there’s something genuinely satisfying about holding a real book and marking your page with something you actually made. DIY bookmarks are one of those rare crafts that manage to be creative and practical at the same time. They’re small enough to finish in an afternoon, cheap enough to make a whole bunch of them, and personal enough to give as a gift that actually means something. Whether you read every night before bed or only crack open a book on vacation, a bookmark you made yourself just makes the whole thing feel a little more special.
What makes bookmark crafting so appealing is the sheer range of styles and materials you can work with, even as a total beginner. You don’t need a craft room or a massive supply haul. Most projects just need scissors, paper, some glue, and a little creativity. That low barrier to entry makes this a great activity for kids and adults alike, and honestly, no matter what your skill level is, you’ll end up with something worth being proud of.
And beyond keeping them for yourself, handmade bookmarks make really lovely gifts. Birthdays, holidays, teacher appreciation week, or just a little something for a friend who loves to read — a bookmark you made by hand carries a warmth that nothing off a store shelf can match. Pair it with a good book and you’ve got a gift combo that’s both budget-friendly and genuinely thoughtful. Let’s get into the best ideas so you can start making them.
Paper and Origami Bookmarks
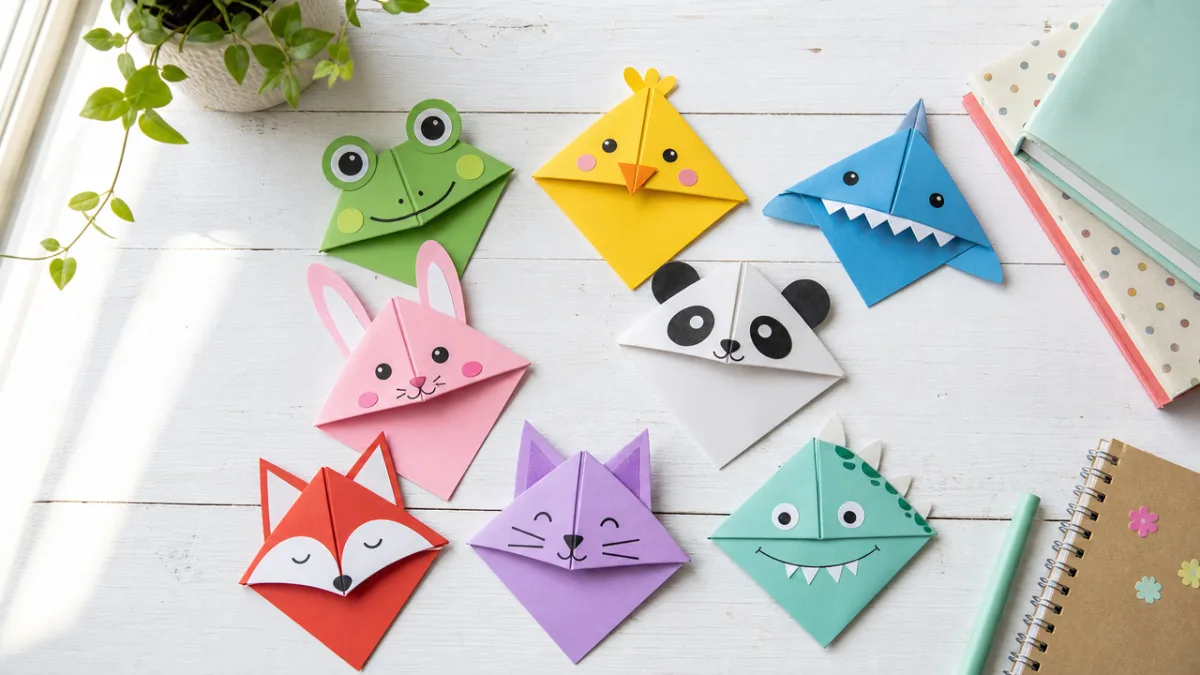
If you’re just getting started with DIY bookmarks, paper is where most people begin — and origami corner bookmarks are probably the most popular design out there right now, especially on Pinterest. These little triangular pockets fold right over the corner of your page to hold your spot without any clips or sticky stuff. You fold a square of paper into a diamond, bring the top triangle down, tuck the side triangles underneath, and suddenly you’ve got a tidy little pocket that actually works. They’re functional and adorable in equal measure.
The best thing about origami corner bookmarks is how easy they are to customize. Patterned scrapbook paper, old magazine pages, plain cardstock you’ve decorated yourself — all of it works. Add some animal ears, a little face, or a geometric pattern to the folded corner and you’ve got a character peeking out from the top of your book. Cat bookmarks, fox faces, and little emoji expressions are hugely popular right now and all you really need is paper, scissors, and a black marker to pull them off.
If you want to try something beyond the corner style, flat paper bookmarks open up a whole other world of ideas. Cut a long rectangle from cardstock and go wild with washi tape stripes, hand-lettered quotes, pressed flowers under contact paper, or layered paper cut-outs. Laminating the finished bookmark is a game-changer — it adds durability and gives everything a polished, almost professional look. A basic home laminator doesn’t cost much, and once you see what it does for your finished bookmarks, you’ll wonder how you got along without one.
- Use patterned origami paper for instant visual interest without any drawing required
- Score fold lines with a bone folder or butter knife for crisp, clean edges
- Seal watercolor or marker designs with a clear matte spray to prevent smudging
- Add a tassel through a hole punch at the top for an extra decorative touch
- Make a set of twelve using the same base color but different face designs for gifting
Fabric and Ribbon Bookmarks
Fabric bookmarks have a softness and texture that paper just can’t compete with. They hold up really well over time, most of them can be washed, and if you’ve got fabric scraps lying around the house, this is a fantastic zero-waste project. The most basic version is just a long strip of sturdy fabric with the edges folded in and secured with hand stitching or fabric glue. The result feels almost luxurious — smooth and ribbon-like — and it’ll survive years tucked inside a well-loved book.
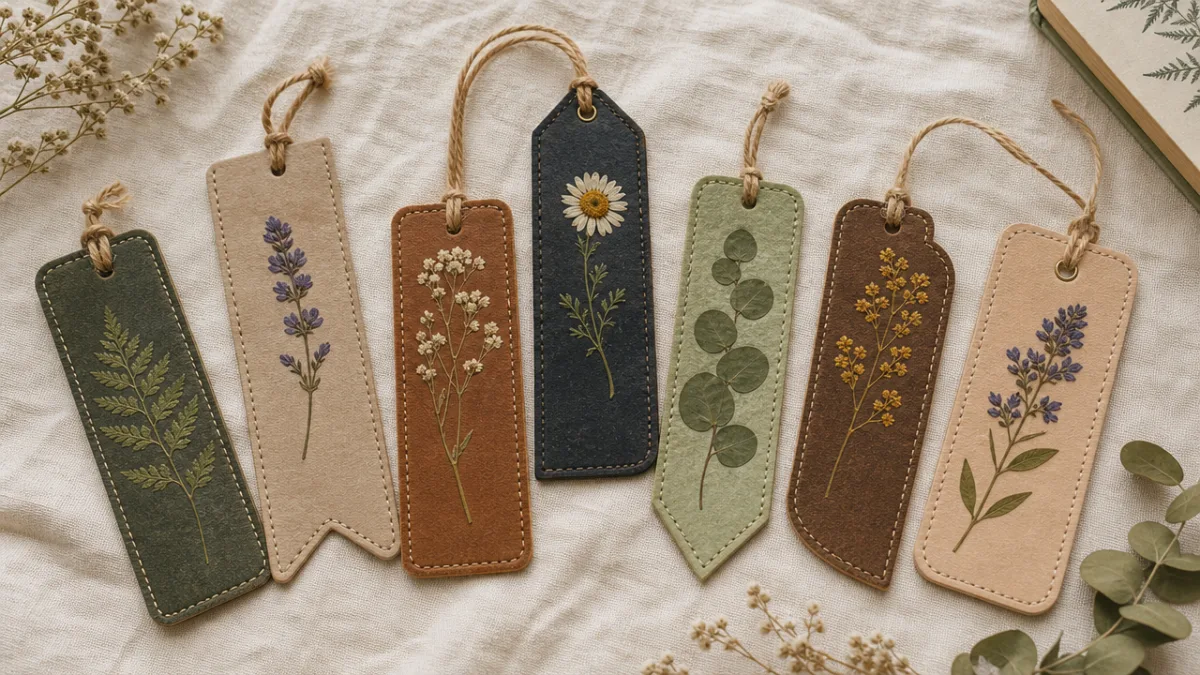
Felt is probably the most beginner-friendly fabric to start with because it doesn’t fray, you don’t have to hem it, and it comes in basically every color imaginable. Cut it into simple rectangles or use small cookie cutters to add shaped details along the edges. Layer different colors and use embroidery thread to stitch on names, patterns, or little designs, and you’ve essentially made a tiny piece of textile art. Felt also takes fabric glue really well, so you can stick on buttons, sequins, or little fabric flowers without ever picking up a needle.
Ribbon bookmarks might be the fastest project in this whole guide. The ribbon is already the right width and already finished on both edges, so you just cut a length of satin, grosgrain, or velvet ribbon, add a charm or bead at one end, and seal the cut end with a quick pass of a lighter or a dab of clear nail polish to stop it from fraying. Add iron-on letters or a small resin photo pendant and suddenly you’ve got a meaningful keepsake. These are especially sweet as wedding favors, baby shower gifts, or graduation presents.
Tassel and Charm Bookmarks
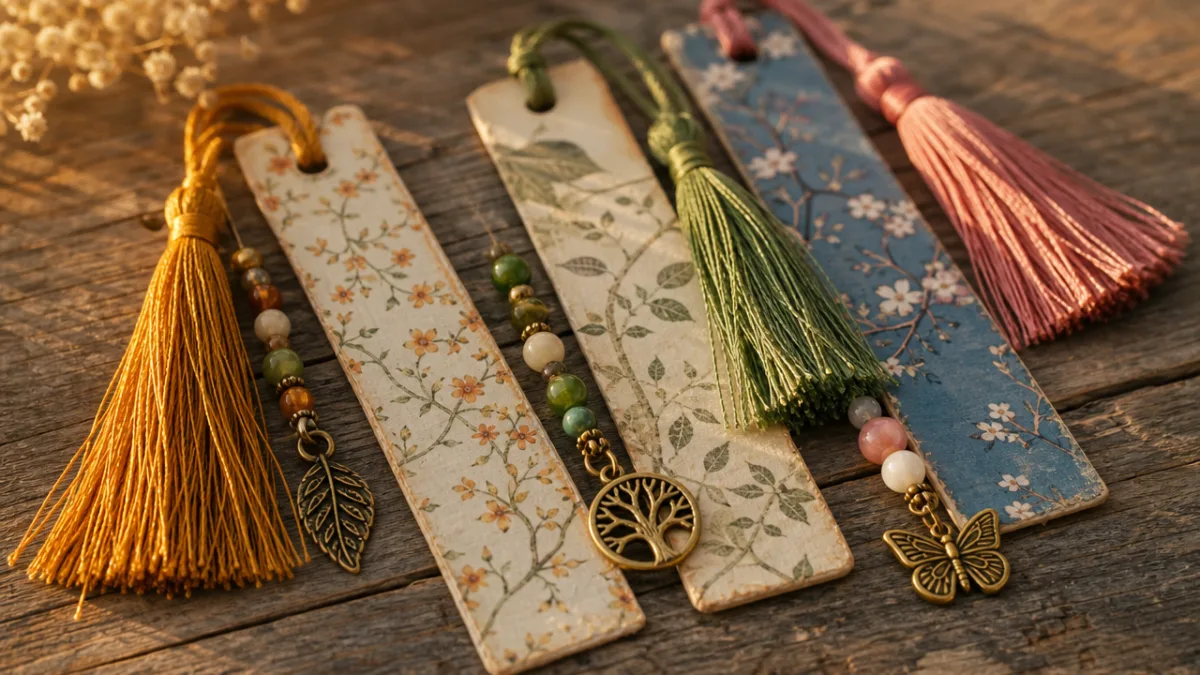
Tassel bookmarks have this elegant, bohemian look that makes them seem way more expensive and complicated than they actually are to make. All you need is embroidery thread, a small piece of cardboard to wrap it around, and a thin cord or ribbon to attach it to your book. Once you’ve done it a couple of times, the whole thing takes about ten minutes, and the finished bookmark drapes beautifully from the top of any spine. You can go with solid colors, ombre gradients, or a mix of shades to match a book cover or a friend’s style.
Adding charms is where things really get fun. Small metal charms — moons, stars, little books, animals, initials — are easy to find at any craft store or on Etsy, and they don’t cost much. Thread a few onto the cord above the tassel, or cluster a bunch together if you like a more maximalist look. Wood beads, glass beads, or little clay beads add great texture and movement too, and mixing different bead types gives the finished piece that genuinely handmade, artisan quality that’s hard to fake.
If you want something a little more structured, try using a small metal ring or a lobster claw clasp as the anchor point instead of just looping cord through the pages. This lets you clip the bookmark directly onto a page, which is honestly so much more practical for thick paperbacks or hardcovers where a hanging tassel tends to slide out. From that clip you can hang charms, small resin flowers, a tiny photo pendant — whatever you like. It ends up feeling like a little piece of jewelry for your book.
Resin and Pressed Flower Bookmarks
Resin bookmarks are definitely a step up in terms of complexity and upfront cost, but the results are stunning enough that they’re worth trying even if you’ve never touched epoxy resin before. The basic idea is simple: pour clear casting resin into a bookmark-shaped mold, add whatever you want to suspend inside it — dried flowers, glitter, tiny shells, foil flakes — let it cure, and pop it out. What you get looks like something from a high-end gift shop, and it’ll essentially last forever if you take care of it.
Pressed flower bookmarks are probably the most beloved version of this style, and it’s easy to see why. You press flowers and leaves using a flower press or a stack of heavy books over a week or two, then arrange them in the mold before you pour the resin. The flowers end up suspended in the clear resin like little windows into a garden, frozen right at their prettiest moment. Pansies, violets, small daisies, ferns, and forget-me-nots all press really well and fit nicely within the narrow shape of a bookmark mold.
If resin feels like too much to take on right now, you can get a very similar look using clear contact paper or laminating pouches, and it’s totally kid-friendly. Arrange pressed flowers on a strip of white or kraft cardstock, carefully cover both sides with clear contact paper, and trim it to the shape you want. The transparency lets all those natural colors show through while keeping everything protected. It doesn’t have that same glassy, dimensional depth as real resin, but honestly, the results are still genuinely lovely.
- Press flowers for a minimum of one week before using them in any bookmark project
- Seal pressed flowers with a thin coat of Mod Podge before embedding in resin to prevent browning
- Use UV resin for faster curing if you have access to a UV lamp
- Add a small jump ring at the top of the mold before pouring to create a built-in hanging hole
- Sand the edges of cured resin with fine-grit sandpaper and polish with a resin polishing compound for a professional finish
Upcycled and Eco-Friendly Bookmarks
One of the most satisfying directions you can take with DIY bookmarks is leaning into upcycled materials — finding new life for things that would otherwise end up in the bin. Old greeting cards, magazine pages, cereal box cardboard, fabric cut from worn-out clothes, even wine corks can all become perfectly functional bookmarks with a little creativity. It’s a great way to craft with purpose, and the challenge of working with what you already have tends to push you toward more inventive solutions than just buying new supplies would.
Leather scraps are a particularly popular choice here because leather is incredibly durable, gets better-looking with age, and doesn’t need much finishing work at all. If you’ve got an old belt, bag, or jacket that’s past its useful life, cutting it into strips gives you bookmark material of genuinely exceptional quality. Punch some holes, use metal letter stamps, emboss a design with leather tools, or just leave it completely plain and let the natural character of the material do the work. A leather bookmark cut from a jacket you used to wear carries a kind of sentimental history that nothing brand new ever could.
Wood veneer and thin balsa wood sheets are another unexpectedly great option. You can cut them to shape with scissors or a craft knife, sand them smooth, and then decorate with a wood-burning tool, paint, or laser engraving if you have access to one. Finishing the wood with a coat of beeswax polish gives it a warm, natural sheen and a subtle scent that makes reading feel like a slightly more sensory experience. Combine wood, leather, dried botanicals, and undyed cotton thread in one bookmark and you’ve got an earthy, cohesive aesthetic that manages to feel both timeless and completely current.
Tips for Gifting and Displaying Your Handmade Bookmarks
Once you’ve built up a little collection of bookmarks, how you present them matters more than you might think. A little thoughtful packaging is the difference between handing something over casually and giving a gift that actually feels considered. Tie a set of three together with a piece of twine and a small handwritten tag. Slip a single bookmark into a glassine envelope with a wax seal. Tuck an assortment into a small linen pouch. None of this has to be elaborate — it just needs to reflect the same care you put into making the bookmark in the first place.
Themed sets are a really nice approach when you’re gifting to someone specific. For a nature lover, you might put together a pressed flower resin bookmark, a leaf-printed fabric bookmark, and a wood veneer one with a botanical illustration. For someone who’s all about color, try three origami corner bookmarks in bold, complementary shades with playful character faces. Taking the time to think about what the recipient actually loves turns a simple craft project into something that communicates real attentiveness — and people notice that.
If you find yourself making bookmarks in larger quantities, it might be worth setting up a small display at a local craft fair, school fundraiser, or community market. Handmade bookmarks typically sell for anywhere from one to five dollars, which makes them an easy impulse buy for people who appreciate handmade things. Display them fanned out in a clear vase or arranged in a wooden box so shoppers can see the variety at a glance. Add a small card explaining what they’re made of and how you made them — that kind of transparency adds real perceived value and tends to start conversations, which is honestly the best marketing a handmade seller can ask for.








What do you think?
It is nice to know your opinion. Leave a comment.