










Celestial Moon & Stars Crochet Bag Pattern: Handbag with Cosmic Charm
Introduction to the Celestial Crochet Trend
Crochet has always been this beautiful intersection of art and practicality, but lately a really magical niche has taken hold: celestial-themed accessories. And honestly, nothing captures it better than the moon and stars crochet bag — a handbag that takes something you carry every day and turns it into wearable cosmic art. Crafters everywhere have fallen for these bags, and it’s easy to see why. They blend classic crochet techniques with a bohemian, free-spirited aesthetic that somehow manages to feel both timeless and deeply you.
Part of the appeal is that a bag like this taps into something really human. We’ve been looking up at the moon and stars for thousands of years — navigating by them, making sense of our lives through them, finding wonder in them. When you carry a bag with a crescent moon and a scattering of stars, you’re quietly participating in that long tradition, while also showing off something no store-bought bag could ever replicate: the fact that you made it yourself.
The current wave of enthusiasm for handmade goods has given projects like this one a real moment. On Pinterest especially, celestial bag patterns are consistently among the most saved and shared things in the whole crafting world. Whether you’re an experienced crocheter hunting for your next satisfying challenge or a motivated beginner ready to push your skills further, this moon and stars handbag is a genuinely rewarding project from your very first chain all the way to the finished piece.
Materials and Tools You Will Need
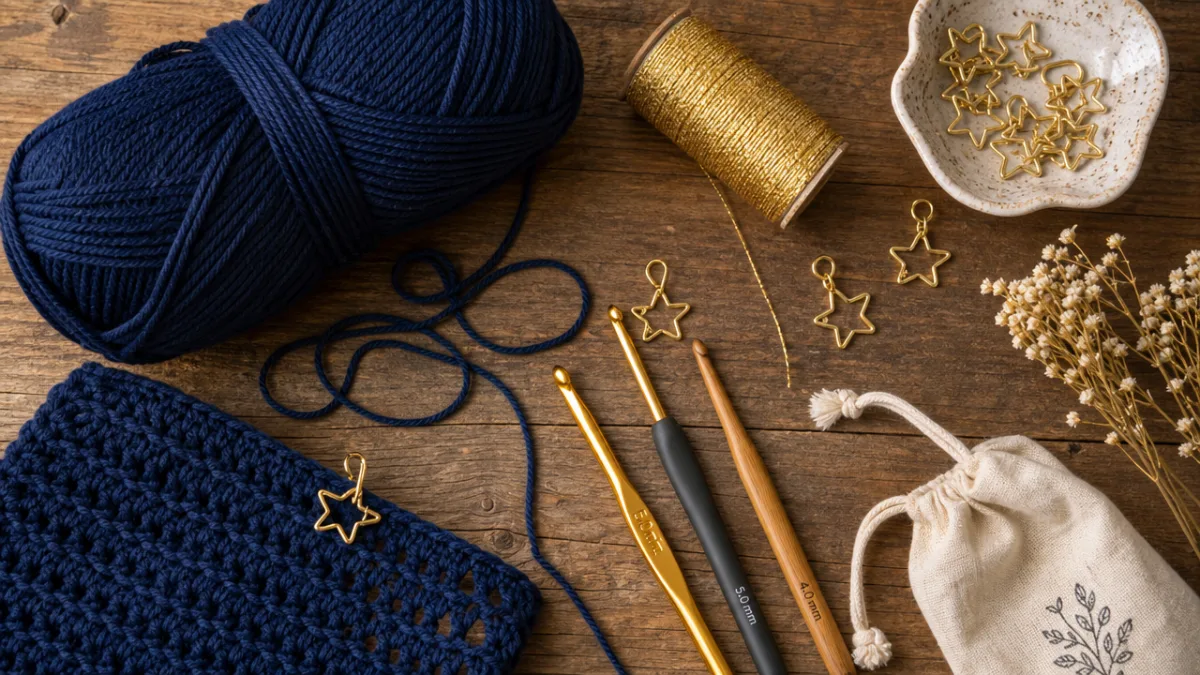
Before you cast on a single stitch, it really does pay to get everything together first. For a celestial bag specifically, yarn choice matters more than you might think — the texture and sheen of your fiber will shape how the whole design reads once it’s finished. Most crochet artists working in this style reach for cotton yarn for the main bag body, and for good reason: cotton holds its structure well and gives those moon and star appliqués clean, crisp edges that really pop against the background.
For color, deep indigo, midnight navy, rich charcoal, and inky black are the perennial favorites for the bag body because they genuinely evoke the feeling of a night sky. For the celestial motifs themselves, soft cream, warm golden yellow, shimmering champagne, or a subtle silver-toned yarn all work beautifully to suggest moonlight and starlight. Some crafters take it a step further by holding a strand of metallic thread alongside their regular yarn when working the stars and moon, which adds a quiet sparkle that can lift the whole bag from charming to genuinely breathtaking.
In terms of tools and supplies, here’s what you’ll want to have ready before you start:
- A crochet hook in the right size for your yarn weight — typically a 4mm or 5mm hook works well with medium weight cotton
- A yarn needle for weaving in ends and stitching your appliqués securely to the bag
- Stitch markers to track your rounds and pattern repeats without losing your place
- Lining fabric in a color you love, plus basic sewing supplies to go with it
- Magnetic bag clasps or a zipper closure to give your bag a neat, functional finish
- Handles or a strap — either bought ready-made or crocheted from cord if you want to go fully handmade
- Scissors and a measuring tape for checking gauge and tidying up yarn ends
Speaking of gauge — please don’t skip this step. I know it’s tempting, especially when you’re excited to dive in, but for a bag it genuinely isn’t optional. Handbags need to hold their shape and hit specific dimensions to actually work as bags, so taking a few minutes to crochet a small swatch and adjust your hook size if needed will save you a lot of frustration down the line. A little patience at the start makes the whole rest of the process so much smoother.
Understanding the Pattern Structure and Stitch Guide
The celestial bag is built in several separate components that get assembled into the finished handbag at the end, and understanding that modular structure before you start makes the whole project feel a lot less overwhelming. The main bag body is usually worked in the round from the bottom up, starting with a rectangular or oval base and gradually building up the sides. This method gives you a seamless, sturdy structure — exactly what you want in something you’re going to fill with your everyday essentials.
For the bag body itself, most versions of this pattern rely on single crochet worked tightly through both loops, which creates a dense, firm fabric that holds its shape nicely. Some patterns mix in a moss stitch or linen stitch for a subtle woven texture that provides a nice visual contrast to the smooth appliqué pieces. If you’re more experienced and feeling adventurous, tapestry crochet or intarsia are both techniques that let you work the star motifs directly into the fabric rather than making them as separate pieces — a beautiful option if you’re up for it.
The appliqués are really the heart of this design, and each type has its own construction approach:
- Crescent moon motifs are worked in rows, following a shaped pattern that builds that characteristic tapered curve of a lunar crescent
- Five-pointed stars start with a magic ring and are worked in rounds, with increases and decreases carefully placed to form each point
- Larger statement stars can incorporate bobble or puff stitches at the center for a satisfying bit of dimension
- Tiny scattered stars can be as simple as four-chain picot arrangements for something delicate and understated
- Optional moon face details — soft closed eyes, a serene little expression — can be embroidered or surface crocheted onto the finished crescent if you love that dreamy look
Once all your appliqué pieces are ready, you’ll arrange them on the bag body before stitching them down for good. Don’t rush this stage — it’s where your bag really takes on its personality. Some people love an asymmetrical, scattered arrangement that feels organic and a little dreamlike. Others prefer a more deliberate composition, with the crescent moon centered on the front and the stars radiating outward in a balanced pattern. There’s no wrong answer; both approaches make beautiful bags that reflect genuinely different aesthetics.
Step-by-Step Construction Process
Once your gauge is confirmed and your yarn is ready, starting the bag body is actually the most straightforward part of the whole project. Most patterns begin with a foundation chain that sets the length of the bag’s base. From there, you’ll work rounds of single crochet and add increases at the four corners of the base rectangle during the first several rounds to build up the bottom panel. Once the base reaches the right dimensions, you stop increasing and just work straight up — round after round of clean vertical sides forming the walls of the bag.
As the sides grow, keep an eye out for any structural elements that need to be incorporated into the body rather than added on afterward. A crocheted flap closure, integrated strap attachment points — these things need to be planned from the beginning, not improvised at the end. Similarly, if you’re going with a zipper rather than a magnetic clasp, adding some reinforcement rows near the bag opening (a tighter stitch or a slip stitch edging works well) will make zipper insertion much easier and the result much cleaner.
Handle construction is one of those decisions worth sitting with before you commit, because there are several really lovely options:
- A simple crocheted chain handle in the same yarn as the bag body gives a cohesive, unified look that ties everything together
- A twisted cord handle made from multiple yarn strands adds texture and a comfortable grip
- Wooden or bamboo handles sewn to the bag top bring a vintage, artisanal warmth that feels right at home with the handmade aesthetic
- A metal chain strap on D-rings introduces a bit of edge and modernity as a contrast to the soft crochet
- A short top handle combined with a detachable crossbody strap gives you the most flexibility for everyday wear
Lining the bag is the final structural step, and it makes a bigger difference than you might expect. Cutting your lining fabric to the inner dimensions of the bag with a seam allowance on all sides, then slip stitching it to the inside of the bag opening, creates a clean interior that keeps items from snagging on the crochet and gives the whole bag a firm, structured feel. Iron the lining before you insert it, and take care to line up the seams with the corners of the bag — it’s a small detail that makes the inside look just as considered as the outside.
Customization Ideas and Creative Variations
Once you’ve got the core construction under your belt, the creative possibilities with this bag are genuinely exciting. The celestial theme is broad enough to take you in so many directions beyond the classic crescent-and-star combination. Constellation patterns are a gorgeous option — imagine stitching or embroidering the arrangement of stars that forms Orion, Cassiopeia, or the Big Dipper directly onto your bag. It adds a layer of real astronomical meaning alongside the visual beauty, which makes for a pretty special finished piece.
Color palette is another area with huge creative range. Deep nighttime colors are the classic choice, sure — but who says this has to look like midnight? Dusty rose and lavender conjure a sunset sky. Soft grey and cream suggest a misty, overcast evening. A white bag with silver and blue appliqués has a cool, wintry frost to it, while warm burgundy with gold moon and stars reads like a richly romantic vintage astronomical illustration. Same basic pattern, completely different mood.
Size is a surprisingly powerful variable too. The same structure scales beautifully across a whole range of formats:
- A tiny celestial coin purse or card holder for when you want to travel light
- A medium clutch with a single dramatic moon motif as the focal point
- The standard handbag size, which usually falls somewhere around 25 to 30 centimeters across
- An oversized tote with a wide starfield scattered across both front and back panels
- A backpack version with adjustable crocheted straps for hands-free celestial style
Mixed media is where things can get really fun. Beaded embellishments stitched between star appliqués catch the light in a way that genuinely mimics the scattered, unpredictable quality of an actual starfield. Small crocheted planet motifs — muted greens, dusty reds, ringed golds — could extend the theme into a whole solar system scene. And if you want to go full whimsy: glow-in-the-dark thread, available from specialty yarn retailers, lets your bag literally glow when the lights go down. Just like the real stars appearing after sunset. It’s delightful.
Caring for Your Finished Celestial Bag and Styling Tips
A bag you’ve spent real time and care making deserves to be looked after properly. How you care for it will depend mostly on your yarn’s fiber content — cotton bags are generally quite forgiving and can often handle a gentle machine wash in a mesh laundry bag. That said, hand washing in cool water with a mild detergent is always the kindest approach to something you’ve put hours of skilled work into, and it’ll keep it looking its best for longer.
Blocking your finished bag before you use it for the first time is one of those steps that feels optional but really isn’t. Dampening the bag, coaxing it into its intended shape, and letting it dry flat gives the stitches a chance to relax and settle into a smooth, even fabric that shows the pattern the way it’s meant to look. The appliqués especially benefit from this — blocking encourages the moon and star motifs to lie nice and flat against the bag body. Once it’s dry, you’re ready for lining installation if you haven’t already done that.
Storage is worth thinking about too. When the bag isn’t in regular use, stuffing it with tissue paper or a small pillow form keeps it from collapsing and developing permanent creases. Storing it in a breathable dust bag rather than a sealed plastic bag lets the natural fibers breathe and avoids that faint mustiness that can develop in airtight storage. Small habits like these keep a handmade bag looking freshly finished for years rather than months.
As for styling — this bag is more versatile than you might expect given its distinctive look. Its deep tones and cosmic motifs make it a natural partner for flowing boho dresses, linen sets, and anything with natural textures and earthy colors. But it also works beautifully as a contrast piece with more contemporary, structured outfits, where its handcrafted warmth softens a blazer-and-trousers combination in the most appealing way. Worn crossbody on a sunny afternoon with a simple white dress, or clutched at an evening event with a velvet skirt and statement earrings, this bag has a quiet confidence that lets it move between occasions with genuine ease.
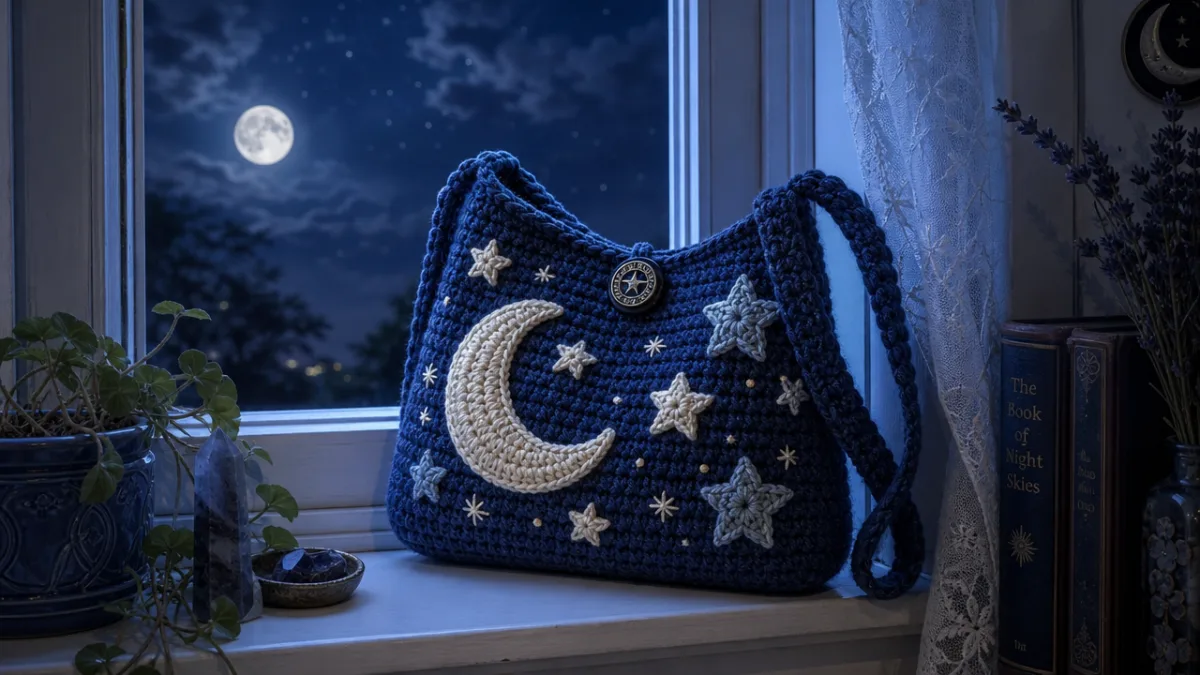
At the end of the day, the celestial moon and stars crochet bag is more than just a pattern — it’s an invitation to bring a little bit of the vast, wondrous universe into your everyday life through nothing more than yarn and a hook. Every stitch is an act of intention, and the finished bag carries that energy with it wherever it goes. Whether you’re making one for yourself, gifting it to someone who loves the cosmos as much as you do, or starting to sell your work to an appreciative community of fellow celestial enthusiasts, this is the kind of project that reminds you why handcraft has endured through every era of human history.








What do you think?
It is nice to know your opinion. Leave a comment.