










Simple Tips for Buying & Storing All Your Crafting Supplies
Whether you’re a seasoned crafter or just starting to explore your creative side, one of the most common frustrations in any creative hobby is the chaos that comes with accumulating supplies. Paints roll under furniture, ribbon tangles into impossible knots, and somehow you end up buying three of the same shade of green embroidery floss because you forgot you already owned it. Getting your crafting supplies organized isn’t just about tidiness — it’s about saving money, reducing stress, and making your creative time actually feel enjoyable rather than like a scavenger hunt through clutter.
The good news is that building a well-organized craft stash doesn’t require a dedicated studio or an enormous budget. With a few smart buying habits and some strategic storage solutions, even the smallest apartment corner can become a functional and inspiring creative space. The tips in this article are drawn from the collective wisdom of experienced crafters who have learned — often through hard experience — what actually works when it comes to managing supplies across multiple crafting disciplines.
Understanding What You Actually Need Before You Buy
One of the most valuable habits you can develop as a crafter is taking stock before you shop. It sounds almost embarrassingly simple, but a quick inventory of what you already own before heading to the craft store (or opening that tempting online cart) can save you a surprising amount of money over the course of a year. Many crafters find themselves with duplicate supplies not because they’re careless, but because their supplies aren’t visible or organized in a way that makes it easy to see what they have at a glance.
Before buying anything new, ask yourself a few key questions. Do you have something that could serve the same purpose? Is this purchase for a specific project you’ve already planned, or is it purely aspirational — that is, do you imagine yourself using it someday but have no concrete plan? Aspirational buying isn’t always a bad thing, but it becomes a problem when it leads to overspending and clutter. Getting honest with yourself about your actual crafting habits is the first step toward a more intentional and satisfying approach to supplies.
It also helps to keep a running list — either on paper or in a notes app on your phone — of supplies you’ve genuinely run out of or need for upcoming projects. When you arrive at the craft store with a list, you’re far less likely to get swept up in impulse buys or be seduced by sales on items you don’t actually need. This one habit alone can dramatically reduce the amount of clutter in your crafting space while also keeping your spending in check. Many experienced crafters swear by a “one in, one out” policy, where they commit to using up or donating a current supply before bringing in a new one.
Making a Master Supplies List
A master supplies list is a living document that tracks everything you currently own, organized by category. You can keep this as a simple spreadsheet, a notebook page, or even a dedicated app. The key is updating it regularly — when you open the last of something, add it to the “needs replenishing” column right away rather than waiting until you’re in the middle of a project and suddenly realize you’re out. Over time, this list becomes an incredibly useful reference that prevents duplicate purchases and helps you plan projects around what you already have.
Smart Shopping Strategies for Crafters
Craft supplies can be surprisingly expensive, especially if you’re working across multiple disciplines — sewing, papercrafting, resin work, and painting all require their own specialized tools and materials. Developing a smart approach to shopping can make a meaningful difference in how far your budget stretches. One of the best strategies is to understand the seasonal sale cycles at your favorite craft retailers. Most major craft stores run significant sales around major holidays and at the end of each quarter as they clear out seasonal inventory. Knowing when to buy — and when to wait — is a skill that experienced crafters develop over time.
Buying in bulk can also be a smart move for supplies you use consistently and in large quantities, such as adhesive, basic paint colors, washi tape in neutral tones, or standard sewing thread. However, bulk buying only makes financial sense when you have adequate storage and when you’re confident you’ll actually use the quantity you’re purchasing before it expires or degrades. Some craft materials — like certain adhesives, paints, and inks — have a shelf life, and buying more than you can use within that window is wasteful regardless of the discount you received.
Don’t overlook alternative shopping sources beyond the big-box craft stores. Thrift stores, estate sales, and online resale platforms like Facebook Marketplace and eBay can be incredible sources for crafting supplies at a fraction of retail cost. Yarn, fabric, stamps, embellishments, and tools are commonly found in excellent condition at thrift stores, because many crafters accumulate more than they use. Joining local crafting groups on social media can also connect you with crafters who are destashing — selling or giving away supplies they no longer need, often at very low prices or even free.
- Sign up for email newsletters from your favorite craft stores to receive advance notice of sales and exclusive coupons.
- Use cashback apps and browser extensions when shopping online to earn a percentage back on your purchases.
- Check the clearance section first when you visit craft stores — you’ll often find high-quality supplies at steep discounts.
- Consider splitting bulk purchases with a crafting friend to share the savings without overwhelming your storage space.
- Look into craft subscription boxes as a way to discover new supplies at a reduced per-item cost, but cancel if you find your stash growing faster than you can use it.

Categorizing and Sorting Your Supplies
Once you’ve committed to being more intentional about buying, the next challenge is getting your existing supplies into a logical, accessible system. The most effective organizing systems are built around how you actually work, not around some idealized vision of how crafting should look. Start by pulling everything out and sorting it into broad categories — paper, fabric, tools, adhesives, embellishments, and so on. This initial sort can be eye-opening, revealing how much you have in certain categories and how little in others, and it gives you a realistic picture of the storage solutions you’ll actually need.
From those broad categories, you can break things down further based on your own workflow. A paper crafter might separate by paper type, color family, or brand. A knitter might sort by fiber content, weight, or project. The goal is to create a system where you can find what you need in under thirty seconds without digging through boxes or bins. If you consistently can’t locate a specific supply quickly, that’s a sign your current categorization isn’t working for you and needs to be adjusted. There’s no single right answer — the best system is the one you’ll actually maintain.
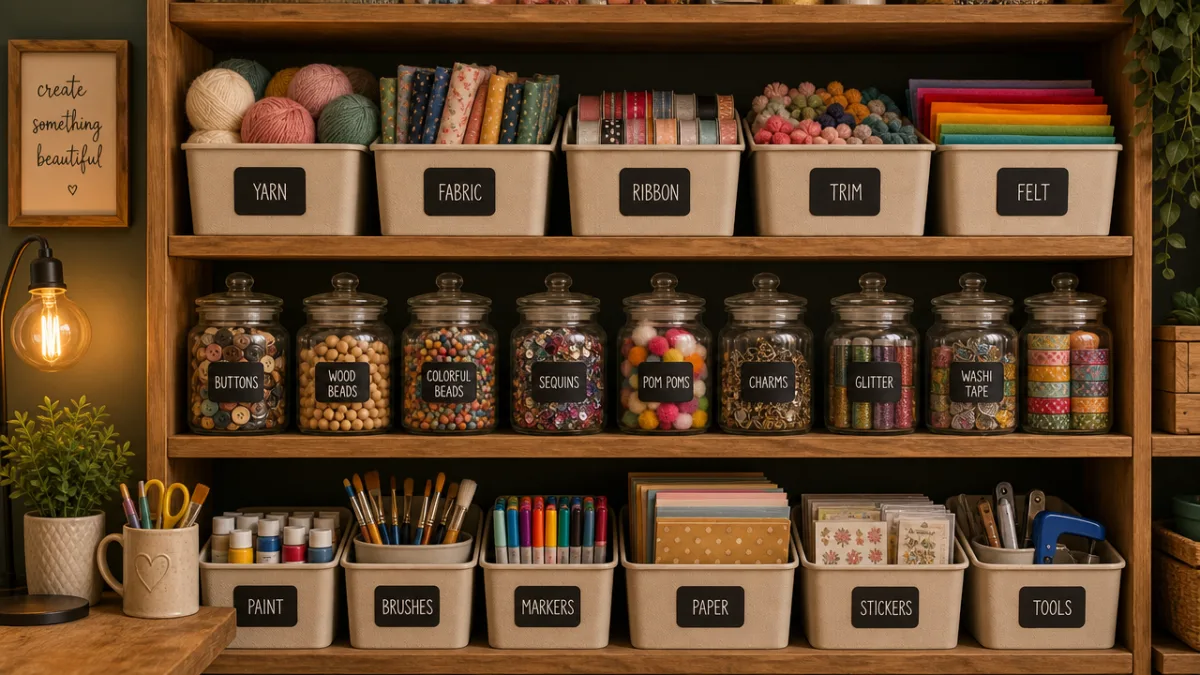
Labeling is a non-negotiable part of any effective organizing system. Labels don’t have to be fancy or elaborate — even a piece of masking tape with a handwritten description is infinitely better than unlabeled bins that require you to open each one to see what’s inside. For supplies stored in opaque containers, a detailed label saves enormous amounts of time over the course of a year. If you enjoy the aesthetic side of organizing, label makers and printed labels can make your storage look polished as well as functional, which can actually motivate you to maintain the system.
Color-Coding as an Organizing Tool
Color-coding is a popular and highly effective strategy for crafters who work with large volumes of supplies. Assigning a color to each category — whether through colored bins, labels, dots, or folders — makes it possible to locate the right section of your storage at a glance, without having to read labels. This is especially useful in larger craft rooms where you might have dozens of bins or boxes. Color-coding also makes it easier to put things back in the right place quickly after a project, which is crucial for maintaining an organized space over the long term.
Storage Solutions for Every Space and Budget
The craft storage market has exploded in recent years, and there are now purpose-built products for virtually every type of supply imaginable. However, you don’t need to invest in expensive specialized storage to have an effective system. Some of the most practical and beloved storage solutions among experienced crafters are repurposed everyday items — glass jars for buttons and beads, over-the-door shoe organizers for small tools and notions, clear shoebox-sized bins from dollar stores, and repurposed spice racks for paint bottles. The best storage solution is one that fits your space, your budget, and your specific supplies.
Vertical storage is a game-changer for crafters working in small spaces. Wall-mounted pegboards, floating shelves, and magnetic knife strips repurposed for metal tools can dramatically increase your usable storage space without taking up any floor area. Pegboards in particular are beloved by crafters because they are infinitely customizable — you can rearrange hooks and holders as your supplies and needs change, and everything remains visible and accessible. Painting a pegboard a fun accent color can also make it a design feature of your crafting space rather than just a functional afterthought.
For crafters who work in shared spaces — at a kitchen table, in a living room, or in a guest room — portable storage is essential. Rolling carts with drawers are a perennial favorite because they can be wheeled out when you’re working and tucked away when you’re not. Craft totes and bags with dedicated pockets allow you to grab a specific project’s worth of supplies and work anywhere in the house or even outdoors. The key with portable storage is to return everything to its designated spot after each crafting session, which prevents the gradual spread of supplies throughout your home that so many crafters experience.
- Start with clear containers wherever possible so you can see contents without opening everything.
- Measure your available space carefully before purchasing any storage unit or shelving system.
- Store frequently used supplies at eye level and within easy reach, relegating rarely used items to higher shelves or the back of drawers.
- Use drawer organizers, small bins, or ice cube trays inside larger containers to prevent small items from becoming a jumbled mess.
- Reassess your storage system every six months — your crafting interests and supplies evolve, and your storage should evolve with them.
Storing Delicate and Perishable Supplies
Some crafting materials require more careful storage than others. Watercolor paints, alcohol inks, and certain adhesives can be damaged by extreme temperatures or humidity. Fabric and yarn are vulnerable to moths and moisture. Paper products can warp or yellow if exposed to sunlight. Being aware of the specific storage needs of each material in your stash helps you preserve your supplies for longer and get the most value from your investment. Store temperature-sensitive items away from windows and exterior walls, and consider cedar blocks or lavender sachets in your fabric storage to deter pests naturally.
Maintaining Your System Over Time
Creating a beautifully organized craft space is satisfying, but maintaining it over months and years is where most people struggle. The reality is that organization is not a one-time project — it’s an ongoing practice that requires regular attention. The good news is that a well-designed system actually makes maintenance easier, because everything has a clear home and returning items to their place takes seconds rather than minutes. The crafters with the tidiest studios aren’t necessarily the most naturally organized people — they’re usually the ones who have built simple, sustainable habits around their supplies.
One of the most effective habits is what some crafters call the “five-minute tidy” — a brief reset at the end of every crafting session where you return tools to their holders, caps to their markers, lids to their jars, and scraps to their bins. This small investment of time at the end of a session prevents the gradual buildup of chaos that makes organizing feel overwhelming. It also means your space is always ready for your next creative session, rather than requiring you to spend the first twenty minutes clearing up before you can actually start creating.
Regular decluttering is just as important as regular tidying. Set a reminder to go through your supplies every six to twelve months with fresh eyes. Supplies that you haven’t touched in over a year are strong candidates for donation or destashing, especially if they’re taking up prime storage real estate. Letting go of supplies that no longer serve your creative practice can actually feel liberating, and your donations might be just the thing another crafter has been looking for. Many local schools, community centers, and art programs gratefully accept crafting supply donations, which makes letting go feel even more worthwhile.
Dealing with Craft Supply Burnout
It happens to almost every crafter at some point — you look around at your stash and instead of feeling inspired, you feel overwhelmed or even guilty about how much you’ve accumulated without using. This is sometimes called “craft supply burnout,” and the solution is almost always to simplify rather than to add more organization systems on top of the existing clutter. Challenge yourself to a “use what you have” month where you commit to creating projects exclusively from your existing stash, without buying anything new. This kind of creative constraint is surprisingly liberating and often sparks more creativity than having unlimited access to new materials.
Building a Stash That Inspires Rather Than Overwhelms
The ultimate goal of all this buying strategy and storage planning is to create a craft space and supply stash that genuinely inspires you every time you walk into it or open your storage bins. A well-curated stash — one where every item has been chosen thoughtfully, has a designated home, and is actually used — is a joy to work with. It sparks project ideas, makes it easy to grab what you need mid-creative-flow, and removes the friction that so often stands between a crafter and actually creating. The supplies you own should feel like resources and possibilities, not burdens or sources of guilt.
Think carefully about the aesthetic of your crafting space, not just the functionality. When your storage looks appealing — whether that means sleek and minimal, colorfully whimsical, or warmly rustic — you’re more likely to spend time there and less likely to let it descend into disorder. Display some of your most beautiful or inspiring supplies visibly, whether that’s a glass jar of colorful buttons, a small arrangement of your favorite yarn colors, or a collection of handmade samples pinned to a corkboard. Making your space beautiful is not frivolous — it directly supports your creative practice.
Finally, remember that your crafting stash and storage system should reflect your actual creative life, not an aspirational version of it. If you mostly do small, quick projects in stolen pockets of time, your storage needs to support that reality — with supplies that are quick to grab, easy to put away, and organized in a way that doesn’t require a time investment just to get started. If you’re a long-form project crafter who spends full weekend days creating, your needs look different. The most beautiful craft room in the world is useless if it doesn’t match the way you actually create. Start where you are, design for the crafter you actually are, and refine from there.
- Keep a small “inspiration board” near your crafting area with samples, color swatches, and images that excite you creatively.
- Store your most-loved and most-used supplies in the most accessible and visible positions to reinforce positive associations with your space.
- Rotate seasonal or project-specific supplies in and out of active storage to keep your accessible stash fresh and relevant.
- Photograph finished projects and display them in your crafting space as motivation and a reminder of what your supplies can become.
- Give yourself permission for your system to evolve — as your crafting interests shift, your storage should shift with them, and that’s a sign of growth, not failure.
Building a thoughtful relationship with your crafting supplies takes time, but every small improvement — one better-labeled bin, one more intentional purchase, one five-minute tidy at the end of a session — compounds into a crafting space and practice that truly supports your creativity. The supplies you gather over your crafting life represent an investment in joy, skill, and self-expression. Treating them with care and organization is simply a way of honoring that investment and making sure it continues to pay creative dividends for years to come.








What do you think?
It is nice to know your opinion. Leave a comment.