










Pressed Flower Suncatcher Craft: Easy DIY with Clear Glue
Introduction to Pressed Flower Suncatchers
There’s something genuinely magical about holding a pressed flower up to a window and watching light filter through its petals, casting soft, colorful shadows across the room. Pressed flower suncatchers bring together the age-old art of botanical pressing and a simple, satisfying craft that anyone can pull off, no matter your skill level. Whether you’re after a relaxing weekend project or a heartfelt handmade gift, this one delivers beautiful results without asking much of you in return.
What makes suncatchers so appealing is that they work with light rather than just sitting pretty on a wall. Unlike a pressed flower frame, a suncatcher is meant to interact with whatever sun is coming through your window, and the flowers inside almost seem to come alive as the light shifts throughout the day. Morning light hits your lavender differently than a warm, amber late-afternoon glow does, which means your suncatcher is basically a decoration that quietly changes with the hours.
What makes this version of the craft so easy to get into is the use of clear glue as the main medium. There’s no need for expensive resin kits, UV lamps, or any specialized tools. This method works with stuff most people already have at home, or can easily pick up at a dollar store or craft shop. The finished result looks far more polished than the effort it actually takes to make it.
Gathering Your Materials and Pressing Your Flowers
Before you start assembling anything, you’ll need two things ready: your materials and your pressed flowers. If you’ve already got a stash of pressed botanicals, you’re ahead of the game. If not, pressing flowers is an easy preparatory step that takes one to three weeks, but almost none of that time involves you actually doing anything. You just need to plan ahead and let time handle the rest.
To press flowers, pick them when they’re at peak bloom, ideally mid-morning after any dew has dried off. Lay them flat between two sheets of parchment or plain white paper, then tuck them inside a heavy book like an old dictionary or encyclopedia. Stack a few more books on top for consistent pressure. After one to three weeks, depending on how thick the flowers are, you’ll have beautifully flat botanicals ready to work with. Thinner flowers like pansies, violas, and Queen Anne’s lace press especially well and are great for beginners.
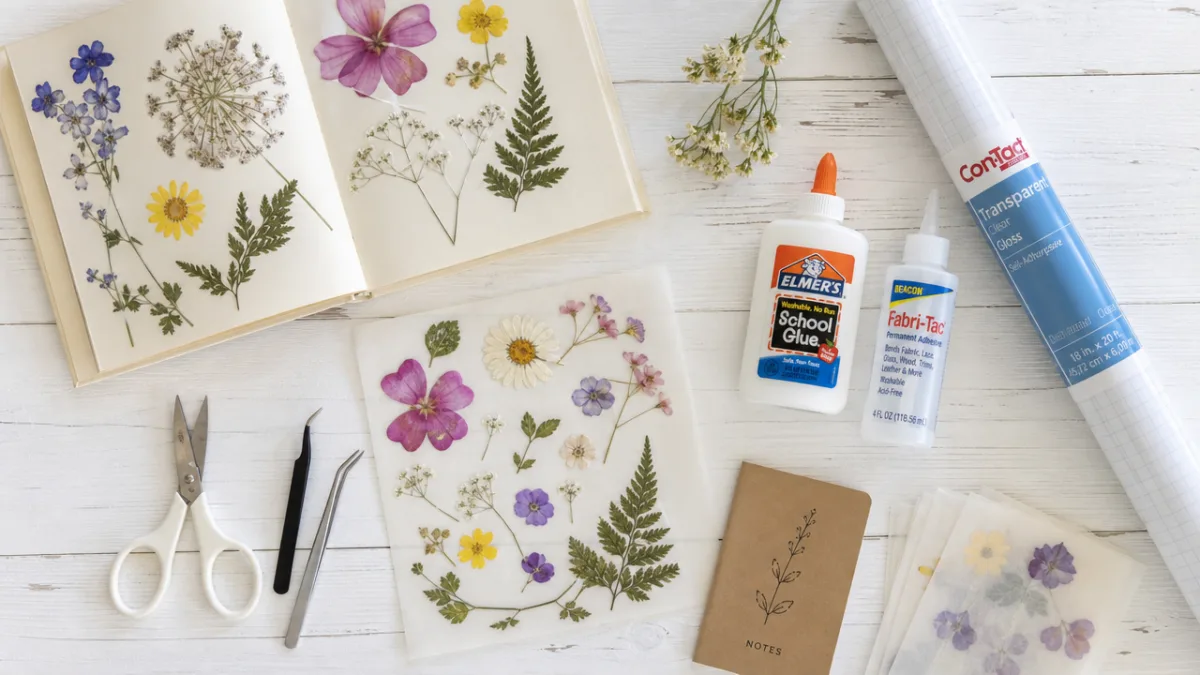
For the suncatcher itself, gather the following materials before you start. Having everything within arm’s reach makes the whole process feel smooth and enjoyable rather than constantly interrupted.
- Pressed flowers and leaves in a variety of shapes and sizes
- Clear school glue or clear craft glue (like Mod Podge in gloss finish)
- Two sheets of clear contact paper or transparency sheets
- A wooden embroidery hoop, metal ring, or any circular frame
- Scissors or a craft knife
- Tweezers for handling delicate petals
- Ribbon or twine for hanging
- A flat waterproof surface to work on
Step-by-Step Assembly Instructions
Once your flowers are fully pressed and your materials are laid out, you’re ready to start building your suncatcher. The process is meditative and forgiving, which makes it a wonderful activity for adults and older kids alike. Start by cutting two circles of clear contact paper slightly larger than the inside of your frame. If you’re using an embroidery hoop, trace the inner hoop onto the contact paper and cut just outside that line so you have a little extra to work with during assembly.
Peel the backing off one sheet of contact paper and lay it sticky-side-up on your work surface. This is your base layer, the thing that holds your flowers in place while you arrange them. Using tweezers, start placing your pressed flowers onto the sticky surface. You can work from the center outward if you have one big focal bloom, or scatter them freely for a more whimsical, wildflower look. Don’t rush this part — the arrangement you land on here is what shows up in the finished piece. The nice thing is that you can lift and reposition flowers as many times as you like while the contact paper is still exposed, so experiment freely before you commit.
Once you’re happy with how it looks, brush a thin, even layer of clear glue over the entire surface, covering both the flowers and the contact paper around them. This glue does two jobs: it seals the flowers in place and helps bond the two layers together for a stronger, clearer finish. Then carefully peel the backing from your second circle of contact paper and press it down over the glued surface, smoothing out air bubbles from the center toward the edges using a soft cloth or your fingertips. Let the whole thing dry completely, usually about thirty minutes to an hour, before you trim the edges and secure it into your frame.
To finish up, trim any excess contact paper around the frame and secure the panel in place. If you’re using an embroidery hoop, separate the inner and outer rings, lay your panel over the inner ring, and press the outer ring down over it, tightening the screw to lock everything in. Trim the excess contact paper close to the frame for a clean look. Then tie a loop of ribbon or twine around the top and your suncatcher is ready to hang.
Design Ideas and Creative Variations
One of the best parts of this craft is how endlessly you can customize it. Once you’ve got the basic technique down, you’ll start imagining new color palettes, themes, and arrangements with every season. A spring suncatcher might feature delicate cherry blossoms and pale yellow buttercups, while a summer one could burst with vibrant zinnias and bold orange marigolds. Autumn calls for rich burgundy maple leaves and dried seed heads, and even winter greenery like pressed pine needles or holly can make a striking, festive panel.
Beyond seasons, you can play around with different compositional styles depending on the look you’re going for. A radial design puts one large focal flower at the center with smaller blooms and leaves spreading outward like a mandala, which gives a lovely sense of symmetry. A scattered garden style mimics a wildflower meadow with blooms placed at seemingly random intervals for something more free-spirited and natural. You could also try a monochromatic palette, pressing flowers in shades of a single color like lavender, lilac, and pale violet, for a calm, cohesive effect.
If you want to add a bit more dimension, think beyond flowers. Thin slices of dried citrus pressed alongside botanicals add cheerful pops of color and a fun geometric contrast to all those organic petal shapes. Feathers, pressed ferns, skeleton leaves, and even decorative tissue paper can all be layered into the design. For a little sparkle, sprinkle a small amount of fine biodegradable glitter between the layers before sealing and watch it catch the light right alongside your flowers.
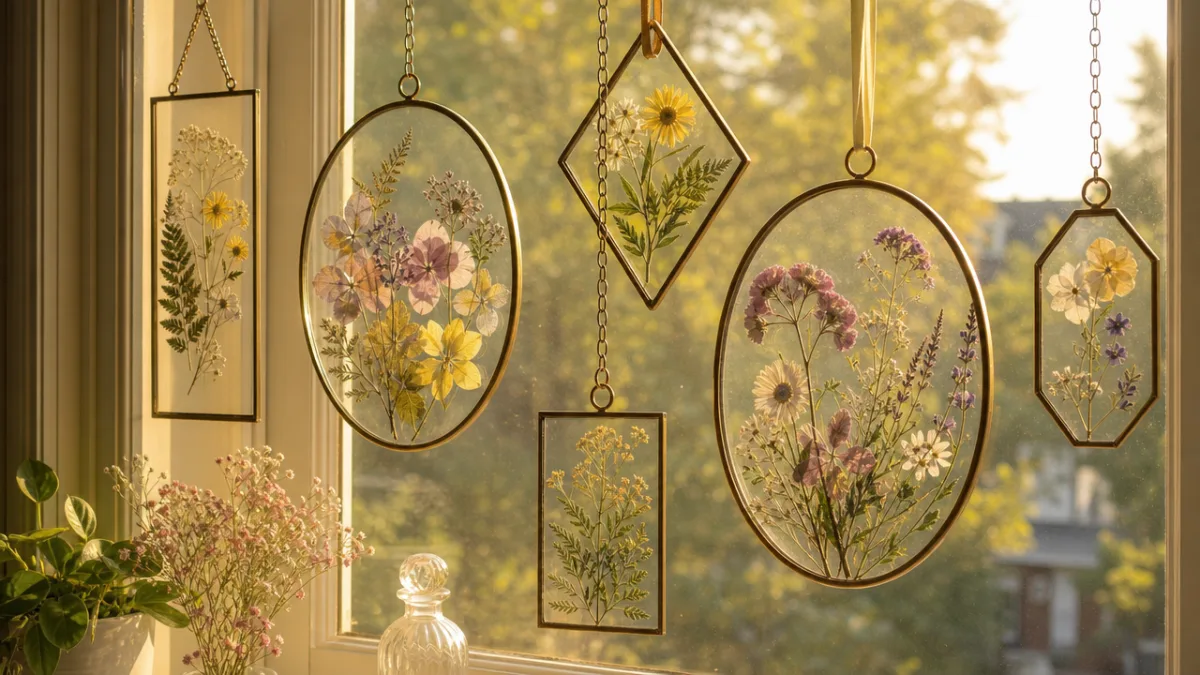
You can also experiment with different shapes and frame types. Square frames made from simple wooden dowels have a more modern, geometric feel. Oval embroidery hoops are easy to find and lend a vintage, elegant quality. For a completely frameless option, reinforce the edges of your contact paper panel with a thin strip of colorful washi tape, punch a hole at the top, and hang it directly from a suction cup hook on the glass itself. That minimalist approach lets the botanical artwork do all the talking.
Tips for Best Results and Common Troubleshooting
Even a craft this straightforward has a few nuances that can make the difference between a suncatcher that looks genuinely beautiful and one that feels slightly off. The single most important factor is making sure your pressed flowers are completely dry before you use them. Flowers that weren’t pressed long enough still hold moisture, and that residual moisture can cause cloudiness or even mold to develop between your contact paper layers over time. When in doubt, leave your flowers in the press for an extra week, especially thicker ones like roses or daisies.
Air bubbles are the other hurdle that comes up most often during assembly. Once the two layers of contact paper are pressed together, those bubbles can be surprisingly stubborn. The best way to prevent them is to press the second layer down gradually from one edge to the other, like laying down a screen protector on a phone, rather than starting in the middle and working outward. A soft credit card or a bone folder works really well for smoothing as you go. If a few small bubbles do remain after the glue has dried, a fine pin can pierce them carefully, and gentle pressure should help them flatten right out.
Color fading is something to expect with pressed flowers, and while some fading is inevitable when a piece is in direct sunlight over time, you can slow it down significantly by choosing UV-resistant contact paper or applying a UV-protective spray to the finished suncatcher before you hang it. Flowers with naturally rich pigment, like deep blue larkspur, purple statice, and golden black-eyed Susans, tend to hold their color longer than more delicate pastels. And honestly, embracing the gentle fade as part of the piece’s aging beauty is a completely valid artistic choice.
Quick Reference: Troubleshooting Common Issues
- Cloudy appearance: Usually caused by flowers with residual moisture. Ensure all botanicals are completely dry before use.
- Air bubbles: Smooth the top layer from edge to edge rather than center outward, or use a small pin to release trapped air.
- Flowers shifting during assembly: Use a tiny dot of clear glue to tack each flower in place before applying the overall glue layer.
- Glue streaks showing: Apply the glue in thin, even coats and avoid spreading it over the same area repeatedly once it begins to set.
- Frame not holding panel securely: Add a thin bead of hot glue around the inner edge of the frame before pressing the panel in.
Displaying and Gifting Your Suncatcher
Once your suncatcher is hanging in a window, the effect it has on a room is immediate and genuinely uplifting. An east-facing window means you’ll catch the full benefit of morning light streaming through the petals as you start your day, which is a lovely way to set a peaceful tone. South-facing windows offer the most consistent light throughout the day, while a west-facing placement makes for a stunning evening display as the sun sets and warm golden light pours through your botanical creation.
Pressed flower suncatchers are also among the most thoughtful handmade gifts you can give someone. Because each one is made from real flowers that you chose, arranged, and assembled yourself, it carries a kind of intimacy and intentionality that purchased gifts rarely match. For an extra layer of meaning, use flowers from a shared garden, a special occasion like a wedding bouquet or birthday arrangement, or blooms that carry personal significance to the person you’re gifting. Include a small card explaining where the flowers came from, and your gift becomes a keepsake with a real story behind it.
These suncatchers work beautifully as gifts for a wide range of occasions and people. New homeowners will love a handmade decoration that instantly adds warmth and color to their space. Teachers, grandparents, and friends going through a hard season often find real comfort in the quiet beauty of something from nature preserved in a tangible way. They also make wonderful party favors for garden-themed celebrations, baby showers, and bridal events, especially when made in small sizes using inexpensive shower curtain rings as frames. A collection of small suncatchers hung at different heights creates a cascading botanical mobile effect that’s breathtaking in how simple it is.
To make the gift feel extra special, pair your finished suncatcher with a small packet of flower seeds and a handwritten note encouraging the recipient to grow and press their own blooms. It turns your gift into the start of a new hobby and a continuing cycle of botanical beauty. Wrap the suncatcher in tissue paper rather than plastic so the contact paper doesn’t get scratched, and keep it flat during storage and transport to protect the flowers from shifting before it reaches its new home.

The Broader World of Botanical Crafting
Making your first pressed flower suncatcher has a way of opening a door into the broader and deeply rewarding world of botanical crafting. Once you’ve developed an eye for which flowers press well and a feel for working with delicate dried materials, you’ll find those skills carry over beautifully to a whole range of related projects. Pressed flower stationery, bookmarks, lampshades, resin jewelry, and wall art all draw on the same foundational techniques and the same joy of preserving natural beauty in something that lasts.
There’s also a genuinely meditative quality to botanical crafting that’s worth mentioning. The act of collecting flowers, waiting patiently for them to press, and then carefully arranging them into something beautiful encourages a slower, more attentive relationship with the natural world and with your own sense of time. A lot of crafters find that working with pressed flowers helps them feel more grounded and present, qualities that feel increasingly valuable when so much of daily life moves fast and stays digital. It’s a practice that invites you to really notice the curve of a petal, the intricate veining of a leaf, the subtle shifts in color you’d normally walk right past.
Children who get involved in pressed flower crafts gain an early appreciation for botany and the natural world while building fine motor skills, patience, and a sense of aesthetics. Sharing this craft across generations, whether pressing flowers with a grandparent or showing a child how to use tweezers with care and focus, creates memories that last just as long as the suncatchers themselves. In a very real sense, every suncatcher you make captures not just a flower but a moment, a season, and the particular quality of light and life that existed when you sat down to make it.
As you grow more comfortable with botanical crafting, consider keeping a dedicated flower press and a simple journal where you note which plants you collected, where they came from, and when they bloomed. Over time, that record becomes something beautiful in its own right, a living nature journal that documents the gardens, landscapes, and seasons that have shaped your creative life. The suncatcher hanging in your window right now is just the beginning of a practice that can deepen and grow with you for years.








What do you think?
It is nice to know your opinion. Leave a comment.