










DIY Vinyl Record Music Wind Chime: Transform Old Records Into Melodic Garden Art
Introduction: The Magic of Upcycled Music
There is something deeply poetic about giving old vinyl records a second life as wind chimes. These beloved discs once filled rooms with music, and now, reshaped and reimagined, they can fill your garden or porch with the gentle sound of the breeze. Vinyl records carry a nostalgic weight that few other materials can match, and turning them into wind chimes is a craft project that honors that history while creating something entirely new and beautiful.
The DIY vinyl record wind chime project has gained enormous popularity among upcyclers, music lovers, and home decorators alike. Whether you have a collection of scratched and unplayable records gathering dust in your attic, or you simply love the aesthetic of that classic black disc, this project transforms something ordinary into a stunning piece of functional garden art. The iridescent sheen of vinyl catches sunlight in extraordinary ways, adding a visual sparkle that complements any outdoor space.
Beyond the aesthetic appeal, this project is also a meaningful exercise in sustainability. Each year, countless vinyl records end up in landfills simply because they are damaged or no longer wanted. By repurposing them into wind chimes, you divert waste from the trash, reduce your environmental footprint, and create something that sparks joy every time the wind blows. This is crafting with purpose, and the result is a one-of-a-kind piece that carries a story.
Materials and Tools You Will Need
Before you begin, gathering the right materials is essential to ensuring your wind chime turns out exactly as you envision. The beauty of this project lies in its accessibility — most of the supplies can be sourced from thrift stores, craft shops, or even your own home. You do not need to be an experienced crafter to pull this off successfully, but having the correct tools will make every step smoother and more enjoyable.
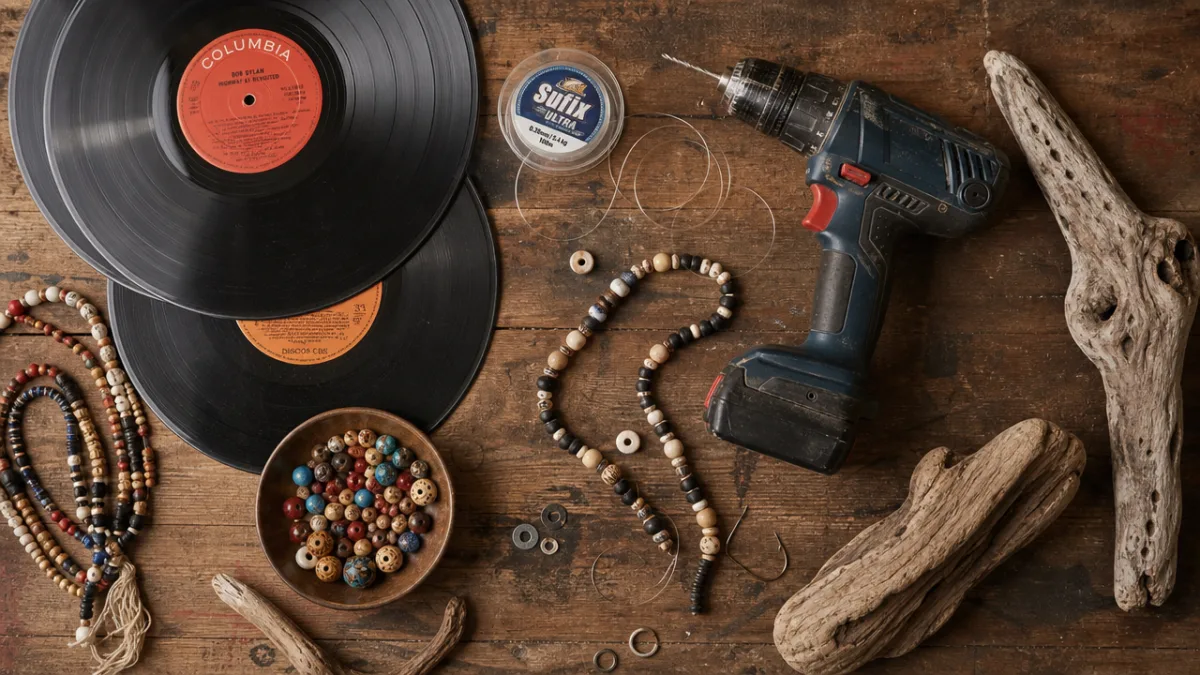
For the records themselves, aim to collect three to five vinyl discs of varying sizes if possible. Standard 12-inch LPs work beautifully as the main centerpiece or top disc, while 7-inch 45s make ideal chime pieces. You will also need a heat source such as a craft heat gun or an oven for shaping, a drill with a small drill bit for making holes, strong nylon fishing line or clear beading thread, and a wooden dowel or sturdy piece of driftwood to serve as the top bar from which everything hangs.
Additional materials that elevate the project include decorative beads, metal washers, old keys, or small bells to add extra chiming elements between the vinyl pieces. A pair of protective gloves is a must when handling heated vinyl, and a wooden skewer or stylus can help shape softened records before they cool. Finally, you may want sandpaper to smooth any sharp edges after drilling, and outdoor-rated varnish or sealant to protect the finished chime from rain and UV damage if it will hang outside year-round.
- 3 to 5 vinyl records in assorted sizes (LPs and 45s work best)
- Craft heat gun or access to an oven preheated to 200°F
- Drill and small drill bit (1/8 inch recommended)
- Nylon fishing line or clear beading thread, at least 50 lb strength for outdoor use
- Wooden dowel or driftwood piece, approximately 12 to 18 inches long
- Decorative beads, metal charms, old keys, or small bells
- Heavy-duty scissors or wire cutters
- Protective gloves for handling hot vinyl
- Sandpaper (medium grit) for smoothing drilled edges
- Outdoor-rated sealant or clear varnish spray
Preparing and Shaping Your Vinyl Records
The preparation stage is where the magic really begins. Vinyl records, when gently heated, become surprisingly pliable and easy to shape into interesting forms. This is what sets vinyl wind chimes apart from other materials — each piece can be uniquely curved, rippled, or folded to catch the wind more effectively and to create a visually dynamic chime rather than flat, predictable discs. The process requires a little patience but is deeply satisfying once you see the vinyl bend to your creative intentions.
If you are using an oven, preheat it to approximately 200 degrees Fahrenheit. Place your vinyl record on a parchment-lined baking sheet and leave it in the oven for two to four minutes, checking frequently. The moment the record becomes soft and flexible — which you can test by gently pressing the edge with a gloved hand — remove it carefully and begin shaping it over a bowl, tube, or freeform with your hands. Work quickly, as vinyl cools and re-hardens within 30 to 60 seconds at room temperature. For more targeted shaping, a heat gun gives you precise control over which sections of the record you soften.
For a wind chime, the most effective shapes are gentle curves or wavy ripples that allow the pieces to swing freely and strike one another as the wind blows. You can also keep some records flat if you prefer a more uniform look. Once each record has cooled and hardened into its new shape, use your drill to carefully create holes along the edges or through the surface. Drill slowly and apply steady pressure to avoid cracking the vinyl. After drilling, run sandpaper around each hole to remove any rough burrs that could fray your hanging line over time.
Tips for Safe Vinyl Heating
Heating vinyl releases small amounts of fumes, so it is important to work in a well-ventilated space. Open windows, run a fan, or better yet, use a heat gun outdoors. Never overheat the record to the point of bubbling or smoking, as this not only ruins the vinyl but produces more significant fumes. A steady, low heat is all you need, and the record will respond beautifully within a short amount of time.
Wearing heat-resistant gloves is non-negotiable when shaping hot vinyl. The material retains heat briefly but is still capable of causing minor burns if you press too firmly with bare hands. Keep a bowl of cool water nearby to dunk your gloved fingers into if needed, and always work on a clean, heat-resistant surface. A silicone mat or ceramic tile makes an excellent work surface that will not be damaged by the brief heat transfer from the record.
If a record does not shape the way you intended on the first attempt, do not worry. You can reheat it and reshape it as many times as necessary without damaging the material, provided you are not overheating it. This flexibility is one of the great advantages of working with vinyl. Practice on a record you care least about first to get a feel for the timing and pressure before moving on to any records with sentimental or visual value that you want to feature prominently in the finished chime.
Assembling Your Wind Chime
With all your records shaped, drilled, and smoothed, the assembly stage is where your wind chime begins to take its final form. This part of the process is enormously rewarding because it is purely creative — you are arranging the elements, choosing the lengths of your hanging strands, selecting which beads or charms to include, and ultimately deciding the visual and sonic personality of your finished piece. Take your time here and lay everything out on a flat surface before committing to any knots.
Begin by preparing your top bar. If you are using a wooden dowel, sand it smooth and consider staining or painting it a color that complements the black of the vinyl — deep navy, forest green, or natural wood tones all look stunning. Drill or carve small notches at even intervals along the dowel where your strands will hang, and tie a length of nylon line at each end of the dowel to form a loop for hanging. Make sure this hanging loop is strong and secure, as it will bear the weight of the entire assembly.
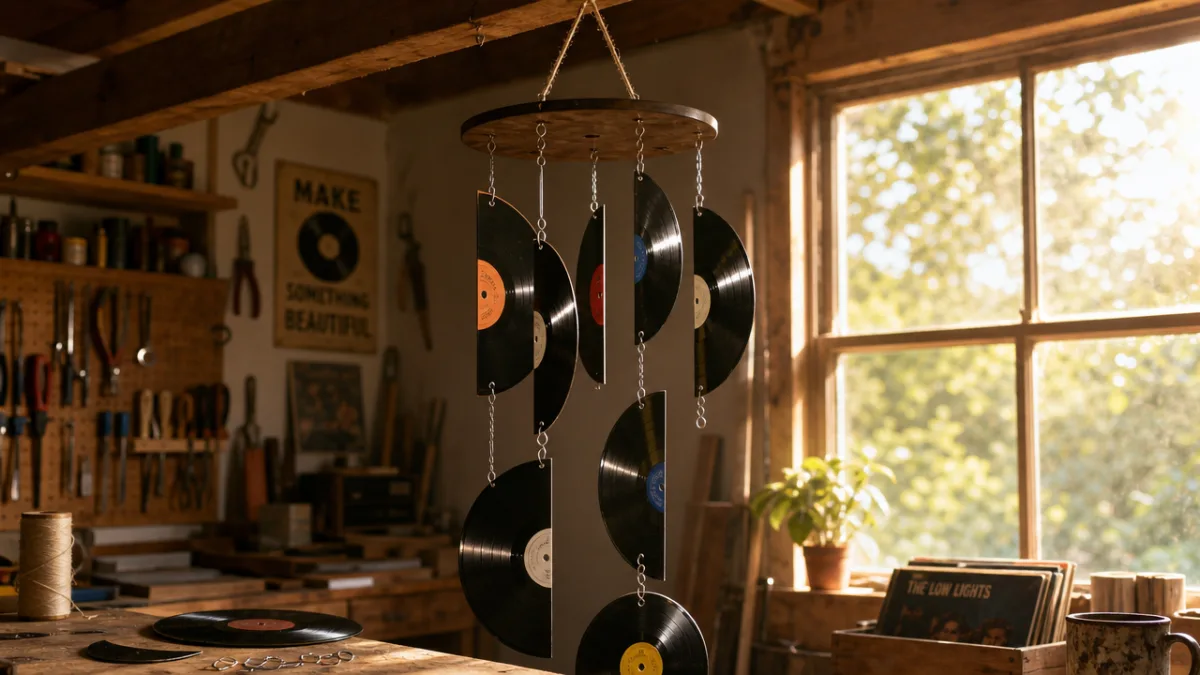
Cut your nylon strands to varying lengths — this creates visual depth and ensures the record pieces hang at different heights, improving both the look and the sound of the chime as pieces strike each other at staggered positions. Thread each strand through the holes in your records, knotting securely above and below each disc to hold it in place. Between records, string decorative beads, metal washers, or small bells to add additional texture and color. Finish each strand with a small, heavy charm or bead at the bottom to give the strand weight and encourage natural swinging motion in the wind.
Arranging for the Best Sound
The sonic quality of your wind chime depends largely on how the pieces are positioned relative to each other. Records that are spaced too far apart will rarely make contact, resulting in a chime that is visually beautiful but nearly silent. Conversely, pieces packed too tightly together will clang constantly and without rhythm, which can become grating. Aim for strands that allow each record to swing approximately two to three inches in any direction before making contact with a neighboring piece.
Heavier pieces produce lower, more resonant tones when they strike, while lighter pieces produce higher, brighter sounds. If you want a more musical-sounding chime, consider combining records of very different weights and thicknesses. The 7-inch 45s are thinner and lighter than 12-inch LPs, so mixing them creates a natural tonal contrast. Adding metal washers or keys to some strands but not others further diversifies the sound palette your chime produces on a windy day.
Once you are satisfied with the arrangement and all knots are secure, hang the chime temporarily at its intended location and observe how it moves in the breeze for a few minutes before making any final adjustments. You may find that one strand is too long and drags, or that two records consistently tangle together. These are easy fixes at this stage — simply adjust the strand lengths or reposition pieces on the dowel. Once everything moves freely and sounds the way you want, apply a small drop of waterproof glue or clear nail polish to each knot to permanently secure it against loosening over time.
Displaying and Maintaining Your Wind Chime
Choosing the right location for your finished vinyl record wind chime is just as important as the crafting process itself. The ideal spot is one that receives a reliable, gentle breeze throughout the day — a covered porch, a garden pergola, beneath the overhang of a deck, or near an open window. Avoid hanging it in a location where it will be subjected to fierce, sustained wind, as violent motion can cause the records to crack over time if they collide at high speed.
In terms of visual placement, consider the backdrop your chime will hang against. The black and iridescent silver of vinyl looks absolutely spectacular against a white or pale painted wall, a weathered wooden fence, or surrounded by lush green garden foliage. If you hang the chime where sunlight will hit it at an angle during part of the day, the records will catch and scatter light beautifully, creating a subtle prism effect that adds another dimension of visual interest to your outdoor space.
Before hanging your chime permanently outdoors, apply a coat of outdoor-rated clear sealant to each vinyl record. While vinyl is a reasonably durable material, prolonged UV exposure can fade and degrade it over years, and moisture can work its way into drilled holes and weaken them over time. A quick spray of UV-resistant clear varnish, applied in thin even coats and allowed to dry fully, will significantly extend the lifespan of your chime and keep it looking beautiful through multiple seasons of outdoor display.
Seasonal Care and Storage
If you live in a climate with harsh winters, it is worth bringing your vinyl wind chime indoors during the coldest months. Extreme cold makes vinyl brittle, and the freezing and thawing cycle can cause hairline cracks to develop, particularly around the drilled holes. Taking it down in late autumn, giving it a gentle cleaning with a soft damp cloth, and storing it flat in a cool, dry place will preserve it beautifully until spring returns.
Throughout the warmer months, a simple maintenance routine will keep your chime in perfect condition. Once a month, check all knots and strands for signs of fraying or weakness, paying particular attention to the points where line passes through drilled holes, as these experience the most friction and stress. Replace any sections of line that appear compromised before they fail completely, and re-seal any areas where the varnish has chipped or worn away. This small investment of time ensures your chime remains safe and structurally sound.
Cleaning the vinyl record pieces themselves is simple and satisfying. A soft cloth lightly dampened with water and a drop of mild dish soap will remove dust, pollen, and grime without scratching the surface or degrading the sealant layer. Dry each piece thoroughly after cleaning rather than allowing water to sit in the drilled holes. With this level of routine care, a well-made vinyl record wind chime can remain a beautiful feature of your outdoor space for many years, weathering the seasons and continuing to sing softly in the breeze every time the wind passes through.
Creative Variations and Personalization Ideas
One of the most exciting aspects of the vinyl record wind chime project is how endlessly customizable it is. Once you have mastered the basic technique, the possibilities for personalization are nearly limitless. You can tailor every element — the shape of the records, the color palette of the beads, the style of the top bar, and the overall length of the chime — to match your personal aesthetic or the specific space where it will live. No two handmade chimes need ever look alike, which makes them incredibly meaningful as gifts or keepsakes.
For a bohemian or eclectic style, consider painting the vinyl records with acrylic paint before sealing them. Swirling patterns in jewel tones, geometric designs in metallic gold and silver, or even hand-painted flowers and vines transform the records from sleek and modern to vibrant and artistic. You can also write meaningful song lyrics, names, or dates on records using a paint pen before sealing, turning your wind chime into a personalized memorial, wedding gift, or celebration of a favorite artist.
For a more natural, rustic aesthetic, pair your vinyl records with elements from the outdoors. Pieces of smooth beach glass, small river stones with holes drilled through them, sections of bamboo, or dried seed pods can all be incorporated into the strands alongside the records. This creates a beautiful contrast between the industrial sleekness of the vinyl and the organic texture of natural materials, resulting in a chime that feels both handcrafted and deeply connected to the natural world it hangs in.
Gifting Your Handmade Wind Chime
A vinyl record wind chime makes an extraordinarily thoughtful and personal gift for music lovers, garden enthusiasts, or anyone who appreciates handcrafted art. If you are making one as a gift, consider using records from the recipient’s favorite artist or genre — even if the records are unplayable, the visual connection to beloved music makes the gift deeply personal. You can often find cheap, scratched records at thrift stores specifically for this purpose, allowing you to choose meaningful titles without spending a fortune.
Packaging a handmade wind chime for gifting requires a little creativity, since the assembled piece can be awkward to wrap. Consider presenting it unassembled in a beautiful box with all the pieces laid out, along with a handwritten instruction card explaining how to hang and display it. Alternatively, carefully coil the assembled chime inside a large gift bag with tissue paper cushioning the vinyl pieces to prevent cracking during transport. Either presentation feels intentional and handcrafted in a way that store-bought gifts simply cannot replicate.
If you find yourself enjoying the process, consider making multiple chimes and selling them at local craft fairs, farmers markets, or through an online shop. Each one can be completely unique, drawing on different color palettes, record sizes, and decorative elements to appeal to a wide range of buyers. The combination of sustainability, nostalgia, and handcrafted artistry makes these chimes a genuinely compelling product that tends to attract admiring attention wherever they are displayed. What began as a simple weekend project can become a creative outlet that connects you with your community and earns a little extra income along the way.








What do you think?
It is nice to know your opinion. Leave a comment.