










DIY Jellyfish: A Complete Guide to Making Stunning Jellyfish Crafts at Home
There’s something almost hypnotic about jellyfish — the way they drift and pulse through the water, trailing those long, gossamer tentacles behind them. It’s no wonder they’ve become such a beloved subject for DIY crafts. Whether you’re looking to add something magical to your home décor, make a one-of-a-kind gift, or just spend a satisfying afternoon doing something creative, making your own jellyfish is one of those projects that’s way more approachable than it looks.
What I love most about jellyfish crafts is how flexible they are. You can make them from coffee filters, tissue paper, yarn, plastic bags, wire, fabric, or whatever you happen to have lying around the house. Every material gives you a completely different look, anywhere from soft and whimsical to bold and sculptural. This guide covers everything from picking your materials to showing off your finished pieces in a way that really does them justice.
It’s easy to see why jellyfish crafts have absolutely taken off on Pinterest and Instagram. They photograph beautifully, they’re genuinely fun to make, and the whole thing can cost just a few dollars. A single afternoon of crafting can produce something that looks like it came from a boutique shop. Whether you’ve been crafting for years or you’re just starting out, you’re in the right place.
Understanding Jellyfish Anatomy for Better Crafting
Before you dive in, it’s worth taking a moment to look at how a real jellyfish is actually built. Every jellyfish has two main parts: the bell, which is that soft, rounded dome on top, and the tentacles, which hang down below in long, flowing strands. Some species also have oral arms — thicker, more elaborate structures that sit closer to the bell. Getting familiar with these elements helps your finished craft look like an actual jellyfish rather than something vaguely blob-shaped.
The bell is typically translucent or semi-transparent, and honestly, nailing that quality makes a huge difference in how your craft turns out. Materials like tissue paper, coffee filters, organza, clear plastic, or iridescent cellophane all do a great job of mimicking that see-through quality. When light filters through them or bounces off them, you get that luminous, otherworldly glow that makes real jellyfish so mesmerizing. Choosing something with a little light interaction really elevates the whole thing.
Tentacles are just as important, because they’re what give a jellyfish its dreamy, flowing character. In the water, they move constantly, creating this sense of perpetual, effortless motion. You can recreate that by using lightweight, airy materials — ribbon, yarn, embroidery floss, strips of fabric, crepe paper, or fishing line all work beautifully. Layering tentacles of different lengths and textures adds depth and makes your jellyfish look like it’s actually drifting through imaginary currents, rather than just hanging there.
Materials You Will Need for a Classic Paper Jellyfish
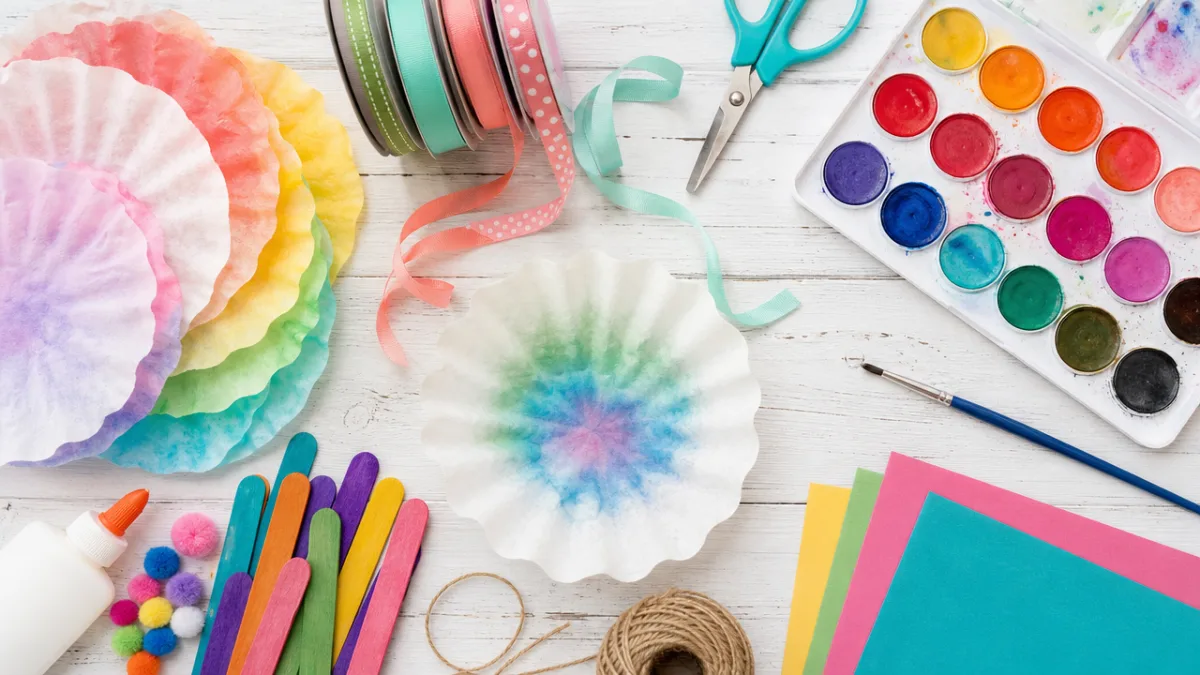
The most beginner-friendly version — and honestly one of the most beautiful — is the coffee filter jellyfish, and you don’t need much to pull it off. The coffee filters themselves form the bell, so grab a bag of large round ones. You’ll also want crepe paper streamers or ribbon in your chosen colors for the tentacles, a small balloon or styrofoam ball to shape the bell, white glue or a glue gun, and some clear fishing line or transparent thread for hanging.
For color, pick up some watercolor paints, food coloring, or alcohol-based inks to tint the filters. These dyes spread through wet paper in the most beautiful, organic way, mimicking the subtle color variations you see in real jellyfish. A little iridescent glitter, some pearl beads, or metallic thread can add a lovely sparkle, and if you want to lean into a more fantastical look, a few sequins or small faux gems glued to the bell can look stunning.
Here’s everything you’ll need to get started: 8 to 12 large coffee filters per jellyfish, one small round balloon or styrofoam ball about three to four inches across, crepe paper streamers or ribbon in two to three coordinating colors, white school glue or a low-temperature glue gun, watercolor paints or food coloring in pink, purple, blue, or aqua, fishing line or clear thread for hanging, scissors, and a small bowl of water for diluting your paint. Once you’ve got it all together, you’re ready to go.
Step-by-Step Instructions for Making a Coffee Filter Jellyfish
Start with coloring your coffee filters, since they need time to dry and it’s easiest to do this step first. Lay them flat on a protected surface and use a brush or dropper to apply diluted watercolor paint or drops of food coloring. The dye will spread naturally through the paper, creating soft, blended gradients that look gorgeous. Two or three colors that blend naturally together — pink and purple, or blue and aqua — give the most realistic effect. Let everything dry completely, which usually takes about thirty minutes to an hour.
Once the filters are dry, it’s time to build the bell. Inflate a small balloon to about three to four inches in diameter and coat the outside with diluted white glue. Drape one coffee filter over the top, smoothing it gently to follow the curve. Brush on another layer of glue, then add a second filter offset slightly from the first so the edges fan out. Keep layering four to six filters this way, with glue between each one, then let the whole thing dry for several hours or overnight.
When everything is fully dry and stiff, pop the balloon and pull it out. You should have a beautifully shaped dome — the bell of your jellyfish. Trim the bottom edge with scissors if you need a cleaner opening. Now cut your streamers and ribbon into strips of varying lengths, roughly eight to eighteen inches. Use your glue gun to attach clusters of tentacles around the inside edge of the opening, mixing lengths and colors to build up a full, flowing look. Finish by attaching a length of fishing line to the top so you can hang it.
Creative Variations and Advanced Jellyfish Designs
Once you’ve got the coffee filter version down, there’s a whole world of variations to explore. Yarn jellyfish are a popular next step — you wrap yarn around a small balloon and coat it with a stiffening solution of equal parts white glue and water. Once it dries and you remove the balloon, you’re left with a gorgeous, textured bell with a delicate, lacy look. Metallic or variegated yarns are especially beautiful here because they catch the light in different ways depending on where you’re standing.
Fabric jellyfish are worth exploring if you enjoy sewing. Cut circles of organza, chiffon, or tulle and gather them at the center to form the bell shape. These have a luxurious quality that makes them perfect for events like weddings or baby showers or any kind of under-the-sea theme. And because fabric holds up so much better than paper, you can reuse them year after year — they’ll actually survive the handling that comes with being party decorations or a mobile in a kid’s room.
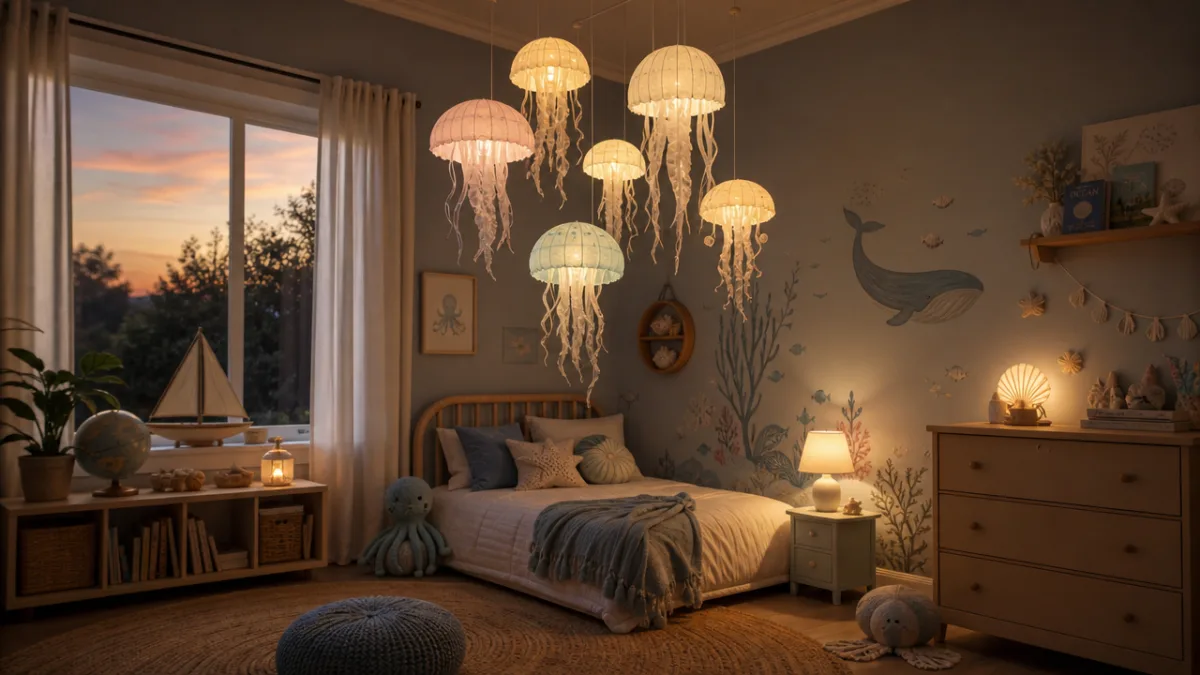
For something really dramatic, try using a large paper lantern as the base for your bell. Lanterns already have that perfect dome shape with no modification needed, and they come in a huge range of sizes. Attach long, flowing strips of iridescent cellophane, ribbon, or fabric to the bottom for sweeping tentacles. Hang three or more at different heights and you’ve got a ceiling installation that genuinely transforms a room into something that feels like an underwater dreamscape.
Glow-in-the-dark jellyfish are another variation that’s easier to pull off than you might expect. Coat your filters or fabric bell with glow-in-the-dark paint before assembly and weave glow-in-the-dark thread or ribbon into the tentacles. When the lights go out, the effect is absolutely magical — soft, eerie, and totally captivating. These are a hit for Halloween decorations, slumber parties, and kids’ bedroom night lights. You can also tuck small battery-operated LED lights inside the bell for a consistent, beautiful glow that works even before the lights go off.

Displaying and Decorating with Your DIY Jellyfish
How you display your jellyfish matters almost as much as how you make them. The most visually striking approach is to hang them in groups at varying heights from the ceiling, so they look like a little bloom drifting through open water. Clear fishing line makes them appear to float in mid-air, which is a genuinely magical effect. Group them in odd numbers — three or five works well — and vary the sizes so the arrangement has a natural, layered feel rather than looking too uniform.
A jellyfish mobile is a beautiful option for nurseries and kids’ rooms. Attach several small jellyfish to a wooden dowel or wire frame and hang it from the ceiling, spacing them at different heights. Air currents from open windows or heating vents will set them spinning gently, and there’s something endlessly soothing about watching them drift. Soft pastels work beautifully in a nursery setting, while bright jewel tones are perfect for a more energetic playroom.
Jellyfish crafts are also wonderfully adaptable to different seasons and occasions. In summer, cluster them in shades of aqua, turquoise, and seafoam for a breezy coastal vibe. In autumn, try amber, copper, and deep burgundy for a warm, harvest-inspired look that’s genuinely unexpected and eye-catching. Over the winter holidays, silver, gold, and icy white jellyfish hung alongside fairy lights make a glamorous, otherworldly alternative to traditional ornaments. The basic form is so versatile that you can reinvent it for just about any time of year.
Tips for Success and Common Mistakes to Avoid
The most common mistake beginners make is rushing the drying process, and it’s a painful one because it can undo a lot of good work. Whether you’re painting coffee filters, gluing yarn, or stiffening fabric, patience really is essential here. If you try to move or shape things before they’re fully dry, your jellyfish will lose its shape, collapse, or stick to the work surface in frustrating ways. It’s worth splitting the project across two sessions — painting and initial shaping in the first, assembly and tentacles in the second once everything has had time to thoroughly dry.
Another thing that trips people up is using too few tentacles. The finished jellyfish ends up looking sparse and a little sad, when it should look full and lush. Real jellyfish have an abundance of flowing tentacles, and your craft version should too. A good rule of thumb: cut at least twenty to thirty individual strips per jellyfish and attach them in overlapping clusters rather than evenly spaced around the edge. That layered density is what gives jellyfish crafts their impressive, cascading silhouette.
Color choices are worth thinking through before you start. The jellyfish that tend to look the most cohesive and beautiful use an analogous color palette — colors that sit next to each other on the color wheel, like blue and purple, or pink and coral. These combinations feel harmonious and naturally beautiful. If you pack too many contrasting colors into a single jellyfish, it can start to look busy and a bit chaotic. Better to keep each individual jellyfish cohesive and save the variety for a group display, where different colors across multiple pieces create interest without any one piece feeling overwhelming.
Storage is something a lot of crafters don’t think about until something gets crushed, so it’s worth planning ahead. Paper jellyfish are particularly vulnerable to humidity and squishing, which can ruin the shape of the bell and flatten the tentacles. When they’re not on display, store them in large cardboard boxes lined with tissue paper to preserve their three-dimensional form. Keep them somewhere cool and dry, away from moisture, direct sunlight, and heat. With a little care, paper jellyfish can last several seasons — so you get to enjoy them again and again without starting from scratch.
Jellyfish Crafts for Different Skill Levels and Ages
One of the best things about jellyfish crafts is how easily they scale to different ages and skill levels. For young kids aged four and up, a simplified version using pre-cut paper plates for the bell and pre-cut streamers to glue on keeps things manageable and fun. Throw in some eye stickers and let them decorate however they want — the results are always charmingly individual and genuinely adorable. It’s a great project for building fine motor skills and creative confidence at the same time.
Older kids and teenagers can handle the full coffee filter method from this guide with minimal adult supervision. This age group tends to really enjoy the painting and dyeing steps, and they can use a glue gun safely with a little guidance. Encourage them to experiment with mixed media — beads, feathers, metallic thread in the tentacles — for something more personalized and sophisticated. Teens especially tend to love the challenge of putting together a coordinated set in a carefully chosen color palette to hang in their room.
For adult crafters and experienced makers, the jellyfish form is a genuinely interesting artistic challenge. Wet felting produces stunning, sculptural jellyfish with organic textures and rich depth of color. Wire-sculpted jellyfish wrapped in colored tissue paper or metallic tape make striking wall art with a modern, graphic quality. And resin casting opens up a whole other world — you can create solid, three-dimensional jellyfish with real flowers, glitter, or pigments suspended inside, pieces that honestly look more like fine art than a craft project.
Jellyfish crafting also works wonderfully as a group activity — for parties, craft nights, classroom projects, or team-building. Set up a station with all the materials pre-organized and let everyone choose their own colors and styles. Because every jellyfish inevitably turns out a little different, there’s a lovely sense of personal creative expression even within a shared format. Hanging all the finished jellyfish together at the end creates an instant communal installation that celebrates what everyone made — and gives each person something genuinely beautiful to take home.








What do you think?
It is nice to know your opinion. Leave a comment.