










DIY Craft Home Decor: How to Fascinate with Personalized Name Art
The Magic of Personalized Name Decor in Your Home
There is something deeply meaningful about seeing your own name — or the names of the people you love — displayed beautifully in your living space. Personalized name decor has become one of the most beloved trends in DIY home styling, blending creative expression with emotional resonance. Whether you are crafting a sign for a nursery, a welcome piece for your entryway, or a gallery wall centerpiece, name-based art gives any room an immediate sense of identity and warmth that store-bought decor simply cannot replicate.
The beauty of DIY name decor lies in its accessibility. You do not need to be a professional artist or own expensive equipment to create something genuinely stunning. With basic craft supplies, a little patience, and a spark of creativity, anyone can transform letters and names into breathtaking home accents. From rustic wooden signs to delicate floral letter arrangements, the range of styles available means there is always a technique that fits your skill level and your home’s existing aesthetic.
Beyond their visual appeal, personalized name pieces carry a sentimental power that elevates them above ordinary decoration. A child’s name spelled out in hand-painted letters above their bed tells them they belong in that space. A family surname wreath on the front door tells every visitor exactly whose home this is. These projects are not just crafts — they are quiet declarations of love, belonging, and personal style that make a house feel genuinely like a home.
Why DIY Name Art Beats Store-Bought Every Time
When you walk through a big-box home goods store, you will find plenty of generic word art and decorative letters, but none of it speaks specifically to you or your family. DIY name decor, by contrast, is created with your exact color palette, your preferred font style, your chosen materials, and your personal aesthetic in mind. The result is something that coordinates perfectly with your existing furnishings and tells your story rather than someone else’s mass-produced version of it.
Cost is another significant advantage. Purchasing large decorative wooden letters from a boutique craft store can easily run forty to one hundred dollars or more per piece, while sourcing unpainted letters from a craft supply store and finishing them yourself costs a fraction of that amount. The same principle applies to canvas name signs, resin name art, and macramé letter hangings — the DIY version is almost always dramatically more affordable, and the process of making it adds its own irreplaceable value to the finished piece.
There is also the dimension of skill-building and personal satisfaction that comes with handmade decor. Each project you complete teaches you something new — how to mix paints for the perfect shade, how to use a Cricut or Silhouette machine to cut precise vinyl lettering, how to arrange dried flowers and greenery around a letter form. Over time, these skills compound, and your home becomes a living portfolio of everything you have learned and created, which is something no retail purchase can ever offer.
Materials and Tools You Will Need to Get Started
Before diving into your first name decor project, it is worth taking stock of the tools and materials that will become the backbone of your craft practice. Having the right supplies on hand not only makes each project go more smoothly but also opens up a wider range of techniques and finishes. Most of what you need is available at major craft retailers, and many items can be sourced affordably online or even repurposed from things you already have at home.
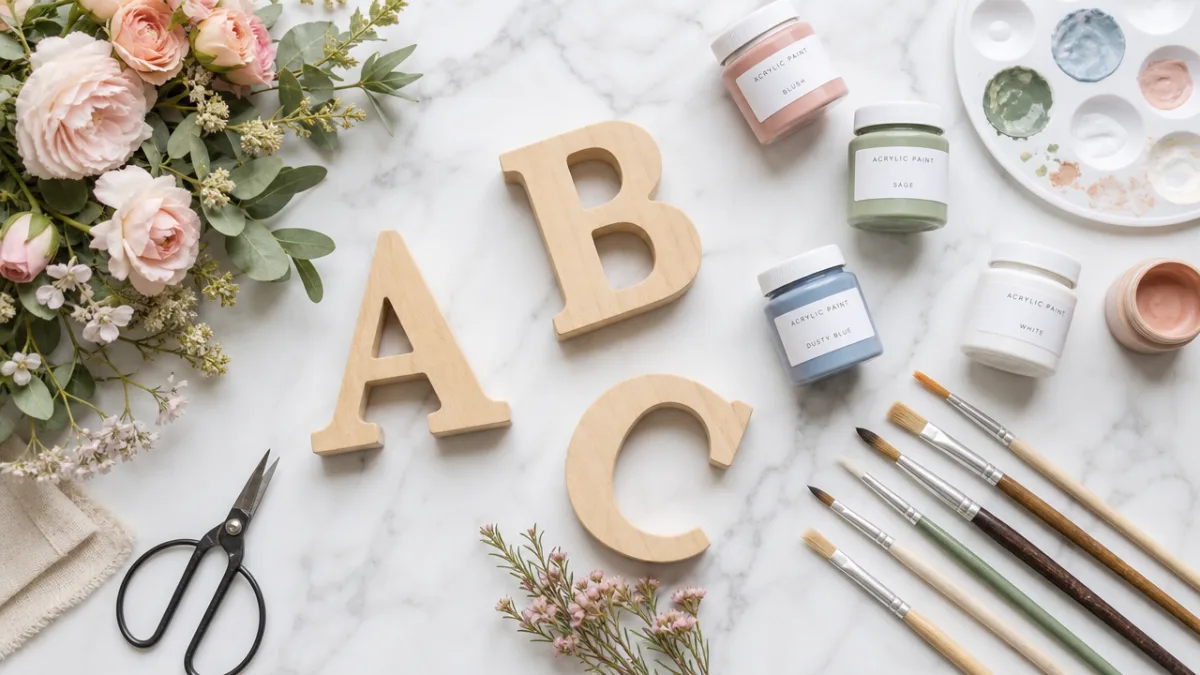
For a well-rounded DIY name decor toolkit, consider gathering the following foundational supplies. Unpainted wooden letters and name cutouts form the base for many projects and come in a wide range of sizes and fonts. Acrylic paints in a variety of colors and finishes — matte, satin, and metallic — give you flexibility across styles. Mod Podge or a similar decoupage medium lets you apply patterned paper, fabric, or tissue to letter surfaces. A quality set of brushes in multiple sizes ensures clean, controlled application whether you are base-coating or adding fine detail work.
Beyond the basics, certain specialty tools can dramatically expand what you are capable of creating. A Cricut Maker or similar cutting machine allows you to cut precise vinyl decals, iron-on designs, and paper elements that would be nearly impossible to replicate by hand. A heat gun is invaluable for embossing effects and for speeding up drying times. Floral wire, hot glue guns, and foam adhesive squares open up three-dimensional and mixed-media possibilities. As you grow in your craft practice, you will likely find yourself accumulating tools organically — buying what a specific project requires and discovering along the way that each new tool unlocks an entirely new category of possibilities.
Choosing the Right Base for Your Name Project
The base material you choose for your name decor project will largely determine the final look, feel, and longevity of the piece. Unfinished MDF wooden letters are among the most popular choices because they are lightweight, inexpensive, sand smoothly, and accept paint and adhesives beautifully. They are available in heights ranging from a few inches up to very large statement sizes, making them versatile enough for projects from tiny nursery accents to dramatic living room installations.
Canvas and wood panel bases are ideal for painted name art where the letters are rendered directly onto a flat surface rather than constructed as dimensional objects. These bases work especially well for watercolor-style name art, calligraphic name prints, and mixed-media pieces that incorporate stenciling, stamping, or collage. Stretched canvas has the advantage of being easy to hang and giving your finished piece the feel of fine art, while wood panels lend a more rustic, farmhouse-adjacent quality that pairs beautifully with shiplap walls and linen textiles.
For crafters interested in a more organic, nature-inspired aesthetic, there are bases beyond wood and canvas worth exploring. Slices of natural wood, with their irregular edges and visible grain, make stunning backdrops for painted or burned name art. Woven macramé or fabric letter forms bring texture and softness to spaces that might otherwise feel too hard and angular. Resin casting offers a luminous, glass-like quality ideal for modern and glamorous interiors. The key is to align your base choice with the overall design language of the room the piece will live in, so that it feels like it belongs rather than like an afterthought.
Step-by-Step Techniques for Stunning Name Art
One of the most beginner-friendly approaches to DIY name decor is the painted wooden letter technique, which requires minimal tools and delivers results that look far more polished than the effort involved might suggest. Start by lightly sanding your unfinished wooden letters to smooth any rough edges, then wipe them down with a slightly damp cloth to remove dust. Apply two thin coats of your base color using a flat brush, allowing each coat to dry fully before adding the next. The key to a professional-looking finish is patience — rushing the drying time leads to streaks and uneven coverage that no amount of additional coats will fully correct.
Once your base coat is dry and smooth, the real creative work begins. You can apply a second contrasting color in a dry-brush technique to create an aged, distressed effect that is particularly lovely on farmhouse and cottage-style pieces. Alternatively, use fine-tipped paint pens or a liner brush to add floral details, geometric patterns, or script embellishments directly onto the painted surface. If you own a cutting machine, cut a vinyl stencil in your chosen pattern and apply it to the letter surface before sponging or brushing paint over it, then carefully peel away the stencil to reveal a crisp, clean design that looks like it was professionally printed.
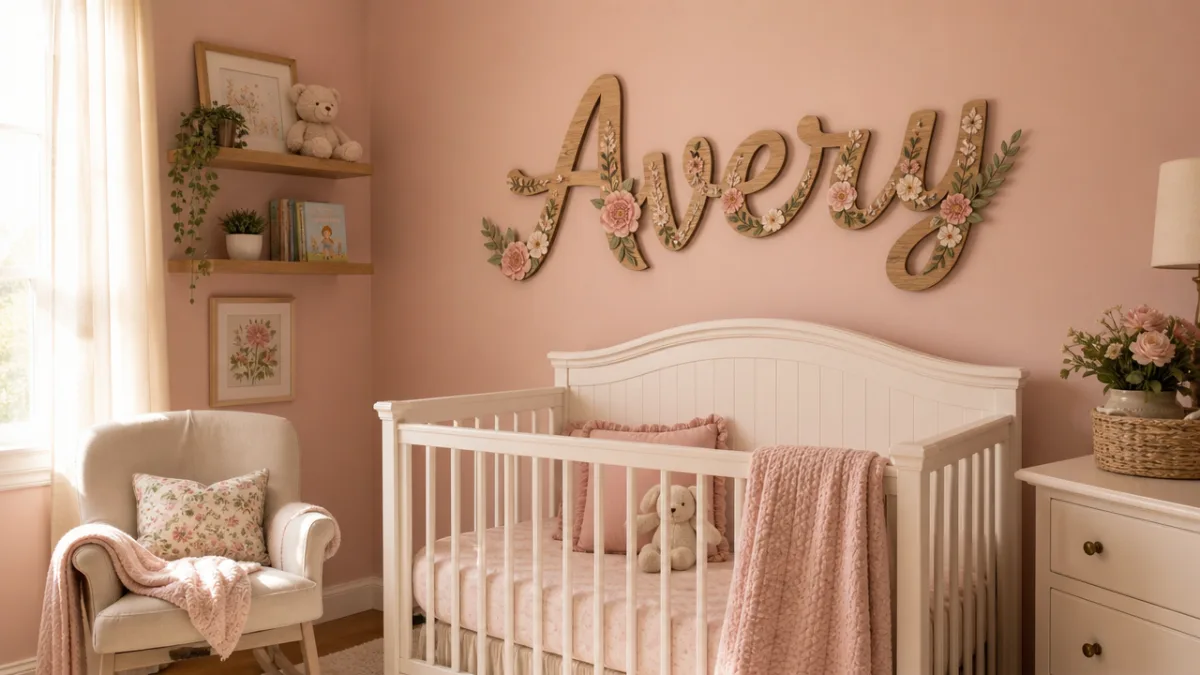
For those who want to incorporate natural elements, the floral letter technique produces some of the most show-stopping results in the name decor world. Begin with a painted or unpainted wooden letter as your base, then use a hot glue gun to attach dried or faux flowers, eucalyptus sprigs, small pinecones, and other botanical elements, working from the outer edges inward and varying the size and texture of each element as you go. The goal is lush density rather than sparse sprinkling — truly beautiful floral letters are covered so completely that the wooden form beneath is essentially a scaffold rather than a visible component. This technique works particularly well for single initial pieces used as nursery decor, wedding signage, or a prominent display on a mantle or bookshelf.
Typography and Font Choices That Make a Difference
The font or letter style you choose for your name decor project is arguably as important as the color scheme or finishing technique, because typography communicates mood and personality before the viewer even registers the specific name being displayed. Serif fonts with their small decorative strokes at the ends of letters convey tradition, elegance, and a certain literary refinement that suits formal living rooms, home libraries, and classic nursery themes. Sans-serif fonts feel modern, clean, and confident — they work beautifully in minimalist spaces and contemporary interiors where visual clutter is actively avoided.
Script and cursive letter styles are perennially popular for name decor because they feel personal and handmade even when executed with great precision, and they carry an inherent romanticism that suits bedrooms, master suites, and spaces meant to feel intimate and warm. The challenge with script-style letters is that individual characters are often designed to connect with one another, which can make three-dimensional wooden letter versions look disjointed unless they are mounted on a backing board or connected with physical bridges. Understanding these practical implications before you begin a project saves both time and frustration.
Block letters — bold, uniform, and highly legible — are the workhorse of the DIY name decor world because they are easy to decorate, read clearly from a distance, and suit an enormous range of decorative techniques. They are ideal for beginner crafters who are still developing their painting skills, because their flat surfaces and simple geometry make even basic paint applications look intentional and tidy. As you become more confident, block letters provide a satisfying canvas for increasingly complex techniques like ombre blending, marbling, and detailed freehand illustration that would be far harder to execute on more complex letter forms.
Styling and Displaying Your Name Decor Pieces
Creating a beautiful name art piece is only half of the equation — displaying it thoughtfully is what transforms it from a craft project into genuine home decor. Consider the wall space where the piece will live before you even begin making it: the scale, the existing color palette, the surrounding furniture and accessories, and the amount of natural light the area receives throughout the day. A piece that is too small for a large wall will look timid and out of place, while an oversized piece in a cramped corner will overwhelm the space. Taking measurements and even mocking up the approximate size with painter’s tape on the wall before you start crafting can save significant disappointment later.
Gallery wall arrangements are a particularly effective way to display multiple name-based elements together — perhaps a large family surname as the anchor piece, surrounded by smaller individual first name letters, framed calligraphy prints, and complementary botanical or geometric accents. When building a gallery wall arrangement, lay all of your pieces out on the floor first to experiment with different configurations before committing to any nail holes. The most visually satisfying gallery walls tend to have a clear center of gravity, a consistent color palette or material theme running through all the pieces, and a mix of sizes and shapes that creates visual rhythm without feeling chaotic.
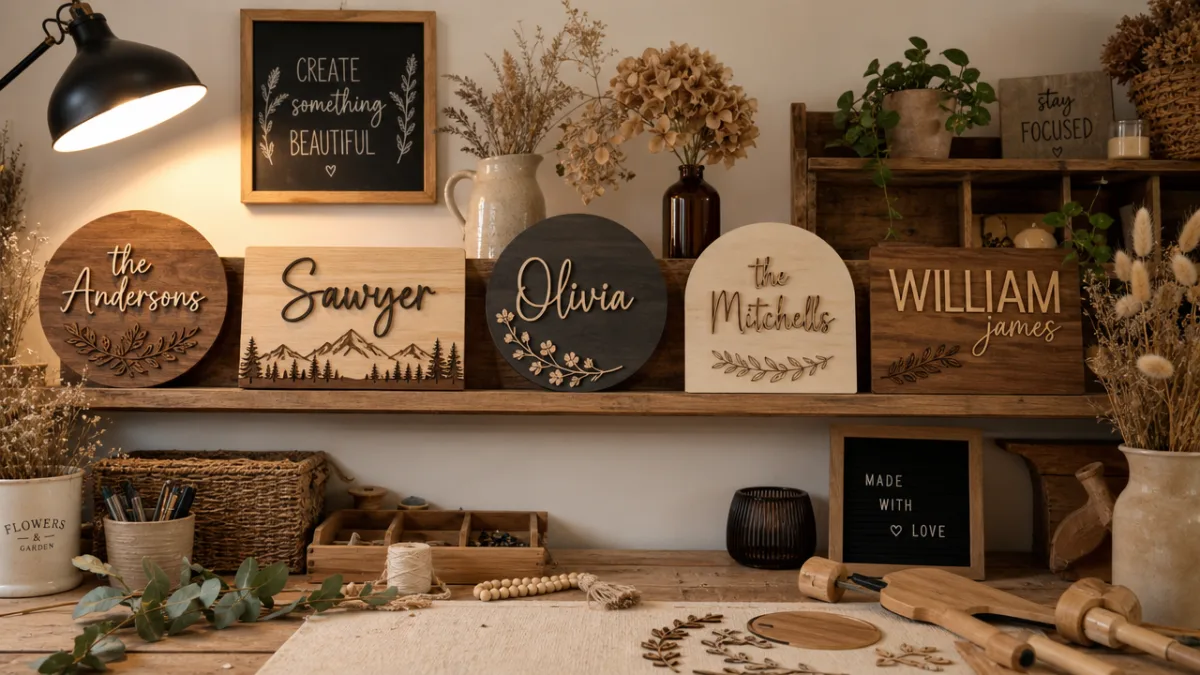
Shelves, mantels, and ledges offer wonderful opportunities to style name decor pieces three-dimensionally, leaning them against the wall and layering them with candles, plants, books, and small sculptural objects. This approach is ideal for people who prefer not to make holes in their walls or who like to rotate their decor seasonally — a set of painted wooden letters is easy to swap out, refresh with new paint, or store when you want a different look. Styling name pieces on a shelf also lets you play with depth and layering in ways that flat wall-mounted arrangements do not allow, creating compositions that feel curated and considered.
Seasonal and Themed Name Decor Ideas
One of the great joys of DIY name decor is how easily it adapts to seasonal themes and special occasions, allowing you to keep your home feeling fresh and festive throughout the year without investing in entirely new pieces. A set of wooden letters spelling out a family name can be repainted or embellished differently for each season — draped with tiny pumpkin and leaf accents for autumn, wrapped in miniature fairy lights and silver ribbon for winter, adorned with faux florals and butterflies for spring, and styled with seashells and raffia for summer. The underlying letter forms remain constant while the decorative treatment transforms them into something entirely new.
Holiday-specific name projects are another rich vein of creative possibility. Christmas ornament letters personalized with children’s names and hung on the tree are cherished keepsakes that grow more meaningful with each passing year. Halloween name signs painted in black and orange with spiderweb accents make delightful seasonal additions to entryway consoles and fireplace mantels. Valentine’s Day calls for soft rose and blush-painted letters adorned with heart motifs, while Easter-themed name art might incorporate pastel watercolor washes and small bunny or floral details that feel sweet without veering into kitsch.
Beyond the major holidays, think about milestone moments that deserve their own commemorative name decor. A baby shower gift of the expected child’s name in hand-painted floral letters is infinitely more personal than any item from a gift registry. A graduation-themed name piece for a new adult heading off to college brings warmth and personal identity to a dorm room that would otherwise feel entirely generic. Wedding gifts of the couple’s new shared surname, rendered in metallic paint or adorned with silk flowers matching the wedding palette, become heirloom pieces that will be displayed for decades rather than tucked into a closet after six months.
Sharing Your Work and Building a Creative Community
Once you have completed a few name decor projects and found your creative footing, sharing your work with a wider community can be one of the most rewarding aspects of the DIY craft journey. Platforms like Pinterest, Instagram, and TikTok have built vast, enthusiastic communities of home crafters who freely share techniques, inspire one another, and celebrate each other’s successes in genuinely generous ways. Posting your finished pieces — and even your in-progress photos and behind-the-scenes moments — invites connection, feedback, and friendship with people who share your passion for making beautiful things.
Photography is the bridge between your physical creation and its digital life, so it is worth putting some thought into how you photograph your finished pieces. Natural light is almost always the most flattering option — place your piece near a window on an overcast day, which acts as a giant soft box, and you will capture colors accurately and shadows gently without harsh contrast. A clean, uncluttered background that complements rather than competes with the piece lets it be the clear subject of the image. Shooting from multiple angles, including flat lay arrangements for smaller pieces and straight-on wall shots for larger installations, gives you a variety of images that tell the full story of the work.
Beyond social media, consider whether your DIY name decor skills might have a commercial dimension worth exploring. Platforms like Etsy have made it entirely possible to turn a craft hobby into a meaningful side income or even a full-time business, with personalized name decor consistently ranking among the most searched and purchased categories on the platform. Starting small — taking custom orders from friends and family, then gradually expanding your reach through online listings and local craft markets — allows you to learn the business side of selling handmade goods without taking on undue risk. Many of today’s most successful Etsy shop owners began exactly where you are now: with a hot glue gun, a set of unpainted wooden letters, and a genuine love for making something beautiful.
Tips for Scaling Up and Refining Your Craft Over Time
As your experience with DIY name decor grows, you will naturally begin to push beyond beginner techniques and seek out new challenges that expand your abilities and the complexity of what you can create. This progression is one of the most satisfying aspects of any creative practice — the moment when something that once felt difficult becomes second nature, and you can devote your full mental energy to the design decisions rather than the technical execution. Embracing this growth mindset and actively seeking out tutorials, classes, and inspiration beyond your current comfort zone is the single most effective way to accelerate your development as a maker.
Investing in higher-quality materials as your skills improve is another meaningful step that pays dividends in the finished product. The difference between a budget acrylic paint and a professional-grade artist acrylic is immediately visible in color richness, coverage, and longevity — qualities that matter much more once you are creating pieces intended to last for years or to sell to customers who expect durability. Similarly, upgrading from a basic hot glue gun to a temperature-controlled model prevents the scorching and stringing that can mar delicate floral elements, and investing in a quality cutting machine opens up design possibilities that simply are not achievable with hand tools alone.
Finally, do not underestimate the value of keeping a creative journal or project log as you develop your craft. Recording which materials and techniques you used for each project, noting what worked beautifully and what you would do differently next time, and sketching ideas for future pieces gives you an invaluable personal reference that accumulates in value over time. Many experienced crafters look back at their earliest project notes and are struck by how far they have come — which is itself a powerful form of motivation to keep creating, keep experimenting, and keep finding new ways to bring the names of the people you love to beautiful, lasting life on the walls of your home.








What do you think?
It is nice to know your opinion. Leave a comment.