










DIY Aquarium: A Complete Guide to Building Your Own Stunning Home Fish Tank
Introduction to DIY Aquariums: Why Build Your Own?
Building your own aquarium from scratch is honestly one of the most satisfying projects you can take on as a fish enthusiast. When you buy a pre-made tank from a pet store, you get what you get — but going the DIY route means you control every dimension, every material choice, and every design decision. Want a long, panoramic freshwater display that fills an entire wall? A compact nano reef that fits on a bookshelf? You can make it happen exactly the way you imagined it.
There’s also a surprisingly strong financial case for building your own tank. Large aquariums from reputable brands can run into the hundreds or even thousands of dollars, but sourcing your own materials and putting it together yourself can cut that cost by 30 to 60 percent compared to retail. That’s real money you can put toward quality filtration, better lighting, or the fish and coral that are really the whole point.
And then there’s the part that’s harder to put a number on — the pride of it. Every time you sit down and watch your fish go about their lives, you’ll know that the tank keeping them safe is something you built. That kind of personal investment tends to make people better caretakers too, because you know your setup intimately, right down to every seam and joint. Whether you’re brand new to the hobby or have been keeping fish for years, the process of building a DIY aquarium is genuinely as rewarding as the finished product.
Planning Your Aquarium: Size, Shape, and Placement
Before you cut a single piece of glass or open a tube of silicone, you really need to spend some time planning. The first big decision is size. Larger tanks are actually more forgiving in terms of water chemistry — more water volume means waste and temperature fluctuations get diluted more effectively. If you’re new to building, a 20 to 55-gallon tank is a reasonable starting point. More experienced builders often jump straight to 75 gallons or bigger custom designs. Just keep in mind that water weighs about 8.34 pounds per gallon, so structural support needs to be part of your planning from day one.
Shape is the next thing to think through. Standard rectangular tanks are the easiest to build and give you the best value in terms of glass used versus water volume, which keeps costs down and gives your fish more room to move. That said, L-shaped tanks, hexagonal designs, and bow-front builds are all doable if you have some intermediate to advanced skills. It’s also worth thinking about how you’ll actually view the tank — a corner placement means two viewing angles, which changes how you’ll want to arrange the interior and where all your equipment will go.
Placement comes with a few environmental factors that are easy to overlook until they become a problem. Direct sunlight is a big one to avoid — it drives algae growth and causes temperature swings that stress your fish. The floor or stand under the tank needs to handle the full weight of water, substrate, rock, equipment, and the tank itself, which can easily reach several hundred pounds for larger builds. And before you commit to a spot, map out your access to plumbing and electrical outlets. Running extension cords halfway across the room is both a safety issue and an eyesore you’ll regret every day.

Materials and Tools You Will Need
Most DIY aquariums are built with glass, and for the front viewing panel you really want to use low-iron or ultra-clear glass. Standard glass has a greenish tint that becomes noticeable over larger spans, while low-iron glass gives you that crystal-clear view you’re after. Acrylic is a popular alternative — it’s lighter and actually stronger than glass — but it scratches more easily and requires different cutting and bonding techniques. For most home builds, 3/8-inch or 1/2-inch glass is the right thickness depending on your overall dimensions, but always verify this against the actual specifications for your planned tank size.
Silicone sealant is what holds the whole thing together, and this is not a place to cut corners. You need 100 percent pure silicone that’s specifically rated as aquarium-safe. Do not use anything with antifungal or antimicrobial additives — those chemicals are toxic to fish and invertebrates. Aquarium-grade silicone is easy to find at hardware stores and pet supply shops. Plan to run thick, even beads along every interior joint and go back over each one with a second pass for the best water-tight seal.
Beyond glass and silicone, you’ll want to have all your tools and supplies gathered before you start — stopping mid-build to track down something you forgot is frustrating and can compromise the quality of your work. Here’s what you’ll need:
- A glass cutter or, better yet, a professional glass shop that can cut your panels to exact specs
- A caulking gun for smooth, controlled silicone application
- Heavy-duty masking tape to hold panels in position while the silicone cures
- A straightedge and measuring tape to keep everything aligned and accurate
- Acetone or isopropyl alcohol to thoroughly clean the glass surfaces before bonding
- Razor blades or a plastic scraper for cleaning up cured silicone
- Safety gloves and eye protection — glass handling is not something to do unprotected
- A level so you can confirm the tank is perfectly flat during assembly
One more thing worth emphasizing: don’t try to save money on the glass itself. Cheap or under-spec glass can shatter under the hydrostatic pressure of a full tank, and the result is a flooded room and a potential injury — not a scenario worth risking. If you’re not sure what thickness you need, there are online calculators and reference charts from aquarium engineering communities that will walk you through the math. When in doubt, go thicker.
Step-by-Step Construction Process
Start by having your glass panels cut to the exact dimensions you worked out during planning. Unless you’ve cut a lot of glass before, it’s worth having a professional glazier handle this — uneven cuts and micro-fractures along the edges are one of the most common causes of aquarium failures down the road. When your panels arrive, inspect every edge carefully for chips, cracks, or rough spots. Lay each one flat on a padded surface and clean all the bonding edges thoroughly with acetone, then let the solvent evaporate completely before moving on.
For assembly, start with the bottom panel laid flat on a stable, level work surface. Stand the two side panels upright along the long edges of the bottom and hold them in place with masking tape, using clamps or weights to brace them if you have them. Run a generous, continuous bead of aquarium silicone along the interior joint where each side panel meets the bottom, then smooth it with a wet fingertip or a silicone tool to make sure it’s in full contact with both glass surfaces. There should be no gaps or voids anywhere in the seam — every gap is a future leak. Work your way around the tank, adding the front and back panels, checking alignment with a square after each one goes in.
Once all four sides are joined to the bottom and to each other, go back and apply a second bead of silicone over every interior joint. That extra layer makes a real difference in long-term seal integrity and gives you a meaningful safety margin. If your tank is wider than 24 inches, it’s also a good idea to add a brace across the top — a strip of glass or acrylic running front to back — to stop the panels from bowing outward under the water’s weight. Then step back and let everything cure for a full 24 to 48 hours at room temperature before you move the tank or start filling it.
The water test is the single most important step before any living thing goes in your tank. Set the empty tank somewhere a leak won’t cause damage — outside on a flat surface is ideal. Fill it completely with fresh water and spend the first hour watching the exterior joints closely, then check again at 12 hours and 24 hours. Run your fingers along every exterior seam and feel for moisture. If you find a leak, drain the tank, let it dry for 48 hours, cut out the bad silicone with a razor blade, re-seal the joint, and test again from the beginning. It’s tedious, but skipping this step is a gamble you don’t want to take.
Filtration, Lighting, and Life Support Systems
A finished tank shell is really just the beginning. The life support systems you choose will make or break whether your aquarium actually thrives. Filtration is arguably the most important piece of the puzzle — it handles physical debris, processes the toxic ammonia that fish waste produces, and keeps your water clear and chemically stable. For most DIY builds, you’ll be choosing between hang-on-back filters, canister filters, or a sump system. A sump — basically a secondary tank housed below the main display that holds all your equipment — is the professional-grade option for larger builds and gives you a lot of flexibility to add gear as your setup evolves.
Lighting pulls double duty in an aquarium, serving both aesthetic and biological purposes. For a fish-only tank, it’s mostly about making your fish look great and giving them a natural day-night rhythm. For a planted tank or reef, though, lighting becomes genuinely critical — plants and corals need specific light spectrums and intensities to photosynthesize and grow. Modern LED fixtures have transformed what’s possible here: full-spectrum output, programmable intensity and color temperature, minimal heat, and far lower energy use than the fluorescent and metal halide setups of years past. It’s worth doing your homework to match the right fixture to your tank’s depth and what you’re trying to grow.
Rounding out the core life support systems are heating, water circulation, and — for planted tanks — CO2 supplementation. Submersible or in-line heaters keep your water at the stable tropical temperatures that most popular freshwater and marine species need, and a common rule of thumb is about 5 watts of heating capacity per gallon. Powerheads and circulation pumps prevent dead zones where waste settles and anaerobic bacteria can start causing problems. For planted setups specifically, a pressurized CO2 injection system can make a dramatic difference in plant growth, which in turn helps keep algae in check and the whole ecosystem better balanced.
Aquascaping and Cycling: Bringing Your Aquarium to Life
Aquascaping is where your creative vision finally gets to take shape, and it’s one of the most enjoyable parts of the whole process. Your substrate is the literal foundation of the design, and it does more than just look good. Planted tanks benefit from nutrient-rich substrates formulated specifically for root feeding, reef tanks typically use live sand or aragonite to help maintain calcium and alkalinity, and freshwater fish-only displays give you a lot of freedom — natural gravel, polished river stones, whatever fits the look you’re going for and suits the species you’re keeping.
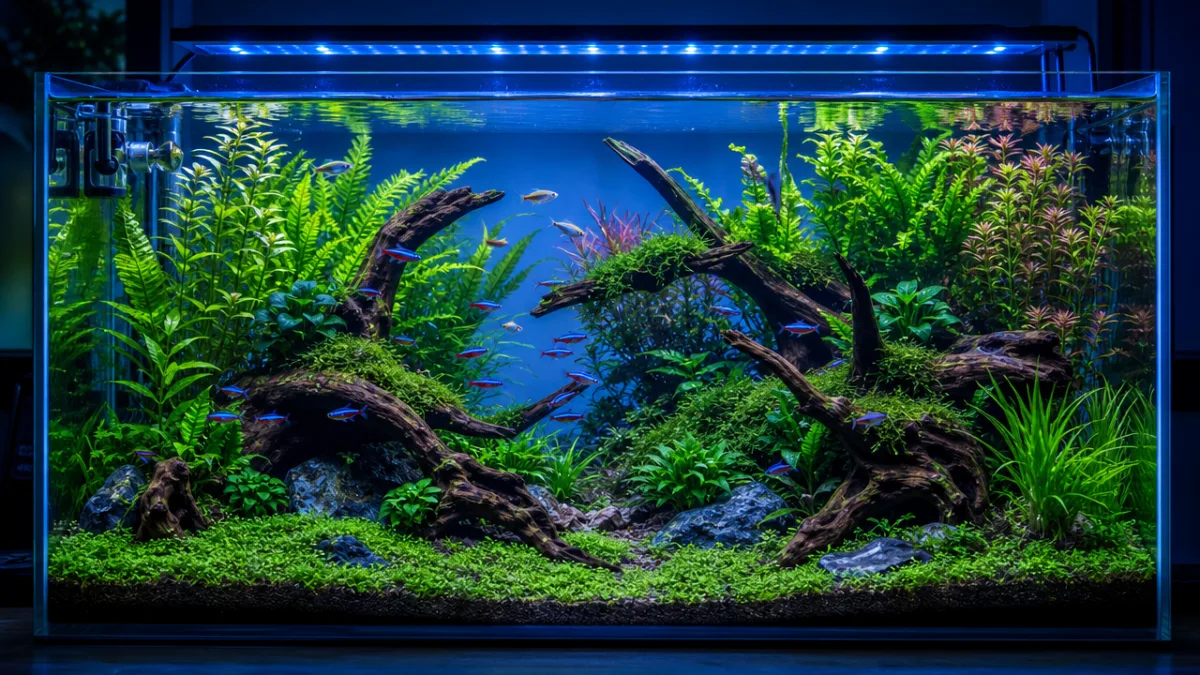
Hardscape elements like rocks and driftwood add depth, visual contrast, and the hiding spots that fish and invertebrates genuinely need to feel secure. There are some well-established aquascaping styles worth knowing about before you start arranging things. The Nature Aquarium style, developed by Takashi Amano, draws inspiration from natural landscapes and often uses striking rock types like Seiryu stone or Dragon Stone to build dramatic mountain and valley scenes. Iwagumi is more minimalist, built around clean stone arrangements with plenty of open swimming space. Dutch style goes in a completely different direction, prioritizing dense, colorful plantings organized into structured rows and terraces. Knowing which direction appeals to you before you start will help you shop for hardscape and plants with a clear vision in mind.
Before a single fish goes in, your tank needs to complete the nitrogen cycle. This is the biological process where beneficial bacteria establish themselves in your filter media and substrate, converting toxic ammonia first into nitrite and then into the much less harmful nitrate. It typically takes four to six weeks from scratch, and rushing it is probably the single most common mistake new aquarists make. Track the progress with a liquid test kit — measuring ammonia, nitrite, and nitrate as you go. When ammonia and nitrite both hit zero and nitrate starts to accumulate, the cycle is complete and you can start adding livestock, slowly and in small groups.
Once the tank is cycled and your first fish are in, the builder’s role shifts to caretaker. Weekly water changes of around 20 to 30 percent keep nitrate from building up and replenish trace minerals. Regular testing keeps you on top of the chemistry. Trimming plants, wiping the glass with a magnetic scraper, and rinsing filter media in tank water rather than tap water all become part of the routine that keeps things looking great long-term. And when you hit a snag — which everyone does eventually — the DIY aquarium community online is genuinely one of the best resources out there. Forums, YouTube channels, and social media groups are full of experienced builders who have probably dealt with whatever you’re facing and are usually happy to help.








What do you think?
It is nice to know your opinion. Leave a comment.