










Craft Room Organisation Ideas for Creative Spaces
Why an Organised Craft Room Transforms Your Creative Experience
Walking into a well-organised craft room can feel like stepping into a sanctuary specifically designed for your imagination. When every tool has a home and every supply is visible and accessible, the mental load of creating drops dramatically. You spend less time hunting for the right shade of thread or that elusive pair of scissors and more time actually making things. Organisation is not about sterility or perfection — it is about creating conditions in which creativity can genuinely thrive without friction or frustration slowing you down at every turn.
Research into creative productivity consistently shows that a cluttered environment competes for your attention. Every pile of unsorted fabric, every tangled ribbon, every drawer stuffed with mismatched embellishments is a small cognitive distraction pulling focus away from your project. When your craft space is thoughtfully arranged, your brain can settle into a flow state more readily. The physical environment becomes an extension of your creative mind rather than an obstacle to it, and that shift in experience is profound for anyone who crafts regularly.
Beyond productivity, an organised craft room also protects your investment in supplies. Proper storage keeps paper from warping, fabric from gathering dust, and adhesives from drying out prematurely. Organisation is therefore both a practical and a financial decision, one that pays dividends every time you sit down to create. Whether you have a dedicated room, a shared corner, or a compact closet studio, these principles apply equally and can be adapted to almost any space with a little planning and the right storage solutions.
Zoning Your Craft Space for Maximum Efficiency
One of the most powerful concepts in craft room organisation is zoning — dividing your space into distinct areas based on the type of activity each zone supports. Think of it like a professional kitchen, where prep, cooking, and plating each happen in a specific area. In a craft room, you might define a cutting zone near a large table or cutting mat, a sewing zone anchored by your machine, a paper crafting zone with flat storage for cardstock and stamps, and a finishing zone where you assemble, photograph, or wrap completed projects. Even in a small room, mental zones improve workflow enormously.
When designing your zones, consider the natural movement patterns of your most frequent projects. If you sew regularly, your fabric storage should be adjacent to your cutting table, which in turn should be close to your sewing machine. Interrupting that flow by placing supplies on the opposite side of the room adds unnecessary steps that accumulate into real frustration over time. Walk through a typical project in your mind before committing to a layout, and note every time you would need to cross the room. Reducing those crossings is the heart of efficient zone planning.
Zones also help enormously with tidying up between sessions. When everything within a zone belongs together, returning items to their correct location becomes intuitive rather than laborious. Children or other household members who occasionally use the space can also respect zones more easily when the logic of the layout is visible and clear. Consider using colour-coded labels, different flooring textures, or even distinct lighting temperatures for each zone to reinforce the boundaries and make the organisation system self-explanatory to anyone who enters the room.
Creating a Dedicated Cutting and Measuring Zone
The cutting and measuring zone deserves particular attention because it typically requires the most surface area and the widest variety of tools. A self-healing cutting mat in the largest size you can accommodate is the cornerstone of this zone. Surround it with a dedicated holder for rotary cutters, scissors, and rulers — a magnetic strip mounted to the wall works beautifully for metal tools and keeps blades within reach without the danger of rummaging through drawers. A small pegboard panel above the cutting table can hold frequently used measuring tools, bias tape makers, and marking instruments.
Storage beneath the cutting table is prime real estate that many crafters underutilise. Rolling carts that tuck underneath can hold fabric yardage sorted by colour or fibre type, and shallow drawers can store interfacing, stabilisers, and batting scraps. If your cutting table doubles as a general workspace, consider a canvas tool roll or a portable caddy that you can set out when cutting and store away when working on other projects. This flexibility keeps the surface clear and the zone functional even in multi-purpose rooms where real estate is limited.
Sewing and Machine Craft Zone Essentials
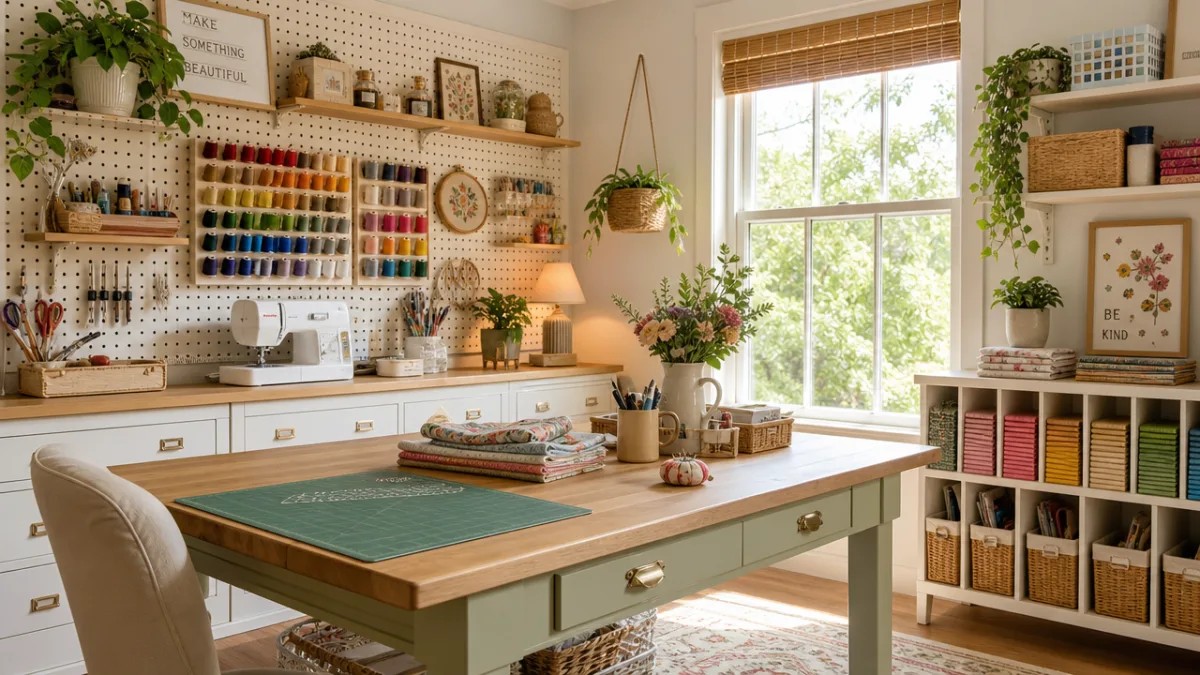
The sewing zone should be designed around your machine or machines, keeping bobbin storage, presser feet, and thread within arm’s reach of the seated position. A thread rack mounted at eye level on a nearby wall allows you to see your entire thread collection at a glance and select colours without getting up repeatedly. Bobbins can be stored on a dedicated bobbin tower or organised in a clear acrylic case sorted to match the thread spools above them, which speeds up the process of threading up considerably during a project.
Lighting in the sewing zone deserves special investment. Poor lighting causes eye strain and increases the risk of mistakes with seam placement and needle safety. A daylight-spectrum lamp positioned to illuminate the needle area without casting shadows is worth every penny. Some crafters add under-shelf LED strips that bathe the machine in consistent, flattering light throughout the day regardless of what natural light is doing outside. Good lighting is not a luxury in a sewing zone — it is an ergonomic necessity that directly affects the quality and safety of your work.
Clever Storage Solutions for Every Supply Type
Not all craft supplies are created equal, and a truly well-organised craft room acknowledges the radically different storage needs of different materials. Paper products need flat, horizontal storage to prevent warping and creasing, while ribbons and trims benefit from vertical spooling systems that keep them tangle-free and visible. Paints, inks, and mediums need upright storage with labels facing forward, while buttons, beads, and embellishments thrive in small compartmentalised containers where individual pieces can be seen and retrieved without disturbing the rest. Matching storage type to supply type is the foundation of a system that stays organised long-term.
Clear storage is one of the single most impactful investments a crafter can make. When you can see your supplies without opening containers, the cognitive effort of locating what you need drops to almost nothing. Clear stackable bins, glass jars on open shelving, transparent drawer units, and acrylic organisers all serve this principle. Many professional crafters and organisers advocate for a rule: if you cannot see it within three seconds of entering the room, it effectively does not exist. Opacity breeds forgotten supplies and duplicate purchases, both of which work against the organised, efficient space you are building.
Repurposed and unexpected storage vessels are a hallmark of beautifully organised craft rooms. Vintage tins hold washi tape collections with considerable style. Wooden cutlery trays become drawer organisers for stamping supplies. Mason jars on a mounted wooden board keep paintbrushes bristles-up and visible. Cake stands or tiered servers display frequently used tools with a decorative touch that makes the organisation itself feel intentional and personal. The best craft room storage solutions balance function with aesthetic — they should make the room feel curated, not clinical, and reflect the creative personality of the person who works there.
Fabric and Yarn Organisation Strategies
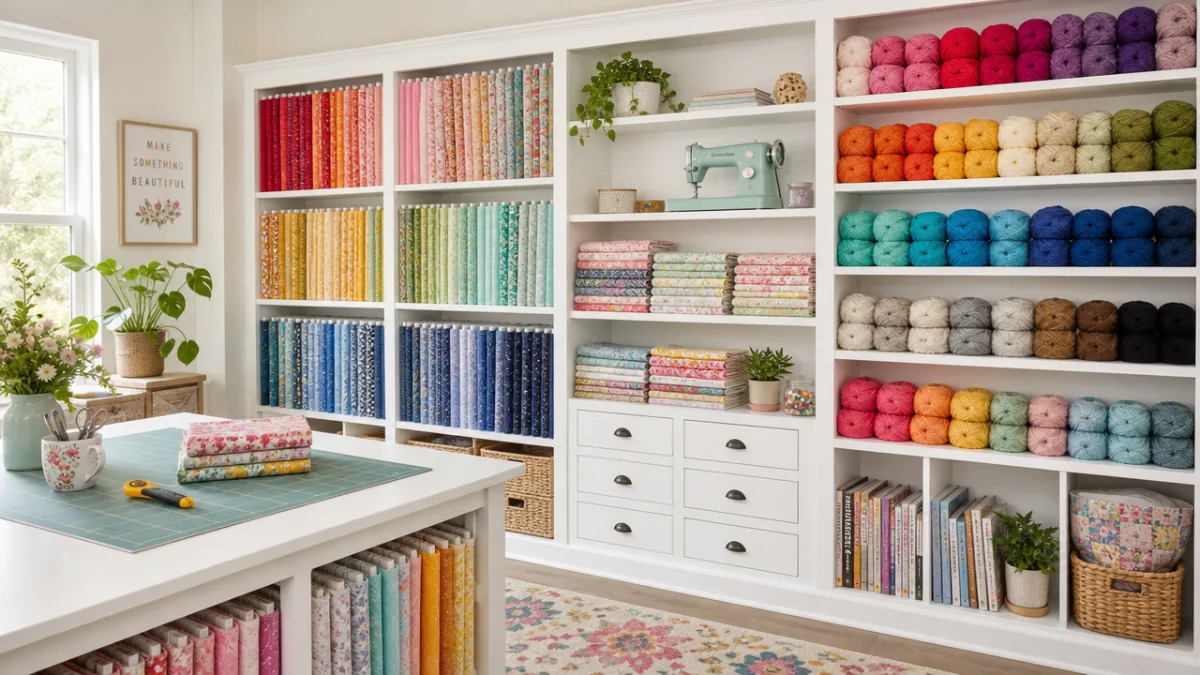
Fabric and yarn represent some of the most challenging organisation problems in any craft room simply because of their volume, their variety, and their tendency to expand over time. A thoughtful fabric storage system begins with folding — the KonMari-inspired method of folding fabric into neat rectangles that stand upright in bins allows you to see every piece of fabric in a drawer or bin at once, much like files in a filing cabinet. Sorted by colour, fibre type, or project designation, this approach turns what is typically a chaotic pile into a scannable, satisfying collection that is genuinely useful when you are shopping your stash.
For yarn, the visual appeal of organisation is as important as the function. A yarn wall — created by mounting wooden dowels or hanging baskets on a large wall panel — turns your yarn stash into living, colourful decor while keeping skeins accessible and tangle-free. Alternatively, open wire baskets on shelving units sort yarn by weight, fibre, or colour family. Including a small label with fibre content and yardage information tied to each skein with a paper clip saves enormous time when planning new projects and prevents the frustrating situation of discovering mid-project that you do not have enough of a particular yarn to finish.
Scrap fabric and yarn scraps deserve their own dedicated container rather than being mixed back into the main stash. A large open bin or laundry basket labelled clearly as a scrap bin invites you to use those smaller pieces creatively in future projects and prevents the main storage from being infiltrated by oddments too small for full projects. Some crafters further divide scraps by size — pieces larger than a fat quarter in one bin, strips and small pieces in another — to make the scrap stash genuinely useful rather than a dumping ground for leftovers that never get touched.
Paper and Cardstock Storage for Paper Crafters
Paper crafters face a unique organisational challenge: cardstock, patterned paper, and specialty papers are fragile, come in a huge range of sizes, and are easily damaged by improper storage. Vertical paper organisers — whether commercial products designed for the purpose or repurposed magazine files and wooden crates — keep papers upright and accessible without creasing. Organising by colour family within these vertical slots allows for intuitive browsing when selecting papers for a project. Dedicated slots for specialty papers like vellum, shimmer stock, or kraft paper prevent these premium materials from being lost among standard cardstock.
Stamps, dies, and stencils benefit from a system that prioritises visibility and protects the intricate detail of each piece. Clear storage pockets in a binder allow stamps to be seen and accessed quickly, organised by theme or manufacturer. Steel dies can be stored on magnetic sheets inside binders or on magnet boards, where they adhere safely and can be fanned out for selection. A well-organised stamp and die collection dramatically speeds up the process of finding the right element for a project and prevents the heartbreak of discovering a beloved die has been bent or a stamp set has been separated from its lid.
Wall Space and Vertical Storage: Going Up to Gain Space
One of the most consistently underutilised resources in any craft room is the vertical space above working surfaces and along walls. In a room where floor space is at a premium, thinking vertically can effectively double or triple your usable storage. Floor-to-ceiling shelving units transform an entire wall into a functional storage system that holds supplies, tools, reference books, and decorative elements simultaneously. Installing floating shelves at varying heights above work surfaces creates storage that is both accessible and visually dynamic, turning an ordinary wall into the focal point of the room.
Pegboards are beloved in the craft room community for good reason — they offer infinitely reconfigurable storage that can be adapted as your supply collection and workflow evolve. A large pegboard panel above a primary work surface can hold everything from scissors and rulers to washi tape dispensers, spray bottles, and small baskets of frequently used embellishments. The beauty of pegboard lies in its transparency: everything is visible, everything is accessible, and reorganising is as simple as moving a hook. Painting the pegboard a bold colour that complements the room’s palette also transforms it from utilitarian to genuinely decorative.
Over-door storage is another vertical strategy that crafters often overlook. The back of a craft room door can accommodate a fabric shoe organiser, a purpose-built over-door rack, or even custom-built shelving if the door is solid and the hinges are heavy enough to bear additional weight. These spaces are ideal for storing items used occasionally rather than daily — specialty tools, seasonal project supplies, or a collection of reference books and magazines. Using every vertical surface intentionally ensures that your most precious resource in a craft room — horizontal work surface — remains clear and available for actual creating.
Maximising Small Craft Spaces with Multi-Functional Furniture
Not every crafter has the luxury of a dedicated room, and many of the most beautifully organised craft spaces in the world occupy corners of bedrooms, sections of living rooms, or converted closets. For these compact spaces, multi-functional furniture is transformative. A fold-down wall desk with integrated shelving and a pegboard above it can serve as a complete craft station that folds entirely flat when not in use, returning the room to its primary function without a trace of the creative workspace it conceals. These murphy-style craft stations are available commercially and are also a popular woodworking project for crafters who enjoy building their own storage.
Rolling carts and trolleys — particularly the now-iconic RASKOG-style tiered trolley — have become synonymous with portable craft organisation, and for excellent reason. A well-stocked rolling cart can serve as a mobile supply station that travels to wherever you are working, whether that is the craft room, the kitchen table during a family project night, or the living room floor for a wrapping marathon. Organising a rolling cart by project type — one cart for painting supplies, one for sewing notions, one for paper crafting — creates instant, portable kits that require no repacking before a crafting session begins.
Maintaining Your Organised Craft Room Over Time
The most beautifully organised craft room in the world will descend into chaos within weeks if the organisation system is not designed for real-life use and accompanied by simple maintenance habits. The key insight most professional organisers share is that maintenance is far easier than initial organisation, but it must be built into your crafting routine intentionally. The most effective habit is the one-session rule: before beginning a new project or crafting session, spend five minutes returning items from the last session to their designated homes. This brief investment prevents the slow accumulation of displaced items that gradually erodes an otherwise excellent organisation system.
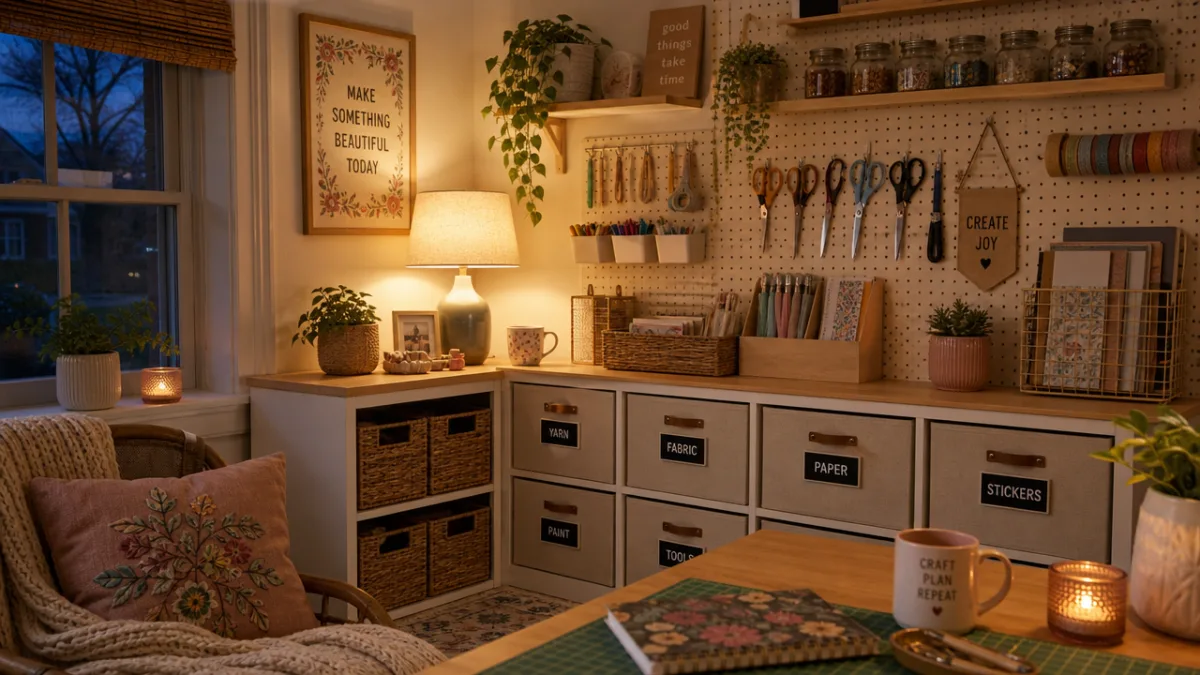
Labelling is the silent backbone of any organisation system that survives contact with real creative life. Labels communicate the intention of a space to your future self — who may be tired, distracted, or in a hurry — and to anyone else who uses the space. Labels can be as simple as a hand-lettered paper tag or as polished as a printed laminated label from a dedicated label maker. The format matters less than the consistency: when every bin, basket, drawer, and shelf is labelled, the path of least resistance becomes putting things away correctly rather than leaving them out. Labelling transforms good intentions into durable habits.
Regular seasonal reviews of your craft supply stash are an essential maintenance practice that prevents supplies from outliving their relevance in your collection. Schedule a dedicated hour every three to six months to go through your supplies with honest eyes. Donate unopened or barely used supplies that no longer align with your current creative interests, discard dried-out mediums and worn-out tools, and reassess whether your storage solutions are still serving your evolving workflow. A craft room is a living space that should grow and change alongside your creative practice, and regular reviews ensure that the organisation system remains a tool in service of your creativity rather than a monument to a version of your creative self that has moved on.
Ultimately, the most important principle in craft room organisation is that the system should serve you, not the other way around. There is no single correct method, no universal layout, and no storage solution that works equally well for every crafter. The best organised craft room is the one you will actually maintain, one that reflects how you genuinely work rather than how you imagine you should work. Start with the zones and solutions that address your most persistent frustrations, implement them thoughtfully, and build from there. An organised creative space is not a destination you arrive at once — it is a continuous, enjoyable process of refining an environment that supports the work you love most.








What do you think?
It is nice to know your opinion. Leave a comment.