










20 Craft Room Ideas With Practical Design Layouts
Why a Dedicated Craft Room Changes Everything
Having a dedicated space for your creative pursuits is one of the most transformative decisions a crafter can make. When your supplies are scattered across the kitchen table, a corner of the bedroom, and various closets throughout the house, your creative energy is fragmented before you even begin a project. A thoughtfully designed craft room pulls everything together into one purposeful environment where imagination can flourish without the constant frustration of hunting for scissors or untangling ribbon from a drawer full of unrelated items.
Beyond simple convenience, a well-designed craft room communicates something important to yourself and your household: that your creative work has value and deserves a proper home. This psychological shift is more significant than it might initially sound. When you sit down in a space that has been intentionally arranged for your needs, your brain shifts into a focused, productive mode more quickly. The ritual of entering your craft room becomes a cue that it is time to create, experiment, and express yourself without distraction or apology.
The practical benefits compound over time in ways that are easy to underestimate. You stop losing supplies, you stop duplicating purchases because you forgot what you already owned, and you stop abandoning half-finished projects because putting them away in a disorganized space felt too daunting to ever return to. A craft room with a practical design layout is an investment in the continuity and sustainability of your creative practice, not merely a luxury for those with extra square footage.
Assessing Your Space and Creative Needs Before You Begin
Before purchasing a single shelving unit or storage bin, take a careful inventory of what you actually create and what materials those projects require. A quilter who works with large fabric cuts and a long-arm sewing machine has fundamentally different spatial needs than someone who primarily does scrapbooking or jewelry making. These differences should drive every decision about layout, furniture scale, and storage configuration. Generic craft room inspiration is a starting point, but your room must ultimately reflect the specific demands of your own creative practice.
Walk through your existing collection of supplies and sort them honestly into categories: what gets used weekly, what gets used seasonally, and what has not been touched in more than a year. This exercise accomplishes two things simultaneously. It gives you a realistic picture of your storage requirements, and it forces a decluttering moment that will make the eventual organization far more effective. There is no point in designing elaborate storage for supplies you no longer need or enjoy using. A streamlined collection is far easier to manage than a comprehensive one that includes items collected out of habit rather than genuine creative intent.
Measure your available space meticulously, noting not just overall square footage but also the locations of windows, electrical outlets, doors, and any architectural quirks like sloped ceilings or protruding columns. Natural light is particularly precious in a craft room because accurate color perception matters enormously when you are selecting fabrics, paints, or papers. If you are working with a small or awkward space, acknowledging those constraints honestly at the planning stage will save you considerable frustration later and push you toward creative layout solutions you might not have considered otherwise.
Storage Solutions That Keep Supplies Visible and Accessible
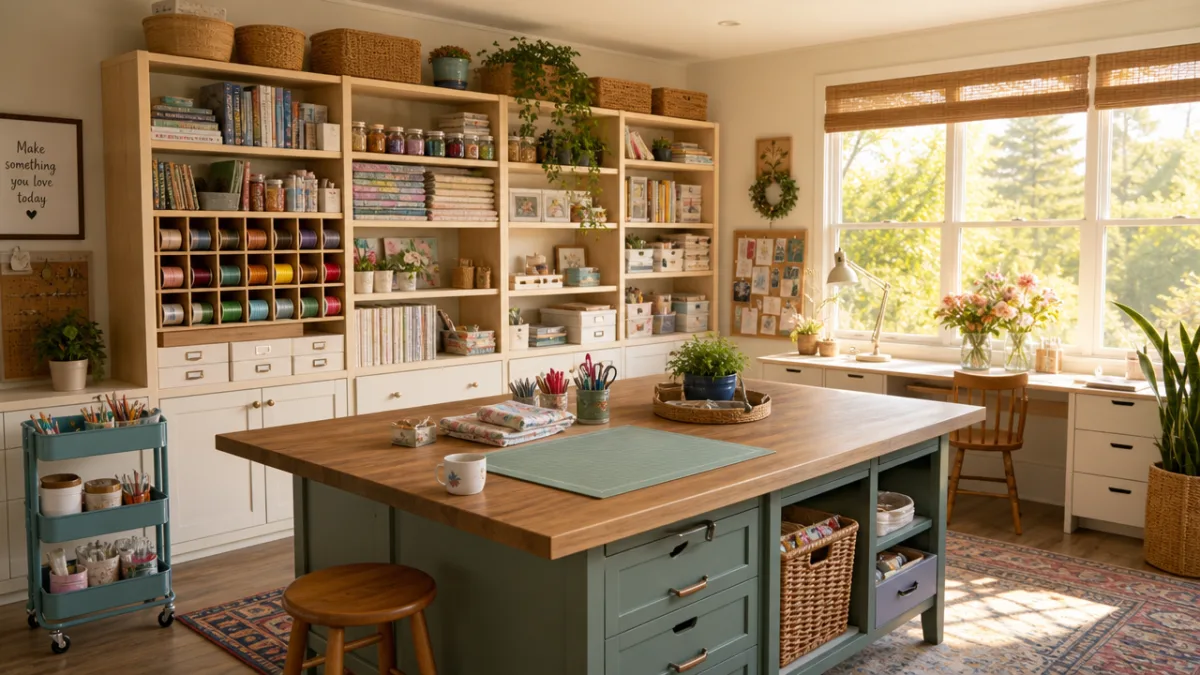
The single most common mistake in craft room design is prioritizing aesthetics over accessibility. Beautiful matching boxes stacked on high shelves look wonderful in photographs but create a system where half your supplies are effectively invisible and therefore unused. The most effective craft storage solutions keep items visible at a glance, easy to retrieve without moving other things, and simple to return to their proper place after use. When putting things away is as easy as taking them out, you will actually maintain your organizational system over the long term rather than watching it collapse within weeks.
Open shelving is the cornerstone of most practical craft room designs, and for good reason. When supplies are visible, you use them more readily, combine them more creatively, and notice when stock is running low before you find yourself mid-project without a critical material. The key to making open shelving work aesthetically is to use consistent containers within each category. Clear bins or jars are particularly effective because they offer the visibility benefits of open shelving while containing small items that might otherwise look chaotic. Label everything, even when you are certain you will remember what a container holds, because certainty tends to evaporate several months after you organize a space.
Consider these storage approaches that experienced crafters consistently recommend for their practical effectiveness:
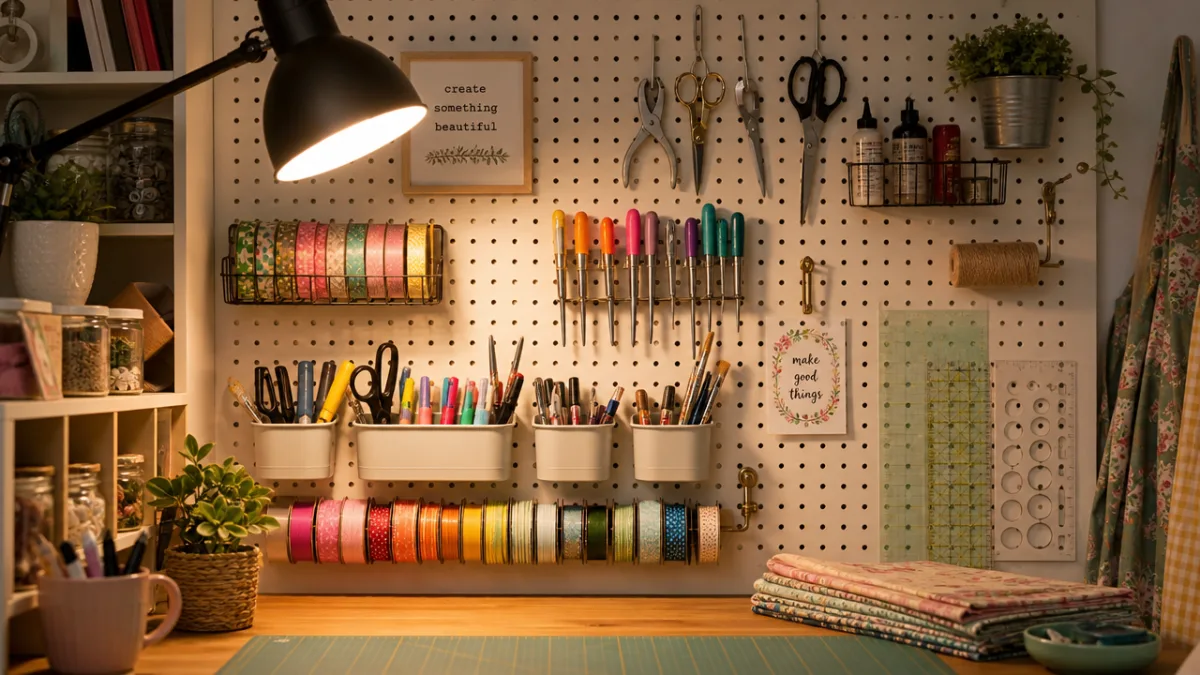
- Pegboards mounted at workstation height for tools and frequently used small items, keeping surfaces clear while maintaining instant accessibility
- Rolling carts that can be pulled to wherever you are working and tucked away when a project is complete
- Vertical file organizers for storing flat materials like cardstock, foam sheets, and patterned papers without bending or creasing
- Tiered lazy Susans inside deep cabinets to eliminate the dead zones where items disappear behind other items
- Drawer dividers and small trays inside larger drawers to prevent the slow entropy of mixed supplies
- Wall-mounted spice racks repurposed for storing small bottles of paint, ink, or other liquid supplies upright and visible
Seasonal and bulk storage deserves its own thoughtful planning separate from your everyday working supplies. Items you use only a few times per year, such as holiday-specific embellishments or specialty tools for techniques you explore occasionally, should be stored in a way that keeps them out of your daily workspace without making them difficult to retrieve when the season arrives. Clearly labeled bins on higher shelves or in a closet adjacent to the craft room work well for this purpose, provided the labeling system is specific enough to jog your memory months later when you are looking for something and cannot quite recall where you put it.
Workstation Design for Comfort and Productivity
Your primary work surface is the heart of your craft room, and investing thoughtfully in its design pays dividends every single time you sit down to create. The first consideration is height. Standard desk height works well for seated computer use but may be too low for crafting tasks that require you to apply pressure, look down at your work at an angle, or work with large flat materials spread across the surface. Many dedicated crafters find that a slightly higher surface, around 34 to 36 inches from the floor, allows for a more comfortable working posture that reduces shoulder and neck strain during extended sessions.
Surface area matters enormously and is consistently underestimated by people designing craft rooms for the first time. A project that appears compact in its finished form often requires spreading out considerably during construction. Quilters need room to layer and smooth batting, scrapbookers benefit from being able to lay out an entire page spread simultaneously, and paper crafters need space to work with large die-cutting machines alongside the materials going through them. If your room allows it, an L-shaped or U-shaped workstation configuration gives you distinct zones for different stages of a project while keeping everything within comfortable arm’s reach.
Ergonomic seating is a detail that crafters often skimp on and consistently regret. Hours spent hunched over a craft table in an uncomfortable chair contribute to back pain, neck stiffness, and a gradual reluctance to spend time in your craft room that you may not even consciously connect to the discomfort. An adjustable chair that supports your lower back and allows your feet to rest flat on the floor or a footrest is not an extravagance but a basic investment in your long-term ability to enjoy your creative space. Some crafters also benefit from having a stool available for periods when standing while working feels more comfortable than sitting.
Layout Strategies for Different Room Shapes and Sizes
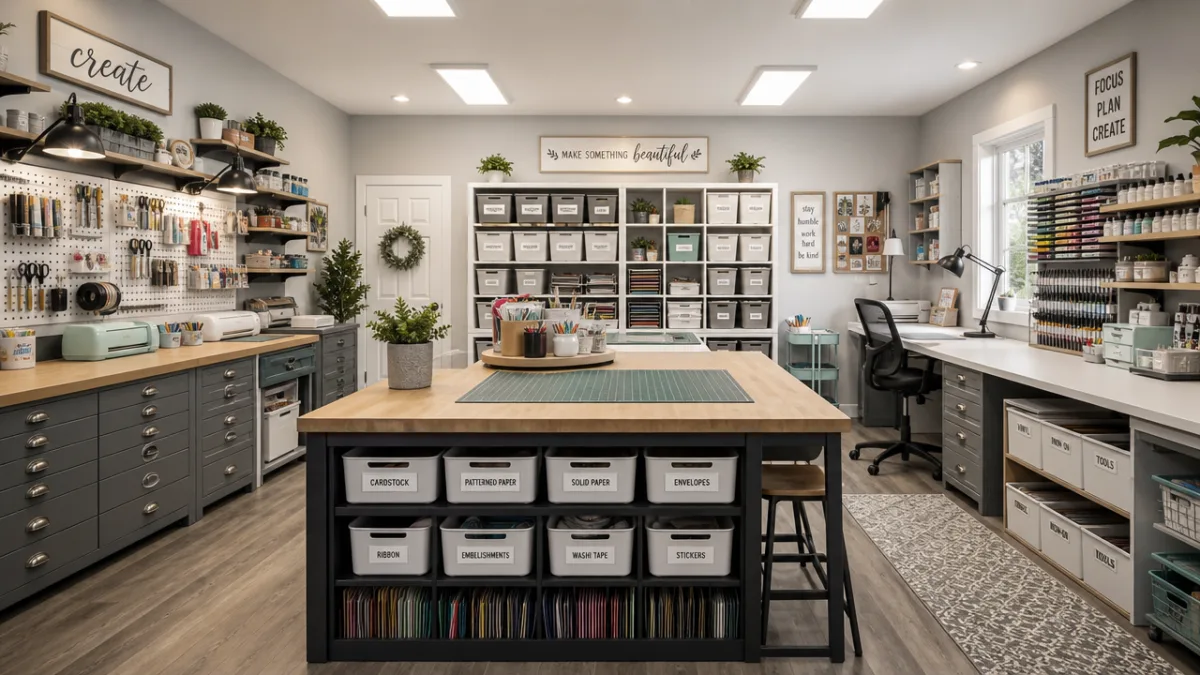
A dedicated craft room is a luxury that not everyone has, but creative layout thinking can make almost any available space function effectively. Spare bedrooms converted to craft rooms offer the most flexibility, typically providing enough square footage to include a full workstation, dedicated storage walls, and a secondary surface for in-progress projects. In these larger spaces, the most effective approach is usually to place work surfaces near natural light sources and use the remaining walls for floor-to-ceiling storage, leaving the center of the room open for movement and larger project work.
Smaller spaces require more deliberate planning but often produce equally functional results through smart furniture selection and vertical thinking. A reach-in closet with the doors removed becomes a surprisingly effective craft nook when fitted with a fold-down or pull-out work surface at the appropriate height and outfitted with shelving above and below. Awkward alcoves, the space under a staircase, or a sectioned-off corner of a larger room can all be transformed into fully functional creative zones when approached with a clear understanding of your specific needs and the constraints of the space.
These layout configurations offer practical starting points for different room shapes and sizes:
- Single-wall layout: Ideal for narrow rooms or dedicated craft nooks, placing all storage and the work surface along one wall creates an efficient, focused workspace with minimal wasted space.
- L-shaped layout: Works well in square or moderately sized rectangular rooms, allowing one arm of the L for active work and the other for storage or a secondary task like cutting or ironing.
- U-shaped layout: Best suited to larger rooms, this configuration maximizes storage while keeping everything within comfortable reach from a central work position, ideal for crafters who work with many different supply types simultaneously.
- Island layout: Placing a central island in a large room, similar to a kitchen layout, allows access from all sides and provides a generous surface for spreading out large projects.
- Floating workstation layout: A freestanding desk positioned away from walls allows you to work from multiple sides and creates flexibility for rearranging as your needs evolve.
Regardless of the layout you choose, plan deliberately for traffic flow through the space. You should be able to move easily from your work surface to your most frequently used storage without squeezing past furniture or stepping over equipment. If your craft room also functions as a laundry room, guest room, or home office, zoning the space visually through the strategic placement of furniture, a rug, or even a change in lighting creates the psychological separation that helps you transition mentally into creative mode even when you are sharing the space with other household functions.
Lighting Design for Accurate Color and Reduced Eye Strain
Lighting in a craft room is not merely a matter of being able to see what you are doing, though adequate illumination is obviously fundamental. The quality and color temperature of your lighting directly affects your ability to accurately perceive and match colors, which matters in virtually every craft discipline. Fabric selection, paint mixing, choosing complementary papers, and evaluating whether an ink color is the right choice for a project all depend on seeing those colors as they will appear in natural daylight. Poor lighting does not just make working harder; it leads to purchasing mistakes and design decisions you will later regret.
Aim for a layered lighting approach that combines ambient overhead light with targeted task lighting at your work surfaces. LED bulbs with a color rendering index of 90 or higher and a color temperature in the range of 5000 to 6500 Kelvin most closely approximate natural daylight and give you the most accurate color perception. A daylight-balanced LED desk lamp positioned to illuminate your work surface without casting shadows from your working hand adds a critical layer of precision lighting that overhead fixtures alone cannot provide. Adjustable arm lamps are particularly useful because they can be repositioned as the nature of your task changes.
Natural light is the gold standard for color accuracy and remains preferable to any artificial source when it is available. Positioning your primary work surface near a window is worth prioritizing in your layout planning, though you should be mindful of direct sunlight falling on your work surface. Direct sunlight creates intense glare, produces uneven illumination that shifts as the day progresses, and can fade certain materials over time with prolonged exposure. North-facing windows provide the most consistent, diffuse natural light throughout the day in the northern hemisphere, making them the preferred orientation for a craft room work area when you have a choice in the matter.
Personal Touches That Make Your Craft Room Truly Yours
After all the practical considerations of layout, storage, and lighting have been addressed, the final and deeply personal layer of craft room design involves creating an environment that genuinely inspires you every time you walk through the door. A craft room that functions perfectly but feels sterile or impersonal will not draw you in with the same magnetic pull as one that reflects your aesthetic and surrounds you with things that feed your creative spirit. This is not a frivolous addition to the design process but an acknowledgment that environment has a measurable effect on creative output and mood.
Display finished projects or works in progress where you can see them while you work. This serves multiple purposes: it reminds you of what you are capable of during moments of creative doubt, it keeps you connected to ongoing projects so you are less likely to abandon them, and it fills the space with visual evidence of your creative identity. A gallery wall of your own framed finished pieces, a rotating display on a dedicated shelf, or even simply pinning works in progress to a large corkboard transforms your craft room from a functional storage space into a genuinely personal creative studio.
Choose a color palette for your craft room that you find energizing and pleasant to spend extended time in, rather than defaulting to safe neutrals simply because they appear most frequently in craft room inspiration content. Bright white has become the dominant aesthetic in shared craft room images because it photographs beautifully and makes small spaces feel larger, but if you do your most creative work surrounded by warm earthy tones, saturated jewel colors, or the soft palette of a French country aesthetic, that is the environment you should build. Your craft room should inspire you specifically, not perform well as a lifestyle photograph, and only you know what visual environment genuinely activates your creativity rather than merely looking pleasant in pictures.








What do you think?
It is nice to know your opinion. Leave a comment.