










13 Genius IKEA Craft Room Hacks: Transform Your Creative Space on a Budget
Why IKEA Is the Crafter’s Best-Kept Secret
When it comes to organizing a craft room, the challenge is almost always the same: too much stuff, too little space, and a budget that doesn’t stretch nearly far enough. IKEA has quietly become the go-to destination for crafters, DIY enthusiasts, and makers of every kind, not because it markets itself that way, but because its modular, affordable, and endlessly adaptable furniture systems lend themselves perfectly to the demands of a creative workspace. The clean Scandinavian aesthetic doesn’t hurt either, turning even the most chaotic stash of ribbon and paint into something that looks intentional.
What makes IKEA particularly brilliant for craft rooms is the sheer flexibility of its product lines. Systems like KALLAX, RÅSKOG, and ALEX were designed with storage and function in mind, but crafters have discovered that these pieces can be repurposed, combined, and modified in ways the designers probably never imagined. A simple shelving unit becomes a yarn wall. A kitchen trolley becomes a mobile supply station. A pegboard becomes a custom tool display. The possibilities are genuinely exciting once you start thinking outside the flat-pack box.
This article walks through thirteen of the most ingenious IKEA hacks specifically designed for craft rooms, drawing from the creative community’s collective wisdom and years of trial and error. Whether you’re working with a dedicated studio, a spare bedroom corner, or a closet converted into a crafting nook, these hacks will help you maximize every square inch while keeping your supplies accessible, organized, and beautifully displayed. Creativity shouldn’t be buried under clutter, and with the right IKEA approach, it doesn’t have to be.
The KALLAX Shelving System: Your Craft Room’s Best Friend
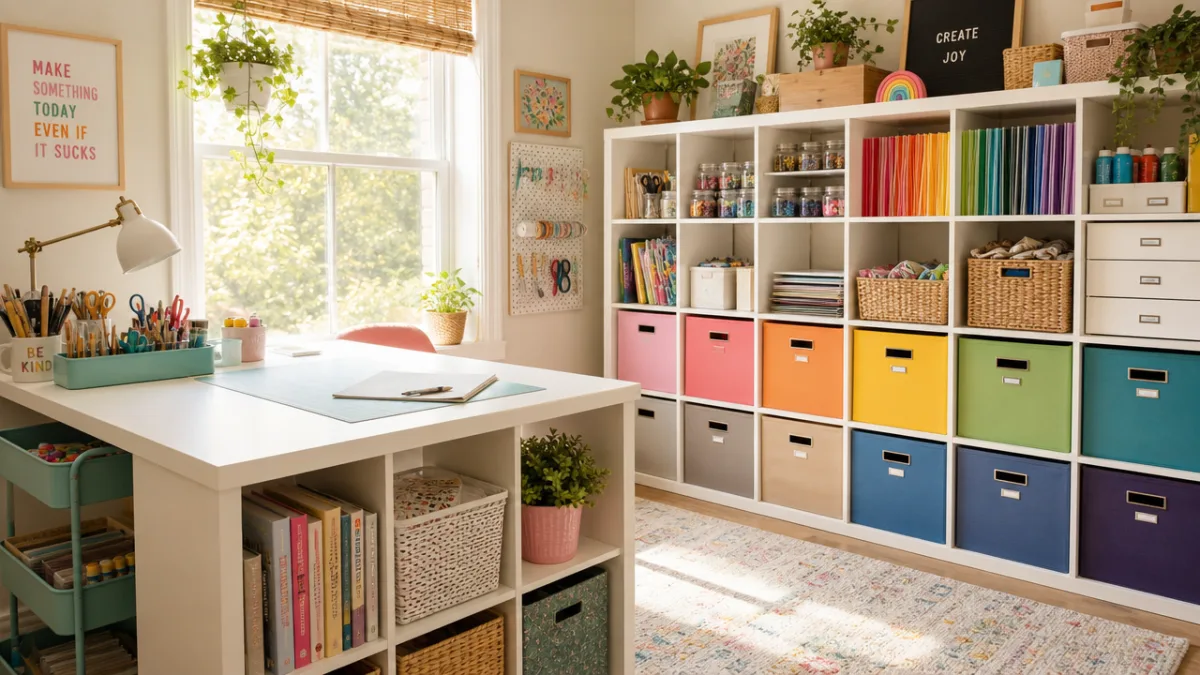
The KALLAX shelving unit is probably the single most versatile piece of furniture IKEA has ever produced, and for crafters, it borders on life-changing. Its cube design creates uniform compartments that work perfectly with IKEA’s own range of inserts — fabric bins, drawers, and door attachments — but also with countless third-party organizers. For a craft room, this means you can dedicate each cube to a specific material category: one for washi tape, one for yarn, one for paper pads, and so on. The visual clarity alone reduces the time you spend hunting for supplies.
One of the cleverest KALLAX hacks involves turning the unit on its side and using it as a room divider or a crafting peninsula. When oriented horizontally and placed with its back against a wall at desk height, a KALLAX unit becomes a work surface with built-in storage below. Add a piece of butcher block or a laminate top cut to size, and you have a custom craft table that would cost three to four times as much at a specialty retailer. The cubbies below store your most-used bins, while the surface above becomes your primary workspace.
Another popular variation is the KALLAX scrapbooking station. By placing a KALLAX unit vertically against a wall and using slim magazine file inserts in each cube, crafters can store their 12×12 paper collections in a way that’s both space-efficient and visually appealing. Label each insert by color family, theme, or season, and you’ll always know exactly where to reach when inspiration strikes. A few floating shelves mounted just above the KALLAX unit extend the display space for frequently used tools like scissors, paper trimmers, and bone folders.
- Use KALLAX door inserts to hide less attractive supplies while keeping the overall look streamlined and tidy.
- Stack two KALLAX units vertically and anchor them to the wall to create a floor-to-ceiling storage wall that maximizes vertical real estate.
- Mix open cubes with fabric bins to create a layered visual rhythm that prevents the shelving from looking monotonous or overwhelming.
- Add casters to the bottom of a KALLAX unit to create a rolling storage island that you can reposition depending on the project at hand.
RÅSKOG Trolley Hacks for Mobile Craft Organization
The RÅSKOG trolley is a three-tiered rolling cart that originally appears in IKEA’s kitchen section, but crafters were quick to recognize its enormous potential in the studio. Its compact footprint means it can squeeze into tight spaces, roll beside a desk during a project, and tuck neatly into a corner when not in use. The open wire shelves allow you to see everything stored inside without digging, and the wheels mean your supplies travel with you rather than forcing you to travel to them. It’s one of those rare products that solves a problem you didn’t fully realize you had.
The most popular craft room use for the RÅSKOG is as a dedicated paint trolley. The three tiers organize supplies by type: acrylic paints on the bottom tier, brushes and palette knives on the middle, and water containers, palette sheets, and finishing sprays on top. Because the trolley rolls freely, you can position it exactly where you need it regardless of whether you’re working at a desk, on the floor, or at an easel. When a painting session is over, the trolley rolls away without any dismantling or repacking, which dramatically lowers the barrier to starting your next creative session.
For mixed media and paper crafters, the RÅSKOG becomes an incredible embellishment station. Line the bottom tier with a shallow tray of stickers, stamps, and dies. Stock the middle tier with inks, embossing powders, and a heat tool holster made from a binder clip attached to the edge. Keep the top tier free for the project you’re actively working on. This mobile setup means you never have to stop in the middle of a creative flow to retrieve a forgotten supply from across the room — everything you need is right beside your hand, ready to go.
Pegboard Magic with SKÅDIS
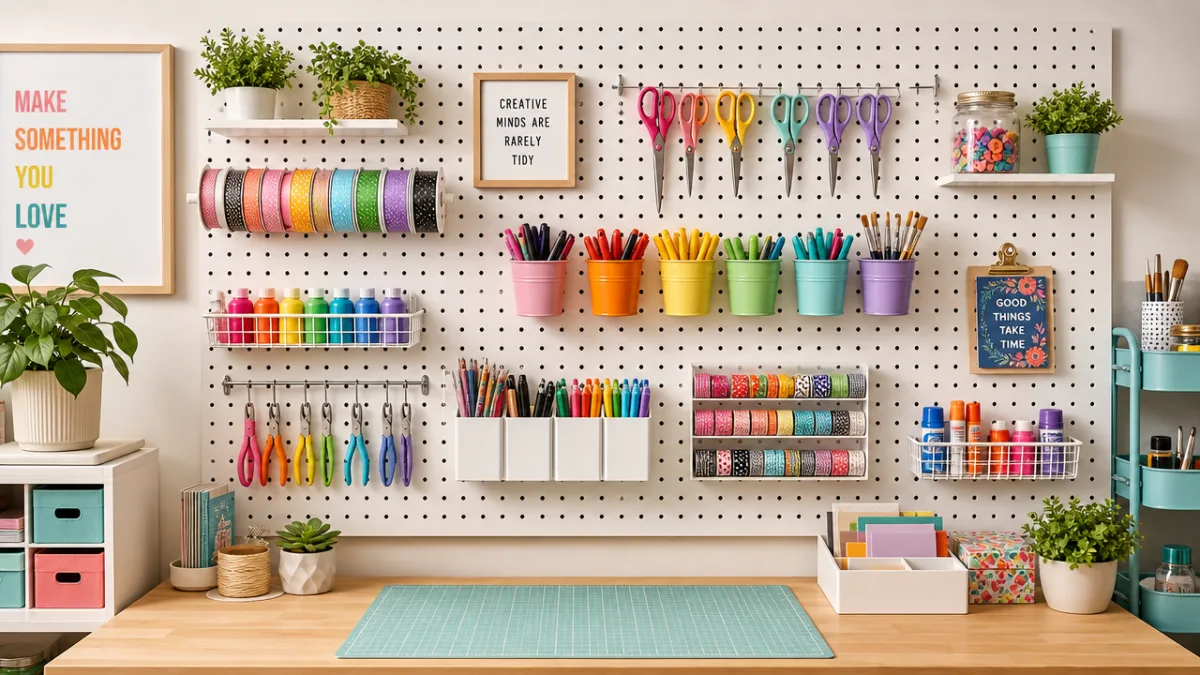
IKEA’s SKÅDIS pegboard system is one of those products that feels like it was designed specifically for craft rooms, even though it lives in the office and workspace section of the catalog. The pegboard comes in several sizes and a soft white finish that keeps the look clean and modern rather than industrial. More importantly, IKEA offers a full range of proprietary accessories — hooks, shelves, containers, clips, and cord holders — that snap directly onto the board without any additional hardware. This makes customization genuinely easy, even for those who don’t consider themselves particularly handy.
The most impactful way to use SKÅDIS in a craft room is as a tool wall directly above the primary work surface. Hang scissors in various sizes, arrange your most-used pens and markers in the small containers, and use the mini shelves to store frequently reached-for items like tape dispensers and ruler sets. Because everything hangs in plain sight, you eliminate the constant low-level frustration of searching through drawers for basic tools. The visual organization also makes it immediately obvious when something has been borrowed and not returned, keeping the workspace in a perpetual state of readiness.
Crafters have taken SKÅDIS further by combining multiple boards to cover an entire wall from desk height to the ceiling. This vertical storage solution is especially powerful in small rooms where floor space is at a premium. The lower section of the combined board handles active tools and current supplies, while upper sections become display areas for finished projects, inspirational images, or work-in-progress pieces waiting for the next layer of glue or paint to dry. It’s simultaneously a functional storage solution and a personal gallery wall that evolves alongside your creative practice.
- Mount SKÅDIS at seated eye level so the most critical tools fall naturally within arm’s reach without requiring you to stand up.
- Use the pegboard’s containers to store ribbon spools by color, creating a visual gradient that’s both practical and genuinely beautiful.
- Combine SKÅDIS with small IKEA picture ledges mounted beside the board for storing flat items like cutting mats and foam sheets.
- Paint your SKÅDIS board a bold accent color to make it a focal point of the room and add personality to your workspace.
- Use binder rings threaded through the pegboard holes to hang tools that don’t have dedicated hooks, extending the system’s versatility.
ALEX Drawer Units: The Unsung Heroes of Craft Storage
IKEA’s ALEX drawer units are a staple in home offices and makeup rooms, but their application in craft spaces is equally compelling and arguably even more impressive. The slim, uniform drawers are ideal for storing flat supplies like paper, cardstock, vellum, and foil sheets without the curling and bending that tends to happen when these materials are crammed into vertical filing systems or stacked in piles. Each drawer acts like a clean visual layer, and because the drawers slide out fully, you can see the entire contents at a glance rather than having to dig through stacked papers to find the color you need.
A popular hack involves using ALEX units as the base for a built-in craft desk. Two ALEX units placed parallel to each other with a solid surface spanning the gap between them creates a workstation with substantial drawer storage on both sides. This desk configuration is ergonomically excellent because you can access left-side and right-side drawers without leaving your seat, keeping your dominant hand free for the work itself. The surface between the units can be custom-cut plywood, a LINNMON tabletop from IKEA, or even a salvaged solid wood door for a more rustic aesthetic.
For die-cut machine enthusiasts — those who work with Cricut, Silhouette, or Brother ScanNCut machines — the ALEX drawer unit offers a particularly elegant organizational solution. Individual drawers can be dedicated to specific material types: adhesive vinyl in one drawer, heat transfer vinyl in another, cardstock sorted by weight in a third. Small foam inserts cut to fit keep the materials from sliding around. The machine itself sits on the desk surface above, and because all the materials are directly below in clearly organized drawers, the workflow from material selection to finished cut is seamless and efficient.
Repurposing IKEA Kitchen Items for Craft Room Brilliance
Some of the most creative IKEA craft room hacks don’t come from the storage or office sections at all — they come from the kitchen. IKEA’s kitchen department is filled with items that translate beautifully into craft room applications, often at a fraction of the cost of specialty craft organizers. The key is learning to look at kitchen products not for what they are, but for what they could be. A spice rack becomes a ribbon holder. A jar organizer becomes a brush storage system. A pot lid organizer becomes a vertical paper file. The transfers are often so natural that it’s surprising they aren’t marketed this way from the start.
The VARIERA pot lid organizer is a standout example of this kitchen-to-craft-room pipeline. This simple expandable rack, designed to hold pot lids vertically in a cabinet, works identically for storing cutting mats, foam sheets, chipboard, and large format cardstock. Mounted inside a cabinet or placed on a shelf, it keeps flat materials upright and separated so you can flip through them like records in a crate. Materials stored this way never curl, never get damaged at the edges, and are always immediately findable — a stark improvement over the typical paper storage situation in most craft rooms.
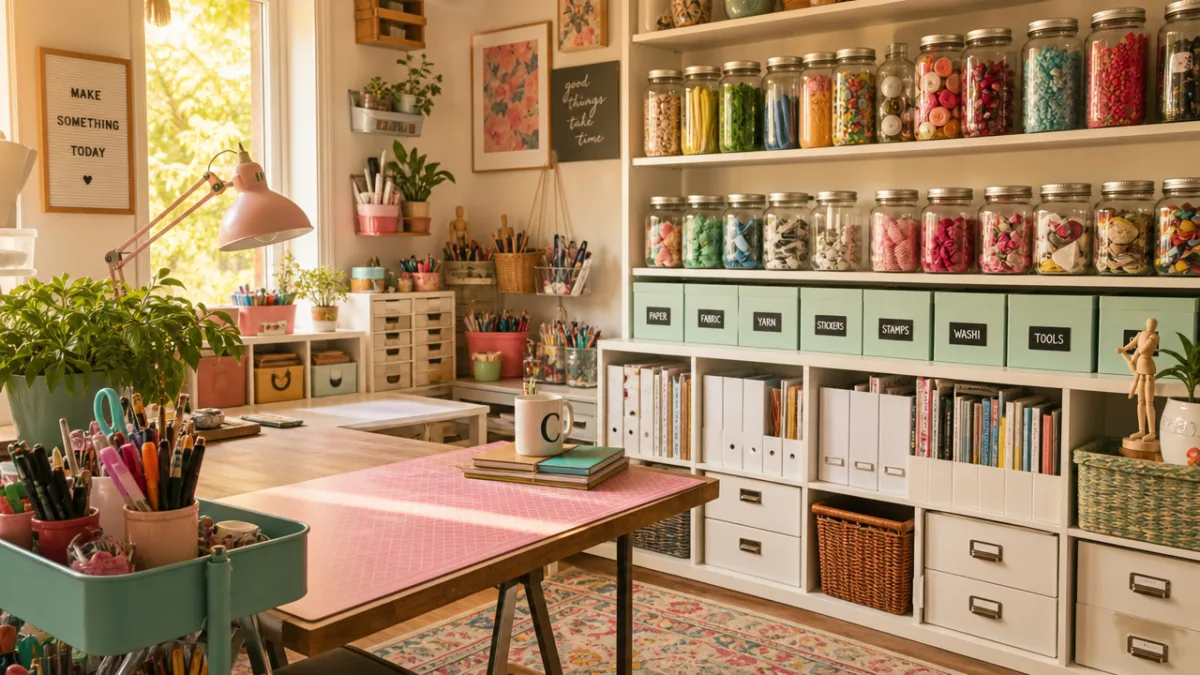
IKEA’s glass jars, originally sold for food storage, are another kitchen aisle treasure for crafters. The KORKEN and VARDAGEN jar lines come in a range of sizes that correspond almost perfectly to different crafting supplies: small jars hold buttons, eyelets, and brads; medium jars store washi tape rolls stacked horizontally; large jars contain yarn balls, fabric scraps, or a full collection of alcohol ink bottles. Arranged on open shelves or inside KALLAX cubes, these glass containers double as décor, turning the raw materials of your craft practice into a visual display that inspires creativity every time you walk into the room.
Creating a Dream Cutting Station and Wrapping Center
One of the most functional and satisfying IKEA craft room setups is a dedicated cutting and wrapping station, and IKEA has all the components you need to build one without spending a fortune. The foundation is typically a KALLAX unit or an BESTA console placed at a height comfortable for standing work — standing is almost always preferable for cutting, as it allows better leverage and a broader range of motion. The surface of the unit is topped with a self-healing cutting mat secured with non-slip shelf liner underneath, giving you a permanent, ready-to-use cutting surface that doesn’t need to be set up and packed away with each project.
The wrapping paper storage problem is one that plagues crafters and gift-givers alike, and IKEA’s PJÄS bag organizer or the DIMPA storage bags were not designed for this purpose but work extraordinarily well for it. Tall, slim storage tubes or DIY PVC pipe inserts fitted into KALLAX cubes keep wrapping paper rolls standing upright, preventing the crushing and creasing that happens when rolls are stored horizontally in a chaotic pile. Label each roll with a small flag tag indicating the occasion it’s reserved for — birthdays, holidays, everyday gifts — and your wrapping paper collection becomes as organized as a professional gift shop’s back room.
Ribbon and trim storage is another area where IKEA hacks shine particularly brightly. A simple GRUNDTAL rail, designed for kitchen towels and utensils, mounted horizontally under the upper edge of a shelving unit becomes a ribbon dispenser when spools are threaded onto the rail. Because the rail holds multiple spools simultaneously and each ribbon can be pulled free from the spool without removing it from the rail, you can measure and cut ribbon in seconds without any untangling or re-rolling. This one small change to your craft room setup can save a surprising amount of time and frustration over the course of a year of crafting.
Final Thoughts: Building a Craft Room That Grows With You
The most important principle underlying all of these IKEA craft room hacks is modularity. Unlike custom built-ins, which are permanent commitments, IKEA furniture can be rearranged, expanded, repurposed, and sold as your needs change. As your craft practice grows — perhaps you pick up a new medium, invest in a larger machine, or simply accumulate more supplies — your IKEA-based system can grow with you. An additional KALLAX unit slots neatly next to the one you already have. A second SKÅDIS board extends the tool wall further toward the ceiling. A new RÅSKOG trolley adds mobile storage for a fresh project category. The system never becomes obsolete.
Budget is often the driving force behind choosing IKEA for a craft room build, and while it’s true that the price points are remarkable, the real value goes beyond the initial savings. Because IKEA pieces are so widely available and so frequently updated with accessories, you can invest incrementally rather than making one enormous purchase at the outset. Start with a single KALLAX unit and a SKÅDIS board. Add a RÅSKOG trolley when you find you need mobile storage. Introduce an ALEX unit when flat storage becomes a priority. This phased approach keeps the financial pressure manageable while steadily improving your workspace over time.
Ultimately, the goal of any craft room — hacked together from IKEA pieces or built from custom cabinetry — is the same: to support your creative practice by making supplies accessible, processes efficient, and the environment itself inspiring. A well-organized craft room doesn’t just store your materials; it lowers the psychological barrier to starting a new project, reduces the friction of mid-project supply hunts, and allows you to spend your creative energy on making rather than managing. These thirteen IKEA hacks, taken individually or combined into a comprehensive system, are practical steps toward that ideal. Your creative space should feel as good as the work that comes out of it, and with a little flat-pack ingenuity, it genuinely can.








What do you think?
It is nice to know your opinion. Leave a comment.