










Wooden Wick Candles with Mica Powder: A Complete Guide to Crafting Luminous, Crackling Beauties
Introduction to Wooden Wick Candles and Mica Powder
Wooden wick candles have taken the candle-making world by storm, and for good reason. Unlike traditional cotton wicks, wooden wicks produce a gentle, rhythmic crackling sound as they burn — much like a miniature fireplace tucked inside a jar. This sensory experience elevates the humble candle from a simple light source into a full atmosphere creator, making wooden wick candles one of the most popular handmade gifts and home décor items on the market today.
Mica powder adds an entirely different dimension to the craft. A naturally occurring mineral ground into an ultra-fine, shimmering powder, mica has been used in cosmetics, art, and decorative crafts for decades. When introduced into candle making, it transforms an ordinary wax pour into something that glitters, glows, and catches the light in ways that feel almost magical. The combination of wooden wicks and mica powder brings together sound, light, and visual sparkle in a single handcrafted object.
Whether you are a seasoned candle maker looking to expand your repertoire or a complete beginner curious about diving into this satisfying hobby, this guide will walk you through everything you need to know. From understanding the materials and their properties to troubleshooting common problems, you will leave with the confidence and knowledge to create stunning mica-infused wooden wick candles that look professional, burn beautifully, and make genuinely impressive gifts for friends, family, or your own home.
Understanding Your Materials: Wax, Wicks, and Mica
Choosing the right wax is the foundation of any successful candle, and this is especially true when working with mica powder. Soy wax is one of the most popular choices among hobbyists and small-batch makers because it is natural, slow-burning, and generally easy to work with. However, it is worth noting that pure soy wax can sometimes cause mica powder to sink to the bottom of the container rather than staying suspended throughout the wax. Coconut wax, or a blend of coconut and soy, tends to hold mica in suspension more effectively due to its denser, creamier consistency.
Paraffin wax is another option that works exceptionally well with mica because of its harder, more uniform structure. If you prefer to work with natural waxes exclusively, consider a coconut-apricot blend, which has gained significant popularity in recent years for its creamy white finish, excellent scent throw, and ability to hold additives like mica without significant settling. Whatever wax you choose, always research its specific melt point and recommended pour temperature, as these factors will directly affect how your mica powder distributes and how your wooden wick performs.
Wooden wicks come in a variety of widths and styles, including single-ply, double-ply, and booster wicks. Wider wicks are generally suited to larger diameter vessels, while narrower wicks work best in smaller containers. When selecting your wick size, consult the manufacturer’s wick guide and always perform test burns before committing to a full batch. The wick must be properly sized to achieve a full melt pool within a reasonable burn time, and an undersized wick in a mica-infused candle can cause mushrooming, tunneling, or poor fragrance throw.
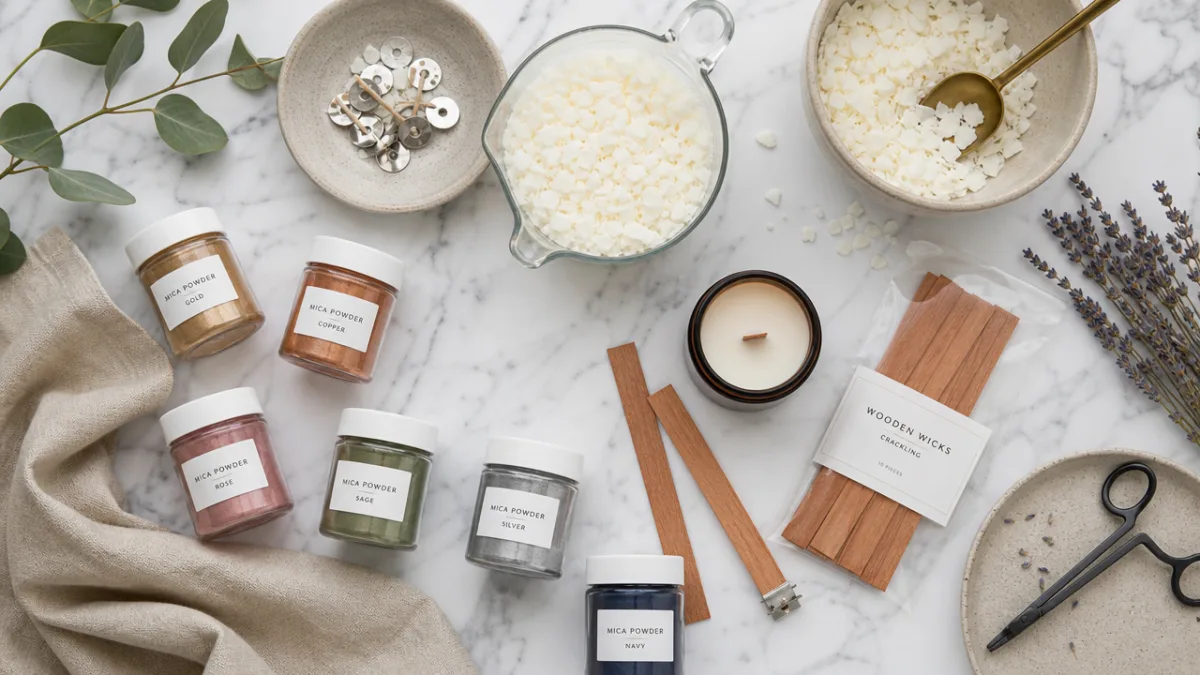
Mica powder for candle making should always be cosmetic-grade or specifically labeled as candle-safe. Not all mica powders are created equal — some contain additives or dyes that can clog wicks, affect burn performance, or even release unpleasant odors when heated. Look for mica that is free from heavy metals and synthetic binding agents. It is also worth purchasing from reputable suppliers who test their products specifically for use in candles rather than repurposing cosmetic or craft mica without verification.
Color Theory and Mica Combinations for Stunning Results
One of the most exciting aspects of working with mica powder is the extraordinary range of colors available. From deep jewel tones like sapphire blue and emerald green to soft pastels, warm bronzes, and blinding metallics, mica gives candle makers a virtually unlimited palette to work with. Understanding a few basic principles of color theory can help you make more intentional and beautiful choices when designing your candles. Complementary colors — those opposite each other on the color wheel — create striking visual contrast, while analogous colors produce harmonious, soothing combinations.
Layering mica colors in a single candle is a technique that produces breathtaking results. By pouring the wax in stages and allowing each layer to partially set before adding the next, you can create distinct bands of color that glow when the candle is lit from within. For example, a base layer of deep copper mica, a middle layer of rose gold, and a top layer of pearl white creates a warm, luxurious gradient effect that looks stunning on a shelf or as a gift. The key is patience — rushing the layers will cause them to bleed together, losing the crisp lines that make the technique so impressive.
Swirling mica directly into the poured wax creates a marbled effect that looks incredibly organic and artistic. To achieve this, add your mica to the wax at a slightly lower temperature than usual — around 120 to 130 degrees Fahrenheit — and use a skewer or chopstick to gently drag through the wax after pouring. Different wax types will respond differently to this technique, so experimentation is part of the process. Keep notes on your ratios, temperatures, and techniques so you can reproduce successful results and refine ones that didn’t quite land the way you envisioned.
Some candle makers choose to use mica powder exclusively on the exterior surface of the candle, dusting it onto the top of a finished pour or mixing it into a thin layer of clear wax applied as a topcoat. This approach gives maximum sparkle and visual impact without affecting the burning performance of the candle at all, since the mica never interacts with the wick. Dusting the top of a freshly cooled candle with a fine layer of coordinating mica using a soft makeup brush is one of the easiest ways to add a professional, luxurious finish with minimal risk of any burn-related issues.
Step-by-Step Process for Making Wooden Wick Mica Candles
Begin by gathering all of your equipment and materials before you start the melting process. You will need a double boiler or a dedicated pouring pitcher placed in a pot of simmering water, a reliable thermometer, your chosen wax, fragrance oil if desired, mica powder in your chosen colors, wooden wicks with their metal sustainer tabs, clean glass or metal containers, and a wick-centering tool or two clothespins. Having everything organized and within reach before you begin prevents rushed decisions and mistakes that can compromise your finished candles.
Melt your wax in the double boiler, stirring gently and monitoring the temperature carefully. Once your wax reaches its recommended melting temperature — typically between 170 and 185 degrees Fahrenheit for most soy and coconut blends — remove it from the heat and allow it to cool to your chosen fragrance addition temperature, usually around 140 to 160 degrees Fahrenheit. Add your fragrance oil at this stage, stirring slowly and steadily for two full minutes to ensure thorough incorporation. Avoid aggressive stirring, which can introduce air bubbles that create an uneven surface on your finished candle.
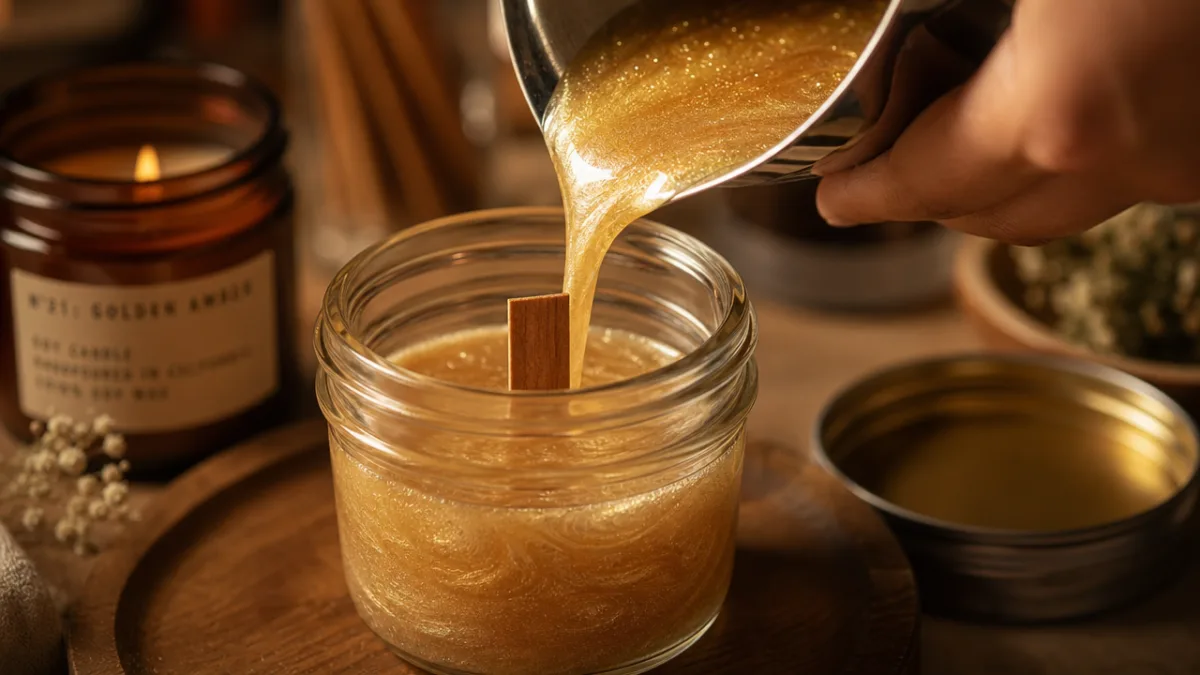
Add your mica powder after the fragrance oil has been incorporated. A general starting point is about half a teaspoon of mica per pound of wax, but this can be adjusted based on the intensity of color you prefer. Stir gently and thoroughly, making sure the mica is evenly distributed with no clumps remaining. If you are creating layers, divide your wax into separate pouring pitchers at this stage and color each one independently. Allow the wax to cool to your recommended pour temperature — typically between 120 and 140 degrees Fahrenheit for most formulas — before pouring into your prepared containers.
Prepare your containers by securing the wooden wicks using their sustainer tabs at the bottom center of each vessel. A small amount of wax or candle-safe adhesive dot can help hold the tab in place during the pour. Use a wick-centering tool or a simple pair of clothespins resting across the top of the container to keep the wick perfectly vertical as the wax sets. Pour your wax slowly and steadily, filling the container to within about half an inch of the rim. As soy and coconut waxes cool, they may sink slightly in the center, requiring a small top-up pour once the candle has fully set — typically after four to six hours at room temperature.
After your candles have fully cured — ideally for 24 to 48 hours — trim your wooden wicks to approximately one-quarter inch above the wax surface. This is a critical step that is often overlooked by beginners. An untrimmed wooden wick will produce an oversized, uncontrolled flame that burns through your candle too quickly and may produce excess soot or carbon buildup. A properly trimmed wick will ignite cleanly, establish a healthy flame within a few minutes, and create that characteristic crackling sound that makes wooden wick candles so beloved.
Troubleshooting Common Issues with Mica and Wooden Wicks
One of the most frequently encountered problems when combining mica powder with wooden wicks is wick clogging. Because mica is a solid particulate, it can accumulate in the wick over repeated burns, gradually reducing the wick’s ability to draw wax upward effectively. This results in a weakening flame, poor scent throw, and eventually a wick that will not stay lit. To minimize this risk, use mica at conservative amounts — no more than one teaspoon per pound of wax — and always choose candle-tested mica from reputable suppliers rather than art or cosmetic mica that has not been specifically evaluated for candle use.
Mica settling is another common challenge, particularly in softer waxes like pure soy. When mica sinks to the bottom of the container before the wax fully sets, the resulting candle has a concentrated layer of glitter at the base and a largely uncolored upper portion. Combating this issue requires a combination of strategies: using a denser wax blend, pouring at a lower temperature so the wax sets more quickly, stirring the wax intermittently in the pouring pitcher as it cools, or choosing a larger particle-size mica which can sometimes counterintuitively remain more evenly distributed than ultrafine powders.
If your wooden wick refuses to stay lit or struggles to maintain a flame, the cause is almost always one of three things: the wick is too narrow for the container diameter, the wick has not been trimmed properly, or moisture has been introduced somewhere in the process. Wooden wicks are particularly sensitive to humidity during storage, so always keep them sealed in an airtight bag or container between uses. Before lighting a new candle for the first time, confirm your wick is trimmed to one-quarter inch and that the wax surface is clean and free of any debris or excessive mica buildup around the base of the wick.
Uneven tops and sinkholes are cosmetic issues that affect the visual presentation of your finished candle rather than its burn performance, but they matter enormously if you are selling your candles or giving them as gifts. These occur because wax contracts as it cools, and the center of the candle cools more slowly than the edges. A top-up pour at the appropriate temperature — typically about 10 degrees lower than your original pour — will fill any depressions and create a smooth, professional-looking surface. If you are using mica throughout the candle, make sure your top-up pour contains the same mica concentration so the color remains consistent.
Safety Considerations and Best Practices
Candle making involves working with hot materials and open flames during testing, so establishing a safe workspace from the very beginning is non-negotiable. Always work on a heat-safe, non-porous surface — silicone mats, metal trays, or dedicated craft tables covered with protective sheeting are all good options. Keep a fire extinguisher rated for grease fires accessible in your workspace, and never leave melting wax unattended on a heat source. Wax that overheats beyond its flash point can ignite, and this risk increases when working with blended waxes whose flash points may differ from the individual components.
When handling mica powder, take care to avoid inhaling it. While cosmetic-grade mica is generally considered safe, the fine particulate can irritate the respiratory system if inhaled in significant quantities over time. Work in a well-ventilated space, and consider wearing a simple dust mask when measuring and pouring mica powder, especially if you are working with large quantities or particularly fine-grained varieties. After use, seal mica jars tightly to prevent spills and to protect the powder from moisture, which can cause clumping and affect its performance in future batches.
Perform thorough burn testing on every new candle formulation before producing a large batch or selling your candles. A responsible burn test involves lighting the candle and observing it at one-hour intervals for the first four hours, checking the melt pool diameter, flame height, wick performance, and any signs of smoking or unusual odor. Log your results carefully so you can identify patterns and make informed adjustments. A candle that performs beautifully in testing will give you the confidence to share it with others, while one that reveals problems during testing saves you from potentially dangerous or disappointing outcomes at scale.
- Never leave a burning candle unattended, and always burn within sight on a stable, heat-resistant surface.
- Keep candles away from flammable materials, drafts, vents, and air currents that can cause uneven burning or accidental ignition of nearby objects.
- Discontinue burning when approximately half an inch of wax remains to prevent the container from overheating.
- Always label your candles clearly with burn instructions, a list of materials used, and any relevant safety warnings, particularly if you plan to sell or gift them.
- Store finished candles in a cool, dark place away from direct sunlight, which can fade mica colors and cause surface bloom in natural waxes.
Packaging, Gifting, and Selling Your Creations
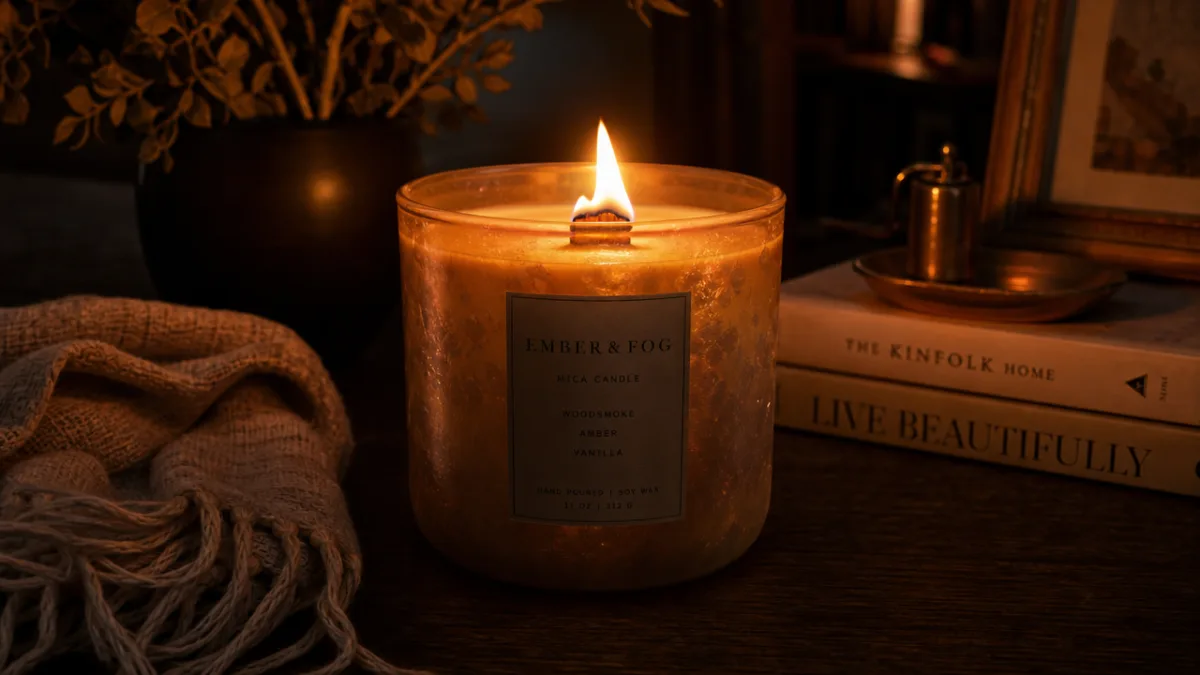
The visual appeal of mica-infused wooden wick candles makes them exceptionally well-suited to gifting and retail presentation. The shimmering, glowing quality of mica combined with the warmth of a wooden wick flame creates a product that practically photographs itself, making it ideal for social media marketing, online shops, and craft fair displays. Investing a little thought and effort into packaging can elevate your candles from a homemade item to a genuine luxury product that commands a higher price point and makes recipients feel genuinely special when they receive one.
For packaging, consider vessel choice as part of your overall aesthetic. Amber glass jars give a warm, apothecary feel that pairs beautifully with earth-tone micas like copper, bronze, and terracotta. Clear glass allows the full shimmer of the mica to be visible before the candle is even lit, making it perfect for jewel-tone and metallic formulations. Concrete, ceramic, and tin vessels offer entirely different aesthetics, from industrial-modern to rustic-farmhouse, and the mica color palette you choose can be adjusted to complement the vessel material and your overall brand identity.
Labels are a critical component of both the aesthetic and the legal requirements for selling candles. In many regions, candle labels must include a list of ingredients or materials, safety instructions, and the business name and contact information of the maker. Beyond legal compliance, a well-designed label communicates your brand identity and helps customers understand what they are buying. Include the scent name or description, the approximate burn time, and any unique selling points such as “hand-poured,” “coconut-soy blend,” or “infused with rose gold mica” to help your product stand out in a competitive market.
When pricing your candles for sale, be sure to account for all of your material costs including wax, wick, mica, fragrance, container, label, and packaging, as well as your time and any overhead costs associated with your workspace. Many first-time candle sellers underestimate the value of their labor and underprice their products significantly. Research comparable handmade candles in your price range to understand what the market will bear, and don’t be afraid to charge a premium for the unique visual quality that mica and wooden wicks bring to your creations. A beautifully made, well-presented candle is a genuinely desirable luxury item, and pricing it accordingly reflects both its true cost and its perceived value.
Finally, consider the experience of unboxing and first use as part of your overall product design. A short card tucked inside the packaging explaining how to get the best burn from a wooden wick candle — including the importance of the first burn, wick trimming, and burn time guidelines — adds a thoughtful, professional touch that customers genuinely appreciate. It also reduces the likelihood of negative reviews from customers who, unaware of wooden wick characteristics, might otherwise be frustrated by issues that are simply a matter of user technique. Educating your customers as part of the gift or purchase experience creates loyalty, trust, and the kind of word-of-mouth enthusiasm that no amount of advertising can replicate.








What do you think?
It is nice to know your opinion. Leave a comment.