










Pearled Sand Candles: Unique Jar Creations
What Are Pearled Sand Candles?
If you’ve never heard of pearled sand candles before, you’re in for a treat. Instead of the solid wax you’d find in a typical candle, these use loose granular wax — tiny beads that look and feel remarkably like fine sand. The really clever part is that you don’t need to melt anything. You just pour the granules straight into a jar around a wick, and you end up with this beautifully textured, matte candle that catches light in a way solid wax never quite manages.
The technique draws from both traditional candle craft and modern decorative arts, and it’s a genuinely fun mix of the two. Because the granules flow and settle just like real sand, you can create layered effects, swirled patterns, and even press decorative bits — shells, stones, dried flowers, colored glass beads — right into the visible surface. No melting means the whole process is safe and approachable for pretty much anyone, kids included.
What really makes pearled sand candles stand out, though, is how well they work with any container. The loose granules conform perfectly to whatever jar you put them in — every contour, every curve — without the air pockets or shrinkage that can ruin a poured candle. Wide-mouth mason jar, tall apothecary vessel, little vintage jam jar — it doesn’t matter. The wax settles in beautifully and the end result looks like something you’d find in a boutique, even if it’s your first attempt. That accessibility is a big part of why they’ve gotten so popular with home crafters and small candle sellers alike.
Materials and Tools You Will Need
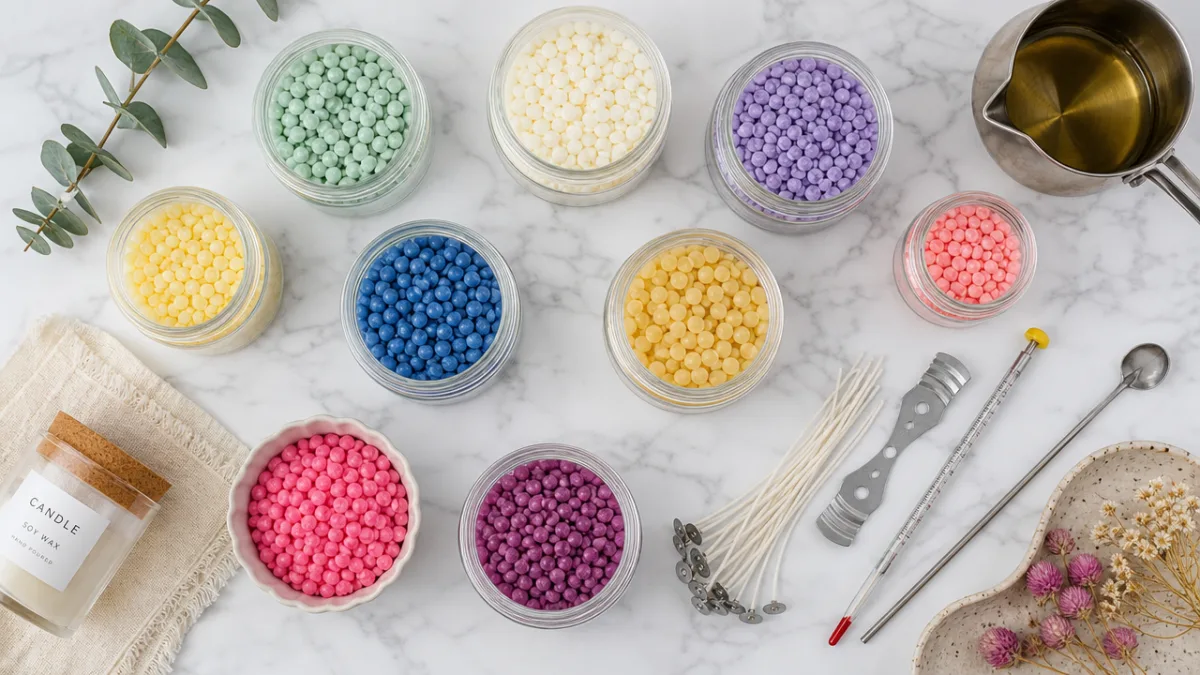
One of the best things about getting into pearled sand candles is that the shopping list is short and pretty affordable. The star of the show is granular or pearled wax, which comes in natural white as well as a whole range of pre-dyed colors. Beyond that you’ll need pre-tabbed candle wicks sized for your jars, the jars themselves, any decorative bits you want to tuck in, and fragrance oils formulated for granular wax if you want a scented candle.
A few simple tools will make the whole process a lot smoother. Small measuring scoops or spoons give you control when pouring the granules, and wooden skewers or chopsticks are endlessly useful — for nudging the wick back into position, creating patterns in the wax, and working decorative elements into the surface. If you’re working with narrow-necked jars, a small funnel will save you a lot of cleanup. And for keeping your wick centered and upright while you fill the jar, a wick centering tool works great, or just lay a clothespin across the jar mouth — it does the job perfectly well.
Choosing your jar is honestly one of the more enjoyable parts of this whole craft, and you have so many options. Clear glass lets the texture and color of the wax shine through completely, while colored or frosted glass creates this gorgeous glowing effect once the candle is lit. Some jar types that work especially well include:
- Wide-mouth mason jars in half-pint, pint, and quart sizes — easy to fill and great for showing off the wax
- Apothecary jars with cork or glass lids, if you’re going for something with a more vintage, elegant feel
- Recycled pasta sauce or jam jars, which have a rustic charm and are a satisfying way to reuse something that would otherwise be recycled
- Tall cylindrical hurricane glasses that really show off layered color effects
- Small hexagonal honey jars that make the sweetest little gift-sized candles
Step-by-Step Guide to Creating Your First Pearled Sand Candle
Before you touch the wax, get your jar and wick set up first. Drop your pre-tabbed wick into the center of a clean, dry jar and press the metal tab firmly to the bottom. If it won’t stay put on its own, a tiny dot of hot glue or a wick sticker will hold it just fine. Then pull the wick upright and drape it over a centered clothespin or wick bar resting across the jar opening — this keeps it perfectly vertical the whole time you’re filling. A centered wick really does matter: it’s the difference between a candle that burns evenly and one that tunnels off to one side.
If you want a scented candle, add fragrance to the granules now, before they go into the jar. Measure your wax into a bowl, then add fragrance oil at the recommended rate — usually somewhere between six and ten percent of the wax weight for granular formulations. Stir gently but thoroughly with a wooden spoon or spatula until the oil is evenly worked through the granules, then let it sit for a few minutes so everything is fully absorbed before you start filling.
Pour your prepared granules slowly into the jar around the wick, stopping every so often to tap the jar gently on your work surface. That tapping settles the granules and knocks out any air pockets, giving you a denser, more polished final surface. Keep going until you’re about half an inch below the rim. Once you’re happy with the fill level, use a skewer or chopstick to press any decorative elements — shells, dried citrus slices, gemstone chips, whatever you like — into the surface and arrange them how you want them. Trim the wick to about a quarter inch above the wax, and honestly, you’re done. The candle is ready to display or light right away.
Creative Design Ideas and Color Combinations
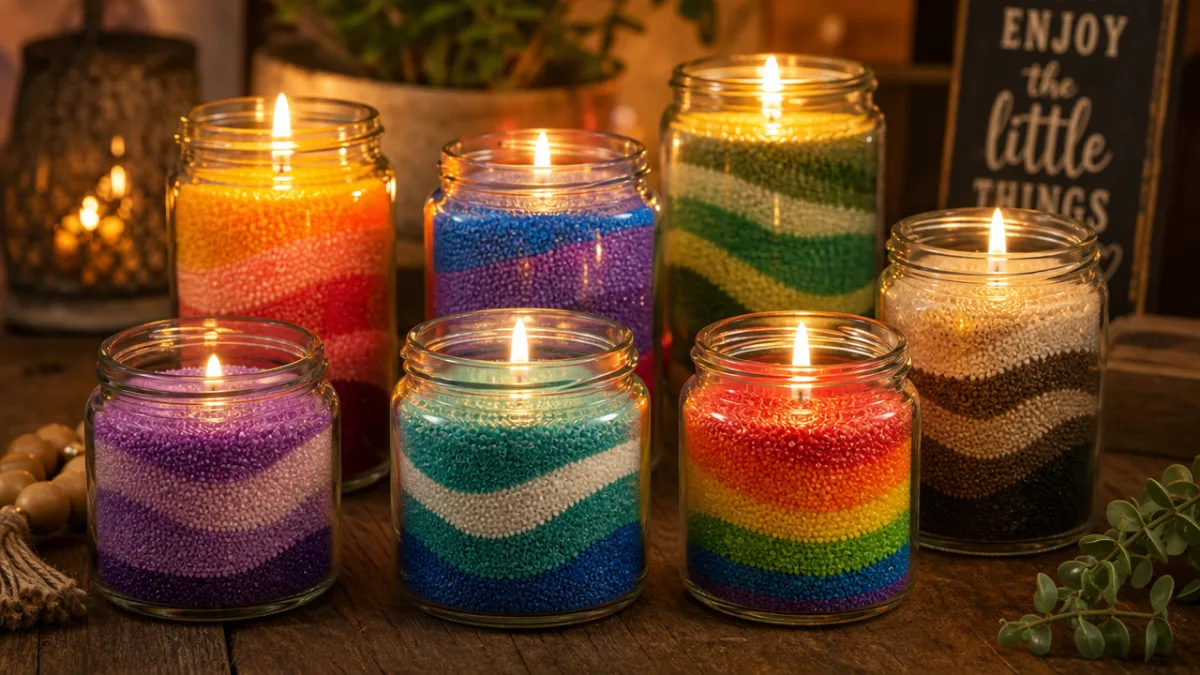
This is where pearled sand candles really come into their own. Because you can mix, layer, and combine the granules in basically any way you can imagine, even a total beginner can produce something that looks genuinely complex and considered. The gradient or ombre effect is one of the most popular approaches — you just fill the jar with sequential layers going from light to dark, or blend two complementary colors at a transition zone in the middle for a seamless color melt. It looks impressive and it’s surprisingly simple to pull off.
Seasonal and themed candles are another direction a lot of crafters have really run with, and for good reason — the results are stunning. Some ideas that have gotten a lot of love in craft communities and on social media:
- Ocean and Beach Theme: Layer pale ivory, seafoam green, and aqua granules, then press small shells, sea glass, and tiny starfish into the top. It’s like a little piece of the coast you can keep on your shelf year-round.
- Desert Sunset: Sweep terracotta, burnt orange, and deep plum granules in wide diagonal bands that mimic the dramatic color shifts of a southwestern sky at dusk.
- Winter Wonderland: Go with glittering white and silver granules, add snowflake charms and a few dried pine needles, then finish with a cedar or fir fragrance oil for something that genuinely feels like winter.
- Garden Botanical: Work dried lavender sprigs, rose petals, or chamomile flowers through pastel purple and yellow granules for a romantic, cottage-core look.
- Galaxy Night: Swirl deep navy, midnight purple, and black granules together and embed iridescent micro-glitter and tiny silver star beads throughout. It ends up looking like something out of a museum gift shop.
And don’t overlook the surface itself as a design element. A smooth, level top reads as clean and modern. A raked or swirled surface made with a skewer gives the candle an artisanal quality that feels very intentional. Some crafters like to mound the granules slightly above the jar rim before adding decorative elements, creating a domed surface that looks almost like a terrarium or snow globe. Playing around with surface treatments is free, takes about thirty seconds, and can completely change the personality of an otherwise identical candle.
Burning, Safety, and Care Tips
Pearled sand candles burn a little differently from solid wax candles, and knowing what to expect makes the whole experience more enjoyable. When you first light one, the flame melts the granules immediately around the wick, forming a small pool of liquid wax that gradually tunnels downward through the granule mass as the burn continues. The unmelted granules around the sides of the jar don’t collapse inward the way solid wax would, so your candle largely holds its shape and decorative appearance even after many hours of burning — which is one of the nicest things about this format.
The safety basics are the same as with any candle, but there are a couple of things worth paying extra attention to with this style. Because the loose granules can shift if the jar gets bumped while it’s burning, make sure your candle is on a completely stable, heat-resistant surface before you light it. Don’t move it while it’s lit — the combination of pooling liquid wax inside the granule mass and shifting granules can cause uneven burning or even spillage. Also keep burning candles away from drafts, which can push the flame toward the glass walls and cause uneven melting.
Trimming your wick before every single burn session is the single most impactful habit you can build. Before you light up, trim it to a quarter inch above the current wax surface. A wick that’s too long creates excess soot, a big flickering flame, and uneven heat that can crack glass jars over time. Try to stick to a maximum burn time of three to four hours per session, and let the candle cool fully before lighting it again. These small habits make a real difference in how long your candle lasts and how well it performs.
Gifting, Packaging, and Selling Your Creations
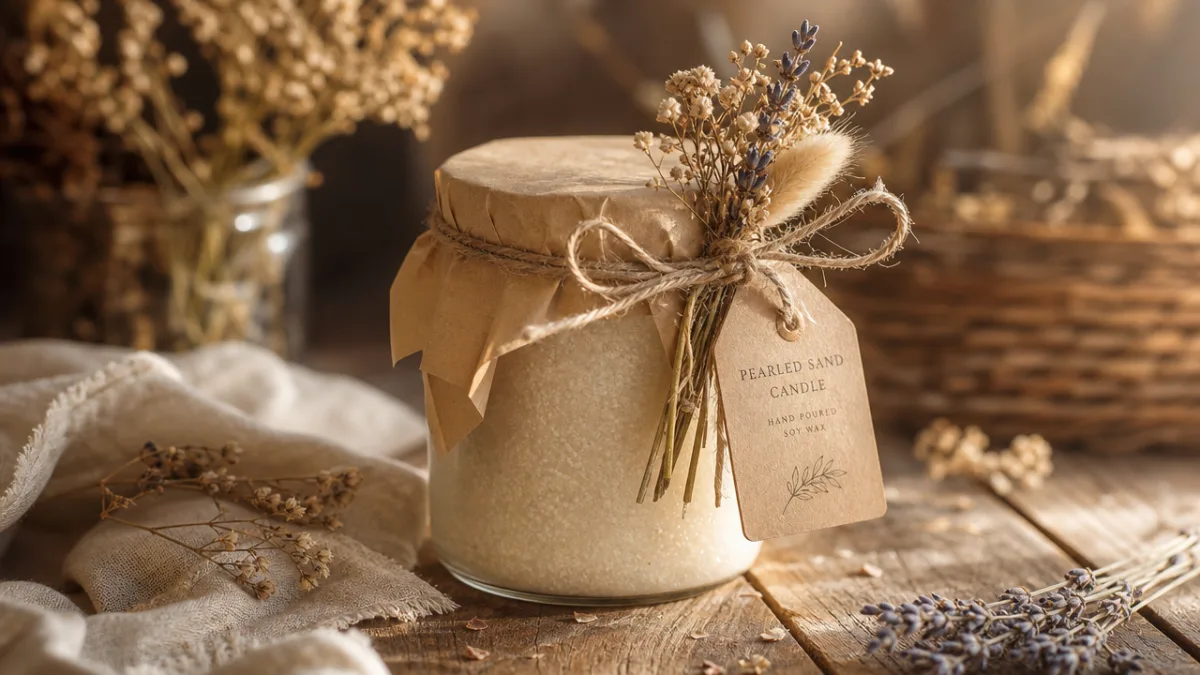
Pearled sand candles make wonderful gifts — the visual detail and obvious care that goes into them communicate thoughtfulness even before the recipient smells the fragrance. For gifting, the jar itself often does most of the packaging work. Just top it with a kraft paper circle tied with twine or a grosgrain ribbon, add a small handwritten tag with the fragrance notes and burn time instructions, and you have something that genuinely feels boutique. It’s the kind of gift that doesn’t look homemade in a bad way — it looks homemade in the best possible way.
If you’re thinking about selling your candles at markets, through an online shop, or to local boutiques, packaging becomes a bigger part of the picture. A few things that consistently land well with buyers:
- Custom labels with a clean logo, fragrance name, burn time, and safety warnings on kraft or white paper stock — this alone makes a huge difference in how professional your product looks
- Lids or cork stoppers that protect the surface during shipping and keep decorative elements from shifting before the first burn
- Tissue paper nesting inside kraft boxes for an unboxing experience that photographs beautifully — important if you want customers sharing your product on social media
- Fragrance cards tucked inside that let customers smell the scent before they open the jar
- QR codes on labels linking to care instructions, your shop, or a behind-the-scenes making video
When it comes to pricing, be honest with yourself about what goes into each candle — wax, fragrance, wicks, jars, labels, packaging, and your actual time. Look at what established small-batch candle makers in your niche charge to get a realistic baseline, and resist the urge to underprice just to compete. The people who seek out handmade pearled sand candles aren’t just buying a candle — they’re buying the aesthetic, the story, and the experience. Pricing that reflects that tends to attract buyers who genuinely appreciate the work, which makes for a much more rewarding experience all around.
Why Pearled Sand Candles Are Worth Exploring
Craft trends come and go, but pearled sand candles have stuck around because they’re genuinely accessible and genuinely fun. There’s no melting, no specialized equipment, no waiting around for wax to cure. A complete beginner can have a beautiful, fragrant, functional candle finished within thirty minutes of sitting down with their supplies. That’s a pretty remarkable ratio of effort to result, and it’s the main reason this style keeps pulling in new crafters who might have been put off by the learning curve of traditional candle making.
There’s also something worth acknowledging on the sustainability side. Because assembly requires no heat at all, the energy footprint of making these candles is essentially nothing beyond what it takes to produce the granules in the first place. And the jar doesn’t have to be a one-time thing — once your candle has burned down, clean it out, refill it with fresh granules and a new wick, and you’re back in business. It’s a genuinely circular product lifecycle, and that resonates more and more with both crafters and the people buying their work.
Beyond the practical and environmental arguments, though, there’s something about the actual making process that’s hard to put into words. Carefully pouring granules, arranging botanicals, building up layers of color — it’s slow, tactile, and deeply satisfying in a way that a lot of people are actively looking for right now. Whether you’re making them for yourself, as gifts, or as the start of a small business, pearled sand candles have a way of rewarding the time you put into them with something genuinely beautiful at the end of it.








What do you think?
It is nice to know your opinion. Leave a comment.