










Painted Candle DIY: Transform Plain Candles Into Stunning Works of Art
Introduction to the Painted Candle Trend
The painted candle DIY trend has taken social media platforms like Pinterest and Instagram by storm, with creators like @annikamarieee leading the charge with breathtaking designs that blur the line between functional home décor and fine art. What was once a simple household item — the humble candle — has become a canvas for self-expression, pattern work, and color exploration. This movement reflects a broader cultural shift toward handmade, personalized home goods that carry meaning and visual impact far beyond anything you can buy off a shelf.
At its core, the painted candle trend is wonderfully accessible. You don’t need a fine arts degree or a studio full of expensive equipment to create something genuinely beautiful. With a few basic supplies, a steady hand, and a willingness to experiment, anyone can produce candles that look like they belong in a boutique gift shop or a curated Etsy storefront. The learning curve is gentle, and the results are almost immediately gratifying, making this one of the most satisfying DIY crafts you can pick up on a quiet weekend afternoon.
Beyond aesthetics, painted candles make exceptional gifts. Whether you’re preparing for the holiday season, a birthday, a housewarming, or simply want to give someone something thoughtful and unique, a hand-painted candle communicates care and creativity in a way that mass-produced gifts simply cannot. The recipient knows that time, attention, and intention went into every brushstroke, and that emotional resonance elevates the gift from a simple object to a genuine keepsake that people display with pride long after the wax has burned down.
Why This DIY Project Is Perfect for Beginners
One of the biggest barriers to entering the world of DIY crafts is the fear of failure, and painted candles do a remarkable job of dismantling that fear almost immediately. Because you’re working on a small, three-dimensional surface, mistakes are easy to paint over or incorporate into the design. A smudge can become a deliberate texture; an uneven line can evolve into a swirling pattern. The forgiving nature of the medium means that perfectionism works against you, and happy accidents are often the most interesting design moments you’ll encounter.
Beginners will also appreciate that the necessary supplies are inexpensive and widely available. Most of what you need can be found at a local craft store, a dollar store, or ordered online for just a few dollars. You’re not committing to a significant financial investment before you know whether you enjoy the process, which removes another common obstacle to trying new creative pursuits. Starting small with just one or two candles lets you develop your technique and confidence before scaling up to more complex or ambitious projects.
The community surrounding painted candle DIY is also incredibly welcoming and generous with knowledge. Creators on Instagram and Pinterest regularly share tutorials, color palettes, brush technique tips, and troubleshooting advice freely and enthusiastically. Following accounts like @annikamarieee gives beginners access to a steady stream of inspiration and practical guidance, making the onboarding experience feel collaborative and supportive rather than isolating. That sense of belonging to a creative community adds another layer of enjoyment to the craft itself.
Supplies You’ll Need and How to Choose Them
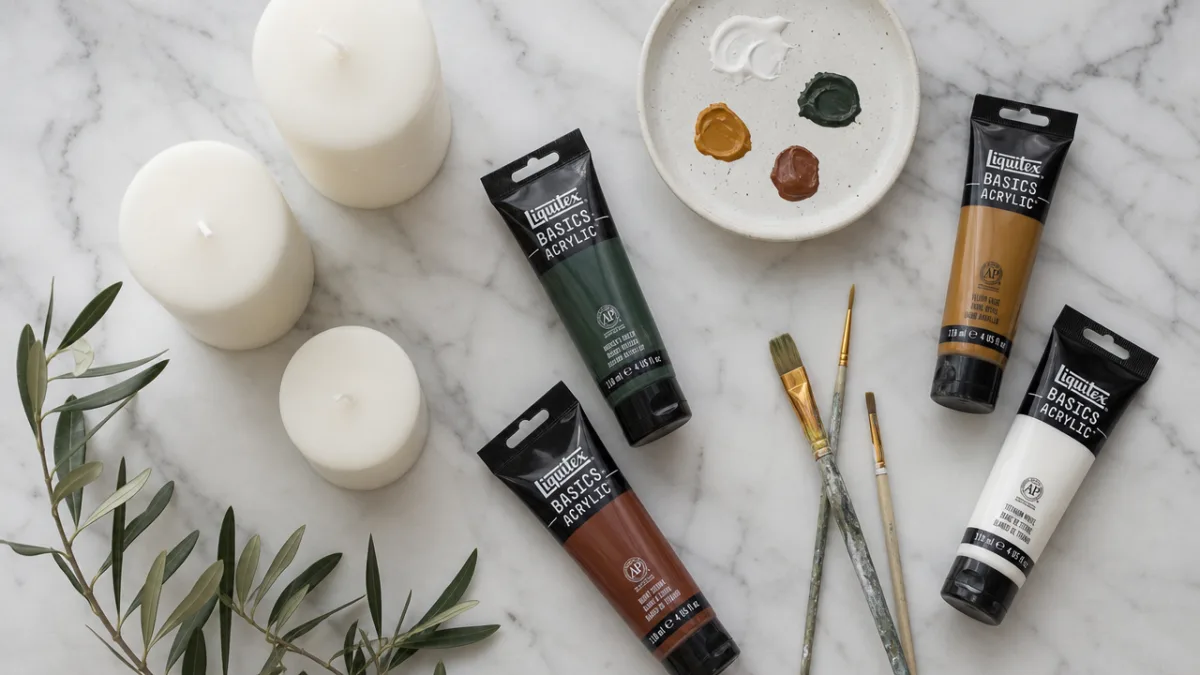
Gathering the right supplies before you begin makes the entire process smoother and more enjoyable. The most important material, obviously, is the candle itself. Smooth, pillar candles with a matte or lightly textured surface work best for painting because they provide an even base that accepts paint consistently. Jar candles can also work beautifully, especially if you want to paint on glass, though the technique differs slightly. Avoid candles with heavy surface textures or those that have been coated with a gloss finish, as these can prevent paint from adhering properly and lead to frustrating peeling or smearing.
When it comes to paint, acrylic paint is the gold standard for this type of project. It adheres well to wax surfaces when applied correctly, dries relatively quickly, and is available in an enormous range of colors and finishes including matte, satin, metallic, and iridescent options. Craft-grade acrylics from brands like Apple Barrel or Folk Art are affordable and perfectly suitable for beginners. As your skills develop, you may want to experiment with artist-grade acrylics, which offer richer pigmentation and more nuanced color mixing capabilities.
Your brush selection matters more than many beginners initially realize. A variety of brush types opens up a wider range of design possibilities and makes execution significantly easier. Consider building a basic kit that includes the following types:
- Round brushes (sizes 0 and 2): Ideal for fine detail work, lettering, and delicate floral or botanical elements
- Flat brushes (sizes 4 and 6): Perfect for filling larger areas with color and creating clean geometric edges
- Fan brushes: Excellent for creating soft, wispy effects like grass, feathers, or abstract texture
- Liner brushes: Essential for thin, consistent lines, borders, and intricate pattern work
- Sponge daubers: Useful for applying base coats, creating ombre effects, or stippling texture
Beyond brushes and paint, a few additional supplies will prove invaluable throughout the process. A palette or plate for mixing colors, a cup of clean water for rinsing brushes, paper towels or a cloth for blotting, and painter’s tape for creating clean geometric lines are all worth having on hand before you start. A heat gun or hair dryer can speed up drying time between layers, which is particularly useful when you’re working with multiple colors and don’t want to wait long stretches between applications.
Preparing Your Candle Surface for Painting
Surface preparation is a step that many beginners skip in their eagerness to start painting, and it’s almost always something they later wish they hadn’t overlooked. Taking just a few minutes to properly prepare your candle surface makes a dramatic difference in how well the paint adheres, how vibrant the colors appear, and how long the finished design lasts. A candle taken directly from its packaging often has a light oily residue or release agent on its surface from the manufacturing process, and painting directly onto this layer compromises adhesion significantly.
The preparation process itself is straightforward. Begin by wiping the entire surface of the candle with a cotton ball or soft cloth lightly dampened with rubbing alcohol. This removes surface oils, dust, and any waxy residue that would otherwise create a barrier between the paint and the candle. Allow the candle to dry completely — which typically takes only a minute or two — before proceeding. If you’re working with a particularly smooth or shiny candle, a very light sanding with fine-grit sandpaper (around 400 grit) can create microscopic texture that gives the paint something to grip onto.
Once your candle is clean, consider whether you want to apply a base coat before adding your decorative design. For many projects, working directly on the natural wax color is perfectly fine and creates a beautiful, organic look. However, if your design calls for bright, opaque colors against a white or specific background, applying one or two thin coats of white acrylic paint first will make your subsequent colors pop significantly more. Allow each base coat layer to dry fully before adding the next, and resist the temptation to rush this foundational stage — patience here pays dividends in the final result.
Protecting and Sealing Your Finished Design
Once your design is complete and you’re satisfied with the result, sealing the painted surface is an important final step that protects your work from chips, smudges, and the inevitable handling that comes with displaying or gifting the candle. A matte or satin Mod Podge applied in thin, even coats works well as a sealant and is flexible enough to accommodate the slight expansion and contraction that can occur as candle wax changes temperature. Avoid high-gloss sealants if you want to maintain a natural, artisanal look, as these can make the painted surface appear somewhat plastic.
An important safety note deserves emphasis at this stage: always ensure that the sealant you choose is non-toxic and has fully cured before the candle is burned. As a general rule of best practice, painted candles are most safely used as decorative objects rather than functional candles to be lit. If the candle will be burned, keep the flame well away from painted areas, and never leave a burning candle unattended regardless of its decoration status. This guidance applies especially to candles painted with metallic or iridescent acrylics, which may contain additives that behave unpredictably under direct heat.
For gift-giving, consider packaging your finished painted candle in tissue paper inside a simple kraft paper box or a clear cellophane bag tied with ribbon. The contrast between the rustic packaging and the beautiful hand-painted surface creates a lovely unboxing experience. You might also include a small card explaining the materials used and, if the candle is meant to be burned, any relevant safety notes. This thoughtful presentation elevates the gift presentation and demonstrates the same attention to detail that went into making the candle itself.
Popular Design Styles and Techniques to Try
One of the most exciting aspects of painted candle DIY is the sheer breadth of design directions available to you. The style you choose can reflect your personal aesthetic, complement an existing room’s décor, suit a particular season or occasion, or simply capture whatever creative mood you happen to be in on a given day. There are no rules here, and that freedom is precisely what makes the craft so endlessly engaging. That said, exploring some of the most popular established styles gives you a valuable foundation from which to develop your own signature approach.
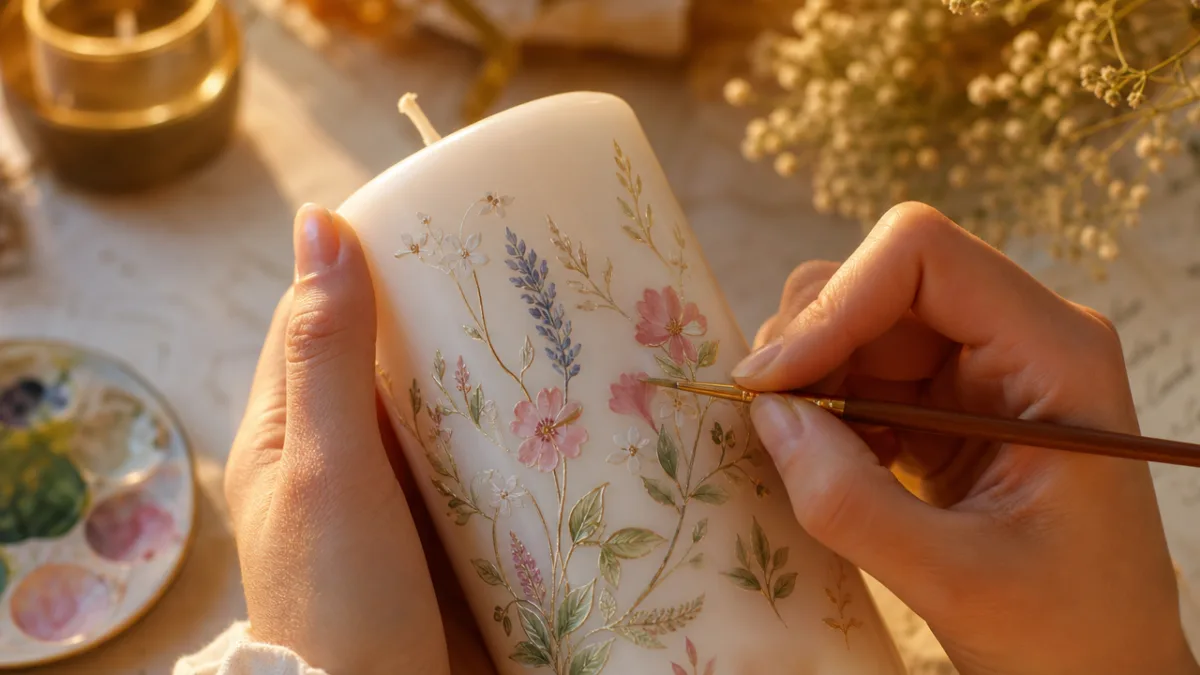
Floral and botanical designs are perhaps the most universally beloved category of painted candle art, and for good reason. Loose, impressionistic flowers painted in soft, muted tones have an effortless elegance that suits almost any interior style, from Scandinavian minimalism to maximalist eclecticism. Techniques range from highly realistic botanical illustrations with fine detail work to gestural, free-flowing strokes that suggest flowers without precisely rendering them. The latter approach is particularly well-suited to beginners because it rewards a relaxed, confident brushstroke rather than painstaking precision.
Geometric and abstract designs offer a completely different energy and aesthetic payoff. Clean lines, repeating patterns, and bold color blocking create a contemporary, graphic look that works beautifully in modern interiors. Painter’s tape is your best friend for achieving crisp geometric edges — apply it carefully, paint over the edges, and peel it away slowly while the paint is still slightly wet to reveal clean, sharp lines. Color-blocking techniques using two or three complementary colors can produce sophisticated results even with minimal artistic experience, and the structured nature of geometric design gives your hands and your composition a clear roadmap to follow.
Seasonal and Occasion-Specific Designs
Tailoring your painted candle designs to specific seasons or occasions adds a layer of intentionality and relevance that makes both the making and the receiving feel especially meaningful. Autumn designs might incorporate warm ochres, burnt oranges, and deep burgundies with motifs like falling leaves, acorns, or abstract woodland imagery. Winter holiday candles lend themselves to rich jewel tones, gold metallics, and imagery ranging from simple stars and snowflakes to intricate illustrated scenes of pine trees or cozy cottages dusted in snow.
Spring and summer designs invite a lighter touch and brighter palette. Soft pastels, watercolor-style washes, and imagery like citrus slices, tropical leaves, seashells, or wildflowers feel perfectly at home in candles meant for the warmer months. For occasion-specific designs, consider monograms or initials painted in elegant script for wedding favors, abstract heart motifs in rich reds and pinks for Valentine’s Day gifting, or playful birthday candles featuring small illustrated cakes, balloons, or confetti patterns. The specificity of a design created for a particular person or moment transforms the candle from a decorative object into something genuinely personal and memorable.
Don’t overlook the creative potential of color palette selection as a design element in its own right. Before you pick up a brush, spend a few minutes curating a palette of three to five colors that work harmoniously together. Tools like Adobe Color, the Coolors website, or even just browsing Pinterest boards for color inspiration can help you identify combinations that feel balanced and intentional. A cohesive palette will unify even a loosely painted, improvisational design and make the finished candle look professionally considered rather than haphazardly assembled.
Displaying and Styling Your Painted Candles
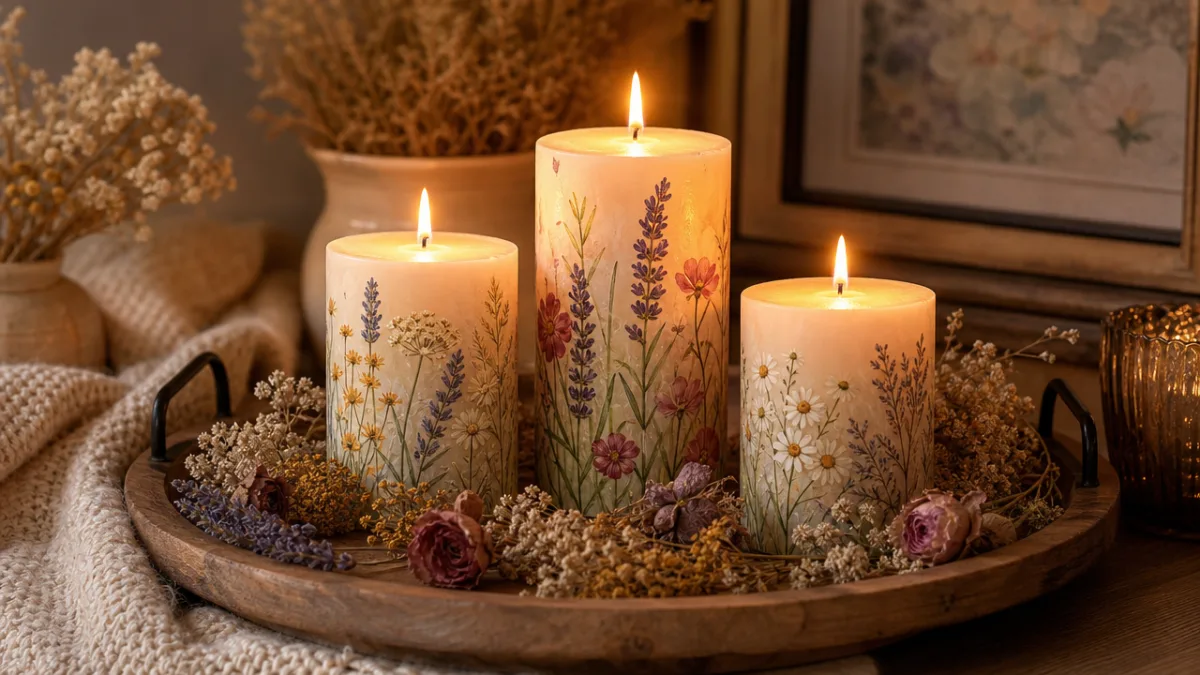
Creating beautiful painted candles is only half the pleasure — styling and displaying them thoughtfully in your home amplifies their visual impact and allows them to contribute meaningfully to your interior décor. A single large painted pillar candle placed on a wooden tray alongside a few natural elements like dried botanicals, smooth river stones, or a small succulent creates an effortlessly styled vignette that looks curated without appearing overly contrived. The candle becomes the focal point while the surrounding elements provide context and texture.
Grouping multiple candles together in varying heights creates visual dynamism and allows different design styles to play off one another in interesting ways. A set of three pillar candles in coordinating but not identical designs — perhaps sharing a color palette but each featuring a slightly different botanical motif — creates a cohesive display that rewards closer inspection. Staggering them at different heights using small wooden blocks, stacks of books, or dedicated candle risers adds dimensional interest and prevents the grouping from looking flat or uniform.
Painted candles also translate exceptionally well into social media content, which is part of what has fueled the trend’s growth on platforms like Pinterest and Instagram. When photographing your finished pieces for sharing online, natural light is almost always your best friend. Position your candles near a window during the golden hour of morning or late afternoon, and experiment with simple, uncluttered backgrounds like white linen, marble cutting boards, or weathered wood surfaces. A few scattered props — a sprig of eucalyptus, a small ceramic dish, an open book — can add lifestyle context without competing with the candles themselves for visual attention.
Building a Creative Practice Around Candle Painting
For those who find themselves genuinely captivated by the painted candle craft, there’s a compelling case for developing it into a regular creative practice rather than a one-time project. Setting aside even an hour each week to paint candles creates a reliable rhythm of creative engagement that many people find genuinely restorative. The focused, repetitive nature of brushwork has a meditative quality that quiets mental noise and encourages a kind of present-moment attention that’s increasingly rare in daily life dominated by screens and notifications.
As your skills and confidence develop, consider exploring adjacent techniques and materials that can expand your painted candle vocabulary. Wax resist techniques using a clear candle or crayon before painting can create interesting texture effects. Transferring designs using carbon paper allows you to work from detailed reference images without requiring freehand drawing ability. Incorporating other materials like dried flowers, gold leaf, or decoupage tissue paper adds dimensional interest and mixed-media complexity to your designs and keeps the creative exploration feeling fresh and stimulating.
Some candle painters find that their hobby naturally evolves into a small creative business, selling their work through Etsy, at local craft markets, or through social media platforms. If this trajectory interests you, begin documenting your process from the start through photos and short videos, as behind-the-scenes content of the making process tends to perform exceptionally well and builds audience connection and trust far more effectively than finished product photos alone. The painted candle community is large, enthusiastic, and genuinely eager to support fellow makers, making it one of the more welcoming creative niches to grow a small creative business within.
Tips for Leveling Up Your Painted Candle Skills
Once you’ve completed a few candles and established a basic comfort level with the materials and process, there are many specific skill-building strategies that can accelerate your development significantly. One of the most effective is dedicated brush control practice on paper before committing a technique to an actual candle. Practicing consistent line weights, smooth curves, and even pressure across a brushstroke translates directly to better results on the candle surface and saves you the frustration of discovering a weak area in your technique mid-project.
Studying color theory — even at a basic introductory level — pays enormous dividends in your palette selection and color mixing decisions. Understanding the difference between warm and cool tones, how complementary colors create visual vibration when placed next to each other, and how value contrast (the relative lightness or darkness of colors) creates depth and readability in a design gives you a principled framework for making intentional choices rather than relying purely on intuition and accident. Numerous free resources online cover basic color theory accessibly and engagingly for non-artists.
Finally, and perhaps most importantly, maintain a habit of studying the work of painters and illustrators whose work you admire, not with the intention of copying their style, but to develop your visual literacy and expand your sense of what’s possible. Look closely at how they use negative space, how they handle edges, how they create a sense of movement or stillness, how they use repetition and variation to build visual interest. This kind of active, attentive looking gradually builds an internal library of visual references and design principles that begins to inform your own creative choices in ways both conscious and unconscious, ultimately helping you develop a distinctive personal style that feels authentically your own.
Common Mistakes to Avoid
Even experienced crafters encounter predictable pitfalls when painting candles, and knowing them in advance allows you to sidestep the frustration they cause. The single most common mistake is applying paint too thickly in a single coat in an attempt to achieve full coverage quickly. Thick paint on a wax surface is prone to cracking, peeling, and dripping as it dries, and the resulting texture is rarely attractive. Always build color in multiple thin layers, allowing each to dry before adding the next — the patience required is modest, and the results are incomparably better.
Another frequent issue involves working on a cold candle in a cold environment. Paint adheres and dries differently depending on temperature, and very cold wax can cause paint to bead up or refuse to spread smoothly. If you’re working in a cooler space, allow the candle to come to room temperature before you begin, and consider working near a gentle heat source. Conversely, avoid painting candles that have been sitting in direct sunlight or near a heat source immediately before you begin, as warm, slightly soft wax can cause brushstrokes to drag and smear unpredictably.
Rushing the drying process by applying too much heat too quickly from a heat gun is another mistake worth naming explicitly. While gently warming the painted surface to speed drying is perfectly fine, blasting it with intense heat can cause the underlying wax to soften and warp or cause the paint layer to bubble and lift. Use any heat source on its lowest setting, keep it moving rather than holding it in one spot, and stop as soon as the paint feels dry to a light touch. When in doubt, simply allowing the paint to air dry is always the safest and most reliable option for achieving clean, professional-looking results.








What do you think?
It is nice to know your opinion. Leave a comment.