










Drip Irrigation Types: A Complete Guide for Beginners
What Is Drip Irrigation and Why Should You Use It?
If you’ve ever watched a sprinkler soak your sidewalk while your tomatoes wilted, you already understand the problem drip irrigation solves. Instead of spraying water everywhere and hoping some of it reaches the right place, a drip system delivers water slowly and directly to the base of each plant. Less water disappears into the air or runs off into the street, which is good for your water bill and good for the environment.
The basic idea is pretty straightforward: a network of tubes and emitters carries water from your source right to the soil at the base of your plants. Water seeps in gradually, which gives roots time to absorb it deeply rather than just getting a quick surface drink. That encourages roots to grow downward, and plants with deep root systems handle heat waves and dry spells a lot better than shallow-rooted ones.
What makes drip irrigation especially appealing for beginners is how flexible it is. A few raised beds on a balcony? There’s a setup for that. A sprawling vegetable garden? Covered. A backyard orchard? Absolutely. You don’t need to spend a fortune or dedicate a whole weekend to installation — most home gardeners can get a basic system up and running in an afternoon, and it’ll keep paying off for seasons to come.
Surface Drip Irrigation: The Most Common Starting Point
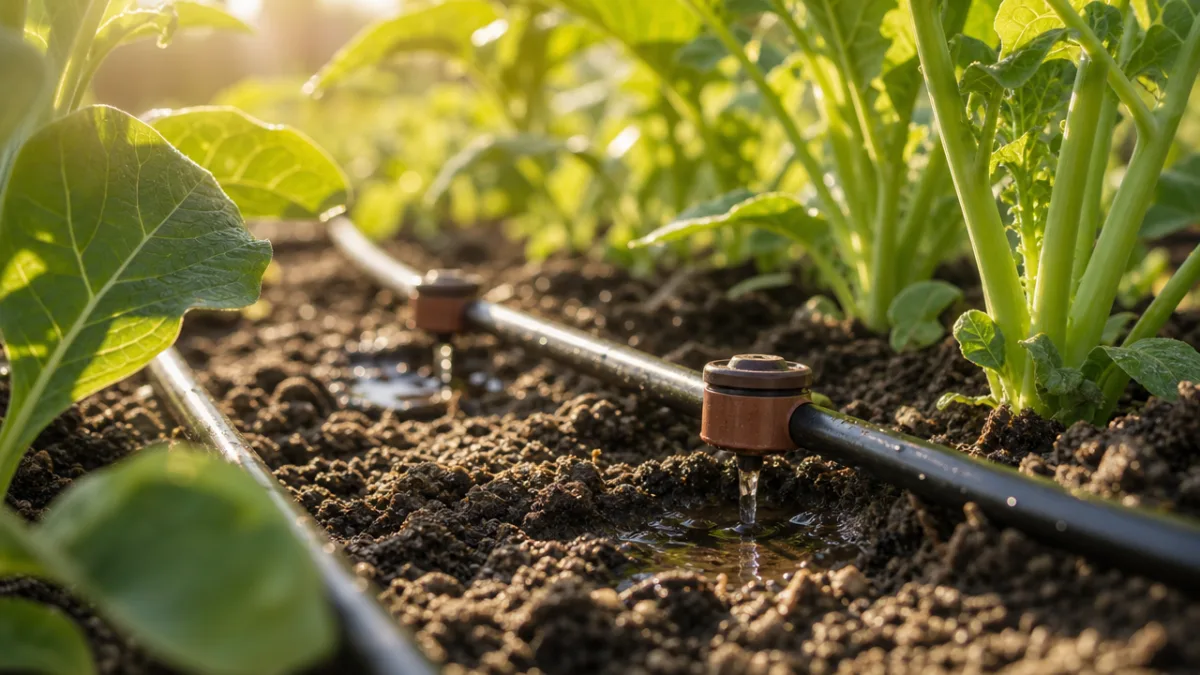
Surface drip irrigation is exactly what it sounds like: the tubing and emitters sit right on top of the soil, either running between rows of plants or looping around individual ones. It’s the most common drip setup you’ll find out there, and it’s what most starter kits at garden centers are based on. Everything is out in the open, which makes it easy to adjust, fix, or just check on whenever you need to.
A typical surface system has a main supply line — a larger hose connected to your water source — and a series of smaller lines branching off from it. Emitters are small plastic fittings that attach to or punch into those lines and control exactly how much water comes out, measured in gallons per hour. You might use a half-gallon-per-hour emitter for a delicate seedling and a two-gallon-per-hour emitter for a thirsty fruit tree. That level of control is one of the things that makes drip irrigation so satisfying to work with.
The best part about surface systems for beginners? You can see everything. If an emitter clogs up with mineral deposits or a bit of soil, you’ll notice the problem quickly — either the soil around that plant stays dry or you spot the emitter itself isn’t dripping. A quick clean or swap and you’re back in business. After running your system, you can simply walk the garden and confirm that each plant got water right where it needed it. That kind of visual feedback takes a lot of the anxiety out of learning.
Subsurface Drip Irrigation: Precision Below the Ground
Subsurface drip irrigation — often called SDI — takes things a step further by burying the drip lines a few inches underground. Water gets delivered straight to the root zone without ever touching the surface. That means almost no evaporation loss, and because the soil surface stays dry, a lot fewer weed seeds get the moisture they need to sprout. It’s a genuinely clever approach once you understand how it works.
Since the tubing is in the ground, subsurface systems are more of a permanent installation than surface setups. They work best in established beds, orchards, vineyards, and fields where the plant layout isn’t going to change much from year to year. The installation takes more planning — you’ll need to trench the soil and get the lines at the right depth for your crops. Most vegetables do well with lines four to six inches down, while trees and shrubs may need the lines placed deeper to reach where their roots actually are.
The main challenge with SDI is maintenance. Because everything is underground, a clog or a leak can go unnoticed until a plant starts looking stressed, which is never a fun way to find out something’s wrong. That’s why subsurface systems almost always include filtration and pressure regulation at the source — it’s worth it to protect those buried lines. Regularly flushing the lines to clear sediment buildup is also a good habit. All that said, subsurface drip is considered the gold standard for irrigation efficiency in professional agriculture, and more and more dedicated home growers are making the switch once they get comfortable with the basics.
Micro-Sprinkler and Mini-Sprayer Systems
Micro-sprinklers and mini-sprayers sit somewhere between a traditional overhead sprinkler and a standard drip emitter. They’re still part of the drip family — low pressure, low flow — but instead of releasing water as a slow drip at one point, they fan it out into a fine spray over a small area. That makes them a great match for crops where you want broader coverage, like densely planted herb beds, strawberries, ground covers, or flower borders where individual emitters would leave gaps.
The spray patterns vary quite a bit depending on the model. Some throw a full 360-degree circle of mist covering two to four feet in diameter; others do a half-circle or a narrow strip, which comes in handy along the edges of beds or in tight rows. Many models let you swap out the spray head or dial in the flow rate, so you can fine-tune the coverage to match the actual shape of your planting area instead of just watering everything in the general vicinity. That flexibility is genuinely useful once you start thinking carefully about where your water is actually going.
One thing worth keeping in mind: micro-sprinklers do get the leaves wet, which conventional drip emitters avoid entirely. In a hot, dry climate that can actually be a good thing — a little leaf cooling goes a long way on a scorching afternoon. But for disease-prone plants like tomatoes or squash, wet foliage can invite fungal problems you’d rather not deal with. A sensible approach is to use micro-sprinklers for your more tolerant plants and stick with point-source emitters for the ones that are fussier about moisture on their leaves. With a bit of planning, micro-sprinklers can be a really versatile piece of a well-designed system.
Soaker Hoses: The Beginner-Friendly Classic
If you want the simplest possible entry point into drip irrigation, soaker hoses are it. Made from porous rubber or recycled material, they weep water slowly along their entire length instead of through individual emitters. You hook one end to your outdoor faucet, lay the hose along your plants however makes sense for your garden, turn the water on low, and within a few minutes the whole length of the hose is gently moistening the soil around it. It really is that simple.
There’s essentially no learning curve with soaker hoses. No emitters to punch in, no pressure manifolds to assemble, no specialized tools required. You open the package, connect it, and it works. That’s a big reason they’re so popular with renters, apartment gardeners, and anyone who wants to water more efficiently without committing to a permanent setup. At the end of the season, you roll them up and store them. Next spring, lay them out again wherever your garden has changed. No fuss.
That said, soaker hoses do have real limitations worth understanding before you go all-in on them. Because moisture seeps out along the whole length of the hose, they work best when your plants are closely and evenly spaced in rows or raised beds. They’re not a great fit for widely spaced trees, shrubs, or containers where you want water delivered to one specific spot. They can also be uneven — more water tends to come out near the faucet end and less at the far end, especially on longer runs. Keeping individual hose runs to 25 feet or less helps a lot with that problem.
- Connect soaker hoses to a faucet timer to automate watering and keep moisture levels consistent without having to remember to turn anything on or off.
- Cover soaker hoses with two to three inches of mulch to reduce surface evaporation and protect the hose material from breaking down in the sun.
- Run soaker hoses in the early morning so any surface moisture has time to dry before cooler evening temperatures arrive.
- Check your water pressure before running a soaker hose system — most work best between eight and twelve PSI, which is much lower than a typical home faucet delivers without a regulator.
- Flush soaker hoses at the start of each season by removing the end cap and running water through them briefly to clear any sediment that built up over winter.
Choosing the Right Drip Irrigation Type for Your Garden
Picking the right system really comes down to a handful of practical questions: How big is your garden and how is it laid out? What are you growing? What’s your budget? And honestly — how much time do you want to spend on installation and upkeep? There’s no single right answer for everyone, and plenty of experienced gardeners use different drip system types in different parts of their yard. Knowing what each approach does well, and where it falls short, is really all you need to make a solid decision.
For most beginners with a small to medium vegetable garden or a few raised beds, surface drip systems or soaker hoses are the natural starting point. They’re affordable, easy to find, and forgiving of mistakes. As you spend a season or two watching how your garden actually uses water, you’ll naturally develop a clearer sense of where you want to go next. Plenty of gardeners start with soaker hoses, gain some confidence, and then graduate to a more customized emitter-based system as their garden grows and their ambitions expand. That’s a completely reasonable path.
If you have established trees, perennial beds, or a larger growing space, subsurface drip irrigation is worth the extra upfront effort. The water savings and reduced day-to-day maintenance can pay back the higher installation cost within just a few seasons. For densely planted flower beds, herb gardens, or strawberry patches, micro-sprinklers give you a coverage pattern that individual emitters simply can’t replicate. Whatever direction you go, adding a timer and a pressure regulator right from the start will make your whole system work more consistently and last longer — two accessories that are absolutely worth the small additional cost.
- Measure your garden and sketch out a rough layout before buying anything, so you know how much tubing, how many emitters, and what flow rates you’ll actually need.
- Test your home water pressure with an inexpensive gauge before choosing a system — most drip components need a pressure regulator to function properly.
- Install a Y-connector at your outdoor faucet so you can run your drip system and still reach for a regular hose when you need one, without disconnecting anything.
- Match your emitter flow rates to your actual plants rather than defaulting to one size for everything — tomatoes and melons are thirsty, while herbs and succulents are not.
- Plan for growth from the beginning by sizing your main supply line a little larger than you currently need, so adding more distribution lines later is easy.
Drip irrigation can feel intimidating at first — there’s a lot of vocabulary to wade through, and the options can seem endless. But every system, no matter how elaborate, is trying to do the same simple thing: get water to plant roots without wasting it. Starting small, learning as you go, and expanding over time is a perfectly reasonable approach, and it’s exactly how most successful home gardeners have figured this out. The most important thing is just to begin, because even a modest drip system will immediately do a better job than hand watering or a sprinkler — for your plants and for your water bill.








What do you think?
It is nice to know your opinion. Leave a comment.