










20 Affordable DIY Projects to Upgrade Your Home This Weekend
Why Weekend DIY Projects Are Worth Your Time and Money
There is something deeply satisfying about transforming your living space with your own two hands. Weekend DIY projects have exploded in popularity over the past decade, and for good reason — they offer a rare combination of creativity, practicality, and genuine cost savings. When you take on a project yourself, you eliminate labor costs that often account for 50 to 80 percent of a professional quote, meaning a bathroom refresh that might cost a contractor $800 could realistically be completed for under $150 with the right materials and a free Saturday afternoon.
Beyond the financial benefits, DIY home improvement gives you something that hired work simply cannot: complete creative control. You decide the exact shade of paint, the precise placement of shelving, and the finishing details that make a space feel uniquely yours. Professionals, no matter how skilled, are working from a brief. You are working from a vision. That personal investment shows in the finished product, and it tends to make you care for the space more thoughtfully long after the project is complete.
The weekend timeline is also psychologically powerful. Knowing that a project has a defined start and end point — Friday evening to Sunday afternoon — removes the anxiety of open-ended home improvement. You are not committing to a months-long renovation. You are committing to two days of focused effort. This constraint actually drives better decision-making, keeps budgets in check, and delivers the almost immediate gratification of walking into a noticeably improved room before the work week begins again.
Kitchen Upgrades That Cost Less Than You Think
The kitchen is frequently cited as the room most homeowners want to improve, and it is also the space where costs can spiral fastest if you rely on professionals. Fortunately, a handful of targeted DIY interventions can make a dramatic difference without touching the plumbing or the cabinetry structure. Painting existing cabinet doors and drawer fronts is one of the most transformative projects available to a weekend warrior. Using a quality bonding primer followed by a cabinet-specific paint, you can take tired oak cabinets from 1990s beige to a crisp, modern navy or a warm sage green in a single weekend, spending roughly $80 to $120 on supplies.
Replacing hardware is another kitchen upgrade with an outsized visual impact. Cabinet handles, drawer pulls, and hinges are the jewelry of a kitchen — small in scale but significant in character. Swapping out dated brass knobs for matte black bar pulls, or replacing ceramic cup pulls with brushed nickel alternatives, takes no specialized tools beyond a screwdriver and about two hours of focused work. A full kitchen’s worth of new hardware typically runs between $40 and $100 depending on the style and quantity, and the visual payoff is immediate and striking.
Peel-and-stick backsplash tiles deserve special mention for renters and budget-conscious homeowners alike. Modern versions of these products have advanced significantly and now convincingly mimic subway tile, herringbone marble, and even handmade ceramic styles. Installing a backsplash behind your stove or sink can be accomplished in an afternoon with no grout, no mortar, and no professional tile-setting skills. Many products are also fully removable, making them ideal for rental properties. Expect to spend $30 to $80 for a standard kitchen backsplash area, depending on the pattern and brand you choose.
Under-cabinet lighting is a kitchen upgrade that home cooks consistently describe as life-changing. Motion-activated or plug-in LED strips illuminate countertops in a way that overhead lighting simply cannot replicate, making food prep safer and the space dramatically more atmospheric in the evenings. Many modern options require no hardwiring — they attach with adhesive backing and plug into a standard outlet, often hidden behind the cabinet overhang. A full set of under-cabinet lights for an average kitchen runs between $25 and $60, and installation takes less than an hour.
Bathroom Refreshes That Feel Like Full Renovations
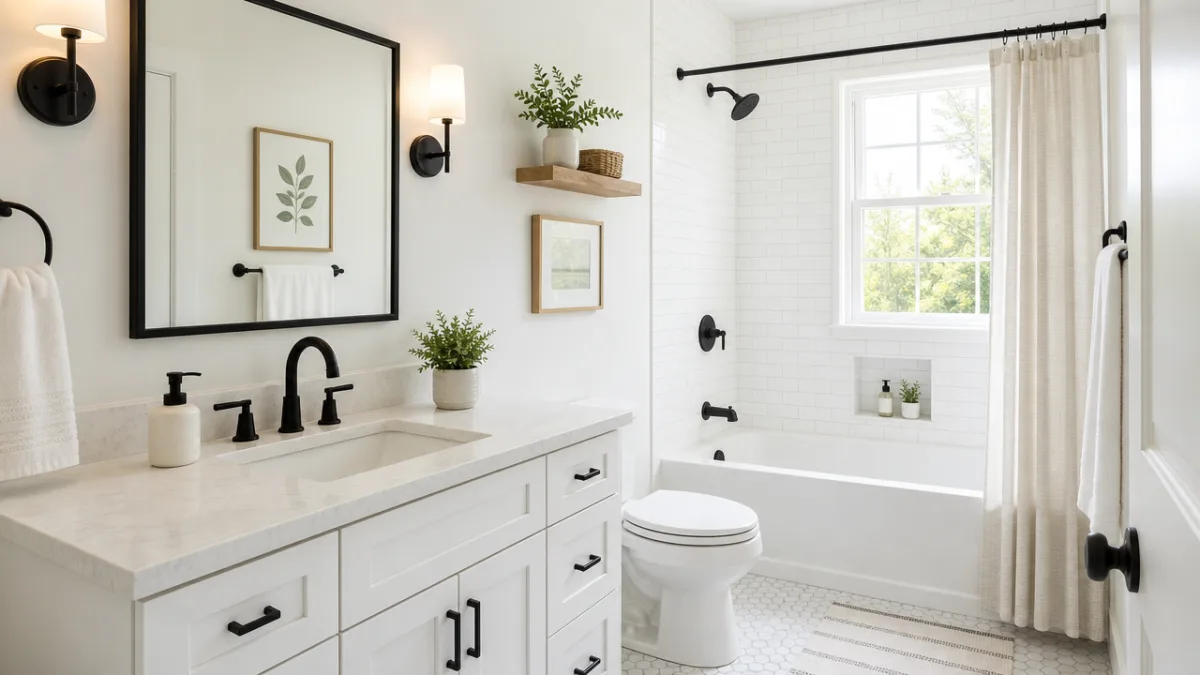
Bathrooms are small rooms with big emotional impact. A dated or dingy bathroom can drag down the feeling of an entire home, while a clean, thoughtfully updated one feels like a genuine luxury. The good news is that because bathrooms are compact, DIY improvements here tend to be faster, cheaper, and more manageable than in any other room. Regrouting tiles is a project that requires nothing more than a grout saw, new grout, a sponge, and patience — yet it can make a decade-old tiled shower look as though it was installed last month. A full bathroom regrouting project typically costs under $40 in materials and can be completed in a single day.
Replacing a builder-grade vanity light fixture is one of the fastest visual upgrades available in a bathroom. Most standard vanity lights are wired identically and use the same mounting bracket, meaning swapping them out requires only basic electrical confidence — turning off the breaker, disconnecting three wires, and reconnecting them to the new fixture. The transformation from a single strip of frosted globes to a sleek multi-bulb industrial fixture or an elegant brass sconce can completely redefine the aesthetic of the space. Replacement fixtures range widely in price, but stylish options from hardware stores can be found for $30 to $80.
Do not overlook the power of a new bathroom mirror. Many homes ship with frameless mirrors that are glued directly to the wall — functional but utterly characterless. You can frame these existing mirrors using simple trim molding from a hardware store, paint it to complement your hardware, and attach it with strong construction adhesive. The total cost for this project is typically $20 to $40, and the result is a custom-looking framed mirror that appears far more expensive than it is. Alternatively, leaning a large decorative mirror against the wall above a console vanity requires no installation at all and immediately elevates the space.
Swapping out toilet seats, towel bars, toilet paper holders, and robe hooks as a coordinated set is a small investment with a cohesive, high-end payoff. Mismatched metal finishes are one of the most common visual distractors in bathrooms, and unifying everything into a single finish — whether brushed nickel, matte black, or oil-rubbed bronze — creates a sense of intentional design that is difficult to achieve otherwise. A complete set of matching bathroom accessories can typically be purchased for $50 to $120, and installation of each piece takes only minutes with a drill and basic wall anchors.
Living Room and Bedroom Transformations on a Budget
The living room and bedroom are the spaces where most people spend the majority of their time at home, which makes improvements here feel especially meaningful. Accent walls have remained a popular DIY project for good reason — a single painted wall in a bold or contrasting color can completely reframe how a room feels without the cost or commitment of painting every surface. The key is choosing a wall that already functions as a focal point, such as the one behind a headboard or the wall your television is mounted on. With a single can of paint and a weekend afternoon, you can create a dramatically different room.
Built-in-looking bookshelves using IKEA Billy bookcases or similar flat-pack units are a beloved DIY trick for adding both storage and architectural character to a room. By installing the units floor to ceiling and adding crown molding across the top to bridge the gap between the shelf and the ceiling, you create the illusion of custom built-ins for a fraction of the cost. Painting the units the same color as the wall or choosing a contrasting deep hue for the back panel further sells the custom effect. The total project cost varies by room size but typically falls between $150 and $400, compared to thousands for genuine custom millwork.
Fabric and textiles are among the most underutilized tools in the DIY home improver’s toolkit. Recovering a tired sofa cushion, reupholstering a dining chair seat, or sewing a custom throw pillow cover requires minimal sewing skill and can completely refresh the look of a piece of furniture you might otherwise replace. Even if sewing is not your strength, iron-on hem tape and fabric glue make simple projects accessible to complete beginners. The cost of fabric from a craft store is a fraction of the price of new furniture, and the result is a personalized piece that fits your specific color palette and style.
Crown molding, chair rail, and wainscoting are architectural details that separate ordinary rooms from ones that feel genuinely polished and considered. Many homeowners assume these features require professional installation, but lightweight polyurethane molding has made them entirely accessible to DIYers. The material is lightweight, cuts with a basic miter saw, and adheres with construction adhesive and finishing nails. Painting it to match the trim in your home ties everything together seamlessly. Adding crown molding to a standard bedroom ceiling costs roughly $50 to $150 in materials and can be completed in a long Saturday with a helper.
Outdoor and Curb Appeal Projects for Maximum Impact
First impressions matter enormously, and the exterior of your home sets the tone for everything that follows. Fortunately, curb appeal improvements are often among the most dramatic in terms of transformation per dollar spent. Painting your front door is perhaps the single most talked-about exterior DIY project, and it earns that reputation. A door in a rich, confident color — a deep red, a classic navy, a vibrant yellow — immediately signals personality and care. The entire project, including cleaning, priming, and two coats of exterior paint, takes roughly four hours and costs $30 to $60 in materials.
Refreshing or adding house numbers is a small detail that carries surprising visual weight. Oversized, modern house numbers mounted directly to the siding or on a contrasting backing panel make an immediate statement of style. Similarly, replacing a worn or builder-basic mailbox with a powder-coated metal or a cedar-wrapped option transforms a functional item into a design element. These combined changes — new numbers and a new mailbox — can typically be accomplished for under $80 and take less than two hours to install, yet they signal to every visitor and passerby that the home is carefully maintained.
Pressure washing is a DIY project that feels like magic. Driveways, walkways, deck surfaces, siding, and fences accumulate years of grime, algae, and oxidation that make homes look far older and more neglected than they truly are. A rented pressure washer from a hardware store costs roughly $40 to $70 for a full day, and the results are frequently stunning — surfaces that appeared permanently stained emerge clean and bright after a single pass. Many homeowners report that pressure washing their driveway and front walkway alone makes the entire property look as though it received a significant upgrade.
Building or refreshing a garden bed border is a weekend project that adds structure and intention to even the most modest landscaping. Landscape timbers, concrete edging blocks, or steel garden edging define the boundary between lawn and planting areas in a way that makes the entire yard feel more deliberately designed. Pair the new edging with a layer of fresh mulch — typically one of the most cost-effective landscaping improvements available, at $3 to $5 per bag — and even a minimal collection of plants suddenly looks curated and purposeful. This project is highly scalable; a single front bed refresh can be completed for $50 to $100 in a single morning.

Planning, Tools, and Making Your Projects Last
The difference between a DIY project that looks professional and one that looks homemade usually comes down to preparation rather than skill. Before beginning any project, taking time to properly clean, sand, and prime surfaces pays dividends that shortcuts simply cannot recover. Paint adheres to prepared surfaces exponentially better than to dirty or glossy ones, hardware hangs level when you take thirty seconds to use a bubble level, and tile lines stay straight when you snap a chalk line before you begin. The prep phase is unglamorous, but it is where the quality of the final result is genuinely determined.
Building a basic toolkit is an investment that pays for itself many times over across multiple projects. You do not need every tool in the hardware store, but a quality set of core items will serve you reliably for years. A good starting toolkit for a weekend DIYer should include a cordless drill and driver, a level, a tape measure, a miter saw or hand saw, a set of screwdrivers, painter’s tape, a putty knife, sandpaper in multiple grits, and a reliable paintbrush and roller set. Investing in mid-range or quality versions of these tools rather than the cheapest available options makes the work easier and the results better.
Budgeting realistically and buying a little more material than you think you need prevents the frustrating mid-project store run. A standard rule of thumb is to purchase ten percent more of any material — paint, tile, flooring, lumber — than your measurements suggest. This accounts for cutting waste, mistakes, and the inevitable moment where a measurement turns out to be slightly off. Keeping leftover materials in clearly labeled storage also gives you the ability to make future repairs that match seamlessly, which is an often-overlooked long-term benefit of DIY work versus professional installation.
Documenting your projects with before-and-after photographs serves multiple purposes. It gives you a satisfying record of what you accomplished, provides reference material if you need to replicate a finish or technique in the future, and — should you ever sell your home — becomes evidence of improvements that can support your asking price. Many buyers and real estate agents respond positively to homeowners who can speak specifically and knowledgeably about the upgrades they have made. A well-maintained home improvement record, even an informal photo album on your phone, communicates care and attention that extends well beyond any single weekend project.
Finally, approach each project as a skill-building experience rather than a one-time task. The first time you patch a wall, it will take longer and the result will be less smooth than the fifth time. The first tile backsplash you install will teach you things that make the second one far easier. DIY home improvement is a compounding practice — each project leaves you more confident, more capable, and better equipped for the next one. Over years of weekend projects, the cumulative savings, the personalized living environment, and the genuine satisfaction of a home built partly by your own hands represent a return on investment that no contractor can fully replicate.








What do you think?
It is nice to know your opinion. Leave a comment.